No number? No Problem! Or Messaging in Flex with Telerivet
Time to read:
July 13, 2022
Written by
Reviewed by

One of the core advantages of using Twilio is the ability to buy phone numbers for SMS and Voice communications in many countries around the world. You don’t need to handle multiple relationships with different carriers in each country, you can buy a number from Twilio right from the Console. But: what if Twilio doesn’t offer a number in a particular country? We try our best to get numbers for our customers – we can use some numbers via porting, and some other numbers are available in private offering or developer preview – but it’s not always possible. This is especially true in countries where our NGO customers, like the Norwegian Refugee Council operate. Think, for example, of Sudan, Libya, or Madagascar.
Solution
In this blog post, we’ll cover how you can use Telerivet as a gateway app with a local SIM and integrate it as a custom channel into Twilio Flex. At the end, you’ll have a Contact Center setup using Twilio Flex, where a Flex agent is able to communicate with the recipient using SMS, the number used to exchange the messages is a local number in the country you'd like, and a SIM card running in a mobile phone is used as a gateway.
Here’s the outline of what we’ll be building:
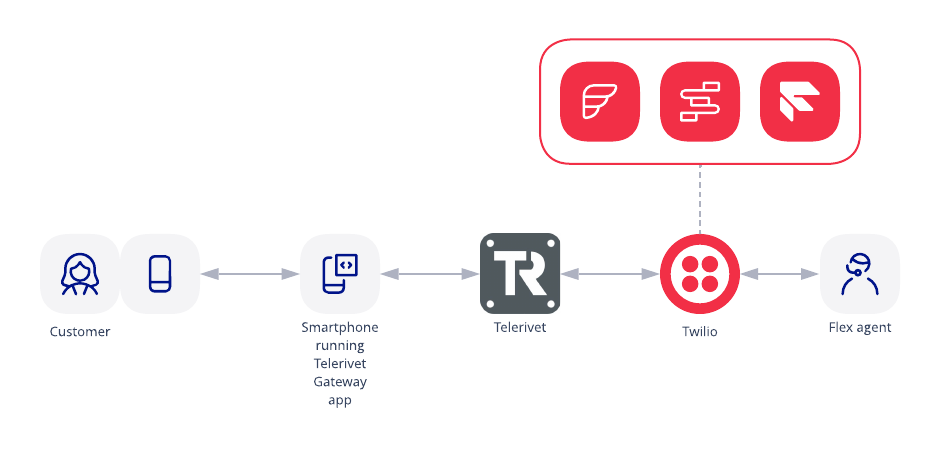
The solution consists of two parts, receiving a message from our correspondent, and sending a reply back to them… without having a number in Twilio. In both cases we’ll use the gateway app to route the messages.
Let’s start with the straightforward part first – sending outbound SMS to your recipient. Twilio Programmable SMS doesn’t allow you to spoof your From number. You can add a verified caller ID for voice, but not for SMS. Therefore, we have to use the gateway app to deliver messages from the same local SIM to our recipient. For sending outbound SMS, we will use Telerivet Rest API.
Telerivet is a gateway for multiple communication channels, not just SMS. It can also handle Voice calls and USSD (a popular messaging channel in developing countries). We also have a blog post on how you can integrate USSD into Flex with the help of Telerivet.
Prerequisites
For this project, we will need:
- A Twilio Flex account. Register here if you don’t have a Twilio account, or use this link if you’re already signed up and want to create a Flex project.
- An account with Telerivet (a trial account is fine).
- An Android phone to use as an SMS gateway (with an active SIM card in it).
- Another phone for testing (I used the Twilio Dev phone).
- (optional) Twilio CLI makes working with Twilio API easier.
- (optional) Twilio CLI plugin for Serverless (you can deploy Functions without it, it just makes it a little simpler).
Twilio Setup
We’ll need to configure a few things, including a Twilio Studio Flow, a Flex Flow, Twilio Functions, a Telerivet account, and the Gateway app. The Twilio Functions code as well as a sample Studio flow can be found in this repository.
Let’s start by cloning the repository linked above, because it will help with the rest of the setup.
git clone git@github.com:strogzy/twilio-flex-custom-channel-chat.gitTwilio Studio
Next, create the Studio Flow in the Twilio Console.
The Studio flow is needed to send inbound chats to Flex. You can use the default Webchat Flow or create a copy of it, in case you want to make some changes later. I’m going to clone the default Webchat Flow. You can do it by Clicking the Duplicate Flow button:

Give it a different name, I called it “Custom channel flow”.
Make sure the Send to Flex widget is not missing any data and save. Since you didn’t modify anything, you won’t need to Publish the flow, but if the button is active, hit Publish. There is also a sample Studio flow in the repository, in case you want to import it into Studio instead. Take a note of the Studio Flow Sid, it starts with "FW".
Flex Flow
Now we are ready to create the Flex Flow. A Flex Flow links our contact identity (SMS-enabled phone number, or a custom channel in this case) to Flex.
In the root folder of the repo you will find a file called createCustomChannel.sh. Open it in your favourite code editor, and change the values relevant to your setup.
A few important parameters:
Integration.FlowSid=FW…- your Studio Flow from the previous stepContactIdentity=telerivet- the name of the channel, in this case you can call it “telerivet”ChatServiceSid=IS…- the Chat channel associated with Twilio Flex
To find the ChatServiceSid go to Twilio Console -> Chat -> Manage -> Services and take a note of Flex Chat Service.
Once you are happy with it, you can go ahead and run the script:
./createCustomChannel.shThe response should contain the Flex Flow SID. It looks something like the following:
{"integration": {"retry_count": 3, "flow_sid": "FWc5500ef547d4cdf678d3534b5f46db5a"}, "janitor_enabled": true, "integration_type": "studio", "date_updated":...
Take a note of the flow_sid value. We’ll need it in the next step.
Twilio Functions
Now, let’s deploy our Functions.
- Inside the repository copy and rename
.env.exampleto.env - Open up the
.envfile and let’s take a look what variables we needACCOUNT_SID=- Account SID for the Twilio Flex AccountAUTH_TOKEN=- Auth token you can get from the home page of the ConsoleFLEX_CHAT_SERVICE=ISxx- We retrieved this value in the previous step.FLEX_FLOW_SID=FOxx- We created this in the previous step.
The rest you can ignore for now. We want to set up Telerivet, but since Telerivet will need to know the URL of our functions to trigger, we need to deploy them to get the URL generated by Twilio. Then, we will need to redeploy it once again later once we finish the Telerivet configuration.
Note: If you want to understand how Custom Chat Channels work in Flex, check out this blog post. There is also a new way to create Flex Channels with Conversations, currently in Beta. This blog uses the standard method with Flex Flows. -
First, check which Twilio profile is active:
Select the correct Twilio profile if needed:twilio profiles:list
Inside the root directory of the repo, deploy the functions using the following command:twilio profiles:use aa-demo-account
twilio serverless:deployTake a note of the base url created. Mine looks like this:
https://custom-channel-serverless-9571-dev.twil.ioWe will need it later to configure our channel update webhooks. Since the runtime domain is generated on the fly, we can’t prepopulate it with the rest of our settings. The current functions, even though deployed, won’t do much. If you trigger them, they won’t run successfully, because they are missing some important environment variables.
Note: you can ignore the env variables in the repository, such as “VIBER” and others. The code supports multiple channels, but in this project we are only focusing on Telerivet.
Now, let’s configure the rest of the setup and come back to redeploy our functions.
Configuring Telerivet
Before we dive in, if you haven't yet, create a Telerivet account here.
Sending Outbound Messages with Telerivet
Telerivet has a REST API, which can be used to tell the phone gateway to send the SMS. Here are the steps to set it up:
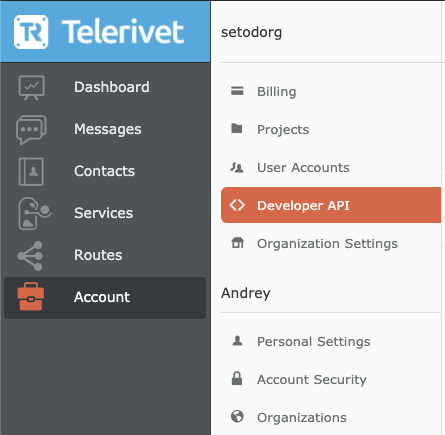
Inside the Telerivet portal, go to Account -> Developer API
Add API client, let’s call it “Flex integration”
Give it permission to “Send messages”, since this is the only thing this API client will be used for.
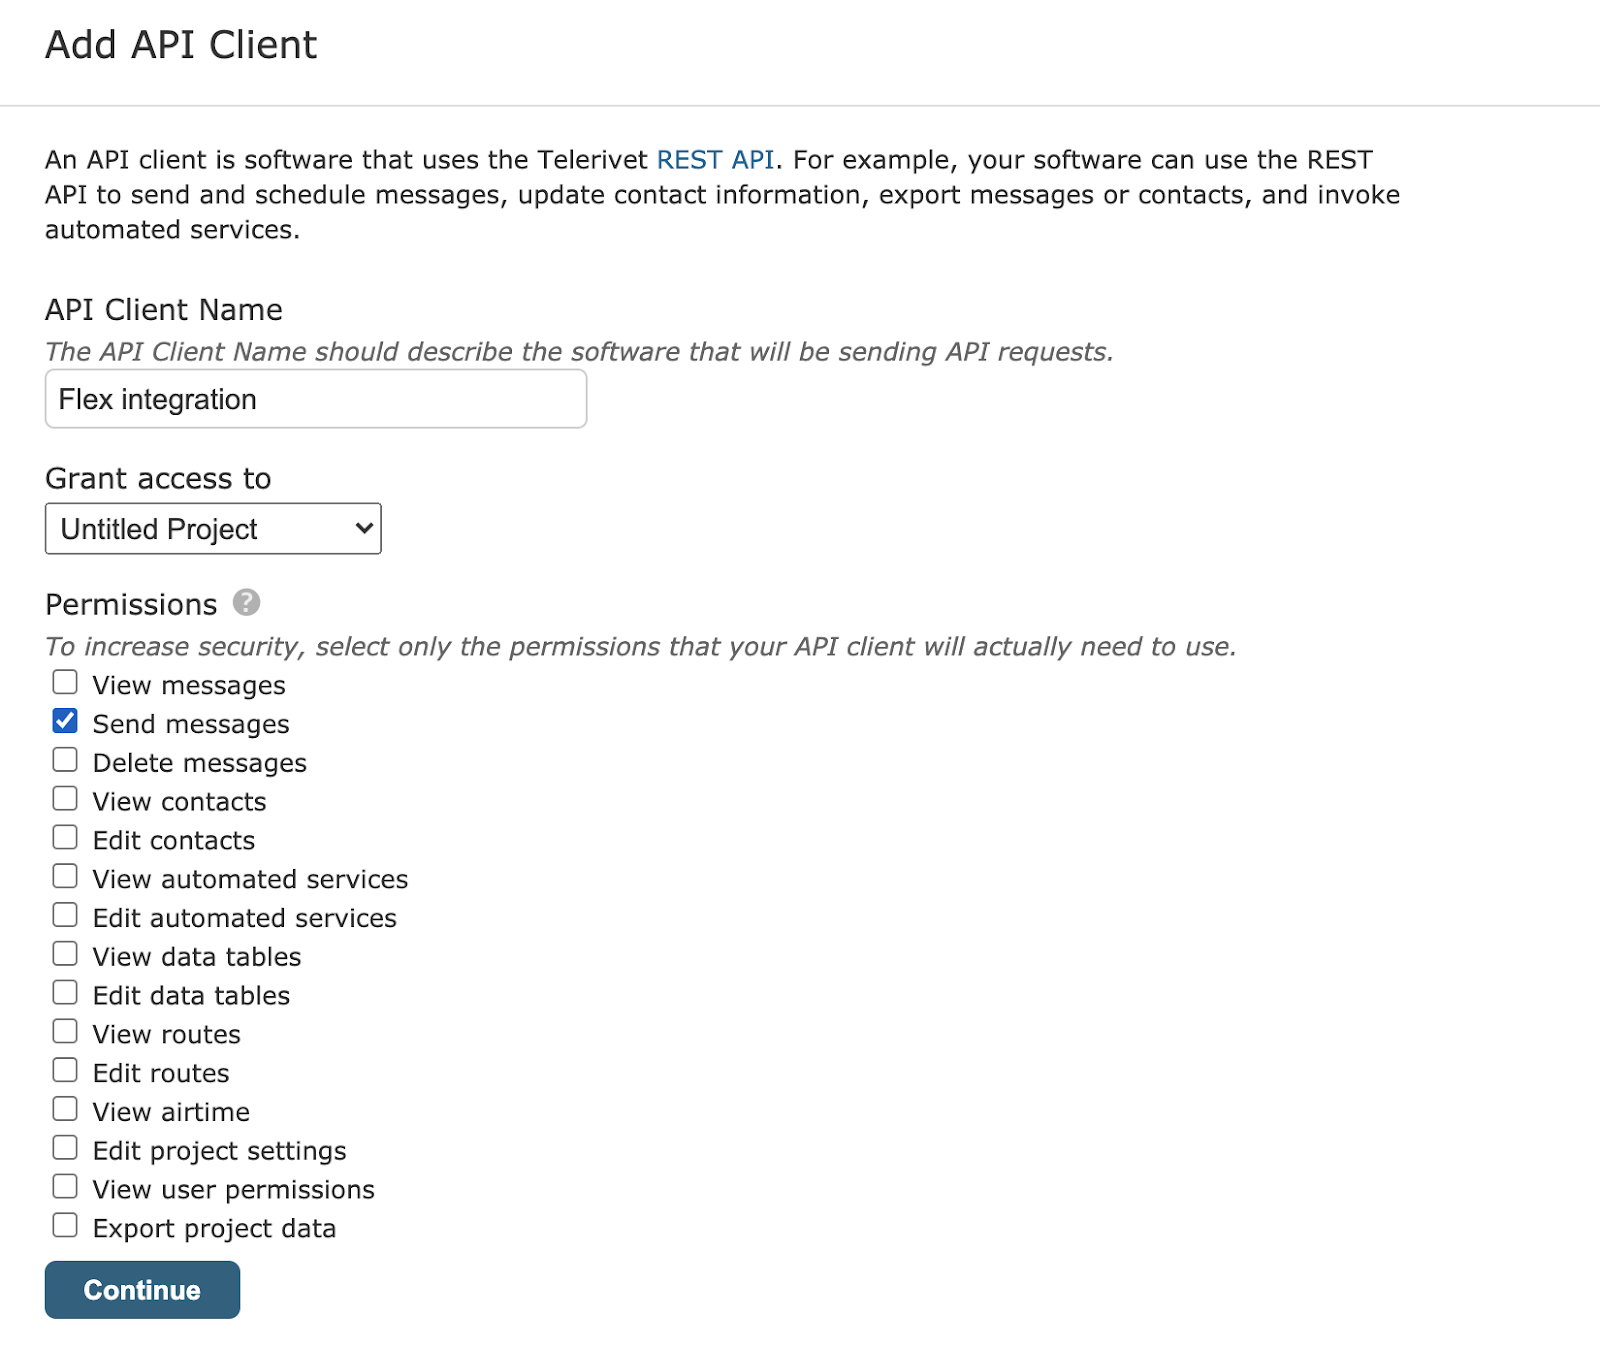
And generate a new API key and save it. You can already add it to our env variables:

TELERIVET_API_KEY=
Also while you are on this page, note down the Project ID and add it to our .env file.
TELERIVET_PROJECT_ID=
Handling Inbound Messages with Telerivet
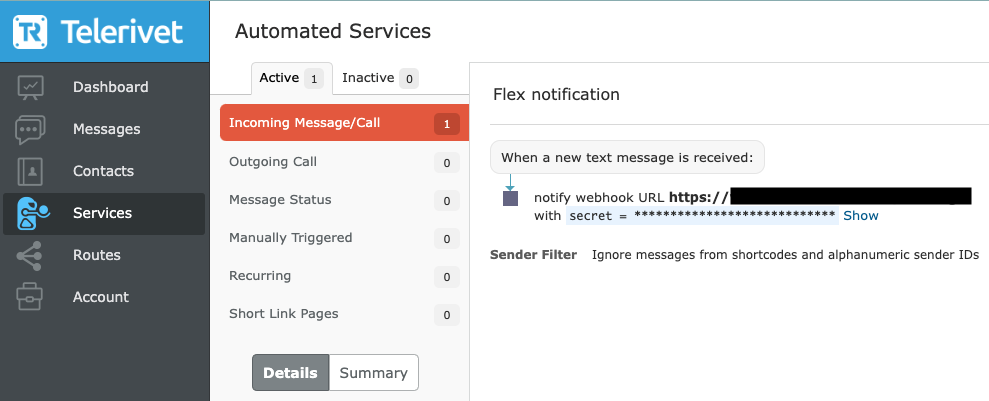
Next, we want to set a webhook API to notify us when somebody sends us a message. In Telerivet, go to Services, and create a Webhook API, making sure you are in the Text tab and not Voice.
Give it a name (I chose “Flex notification”), and as webhook URL put the Twilio function URL which ends in /message like https://123-custom-domain-dev.twil.io/message
For the secret, you can either generate your own (for example, using uuidgen command on Mac), or copy the already suggested one. I used the auto-generated one.
Click Done and don’t forget to save the value of the secret to .env
TELERIVET_SECRET=
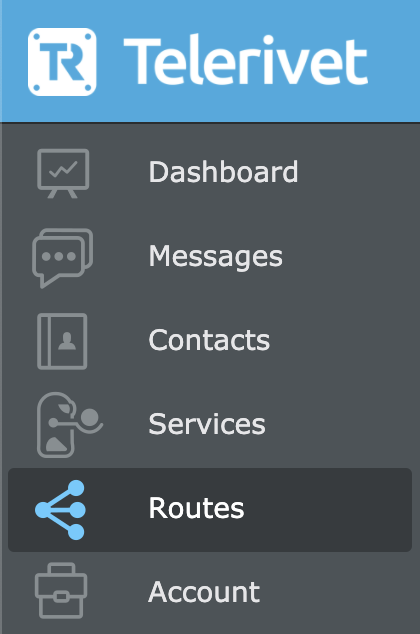
Next, we need to create a Route. A Route on Telerivet will link with the gateway app on the phone and route the incoming messages to your configured Service.
Inside the Telerivet portal, go to Routes and create a new route with the Add Route button.

Choose SMS for capabilities, then select Android Phone.

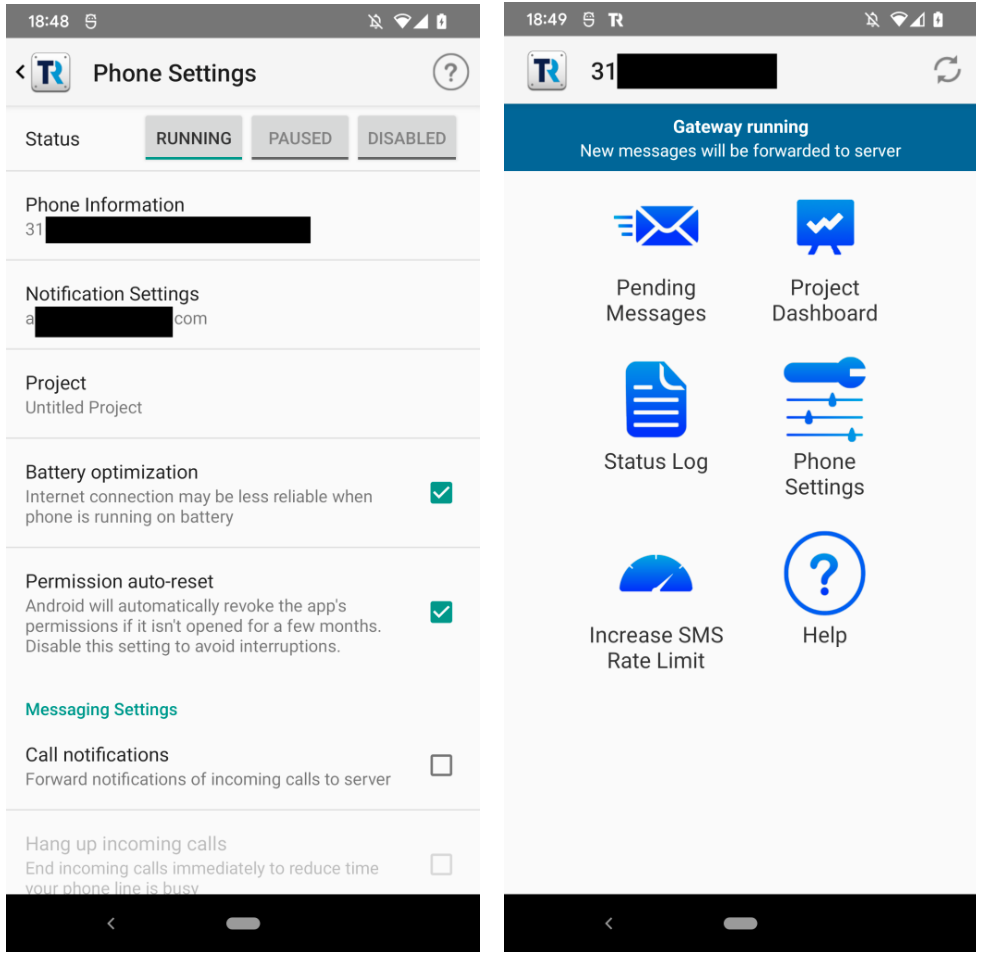
The instructions to set up the app on the Android phone will be shown. Currently, the link to download the app from the phone is telerivet.com/gateway, but this may change, so please follow the instructions provided by Telerivet on the portal.
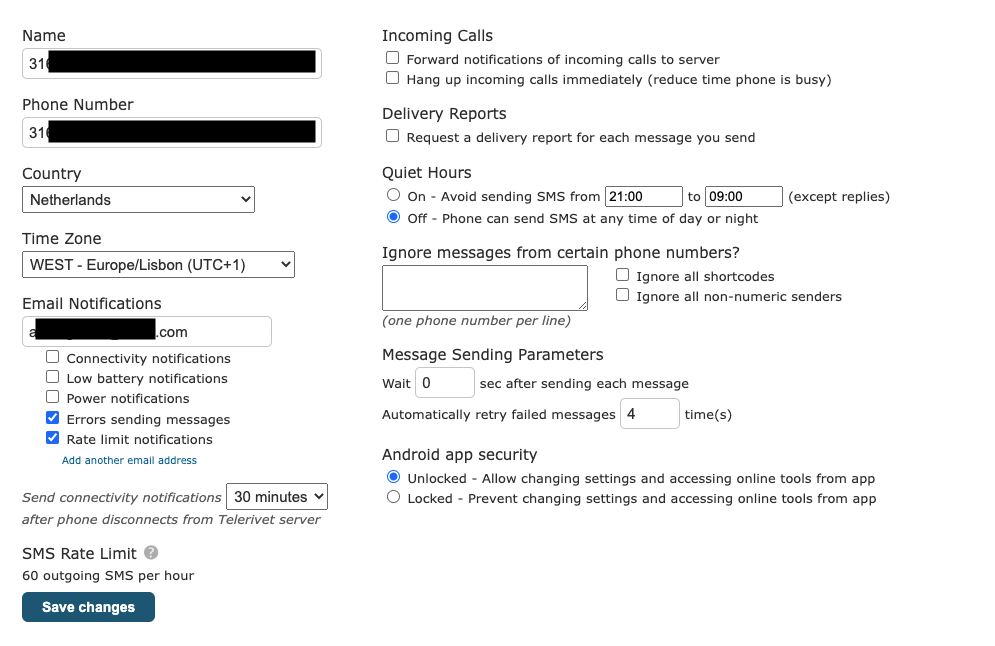
- Once you’ve logged into the app on the Android phone, it will link it to your project which you created using the web portal. Next you can proceed to configure how you want to handle the SMS.
- Since this is purely for messaging purposes, you can choose to ignore incoming calls. Review the other options since it might be useful to know if the phone goes offline or the battery becomes low, for example. I decided to not receive any notifications except for errors and rate limits.
Redeploy Twilio Functions with Telerivet Keys
And now we are almost done with Telerivet. One final step is to redeploy our functions with the new information from the previous step. Before you do this, make sure that TELERIVET_API_KEY, TELERIVET_SECRET, and TELERIVET_PROJECT_ID are all set in your .env file. Then use the Twilio CLI to run the following:
twilio serverless:deployTry it Out!
Now we are ready to test. Make sure the Gateway app is running.
Send a message from your own mobile number to the gateway phone number. It should forward it to Flex. When the agent replies, you should get an SMS reply.
In my testing I used Twilio Dev Phone as the customer and my own phone to run the gateway app.
Limits
It’s important to know the limits of this solution.
- Please review Telerivet’s documentation on rate limits, and keep in mind the possible restrictions imposed by Android.
- It’s important to note that Telerivet doesn’t recommend using this approach for sending a high volume of messages.
- The local Telco can notice high spikes in messages from an individual number and decide to block it as spam. It’s best to avoid sending the same SMS to multiple numbers.
- You need to keep track of the balance on the phone to make sure you don’t run out of credit.
- It’s important to keep in mind that the number of concurrent executions in one Twilio account is limited, as well as the execution time for each Function is limited. Please check the Twilio documentation on Serverless limits here. If you need to scale it beyond that, you can rewrite the functions to run on AWS Lambda, GCP, or Azure. You could also implement this code on your own backend or even Telerivet itself!
Far and beyond
Congratulations! With this build, you were able to send and receive messages without using a Twilio Phone number! Hopefully, you also have a better understanding of what is possible with Telerivet. Now you can interact by SMS through local numbers in hard to reach regions – and your journey doesn’t have to stop there.
Next, you can try exploring what is possible by forwarding calls with Telerivet, adding new custom channels (like Telegram) to Flex through Conversations, or perhaps adding a chatbot to the existing solution to help gather useful information before sending the chat to a real person.
If you have any questions or want to suggest improvements, feel free to reach me over email or Github.
Andrey Asfaganov is a Solutions Engineer at Twilio. He works with companies of different sizes in BeNeLux and the Nordics to build innovative solutions on Twilio, and has a special place in his heart/diary for NGO/NFP customers. He can be reached at aasfaganov [at] twilio.com.
Related Posts
-
Orchestrate an AI-to-Human Agent Handoff with Twilio Agent Connect, Conversations Orchestrator, Studio, and FlexKinshuk Kar Sarang Shah
-
No Rip and Replace. Add AI to Your Contact Center for Instant ROIApoorva Singh Hadijah Creary
-
Integrate Twilio Flex and Microsoft Dynamics 365 with ZingJordan Edmunds Ricardo Bangueses
Related Resources
Twilio Docs
From APIs to SDKs to sample apps
API reference documentation, SDKs, helper libraries, quickstarts, and tutorials for your language and platform.
Resource Center
The latest ebooks, industry reports, and webinars
Learn from customer engagement experts to improve your own communication.
Ahoy
Twilio's developer community hub
Best practices, code samples, and inspiration to build communications and digital engagement experiences.