Supercharge your contact centre experience with Flex and Veridas Voice Biometrics
Time to read: 9 minutes
November 19, 2021
Written by
Reviewed by

Wouldn't it be great to verify the identity of the person who is at the other side of a phone call just using their voice? Agents in contact centres spend precious time asking security questions to verify customers’ identities. This process is not friendly and often relies on information that can be phished – stolen by untrustworthy third parties. Furthermore, from the customer's point of view, it is also an arduous and bewildering process. Either they have to spend an average of 30 seconds answering personal questions, or they are forced to memorize passwords that are often forgotten. In the end, these processes do not actually verify an identity but simply check that a person has access to certain information.
Voice biometrics can help contact centres create friendly and natural ways to verify who is speaking on the phone. Veridas Voice Biometric Authentication solution services facilitate the registration of a user’s biometric credentials when calling a contact centre. Later, any agent will be able to verify or identify that person through their voice.
In this post, you will learn how to add voice biometrics into Twilio's contact centre platform, Flex. We will show you how to integrate the Veridas Voice Biometrics plugin for Flex.
Prerequisites
Before you can start the tutorial, you’ll need to set up a few accounts.
- A Twilio Flex Account. If you do not have one yet, follow this guide to set up your Flex account for free.
- The Twilio CLI and the Flex plugin for the CLI.
- Veridas client secrets. You can get them after filling this form for the Veridas Voice Biometric Authentication solution for Twilio.
- The Veridas Voice Biometrics npm packages, provided by Veridas.
- A secure way to store ids and biometric credentials.
In our example, we will be using the Veridas Voice Biometric Authentication Plugin in testing mode. We will focus on integrating the voice-biometrics in the contact centre; therefore, we will be simulating the storage and retrieval of the biometric information using a cookie in the browser displaying the Flex agent interface. We will also indicate where the code to store and retrieve credentials from the DB would go when you develop a production solution.
How to Build the Integration
Install the Twilio Flex plugin CLI
First of all, you will need to set up a Flex Plugin development environment. To do so please follow this quickstart that will show you how to create a Flex plugin from scratch. You can also check this past blog post for inspiration on how to make the most of Flex Plugins.
In any case, you will need to work with the Twilio CLI and the Flex Plugins CLI.
Connect your Twilio Flex account to the CLI.
If you have already installed the Twilio CLI and plugins, check that you are using the right account:
Create the Veridas Flex plugin
We will first create the caliope plugin using the Twilio CLI
Or, if you prefer a typescript project, run
To see the Plugin running locally visit http://localhost:3000
Create the Veridas component in your plugin
Create the Webcomponent
Part of the Veridas integration will be run as a WebComponent on the Flex UI.
Install WebComponent from NPM:
Where ${PACKAGES_PATH} contains the location where you have saved the files you were sent by Veridas as part of the prerequisites.
Replace the X.Y.Z for the version released by Veridas.
Create the VeridasComponent class
To create the Veridas Component to be inserted in Flex:
- Create the folder
src/components/veridas/ - Create a
VeridasComponent.jsfile inside it, with the following React code:
The Veridas plugin uses several Flex parameters to work. DO NOT EDIT THEM or the plugin will not work as expected. The following parameters should not change:
securityToken: It is a security measure recommended by Twilio documentation for calling Twilio functions from Flex plugins.callSid: Current call identifier.callerId: Customer telephone number.taskSid: Current flex task identifier.conferenceSid: Unique identifier of the current conference.callInProgress: bool value,trueif call is active.
Include VeridasComponent in your code
Import the created component inside the Flex project (VeridasPlugin.js) like this:
Create the config and utils files
In the same Veridas folder, the following two files need to be created:
1. Config.js:
To use this plugin, get the following parameters from Veridas:
urlSio: URL of the server API.urlAudioConsumer: URL of the audio consumer service.
Also, you'll need to configure following parameters after the section Create Veridas Service with streaming functions
urlStartStreaming: URL to thestartStreamTwilio Function you will develop laterurlStopStreaming: URL to thestopStreamTwilio Function you will develop laterurlGetTemporaryToken: URL to thegetTemporaryTokenTwilio Function you will develop later
2. Utils.js:
Then, insert this component in your Twilio Flex Project inside the init function. You can use the following snippet:
Create a Veridas Service with streaming functions
We will use some Twilio Functions to link Flex with the Veridas Voice Biometric Authentication solution. You can develop the functions using the Twilio CLI Serverless Toolkit or, alternatively, you can also code the service directly on the console as follows:
- Go to your Twilio Console
- Click on All products and services on the left panel (the “three dots” button)
- Go to the Runtime section and click on Functions
- Click on Services > Create service
- Set the name field to
VeridasServiceand click on Next - Click on Add > Add Function and set
/startStreamAudioas name - Click on Add > Add Function and set
/stopStreamAudioas name - Click on Add > Add Function and set
/getTemporaryTokenas name - Insert code snippets from the below sections
- Make sure your functions are set as
public(fromprotectedby default). These functions will be protected from unsolicited requests by validating tokens generated by Twilio. Only the Twilo environment will be able to execute them. - Click on Settings > Dependencies on the bottom left of the page
- Add the
twilio-flex-token-validatormodule (version1.5.5) - Update the
twiliomodule version to3.56.0 - Add the
form-datamodule (version 4.0.0) - Add the
axiosmodule (version 0.23.0) - Add the
httpsmodule (version 1.0.0) - Save and deploy the new functions
Start Stream function
Open the startStreamAudio function and paste the following block of code. Then, save the code.
Stop Stream function
Open the stopStreamAudio function and paste the following block of code. Then, save the code.
Get Temporary Token function
Open the getTemporaryToken function and paste the following block of code. Then, save the code.
Final setup for the Veridas Plugin
Veridas Temporary Token URL
Once Veridas provides you with valid credentials and configuration URLs, enter the Environment Variables in the Twilio Functions Service Settings section, or .env if using Twilio's CLI for deployment. Insert the following parameter and add the provided info:
getTemporaryTokenCloudUrl: URL to the Veridas endpoint to obtain a temporary token
Veridas credentials
In the same Environment Variables section, set the following credentials provided by Veridas:
client_secretclient_id
Cloud URLs
Once Veridas provides you with valid credentials and audio consumer service URLs, set them in the Config.js file.
urlSio: API URL for the serviceurlAudioConsumer: Audio consumer service url
Twilio Streaming functions URLs
Set these urls in the Config.js file.
urlGetTemporaryToken: URL to your getTemporaryToken Twilio FunctionurlStartStreaming: URL to your startStream Twilio FunctionurlStopStreaming: URL to your stopStream Twilio Function
Request-parameters customization
The parameters used for the requests to the Veridas service can be customized in the Config.js file.
scoreThreshold: Number ranging from 0 to 1 representing the similarity between the incoming voice and the voiceprint. 0 stands for completely different vocal patterns, while 1 would mean completely identical. (The margin of error of 0.01 is due to rounding results.)authenticityThreshold: Number ranging from 0 to 1 representing how likely the sample (incoming audio) is to be a bonafide voice. The closer the number is to 1, the higher the chance of being a genuine voice. The margin of error of 0.01 due to rounding results.audioTotalDurationRegistration: Minimum number of seconds of speech required to process the audio on a registration.audioTotalDurationVerification: Minimum number of seconds of speech required to process the audio during a verification.
The code presented here has a realistic starting point but you might want to tune it to your own use case.
Finally, do not forget to redeploy the functions (in the console interface) and the plugin with any change.
`twilio flex:plugins:deploy --changelog 'add veridas plugin'
Database integration and external methods
In the Utils.js file, there are functions that are designed for an integration with a client's database. The code provided explains how each function should work. These functions are called within the plugin’s internal logic:
storeCredential: Called whenever a credential needs to be saved in the database. For example: when a registration completes successfully and a credential is generated from the subject's voice.deleteCredential: Called whenever a credential needs to be removed from the database. For example: when an Agent presses the Delete Registration button.getCredential: Called to obtain the credential from a subject. For example: when a new call is started and the plugin needs to know if that subject has already been registered.onResponse: Called whenever a result is retrieved from the Cloud service. This allows analyzing and storing results and metrics.
Automatic verification
To activate the live verification in all calls, we can change the Config.js to tell the system that we are moving from manual to automatic:
automaticVerification: boolean value to represent whether the logic is going to automatically start verifications of previously registered users.
If set to true, when a new call is started, if the user was previously registered, a verification starts right away.
Delete only after verification
In the Config.js file you’ll find the following parameter:
deleteOnlyAfterVerification: boolean value to represent whether the logic is going to force a successful verification before enabling the deletion button.
If set to true, the delete button will not be enabled until a successful verification is completed.
Test the Veridas Flex plugin
Deploy and activate the plugin on your Twilio Flex instance:
Make sure that the plugin is active in your Flex configuration console.
How to onboard and test the biometric credentials of a caller
Once the Veridas plugin is activated, you will see the Veridas component as soon as you pick up the call. At this stage, you will want to register a given caller.
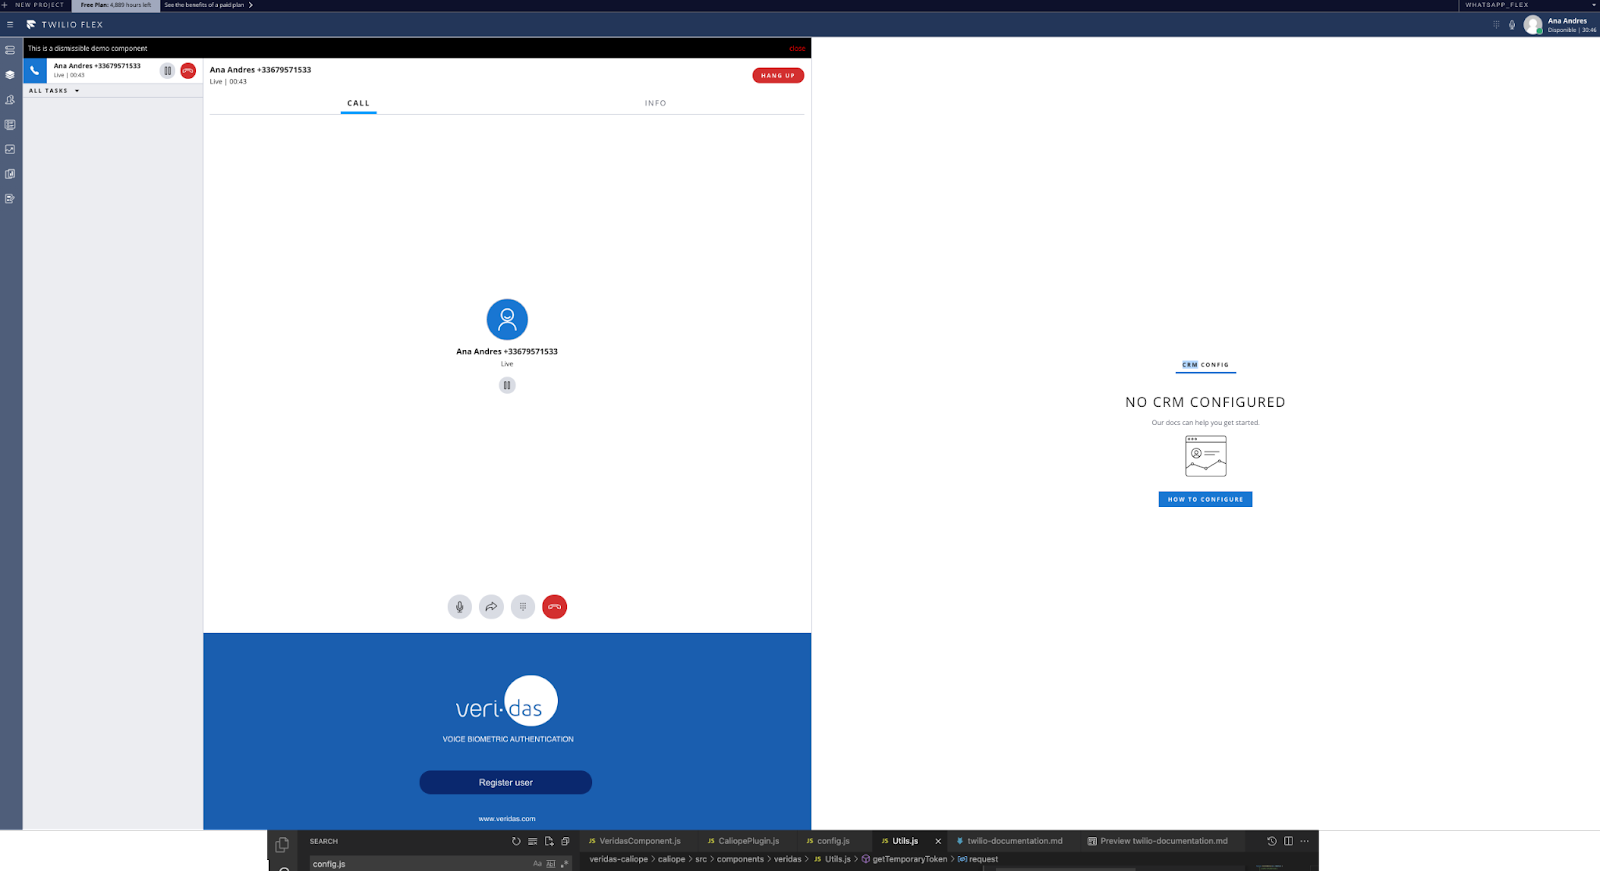

The plugin will gather the audio from the stream and perform the registration. When the registration finishes correctly, the plugin will test the authentication of the caller's voice. Remember that the default plugin stores the biometric credentials of the caller along with the caller's phone number in a cookie for demo purposes.

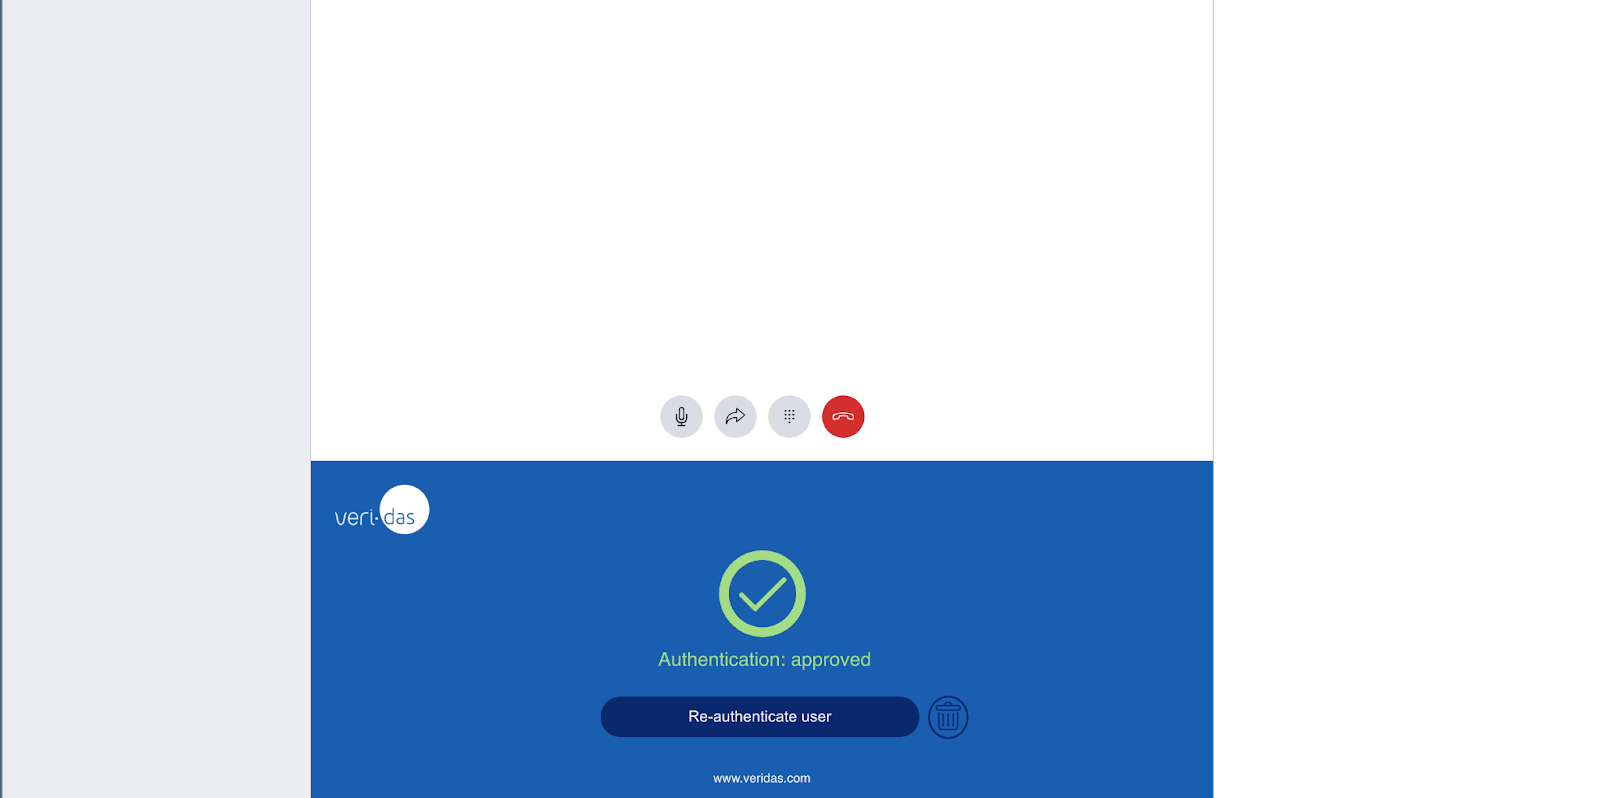
Now you can test the biometric authentication. Click on "Authenticate user" and let the caller speak. The plugin will gather the voice and biometric credentials and let Veridas check whether they are correct.

If Veridas authenticates the caller, the plugin will show a green tick and a message informing the agent.
You can also test when there is no correct match. Let another person call with that number, and you will see that it does not pass the test. Veridas even detects when a caller is a recorded message.

API mocking: cross-product integration testing
Calls to the API can be mocked to ease your development and testing. This mocking is set up within the Config.js file via the following parameters:
mockApi: boolean value to represent whether the API needs to be mocked or not.mockResponseType: type of response that the internal logic is going to retrieve while mocking the API. Below are the possibilities for this value.
Types of responses available:
resultSuccess: applicable either for registrations and verifications. Used whenever a process is successful.resultFailSpoof: applicable either for registrations and verifications. Used whenever a process results in a spoofing scenario.resultFailScore: applicable only for verifications. Used whenever a process results in a low score scenario (not a match between the subject's voice and credential sent in the request).errorConsumerNotReady: applicable either for registrations and verifications. Used whenever the audio consumer required is not up and running in Veridas servers.errorParameters: applicable either for registrations and verifications. Used whenever a request contains wrong parameters or is missing some.errorAudio: applicable either for registrations and verifications. Used whenever a problem with the audio occurs.errorDasPeak: applicable either for registrations and verifications. Used whenever an internal problem in the biometrics process occurs.
Conclusion
Voice biometrics brings customer engagement for identity and authentication to the next level in a contact center scenario. With Flex and the Veridas Plugin you could be running world class voice authentication in your contact centre in a matter of hours.
You can check the technical details of the Veridas Flex Plugin in the Veridas doc site.
Biography
Ana Andrés is a Telecommunications Engineer and Computer Sciencie PhD. She is part of the Solutions Engineering team in Twilio. She acts as a trusted advisor for customers in Europe in everything related to Twilio technology and products. You can reach to Ana at aandresdelvalle [at] twilio.com
We would like to thank the Veridas team for their contribution to this blog.
Related Resources
Twilio Docs
From APIs to SDKs to sample apps
API reference documentation, SDKs, helper libraries, quickstarts, and tutorials for your language and platform.
Resource Center
The latest ebooks, industry reports, and webinars
Learn from customer engagement experts to improve your own communication.
Ahoy
Twilio's developer community hub
Best practices, code samples, and inspiration to build communications and digital engagement experiences.