Getting Started with Twilio and the Laravel framework for PHP
Time to read:
September 17, 2014
Written by
This post is part of Twilio’s archive and may contain outdated information. We’re always building something new, so be sure to check out our latest posts for the most up-to-date insights.

One of the things I’m grateful for in my work so far is having the chance to write meaningful code in many different programming languages. Most recently this has been JavaScript (node/browser), Objective-C, and Ruby, but I cut my teeth as a Java/JEE developer, developed huge Adobe Flex apps in ActionScript 3, and have been asked to contribute code (for good or ill) in C#, Python, and Perl as well. Notably absent from that list is the workhorse of the Internet, the glue that holds the world wide web together – I am referring of course to PHP. But as luck would have it, I have recently had a pressing need to learn the rudiments of this venerable server-side scripting language and start to fill that gap.
As I orient myself in the PHP multiverse, I am discovering that the language seems to be entering something of a renaissance. When your only interaction with PHP is the odd WordPress hack, you don’t understand the nuance of how web developers are pushing this technology ahead. While there is still incredible diversity in how problems are solved, PHP seems to have a strong player in package management with Composer. The runtime and language continue to evolve with PHP 5.6, PHPNG, and Facebook’s HipHop VM showing there’s still healthy competition and passion around the platform.
The higher-level web frameworks of PHP are legion, and continue to evolve apace. Recently, there’s been a lot of excitement around the Laravel framework. As I learn about and explore Laravel I can understand why – it brings together a lot of the tools and frameworks that were already well-liked and battle-tested in the PHP community into a cohesive whole.
Of course, the first thing I did when I started learning Laravel was to get to the “Hello World” level with Twilio. Maybe what I learned during that process can be useful for you as well? If developing web apps with Laravel is cool, surely using Laravel and Twilio to call or text your customers is even cooler.
In this tutorial, I’ll show you how to get up and running with Twilio and Laravel using the cloud development platform Nitrous.io. We’ll show how to receive incoming calls or text messages in your Laravel app using a callback mechanism called webhooks. We’ll also use Twilio’s helper library for PHP to make authenticated requests against the REST API, which enables us to send text messages and make outbound phone calls. You’ll also leave with resources to learn more about Twilio, Laravel, and the other technologies used in this post.
Sound like a plan? Then let’s get started! We’ll begin by setting up a PHP/Laravel development environment in the cloud with Nitrous before diving into the Twilio side of things.
Setting Up Your Dev Environment with Nitrous.io
Nitrous is a cloud-based development environment that makes it easy to create and configure a development machine for a variety of popular programming languages. It also has the benefit of living on the Internet, so you can preview with a live URL that you can share with your co-workers (and Twilio, as we will see later). We’re using Nitrous here since it’s the fastest way I’ve found to go from absolute zero to a functional PHP dev environment. But if you’re cool using Homestead, MAMP, or your pre-existing PHP development environment, go right ahead and use it, and skip to the “Responding to Incoming Calls and Text Messages” section of this tutorial. Just know that Twilio will need a public URL for your server (ngrok works great to give your local machine a public URL – I wrote a little tutorial about it here).
This tutorial assumes you will (at least initially) use Nitrous’ cloud-based IDE, but you can download their Desktop app if you’d prefer to work locally with your own editor and tools. Let’s get our Nitrous box set up to hack on our Laravel app.
Provision a Nitrous box for local development
If you haven’t already, go and sign up for a Nitrous development account. Once signed up and authenticated, go to your dashboard and create a new PHP box.

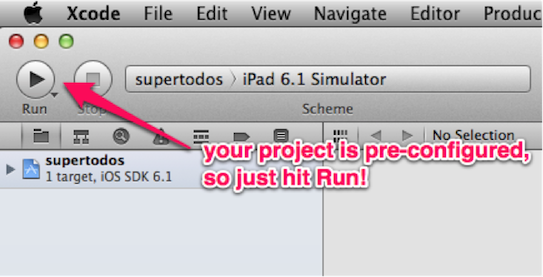
You can tune the resources available to your liking, but a free account has a limited amount of resources to go around. Once your box is created, click the button that says “IDE”:
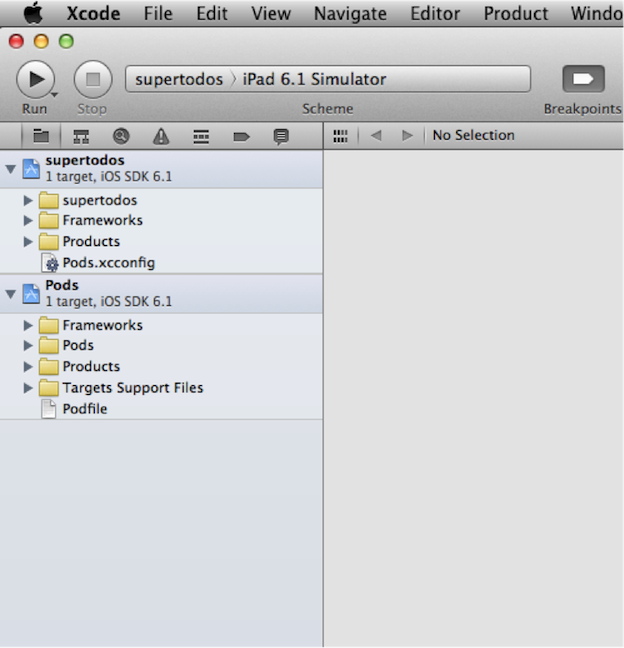
In the page that follows, you’ll be greeted with a familiar interface that resembles IDEs you might use on the desktop. There’s a file explorer view, an editor view, and a terminal window docked on the bottom of the screen. There’s already an Apache HTTP server installed and running on port 3000, set up to serve the contents of your ~/workspace/www folder. To make sure that’s all good, create a simple PHP script in that directory called “index.php” and add the following code:
In your IDE, you’ll notice a menu of options along the top edge of the screen – one of these is called “Preview”. Click this menu, and choose port 3000 (not the SSL version). This should open up a new web browser window with information about your PHP environment on screen. There’s a time and a place for “no framework” PHP, but in this tutorial we’d like to use Laravel. Let’s see how we get that set up on Nitrous.
Installing Laravel and creating a project
In order to use Laravel on our Nitrous box, we have a little more work to do. We’ll need to edit some configuration files and install a bit more software on our development box. Just below the file explorer view, there’s an option to show hidden files – make sure to click this, as we’ll need to edit some of those hidden files in just a few seconds:

But first, let’s make sure we have the latest and greatest version of Composer, the package manager for PHP. We’ll be using it to manage and install all of our dependencies, including Twilio and Laravel. In the terminal pane of the IDE, enter “composer selfupdate”:
Now, per the instructions in the Laravel docs, we’ll globally install the “laravel” command with Composer, so we can use it to manage and create new projects. In the terminal, enter “composer global require “laravel/installer=~1.1”:
This will download and install Laravel, but we still need to add the “laravel” command to our system path. To do this, we’ll have to edit “.bash_profile” in our home directory. You should see this file in your explorer on the left, if you clicked the “Show Hidden” button beneath it. In this file, replace the line that configures your system path with the following:
In the terminal, type “source .bash_profile” – now, you should have the “laravel” command on your system path. Confirm this by typing “laravel” into the terminal with no additional arguments:
Okay, now let’s create our new Laravel app. In the terminal, “cd workspace” to change into the directory where we’ll create our application. Type “laravel new myproject” to create a new Laravel project called “myproject” in the workspace directory:
Okay, sweet – now we have a Laravel project set up on our Nitrous box. Now, we need to point our Apache HTTP server to this new Laravel project. In your file explorer, find the “httpd.conf” configuration file for Apache – it should be in “~/.parts/etc/apache2/httpd.conf”. Open this file, and locate the configuration entry for the server’s document root – change the reference to “www” (the old PHP app) to your new project’s public folder. The configuration will end up looking something like the following:
The “public” folder we set as the document root will contain all your static assets (CSS, JavaScript, images, etc). It also contains a “.htaccess” configuration file that sets up Laravel’s router and enables pretty URLs. Now we need to restart the Apache server to have our new app served up. On a Nitrous box, we use the autoparts package manager to install and manage dependent software. Using the “parts” command, let’s restart Apache with “parts restart apache2”:
Now, let’s preview our website again – in the “Preview” menu of the IDE, choose port 3000 again. This time you should see the Laravel logo, and the welcome text “You have arrived”:
And arrived we have! Now we’re ready to build a simple Twilio application using Laravel. Let’s begin by exploring how we respond to incoming calls and text messages to a Twilio number.
Responding to Incoming Calls and Text Messages
Your web application already has a URL – a unique identifier you can type in your web browser’s address bar to access your site’s content. With Twilio, you can give your app a phone number as well! Your users can call or text your application, and you can present data to them with speech, audio, or text. You can build something as simple as a company directory or text message alerts all the way to a full call center with Twilio and your PHP app.
But let’s start with the basics, shall we? If you haven’t already, you’ll need to sign up for a Twilio account. Once signed up, we can obtain a Twilio phone number to use with our application. You can buy a new number to use with your app, or use an existing one here. Once you have a phone number, click on it to reveal a configuration screen that looks like this:

In the two text fields, you will specify a Request URL for both incoming voice calls and incoming text messages. Twilio will send an HTTP request to these URLs when your Twilio-powered phone number receives a call or text. Your web application then needs to respond with an XML document that contains instructions on how to handle the call or text. You tell Twilio how to behave with a set of XML tags we call TwiML. Using TwiML, you can tell Twilio to send back a text message, use text-to-speech to read a response back to a caller, play the caller an MP3 file, dial a caller into a conference call, and much more.
Let’s use our Laravel app to respond to an incoming call. To help us do that, we’ll install and use the Twilio Helper library for PHP. The latest version of the Twilio helper has been deployed to Packagist, the central repository behind Composer. You can install the latest version of the Twilio helper with “composer require twilio/sdk”. When prompted for a version constraint, you can enter “3.x” to specify the latest in the version 3 line of releases (Twilio’s PHP library should largely adhere to semantic versioning):

The first thing we’ll use the Twilio SDK for is to generate TwiML instructions for an incoming call. In your Laravel app, open “/app/routes.php” – this file contains all the routes that your application will respond to. Laravel is set up to have simple closure-based routes as well as routes that map to methods on controller objects. For the purposes of this example, we’ll use these simple routes rather than full blown controller objects.
Right now routes.php contains a single route for the home page – an HTTP GET request to the root URL “/”. Let’s add another route which will respond to either a GET or a POST request, so we can test it both ways. Just above the route for the home page, add the following route:
Here, we’re manually creating an XML string that we are returning using Laravel’s Response object. To test that this is working okay, you can Preview your app again, but this time appending “/incoming” to the URL in the browser. You can see that rather than HTML, we’re rendering an XML document, per the Content-Type header we set on our response.
Manually creating an XML string is pretty gross though, so let’s use the Twilio helper to programmatically assemble a TwiML response. This should scale a little better as we have more complex TwiML responses:
If you refresh your preview browser, you’ll see we still have XML, but this time the tag has a “voice” attribute – this tells Twilio’s text-to-speech engine which voice should be used to read back a message. Now that we know what we want Twilio to do, let’s configure our Twilio number to ask our web application for instructions when we receive any incoming calls. Copy that preview URL in your web browser, go to your Twilio number configuration, and paste the URL into the Voice Request URL field as shown:
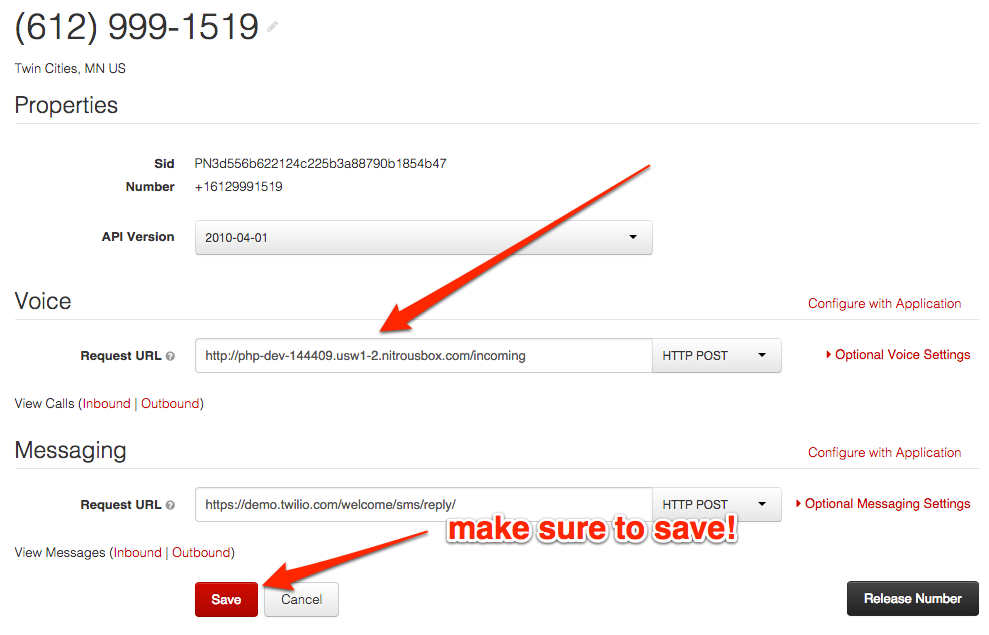
Make sure to save your changes once you add the URL. Now, give your Twilio number a call – you should be greeted by a friendly robot lady telling you how neat your Laravel application is. I, for one, am inclined to agree.
Now that we know how to handle inbound communication, let’s handle some outbound communication and send ourselves a text message.
Outbound Calls and Text Messages
Let’s start things off by creating a simple web form with two fields – one for the text message we’re sending, and another for the phone number we’d like to send the message to. Laravel follows the Model View Controller design pattern, and separates rendering of HTML to “views” – these PHP files live inside the /app/views directory. Inside this directory, create a new file called “home.php” – we will render this view when we preview our site. In that file place the following simple HTML form:
|
1 2 3 4 5 6 7 8 9 10 11 12 13 14 15 16 17 18 19 20 21 22 23 24 | <!doctype html> <html> <head> <title>Send A Text</title> <link rel="stylesheet" href="https://maxcdn.bootstrapcdn.com/bootstrap/3.2.0/css/bootstrap.min.css"> <link rel="stylesheet" href="https://maxcdn.bootstrapcdn.com/bootstrap/3.2.0/css/bootstrap-theme.min.css"> </head> <body> <div class="container"> <h1>Send A Text!</h1> <form action="/text" method="POST" role="form"> <div class="form-group"> <label for="phoneNumber">Phone Number</label> <input type="text" class="form-control" id="phoneNumber" placeholder="Enter a mobile phone number"> </div> <div class="form-group"> <label for="message">Message</label> <textarea class="form-control" id="message">Hello There!</textarea> </div> <button type="submit" class="btn btn-primary">Send Text</button> </form> </div> </body> </html> |
We use Twitter Bootstrap from a CDN to make our page a little more attractive, but other than that, we’re just creating a form with those two text fields we need. Now, let’s go back to our router and change the view for the home page to use this new view file:
Preview your site again, and you should see a nice form for collecting a phone number and the contents of a text message. However, the form doesn’t POST to anywhere yet! We still need to implement the /text POST route, which we’ll do soon. But before we can send a text, we’ll need to configure our Twilio account information for the application. Laravel provides a means of storing environment-specific configuration options for your application. You can read more about how it works in their documentation here. At the root of your project, the same level as composer.json, create a new file called “.env.php”. This PHP code will return an associative array of configuration variables that will be made available to your application.
In this app we’ll need three config variables – our Twilio Number which we’ll use as the sender of the text message, plus our account SID and auth token, which are essentially our username and password for the Twilio API. You can find your account SID and auth token on the account dashboard. In the code below, replace XXX with your Twilio account SID, YYY with your auth token, and the 612 number with your own Twilio number:
NOTE: Make sure not to check this file into version control! Add it to your .gitignore file if you’re using git, or take similar steps for other VCS.
Now, open up your /app/routes.php file. We can now create a route that sends a text message, per the form inputs we have in place. Somewhere in routes.php, add the following code – read through the comments to see what’s happening at each step:
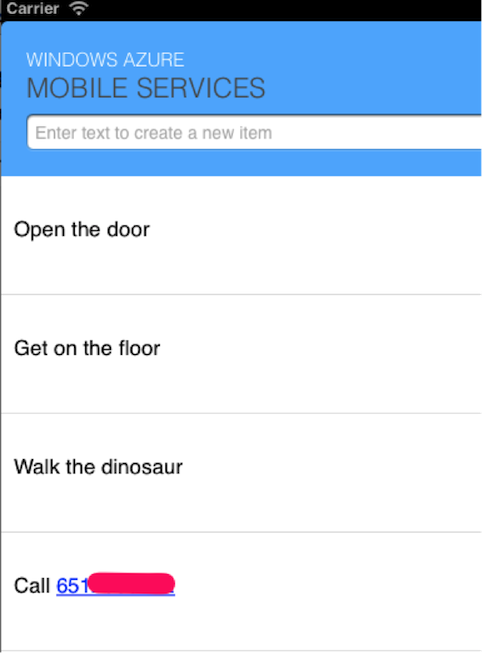
Now, preview your website and type your mobile number and a test message into the fields provided. When you hit the button, you should be greeted with a JSON representation of a Message object that’s returned after a successful request to Twilio. More importantly, your phone should start buzzing after it receives the text message you just crafted!
Sometimes, however, things don’t go according to plan. If for some reason there’s an error while attempting to send your message, the Twilio helper will throw an exception. For this reason, you should usually wrap your calls to the Twilio API with a try/catch block, like so:
Wrapping Up
We’ve only just scratched the surface of what’s possible with Twilio and Laravel. With Twilio and your web dev skills, you can build custom call centers to deliver amazing service, automate business processes via voice and text, and enable collaboration across multiple communications channels between your colleagues and customers. Here are some resources that might be useful as you learn more:
- Twilio PHP Helper Docs
- Twilio Quick Start
- Build a Simple IVR System in PHP
- Click To Call in PHP
- Laravel Docs
- Nitrous.io Docs
If you have any questions, or would just like to dish about something awesome that you built, feel free to find me on Twitter. If you have any tech questions or need help getting started, shoot us a note a help@twilio.com and we’ll do our best to get you unstuck. Good luck, and have fun!

Related Resources
Twilio Docs
From APIs to SDKs to sample apps
API reference documentation, SDKs, helper libraries, quickstarts, and tutorials for your language and platform.
Resource Center
The latest ebooks, industry reports, and webinars
Learn from customer engagement experts to improve your own communication.
Ahoy
Twilio's developer community hub
Best practices, code samples, and inspiration to build communications and digital engagement experiences.