iOS UserNotifications in Swift

July 13, 2017
Written by
Sam Agnew
Twilion

iOSUsernotificationsSwift

Local notifications provide a core functionality in many apps, and in Swift they are easy to add to whatever you’re building. With iOS10’s UserNotifications you can even display GIFs in notifications.

Let’s build a quick application to display a local UserNotification containing a SEGA-related GIF and a prompt for the user to continue receiving notifications.

Setting up the project

Get started by grabbing this example project off of Github. It takes care of all the setup so we can focus on the important stuff. Open your terminal, navigate to where you want this project to live, clone this repository and check into the tutorial branch:

git clone https://github.com/sagnew/sega-gifs.git
cd sega-gifs
git checkout tutorial

This app has several dependencies:

We’ll use CocoaPods to install these dependencies. First, install CocoaPods if you don’t have it:

sudo gem install cocoapods

Now install the dependencies by running the following command in the directory where our Podfile is:

pod install

CocoaPods links the dependencies of our project together by creating a new Xcode Workspace. To make sure XCode loads those dependencies open the workspace using the PlayingWithUserNotifications.xcworkspace file instead of the Xcode project file:

open PlayingWithUserNotifications.xcworkspace

Feel free to build the project to make sure everything compiles correctly before kicking off this adventure.

giphy.gif

Displaying Notifications

Let’s hop into some code. First we’ll need to import UserNotifications at the top of AppDelegate.swift:

import UserNotifications

Before being able to send notifications, our app will have to request permission from the user in AppDelegate.swift. Replace the code in application(_:didFinishLaunchingWithOptions:) with the following so that the app will request permission to send notifications when it launches:

func application(_ application: UIApplication, didFinishLaunchingWithOptions launchOptions: [UIApplicationLaunchOptionsKey: Any]?) -> Bool {
  
  // Request Permission
  UNUserNotificationCenter.current().requestAuthorization(options: [.sound, .alert, .badge]) {
    granted, error in
    if granted {
      print("Approval granted to send notifications")
    } else {
      print(error)
    }
  }
  
  UNUserNotificationCenter.current().delegate = self
  
  return true
}

Note that before returning, we are setting the UNUserNotificationCenter delegate to self.

Before we’re done in AppDelegate.swift, add an extension at the bottom of the file for handling the notification center logic:

extension AppDelegate: UNUserNotificationCenterDelegate {
  
  func userNotificationCenter(_ center: UNUserNotificationCenter, willPresent notification: UNNotification, withCompletionHandler completionHandler: @escaping (UNNotificationPresentationOptions) -> Void) {
    completionHandler(.alert)
  }
}

Now jump over to ViewController.swift so we can begin writing the code to actually send a notification. Add an identifier for our notification in the ViewController class:

let notificationIdentifier = "myNotification"

Next add a method in ViewController to schedule the notification itself:

func scheduleNotification(inSeconds: TimeInterval, completion: @escaping (Bool) -> ()) {
  
  // Create Notification content
  let notificationContent = UNMutableNotificationContent()
  
  notificationContent.title = "Check this out"
  notificationContent.subtitle = "It's a notification"
  notificationContent.body = "WHOA COOL"
  
  // Create Notification trigger
  // Note that 60 seconds is the smallest repeating interval.
  let trigger = UNTimeIntervalNotificationTrigger(timeInterval: inSeconds, repeats: false)
  
  // Create a notification request with the above components
  let request = UNNotificationRequest(identifier: notificationIdentifier, content: notificationContent, trigger: trigger)
  
  // Add this notification to the UserNotificationCenter
  UNUserNotificationCenter.current().add(request, withCompletionHandler: { error in
    if error != nil {
      print("\(error)")
      completion(false)
    } else {
      completion(true)
    }
  })
}

This function might seem a little long, so let me explain what’s going on:

  • We’re creating a UNMutableNotificationContent object and setting the notification content.
  • Next we’re creating a UNTimeIntervalNotificationTrigger which is a trigger for the notification. In this case, we’re going to be scheduling a notification for the number of seconds that gets passed to this wrapper function.
  • After all of this, we’re making a UNNotificationRequest object for our notification identifier, content and trigger.
  • Finally we are adding the notification request to the UNUserNotificationCenter.

Once this is taken care of, let’s call this new scheduleNotification method whenever the button in our app is clicked. Add the following code to the notificationButtonTapped method:

@IBAction func notificationButtonTapped(_ sender: Any) {
  self.scheduleNotification(inSeconds: 5, completion: { success in
    if success {
      print("Successfully scheduled notification")
    } else {
      print("Error scheduling notification")
    }
  })
}

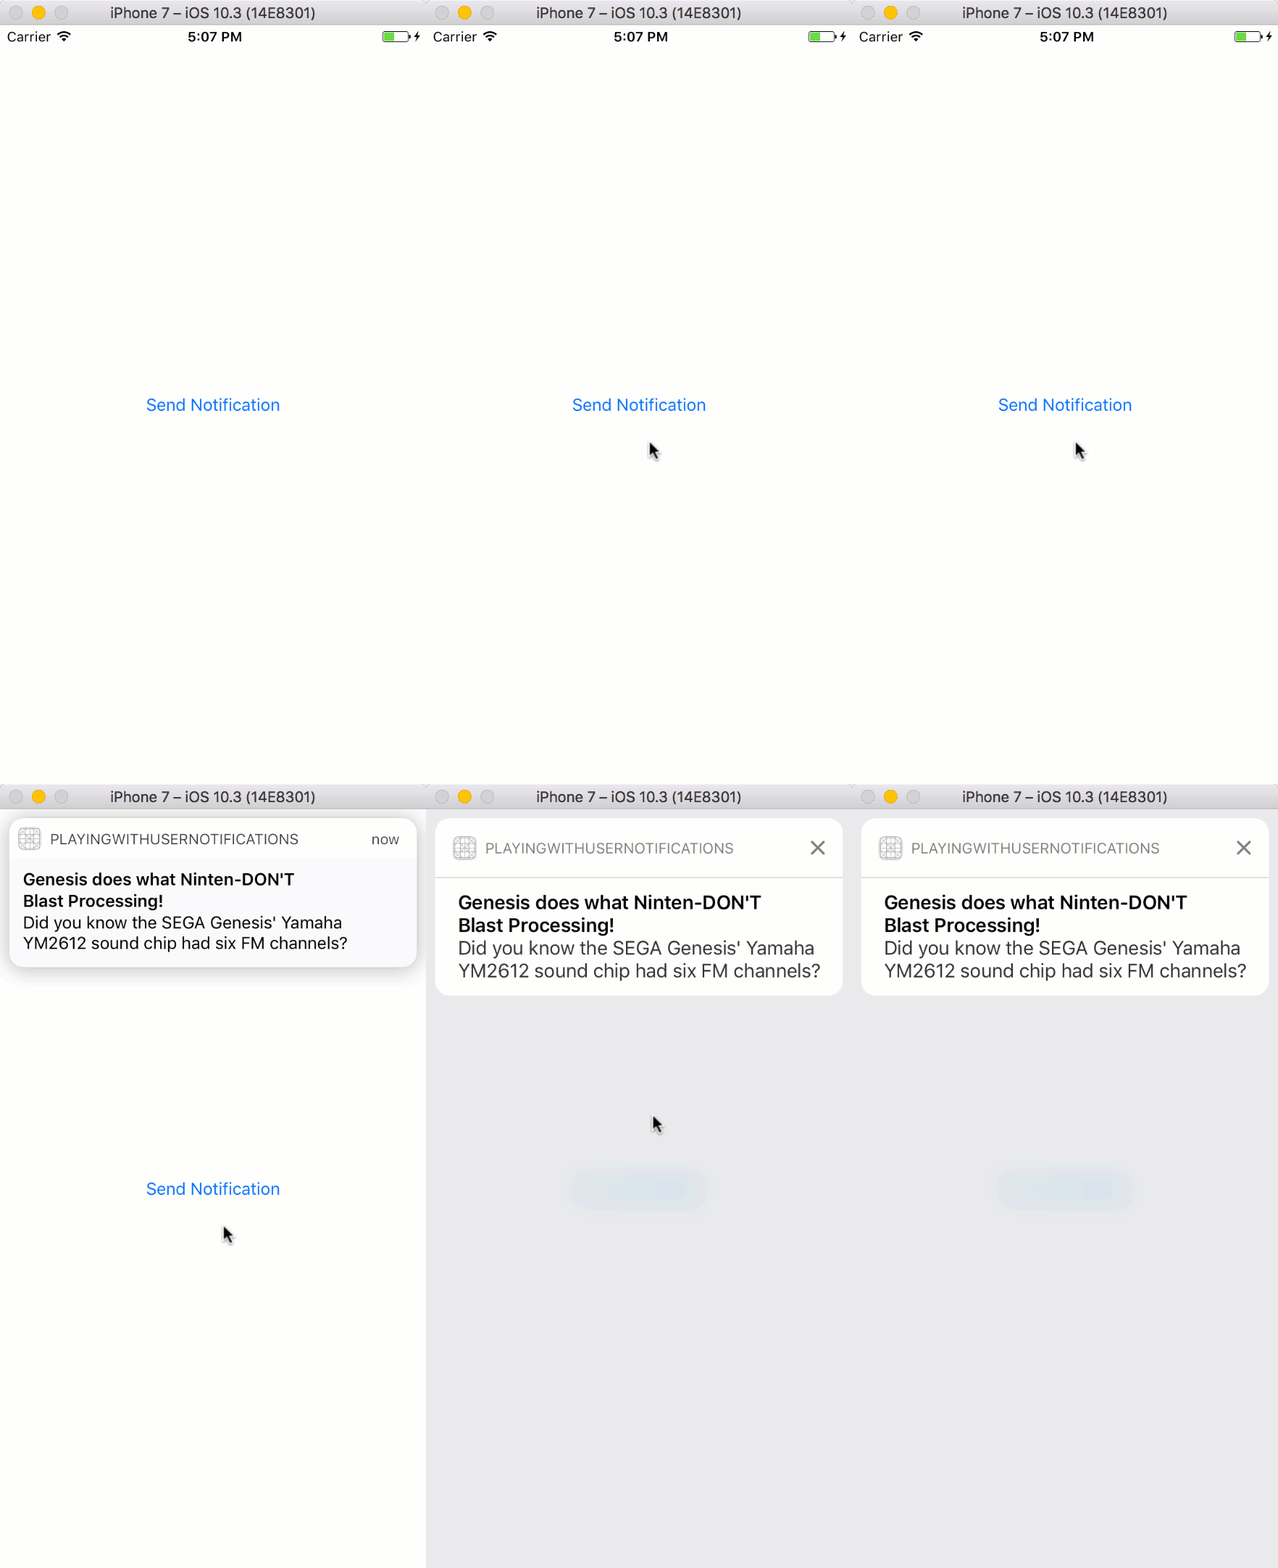
You should be ready to run the app, press the button and receive a notification.
Notification.gif

Displaying GIFs in Notifications

That was cool, but let’s spice this notification up a bit with some 16-bit awesomeness.

To add GIFs to our notifications, we will use the Giphy API. Let’s make a class to wrap around and deal with this API. Create a file called GiphyManager.swift and in it add the following code:

import UIKit
import Alamofire
import SwiftyJSON
import PromiseKit

class GiphyManager: NSObject {
  
  let giphyBaseURL = "https://api.giphy.com/v1/gifs/search"
  let apiKey: String
  let imageLimit: UInt32
  
  override init() {
    self.apiKey = "dc6zaTOxFJmzC"
    self.imageLimit = 50
    super.init()
  }
  
  init(apiKey: String, imageLimit: UInt32) {
    self.apiKey = apiKey
    self.imageLimit = imageLimit
    super.init()
  }
  
  func fetchRandomGifUrl(forSearchQuery query: String) -> Promise<String> {
    return Promise { fulfill, reject in
      Alamofire.request(self.giphyBaseURL, parameters: ["api_key": self.apiKey, "q": query, "limit": "(self.imageLimit)"])
        .responseJSON { response in
          if let result = response.result.value {
            let json = JSON(result)
            let randomNum:Int = Int(arc4random_uniform(self.imageLimit))
            
            if let imageUrlString = json["data"][randomNum]["images"]["downsized"]["url"].string {
              print(imageUrlString)
              fulfill(imageUrlString)
            } else {
              reject(response.error!)
            }
            
          }
      }
    }
  }
}

This is a wrapper around the Giphy REST API and is very similar to what I did in my PromiseKit tutorial. This class provides a method that grabs a URL to a random GIF on Giphy with the given query.

Let’s clean up the code we wrote for scheduling the notification. First, start by taking out most of the extra code written in ViewController.swift and move it into a new file.

Create a new Swift file called NotificationManager.swift and add the following code:

import UIKit
import UserNotifications

import Alamofire
import SwiftyJSON
import PromiseKit

class NotificationManager: NSObject {
  
  static let sharedInstance = NotificationManager()
  
  let notificationIdentifier = "myNotification"
  
  func createNotification() {
    let giphy = GiphyManager()
    
    giphy.fetchRandomGifUrl(forSearchQuery: "SEGA Genesis").then { imageUrlString in
      NotificationManager.sharedInstance.handleAttachmentImage(forImageUrl: imageUrlString)
      }.then { attachmentUrl in
        NotificationManager.sharedInstance.scheduleNotification(inSeconds: 5, attachmentUrl: attachmentUrl) { success in
          print(success)
        }
      }.catch { error in
        print(error)
    }
  }
  
  func handleAttachmentImage(forImageUrl imageUrlString: String) -> Promise<URL> {
    return Promise { fulfill, reject in
      Alamofire.request(imageUrlString).responseData { response in
        if let data = response.result.value {
          print("image downloaded: (data)")
          
          let fm = FileManager.default
          let docsUrl = try! fm.url(for:.documentDirectory, in: .userDomainMask, appropriateFor: nil, create: true)
          let fileUrl = docsUrl.appendingPathComponent("img.gif")
          
          do {
            try data.write(to: fileUrl)
            fulfill(fileUrl)
          } catch {
            reject(error)
          }
          
        }
      }
    }
  }
  
  func scheduleNotification(inSeconds: TimeInterval, attachmentUrl: URL, completion: @escaping (Bool) -> ()) {
    
    // Create an attachment for the notification
    var attachment: UNNotificationAttachment
    
    attachment = try! UNNotificationAttachment(identifier: notificationIdentifier, url: attachmentUrl, options: .none)
    
    // Create Notification content
    let notificationContent = UNMutableNotificationContent()
    
    notificationContent.title = "Genesis does what Ninten-DON'T"
    notificationContent.subtitle = "Blast Processing!"
    notificationContent.body = "Did you know the SEGA Genesis' Yamaha YM2612 sound chip had six FM channels?"
    
    notificationContent.attachments = [attachment]
    
    // Create Notification trigger
    // Note that 60 seconds is the smallest repeating interval.
    let trigger = UNTimeIntervalNotificationTrigger(timeInterval: inSeconds, repeats: false)
    
    // Create a notification request with the above components
    let request = UNNotificationRequest(identifier: notificationIdentifier, content: notificationContent, trigger: trigger)
    
    // Add this notification to the UserNotificationCenter
    UNUserNotificationCenter.current().add(request, withCompletionHandler: { error in
      if error != nil {
        print("(error)")
        completion(false)
      } else {
        completion(true)
      }
    })
  }
}

Here we have a singleton object to handle all of the notification logic in our app.

In this class, we have a new scheduleNotification method that is mostly the same as the one we wrote before in ViewController.swift, but with logic to handle attachments.

There’s also a method for handling the attachment images for our notifications. This function returns a Promise and takes the Giphy URL. It then downloads the image and saves it to a file. That file URL gets passed to the next function in the chain.

The createNotification method is what we will call from ViewController.swift whenever the button in the app is pressed. This will kick off the call chain that will grab an image from Giphy, prepare it to be placed as an attachment in a notification, and then schedule that notification to be sent.

Now head back over to ViewController.swift and remove the code we wrote before: both the scheduleNotification function and the let notificationIdentifier = "myNotification" line at the top of the class.

Replace the code in notificationButtonTapped with the following to create a notification:

@IBAction func notificationButtonTapped(_ sender: Any) {
  NotificationManager.sharedInstance.createNotification()
}

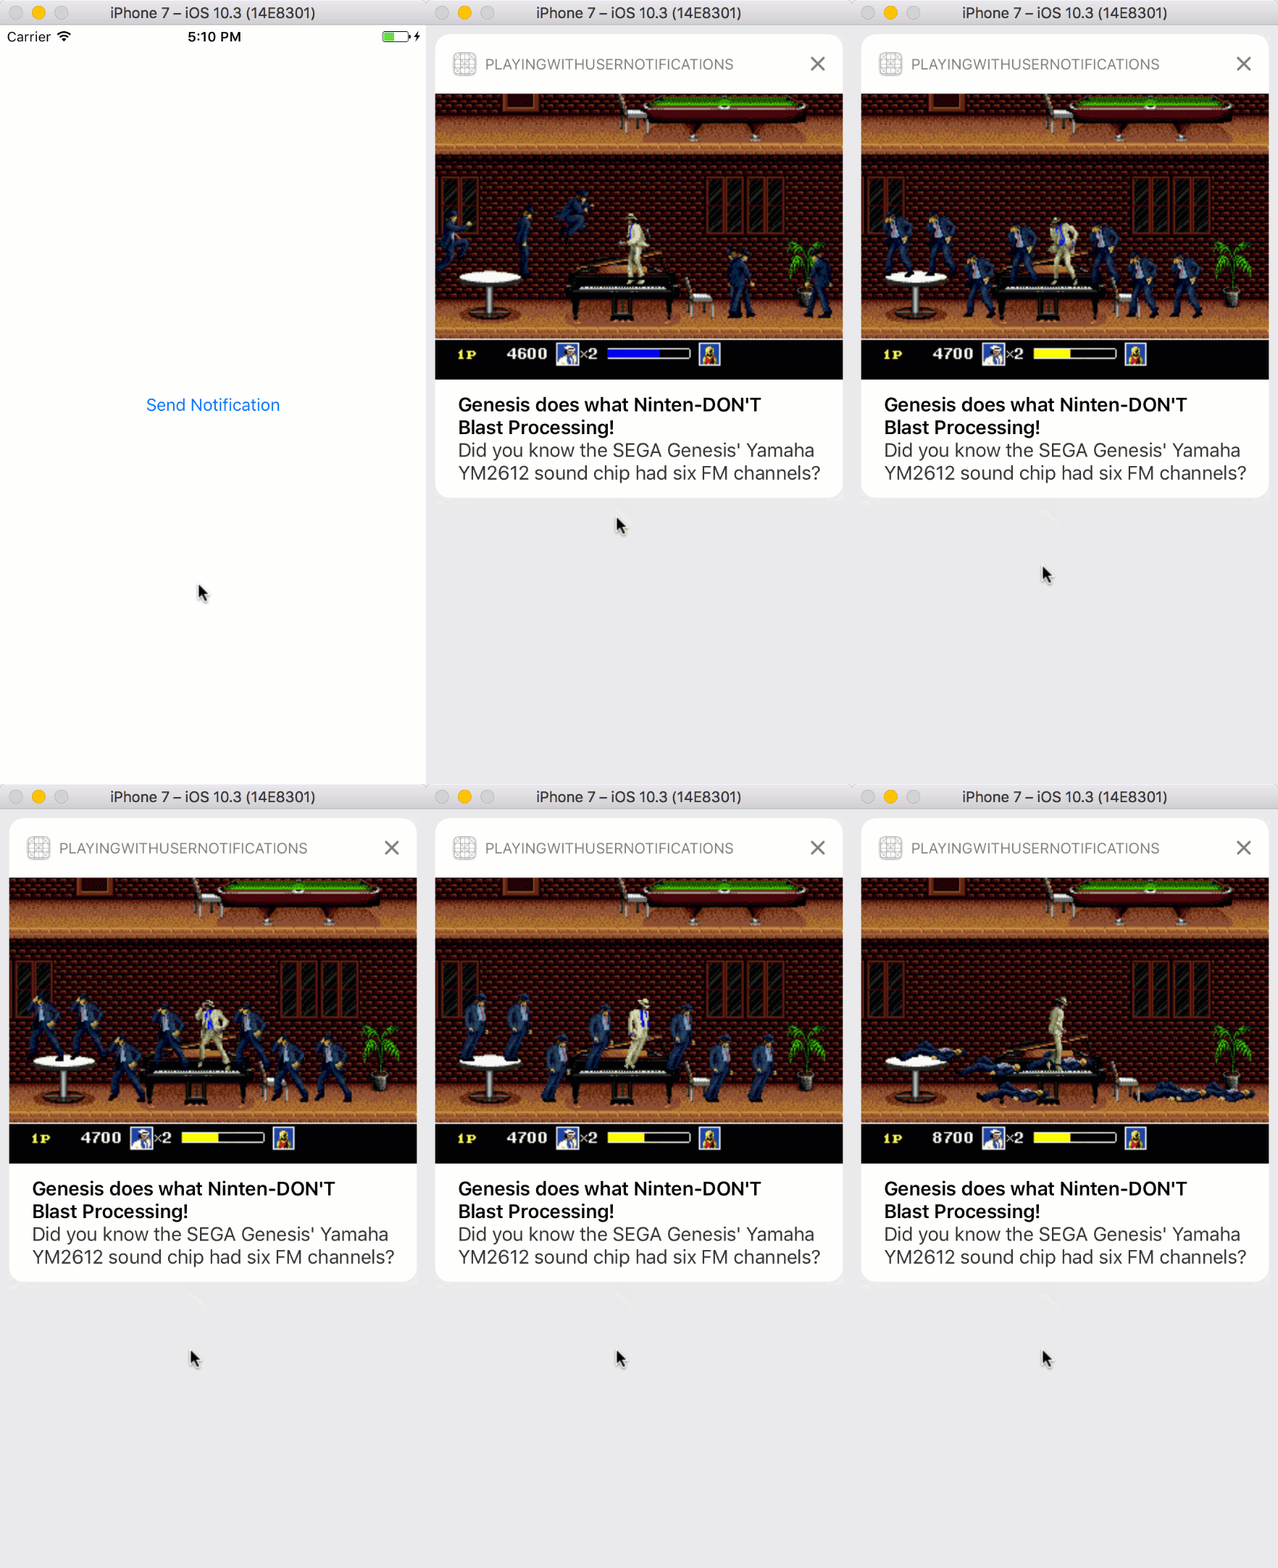
Run the app and your notification should contain a sick SEGA GIF.
MJNotification.gif

Adding Input Options to your Notifications

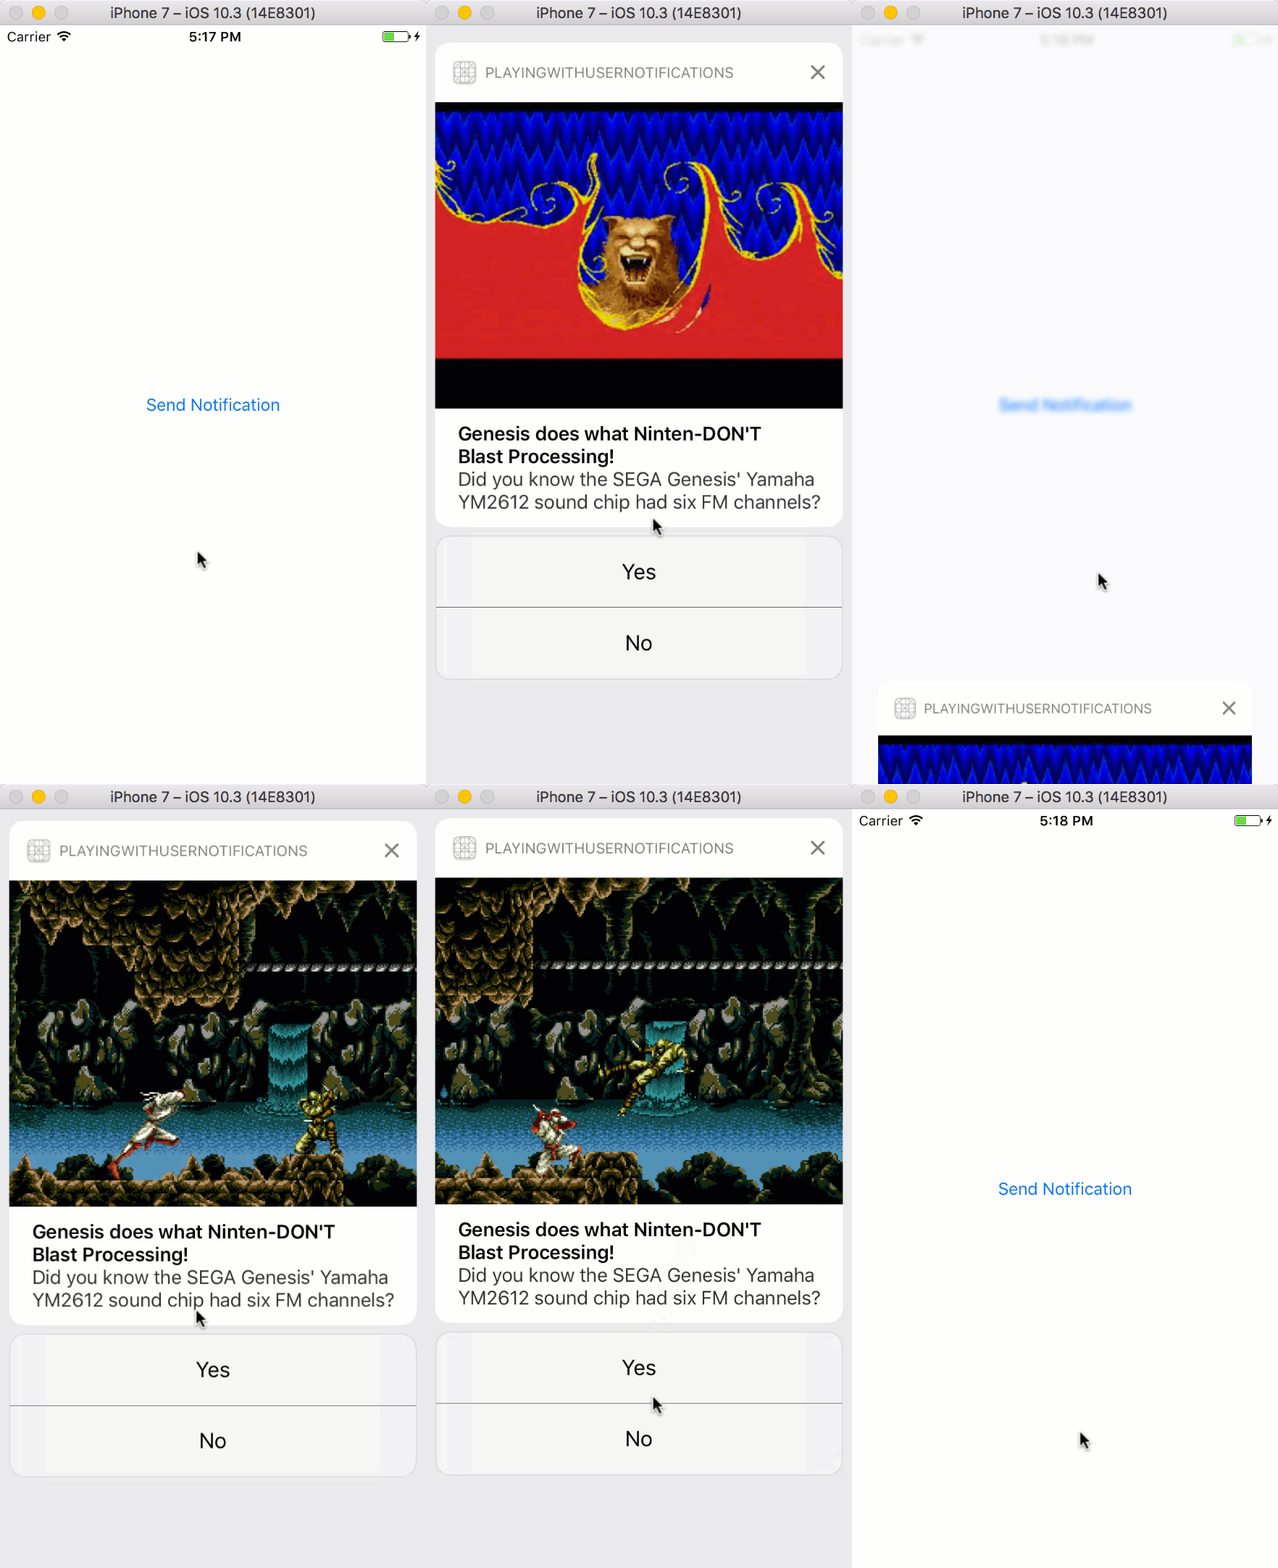
Let’s make it so that we can receive input from our notification and allow the user to select whether or not they want more notifications.

We need to add a category identifier to the notification for confirmation options. In NotificationManager.swift add the highlighted line to the scheduleNotification function:

func scheduleNotification(inSeconds: TimeInterval, attachmentUrl: URL, completion: @escaping (Bool) -> ()) {
  
  // Create an attachment for the notification
  var attachment: UNNotificationAttachment
  
  attachment = try! UNNotificationAttachment(identifier: notificationIdentifier, url: attachmentUrl, options: .none)
  
  // Create Notification content
  let notificationContent = UNMutableNotificationContent()
  
  notificationContent.title = "Genesis does what Ninten-DON'T"
  notificationContent.subtitle = "Blast Processing!"
  notificationContent.body = "Did you know the SEGA Genesis' Yamaha YM2612 sound chip had six FM channels?"
  
  notificationContent.attachments = [attachment]
  
  // Add a category
  notificationContent.categoryIdentifier = "moreNotificationsOptions"
  
  // Create Notification trigger
  // Note that 60 seconds is the smallest repeating interval.
  let trigger = UNTimeIntervalNotificationTrigger(timeInterval: inSeconds, repeats: false)
  
  // Create a notification request with the above components
  let request = UNNotificationRequest(identifier: notificationIdentifier, content: notificationContent, trigger: trigger)
  
  // Add this notification to the UserNotificationCenter
  UNUserNotificationCenter.current().add(request, withCompletionHandler: { error in
    if error != nil {
      print("\(error)")
      completion(false)
    } else {
      completion(true)
    }
  })
}

Now head over to AppDelegate.swift to create the actions that will be placed in this notification. Replace the code in application(_:didFinishLaunchingWithOptions:) with the following:

func application(_ application: UIApplication, didFinishLaunchingWithOptions launchOptions: [UIApplicationLaunchOptionsKey: Any]?) -> Bool {
  
  // Request Permission
  UNUserNotificationCenter.current().requestAuthorization(options: [.sound, .alert, .badge]) {
    granted, error in
    if granted {
      print("Approval granted to send notifications")
    } else {
      print("\(error)")
    }
  }
  
  let yesAction = UNNotificationAction(identifier: "yes", title: "Yes", options: [])
  let noAction = UNNotificationAction(identifier: "no", title: "No", options: [])
  let category = UNNotificationCategory(identifier: "moreNotificationsOptions", actions: [yesAction, noAction], intentIdentifiers: [], options: [])
  UNUserNotificationCenter.current().setNotificationCategories([category])
  
  UNUserNotificationCenter.current().delegate = self
  
  return true
}

All that’s left is to update the extension we previously made in AppDelegate.swift and add a method to actually define what happens when the user clicks on the “Yes” option. In this case we are just calling createNotification again. Replace that extension with the following:

extension AppDelegate: UNUserNotificationCenterDelegate {
  
  func userNotificationCenter(_ center: UNUserNotificationCenter, willPresent notification: UNNotification, withCompletionHandler completionHandler: @escaping (UNNotificationPresentationOptions) -> Void) {
    completionHandler(.alert)
  }
  
  func userNotificationCenter(_ center: UNUserNotificationCenter, didReceive response: UNNotificationResponse, withCompletionHandler completionHandler: @escaping () -> Void) {
    
    if response.actionIdentifier == "yes" {
      NotificationManager.sharedInstance.createNotification()
      completionHandler()
    }
  }
}

Now run the app again and prepare for some repeating notifications
DoubleSEGANotification.gif
giphy.gif

Now you can send local UserNotifications that contain GIFs and even receive input! That’s only the beginning when it comes to notifications. You can send notifications from a remote server if you want to and even use Twilio Notify to send push notifications.

Feel free to reach out if you have any questions or comments or just want to show off the cool stuff you’ve built.