Working with iOS View Animations and Transitions in Swift
Time to read:
September 18, 2018
Written by

If you use an Apple device, you’ve probably seen a bunch of animations from third-party apps or Apple’s stock apps. If you ever wished you knew how to do that, but thought it looked too complicated, your wish is about to come true. Follow along with me and you’ll discover that creating animations in iOS is not only uncomplicated, but also fun.
Animations grab a user’s attention and allow them to focus on what’s important on the screen. Animations also highlight changes on the screen and can help a user learn to navigate your app. But who are we kidding, everyone loves animations. They’re just so cool.
Tools You’ll Need
To follow along with this tutorial, assuming you are an iOS developer looking to explore the world of animations, you will need a couple of prerequisites:
- A Mac running the latest point release of macOS X Sierra or later.
- Xcode 8 or later.
- Basic knowledge of the Swift 4 language and Auto Layout.
If you don’t have any of these things, you can go ahead and get them, I’ll be here...
Getting Started
Now that you have what you’ll need, I have already set up a small project for you to work on. You can download it here or if you prefer to check out the Git repo, you can do that as well.
Once you’ve downloaded or cloned it, go ahead and open the project file. You should find a file structure that looks like this:
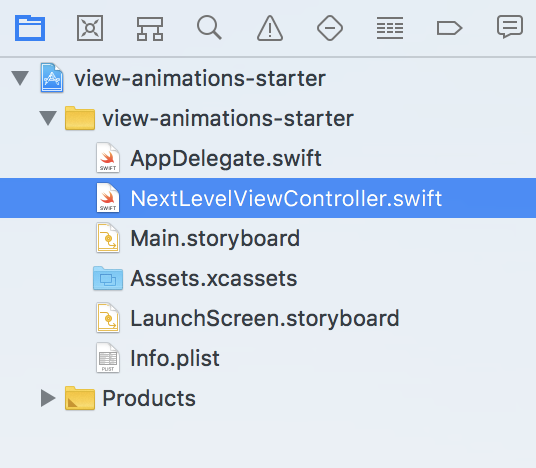
Open Main.storyboard. In it you’ll see a black and golden-themed view controller.
It’s aptly named Next Level Designs and contains a label, two UIViews: one golden, the other green, and a Transition button at the bottom. The golden UIView is layered on top of the green one; that’s why you can’t see it at the moment.
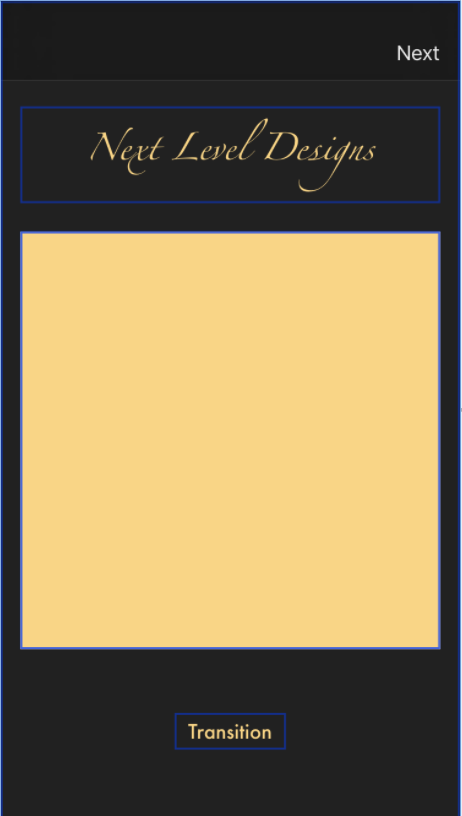
You can go ahead and run the project to see how the design looks in action. We will be using this view controller to demonstrate view transitions.
Let’s get started.
View Transitions
As you might have guessed, we will be transitioning the UIViews. Our goal is simple: when we click the Transition button, we want a transition to happen from the golden UIView to the green one and vice versa when we click it again.
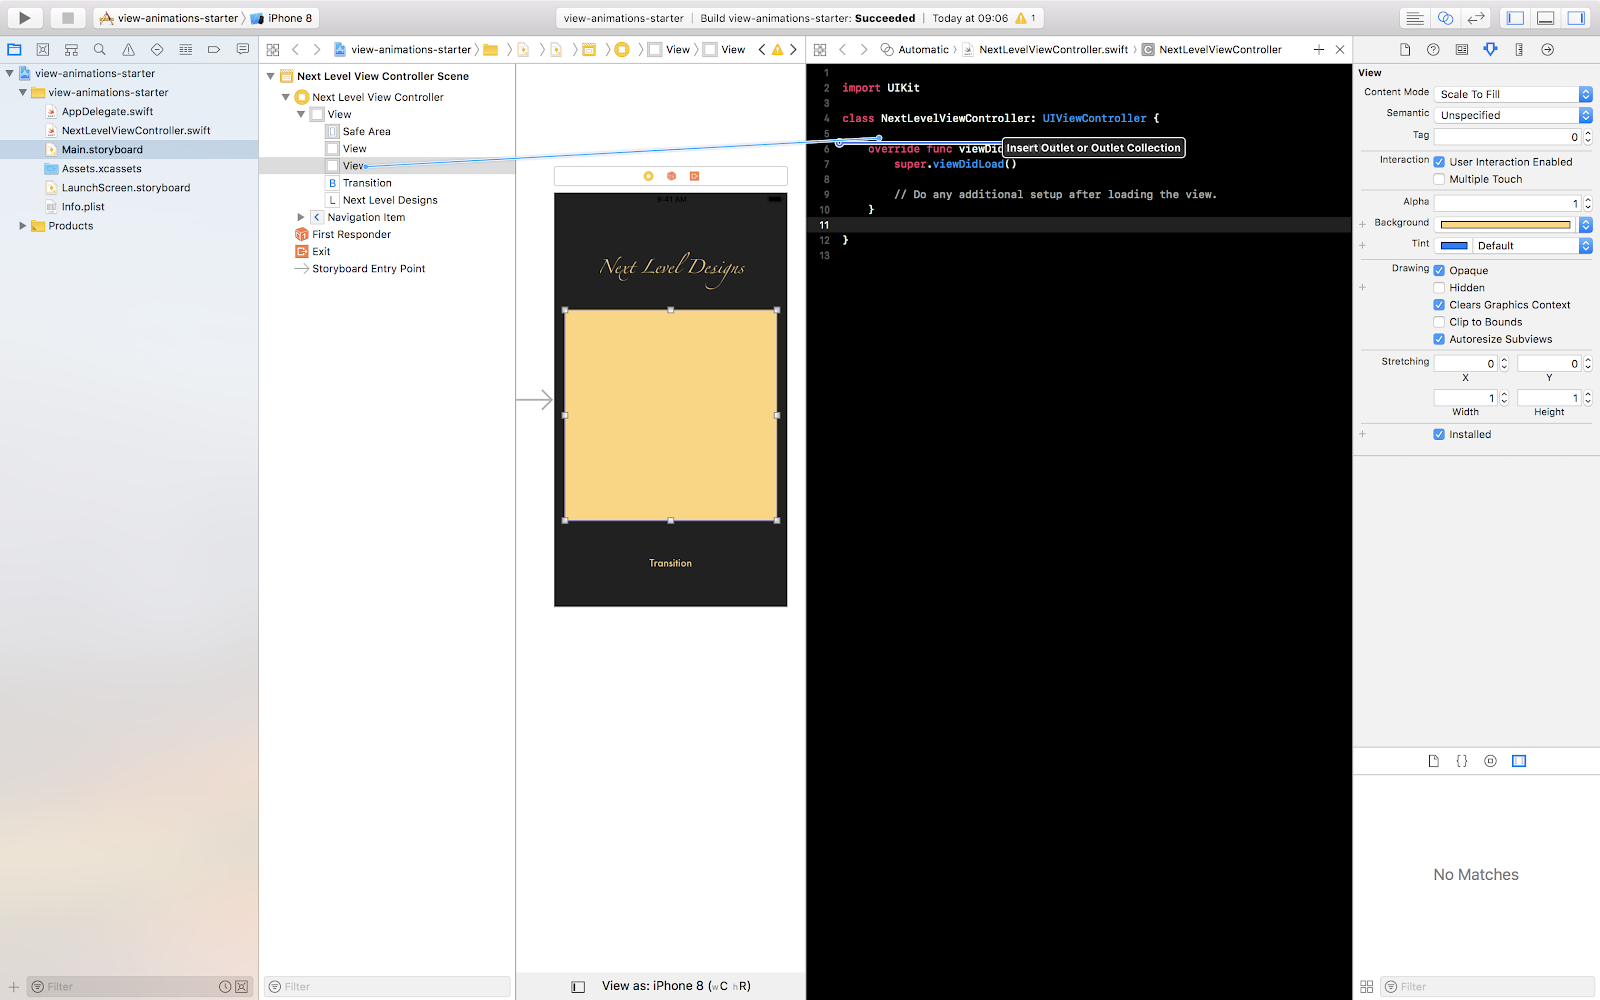
But before we can do that, we have to connect some outlets to a custom class. Open Main.storyboard, select the Next Level View Controller, and click on the Assistant Editor in the top right section of Xcode (the one that looks like two overlapping circles).
The first thing we want to connect is our two UIViews, and since one is overlayed on top of the other, the easiest way to connect them would be from the Document Outline on the left.
From there you can either Option + drag or right-click drag to the Swift file just above the viewDidLoad() method.
Name the golden one goldenView and hit connect.
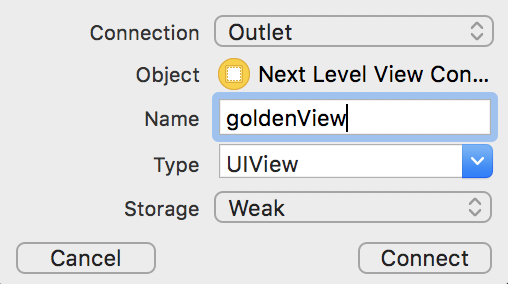
You can confirm which UIView you are connecting by checking its background color in the Attributes inspector on the right side.
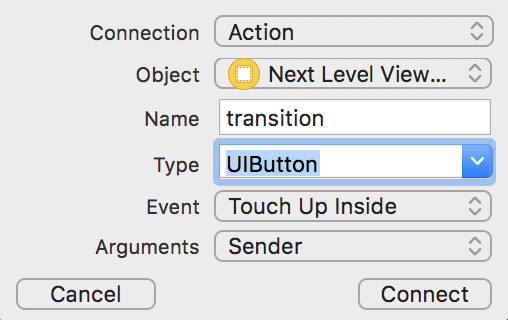
Do the same for the greenView and finally connect the Transition button after the viewDidLoad() method.
Make sure it is an Action and is of type UIButton.
Now that that’s done, get ready to request the help of our resident transition API from the good folks at Apple.
The Transition API
If you’re familiar with the UIKit Animations API, the Transition API is quite similar to that and fairly simple to implement. However, there are a few differences and we are going to cover all of them.
The first thing to know is that the Transition API has two implementations, which on the surface level are very similar because they do the same thing. However, they operate a little differently.
In our transition() action method, if you start to type UIView.transition, the XCode autocomplete will give you a couple of options:

We are interested in the first two options and to best explain how they work, we are going to use them both to transition our UIViews.
UIView.transition(with: …)
Let’s start with the second option; the one with the with: parameter. It’s the more straightforward one.
View transitions are predefined, which means they’re somewhat limited, but very powerful and simple to implement. To implement the transition, you have to do one simple thing: pair a transition trigger with a predefined transition.
Naturally your next questions are, “That’s great, but what is a transition trigger? What are these predefined transitions? And how do I do any of that?”
Have patience, all will be revealed in due time. Let’s start with transition triggers.
There are three triggers that should cause a view to transition:
isHidden- this one triggers a view’sisHiddenproperty and causes it to disappear from view.addSubview()- this method adds a subview to a view’s view hierarchy.removeFromSuperview()- this does the opposite and removes a view from its superview’s view hierarchy.
The triggers go in the animations: closure.
As for the transitions, there are seven:
.transitionFlipFromLeft.transitionFlipFromRight.transitionFlipFromTop.transitionFlipFromBottom.transitionCurlUp.transitionCurlDown.transitionCrossDissolve
The transitions really do what they say and we’ll see this in a while. They go in the options: parameter.
Now that you’re up to speed, let’s get transitioning. In your UIView.transition(with: …) implementation, have the with: parameter be the goldenView because it’s the one on top, have a duration: of 0.5, in the options: set, input [.transitionFlipFromRight], and in the animations: closure, set goldenView’s isHidden property to true.
Your implementation should look like this:
Build and run the project, hit the Transition button, and see what happens.
Congratulations on your first view transition. Give yourself a self-five!

Our transition project is far from complete though. The transition only happens once and that’s not the effect we are going for. We need to find a way to make it transition back and forth.
In the same file, right under the outlets for our UIViews, define a private constant, call it isFlipped, and initialize it to false.
Next, tell our transition method which UIView it has to flip when the button is clicked.
The card we need to flip will be goldenView when isFlipped is true and greenView when isFlipped is false.
In our button action method, add a ternary operator based on our isFlipped property that determines whether the card to flip will be the goldenView or the greenView.
However, our isFlipped property, at the moment, is static, which means it will always be false. So we need to change the value of isFlipped everytime the button is clicked.
To do that, add the following just above the declaration of cardToFlip:
One last thing, in the UIView.transition(with: …) method, replace any instance on goldenView with cardToFlip.
The whole method should now look like this:
Build and run the project. Notice now that the cards transition interchangeably.
Oh, what’s that? The cards flip correctly and then disappear? Of course they do! That’s because we told the cardToFlip to be hidden and didn’t tell it to come out of hiding.
To fix it, we have to use the completion closure and trigger the isHidden property of the cardToFlip back to false. Your completion closure should now look like this:
Build and run the project one more time.
You should have run into another problem and this time, the goldenView transitions out of view and then awkwardly reappears after a while. I know what you’re probably thinking and no, I’m not messing with you. This is actually a teachable moment about the view hierarchy.
I’m not going to go deep into the view hierarchy because that’s not what this article is about. But basically, views can also act as containers for other views and they thus create a view hierarchy.
In our specific case, our two UIViews are contained in the main view of the view controller, the root view, and are therefore its subviews. The goldenView is initially placed in front of the greenView and will remain there unless the order is changed.
Luckily for us, there is a built-in method that can help us out.
First, we have to capture our bottomCard. So, below our ternary operator for the cardToFlip, add another for the bottomCard.
Next, in the completion closure just above where we tell our cardToFlip to stop being hidden, add the following line of code to bring the bottomCard to the front:
Your whole action method should now look like this:
Now build and run the project again. I promise it will work this time. 😄
Look at that! That’s the exact effect we were going for.

One more thing: when a transition is triggered by adding or removing views from the hierarchy, i.e., addSubview() and removeFromSuperview(), you need to use the view’s superview in the with: parameter.
When a transition is triggered by isHidden, the view acts as its own container view.
Now let’s look at the other variation of the transition API.
UIView.transition(from: …)
This variation, on the surface, seems like the simpler one to use. However, there are some underlying functionalities that happen, as you’ll find out in a bit.
We are going to apply the exact same transition to our UIViews as we did before, so go ahead and comment out the previous UIView.transition(with: …) implementation.
Just like before, in our button’s action method, right under the definition of bottomCard, start typing UIView.transition, and from the Xcode autocomplete, pick the first variation--the one with the from: parameter.
We would like to transition from the cardToFlip to bottomCard. So we are going to have cardToFlip for the from: parameter and bottomCard for the to: parameter. Let’s have the same 0.5 seconds for the duration: parameter and let’s use a [.transitionCurlUp] for the options: parameter. Have the completion: be nil for now.
Your transition method should look like this now:
Build and run the project.
The first transition happens as expected, but when you click the button the second time, the compiler hits you with a ⚠ fatal error.
You may have noticed that this variation doesn’t have an animations: closure like the other, and we need the animations: closure to trigger the transition. Well, as I mentioned earlier, this variation has some automated processes happening under the hood.
If you check your variables view at the bottom, you will notice that the bottomCard, which in this case is the goldenView, is nil.
Here’s what happened: the automated transition trigger removed the goldenView from the view hierarchy.
In the official Apple documentation, they state that, in this variation, the fromView: is removed from its superview as part of the transition.
Well, that’s all fine, but we can’t just live with this fatal error. We have to fix it somehow and there are two ways to go about that.
One would be to add the cardToFlip back to its superview’s view hierarchy in the completion: closure and bring the bottomCard to the front as we did previously. But you’ve already learned how to do that, so let’s explore the other, swifter (pun intended 😏) option.
In the options: parameter set, add another option named .showHideTransitionViews. What this does is simply hide the fromView instead of removing it from the view hierarchy.
Your transition method should now look like this:
Build and run the project one more time.
Our transition now works well, however, there’s one small problem. The whole page, instead of the view, curls up, and we definitely don’t want that. In this variation of the transition method, the transition only happens on the superview, and unfortunately, there’s no way to make the transition happen specifically on the subview. And that’s the limitation that comes with automation.
The only work-around would be to embed our two UIViews in another UIView of the same size and position that will act as their superview instead of the main root view.
To do this, open Main.storyboard and in the document outline, highlight both UIViews by Command + clicking both of them. Then go to Editor/Embed In/View.
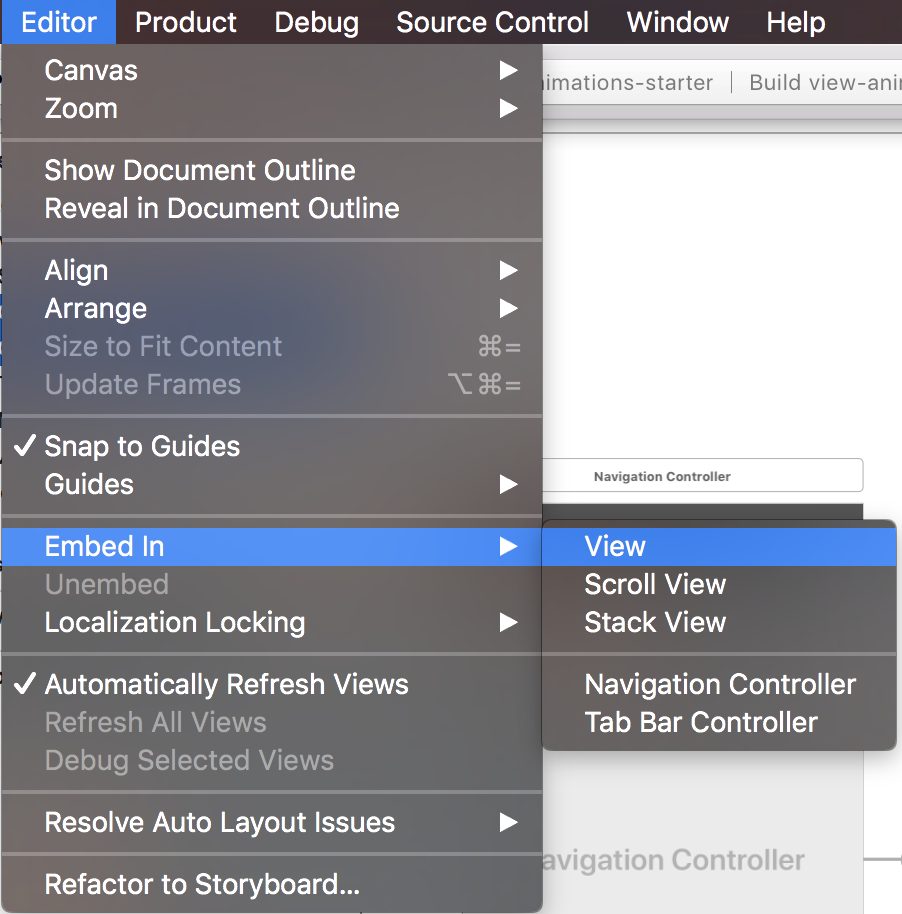
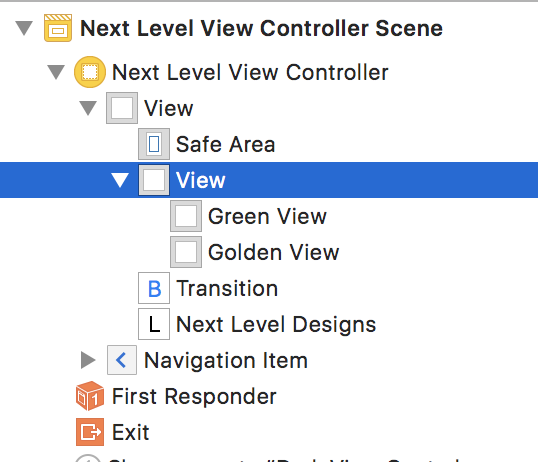
You should now see a white view that’s slightly larger than the other two. And you should notice in the document outline on the left that our two UIViews are now subviews of the new UIView.
Resizing the new UIView might prove tricky, so I’m going to walk you through it.
- First, grab the left edge of the white UIView and bring it within the bounds of the main root view.
- Next, select both the
goldenViewand thegreenViewand move them simultaneously toward the top left corner of the white UIView and align them perfectly with the white UIView’s top and left edges. - Now, grab the bottom right corner of the white UIView and resize it to fit the dimensions of the
goldenViewand thegreenView. - Finally, select the white UIView from the document outline and simultaneously move all three UIViews to where the
goldenViewand thegreenViewpreviously were.
Build and run the project for the final time and watch the beauty of your work.

Related Resources
Twilio Docs
From APIs to SDKs to sample apps
API reference documentation, SDKs, helper libraries, quickstarts, and tutorials for your language and platform.
Resource Center
The latest ebooks, industry reports, and webinars
Learn from customer engagement experts to improve your own communication.
Ahoy
Twilio's developer community hub
Best practices, code samples, and inspiration to build communications and digital engagement experiences.