Monitor your Apache Airflow Workflows with Twilio
Time to read:
July 27, 2020
Written by
This post is part of Twilio’s archive and may contain outdated information. We’re always building something new, so be sure to check out our latest posts for the most up-to-date insights.

Airflow is an open source platform used to orchestrate workflows. It is perfect for Extract, Transform, Load tasks, data migration and data integration, among other jobs.
In this tutorial we will see how we can leverage Twilio’s Programmable Messaging to set up an alerting system for Airflow jobs.

Airflow DAG (source: Apache Airflow)
Tutorial requirements
To follow this tutorial you need to have:
- Git. See installation instructions here.
- Docker. You can follow the installation steps provided here.
- A Twilio account. If you are new to Twilio create a free account now. You can review the features and limitations of a free Twilio account.
Set up Airflow to run locally
We are going to start off by cloning a repository that contains the docker image we shall use for this tutorial. The image is based on Python 3.7-slim-buster and will create Postgres and Redis containers. Postgres is used for the backend, while Redis is for the queue.
Installation & Setup
In this tutorial, I am going to use an existing docker-airflow image. If you prefer to install Airflow locally, please find detailed instructions here.
Enter the following commands in your terminal window to clone the docker-airflow repository:
Run the following command to start an Airflow instance:
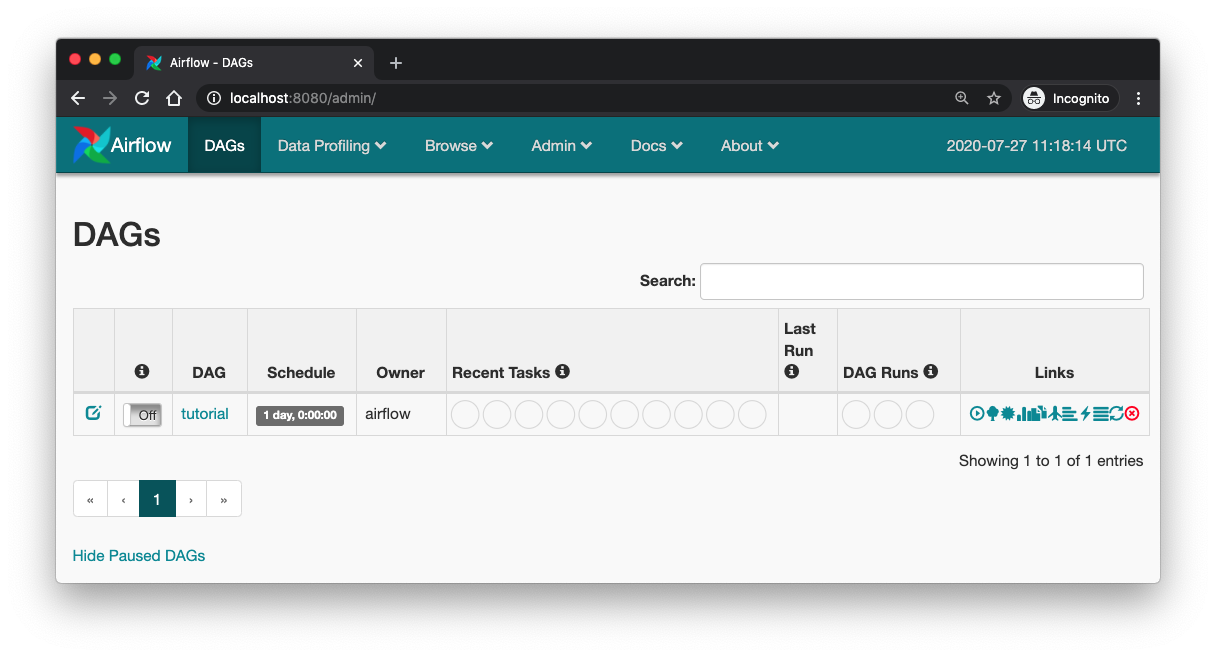
If everything is set up correctly, you should see the Airflow web server UI on visiting the http://localhost:8080/ URL in your browser. Please note that the code base comes with a default tutorial entry that we are not going to use.
Creating a DAG
Airflow jobs are authored as Directed Acyclic Graphs (DAGs). Let’s break down this term just in case you have never come across it. In this context, a graph is a finite set of vertices connected by edges. Each of these nodes represents a task within the DAG. The word ‘directed’ means that each vertex in the graph has a specific direction, while acyclic means that if you start at a node n and follow a set of vertices, you can never end back at n. Airflow allows you to schedule DAGs based on the frequency you want them to run; for example, daily, weekly, etc.
For the first example, we are going to fetch data from the Star Wars API (SWAPI) and then output a ‘Hello World’. Let’s get started.
Open a new terminal window and navigate to the docker-airflow folder, then enter the following command:
This sub-folder is where our DAGs will live. Let us set up a new one, by creating a file hello.py in this sub-folder. Copy the following code into the file:
DAG_NAME is a variable we create to contain the name of the DAG. The default_args are arguments that are shared between different tasks. BASE_URL is the root URL for SWAPI. The fetch_resource function uses the requests library to query SWAPI. We expect it to return a HTTP 2xx status code if successful, otherwise we raise an exception. Note that the requests library is already installed in the docker image we are using.
The with statement is where we create our DAG. We pass its name, the default arguments, and the schedule interval. Our first task, fetch_resource_task, executes the fetch_resource function using Airflow’s PythonOperator. The second task, hello_world_task, uses the BashOperator to print ‘Hello World’.
If you visit http://localhost:8080/ in your browser and everything is set up successfully, you should see the DAG we just created, swapi, right above the tutorial DAG. You may need to refresh the page if you already had it open from before.
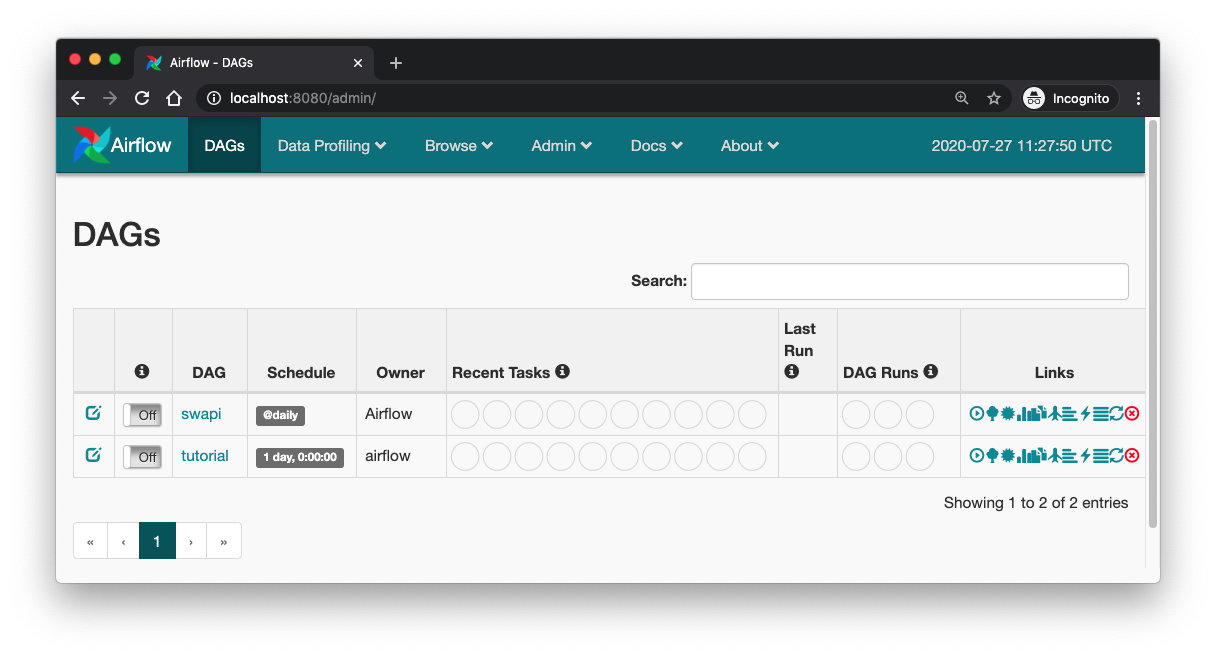
By default new DAGs will have the toggle button to the left of the name set to “Off”. Set it to “On” by clicking on the button. Now you can run the DAG by clicking the little play button on the right under the “Links” column. The “Recent Tasks” column monitors the status of the current run.
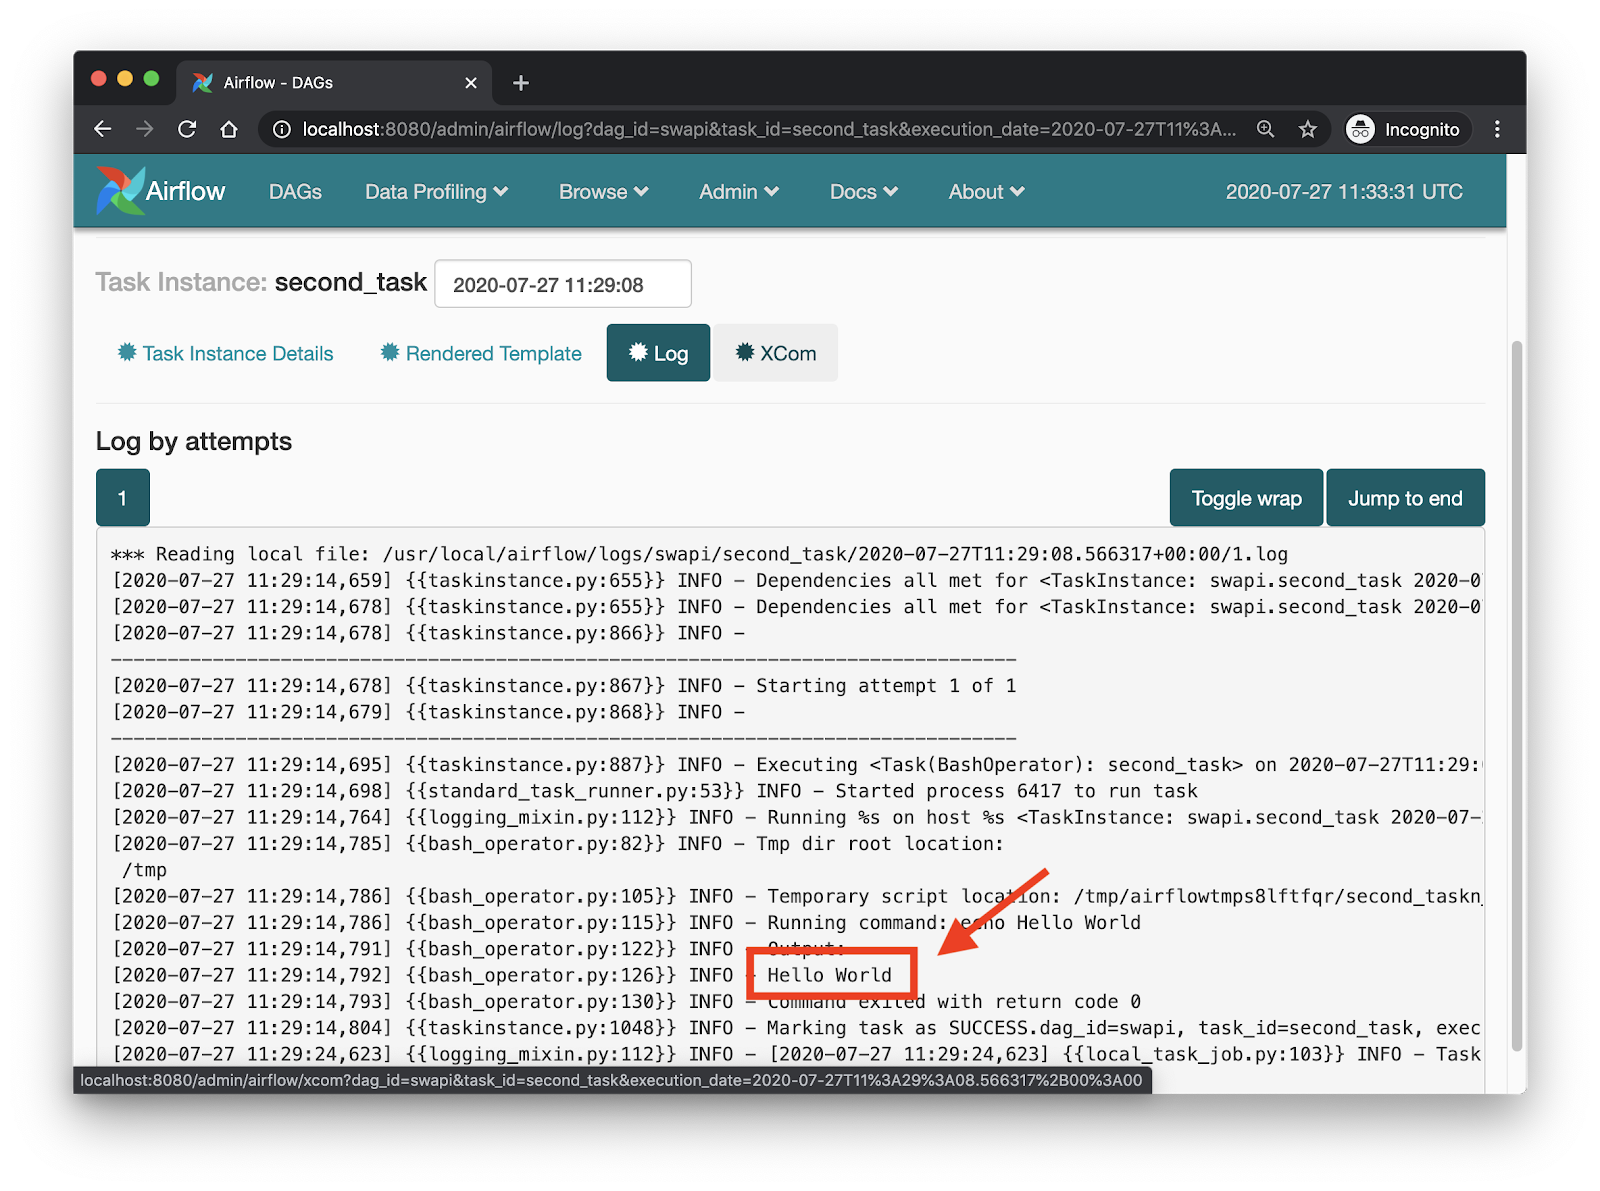
Once successful, the first circle under the “Recent Tasks” column will turn green. At that point, click on the green circle, then on the “second_task” entry at the top and then on “Log”. You should be able to see the following logs output. Confirm that you can see the “Hello World” that this task prints.
The first task, which has the name fetch_films_resource_task, returns a data structure with Star Wars films. Feel free to review the logs of this task to see it.
Integrating the Project with Twilio
Honestly, the second task does not really fit as a follow up job after the first one. Yes, we saw the “Hello World”, but this task does nothing with the data that we fetched from SWAPI in the first task. It does not sound like a real life workflow. How about we write the data to .json files that could be used as fixtures for a database?
Add the following function just below fetch_resource:
Add the BASE_FIXTURE_DIR variable below the BASE_URL with the location where we are going to save our data files:
With the new function, let us update our DAG to look like this:
This is our new workflow, fetch_resource_task >> write_resource_in_file_task, and this is going to be repeated three times, for Star Wars films, starships and planets.
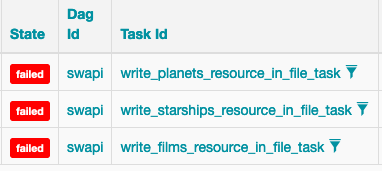
Make sure that the webserver is running, and then trigger the DAG. The second task in this DAG is expected to fail, and this is intentional. Take a look at the BASE_FIXTURE_DIRS variable: we do not have a folder called workflows nor a subfolder called fixtures. Refresh the page to load the status of the job and see the failure.

Click on the red circle under “Recent Tasks” to see a detail of the failures.
Imagine this task was running at 1 am when you are asleep. Wouldn't it be nice to have a way to get a notification on your phone?
This is where we get to leverage Twilio’s programmable SMS feature. After you sign up for a trial account, get a free phone number. We can use this Twilio phone number to send SMS alerts to your personal phone.
Adding Twilio to the Airflow Docker image
To be able to send SMS notifications, the first thing that we need to do is install Twilio’s Python SDK in our Docker image.
First determine what is tag that you are running for the Airflow image:
As you see, my local installation is using release 1.10.9 of the Docker image. You may have a different release. Now we can create a new version of this image that includes the twilio package:
The above commands start a temporary container with the name airflow-twilio, install the Twilio SDK for Python in it, and then save the updated image with the twilio tag. Finally the temporary container is removed. Make sure you replace 1.10.9 in the first command with your version if it is different.
Once the image is built, we can replace the image in the Docker compose file. Open docker-compose-LocalExecutor.yml in your text editor, look for the webserver container and edit the image as follows:
Please note that we only make this change in the webserver container because that is where our code will run.
Creating a Callback Function that is called on Failure
Create an environment file, twilio.env, in the docker-airflow folder of the cloned repository. Store your Twilio Account SID and Auth Token here. Your twilio.env file should look something like this:
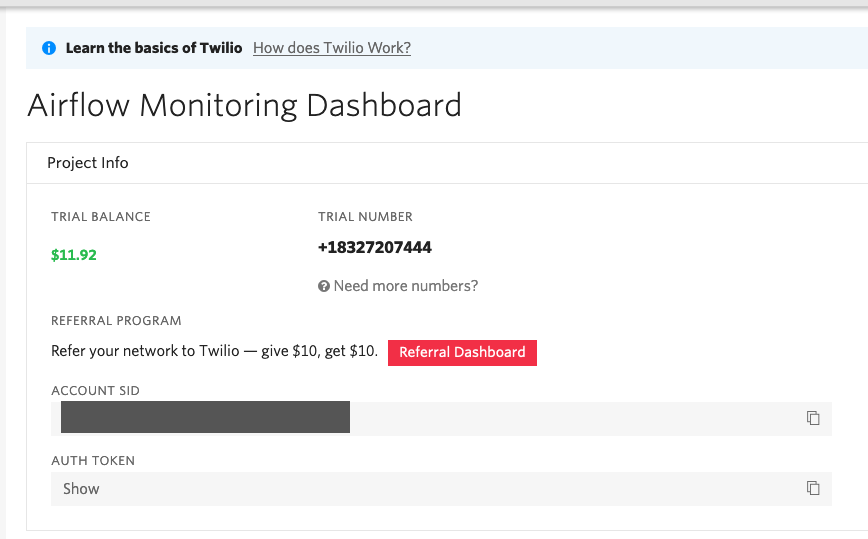
For the Twilio and your own phone numbers, use the E.164 format. You can find your Twilio Account SID and Auth Token in the Project Info pane of the Console Dashboard page.
Let's go back to the docker-compose-LocalExecutor.yml file, where we'll add the environment file right below the image line. Here is an excerpt of how this will look:
After this is done, proceed to update the code in hello.py to look like this:
The changes introduced in this version of hello.py are:
- We created a Twilio client class that we will use to send messages. Read more on sending SMS programmatically using Python and Twilio.
- We added a callback function
on_failurein thedefault_argsunderon_failure_callback. When the function is called withnotify=True, an SMS is sent to a selected phone number from our Twilio number. - The callback is instantiated with context from the failed DAG. We can use this argument to send a more explicit SMS that helps us know what went wrong. In this case
body = 'Task {} in DAG {} failed'.format(task_id, dag_id)does it for us.
Trying it Out
To apply the image and environment changes we’ve made to our running instance of Airflow, go back to the terminal that is running docker-compose and stop the process by pressing Ctrl-C. Then restart everything by running docker-compose again:
Once the system is up again, visit http://localhost:8080/ on your web browser and make sure the hello DAG is switched to “on”. Run it one more time to see the write_resource_in_file_task task fail three times as before. Only this time, you will get an SMS that reports each failure:
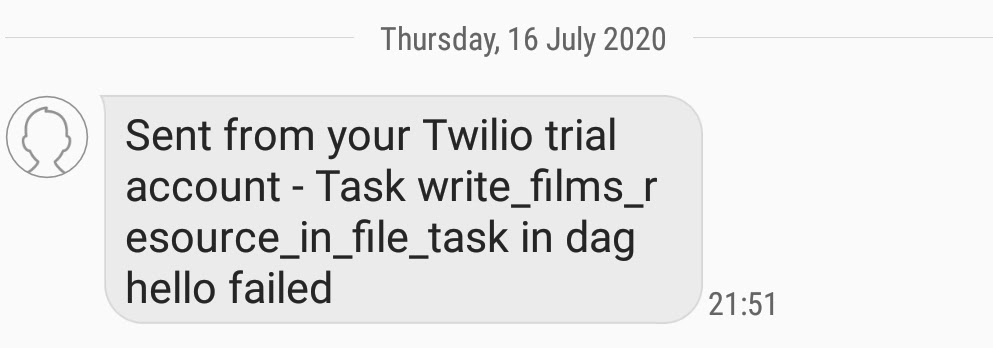
You are welcome to reword the message body in the callback to fit your desired text.
To complete this tutorial, and just in case you are wondering how to fix the code to not produce the error, you can change the definition of the BASE_FIXTURE_DIR constant to a valid directory:
This should get all the tasks in the DAG to pass, and also you will have the data payloads obtained from SWAPI in the dags directory.

More Use Cases
There are other use cases where you would consider SMS notifications for monitoring your Airflow DAGs. Here are some of them:
- Airflow has an
on_success_callbackargument, which can be implemented in pretty much a similar way to the failure one. If you have a set of workflows that take some time to implement and you would like to be notified when they are successfully executed, this would come in handy. Also if you need to perform a manual action such as Acceptance Testing a service before promoting to production once the task is complete. - You can add an argument
criticalthat receives a boolean in theon_failurefunction. For this context, critical failures are those that may result in service unavailability or an upstream breakdown that has multiple effects on downstream services. This lets you get notified only when critical failures occur. Additionally, based on the significance of a workflow, you can notify several people if it fails. If you are feeling adventurous and your team is in different timezones, you can alert specific individuals depending on when the failure occurs.
Mwangi Kabiru is a Data Engineer at Wellio and a Software Engineer at Andela. Reach out to him if you have any related questions or need clarification on topics covered in this tutorial.


Related Resources
Twilio Docs
From APIs to SDKs to sample apps
API reference documentation, SDKs, helper libraries, quickstarts, and tutorials for your language and platform.
Resource Center
The latest ebooks, industry reports, and webinars
Learn from customer engagement experts to improve your own communication.
Ahoy
Twilio's developer community hub
Best practices, code samples, and inspiration to build communications and digital engagement experiences.