How to Build a Pomodoro Timer With Java Spring Boot and Twilio
Time to read:

Pomodoro timers are not only used in the kitchen, but they are also used to assist in daily productivity. The purpose of this particular timer is to promote the concept of working on a task for 25 minutes then taking a short break afterwards.
With the assistance of Twilio, you can be notified with a text message about your next break by clicking on a button on a webpage.
In this tutorial, you’ll learn how to build your own pomodoro timer using Java Spring Boot and Twilio Programmable Messaging services.
Tutorial requirements
- Refer to this Twilio article to set up a Java Spring Boot application that can be hosted on the web.
- Java Development Kit (JDK) version 8.
- A Twilio account. If you are new to Twilio click here to create a free account now and receive $10 credit when you upgrade to a paid account. You can review the features and limitations of a free Twilio account.
- A phone capable of receiving SMS to test the project.
Buy a Twilio phone number
If you haven't done so already, your first task is to purchase a Twilio phone number to send SMS.
Log in to the Twilio Console, select Phone Numbers, and then click on the “Buy a number” button to buy a Twilio number. Note that if you have a free account, you will be using your trial credit for this purchase.
On the “Buy a Number” page, select your country and check SMS in the “Capabilities” field. If you’d like to request a number that is local to your region, you can enter your area code in the “Number” field.
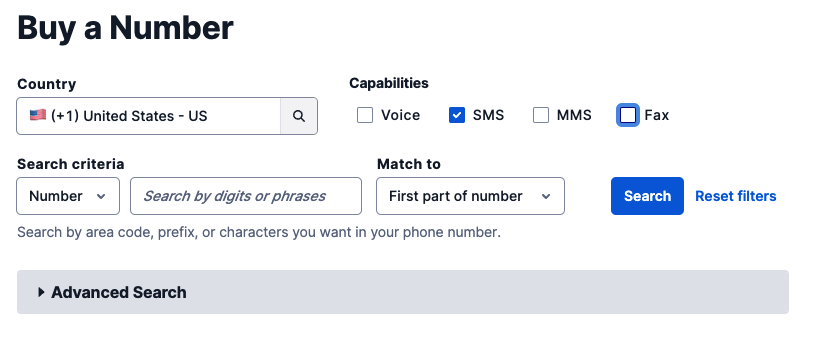
Click the “Search” button to see what numbers are available, and then click “Buy” for the number you like from the results. After you confirm your purchase, click the “Close” button.
Configure a Messaging Service
Scheduled messages can only be sent from a Messaging Service at this time, so the next step is to configure one and add your Twilio phone number to it.
Still in the Console, find the “Messaging” product and click on its Services option. Then click the “Create Messaging Service” button.
On the first page of the creation process, enter a friendly name for the service, such as “Timer”, and select “Notify my users” in the “Select what you want to use Messaging for” dropdown.
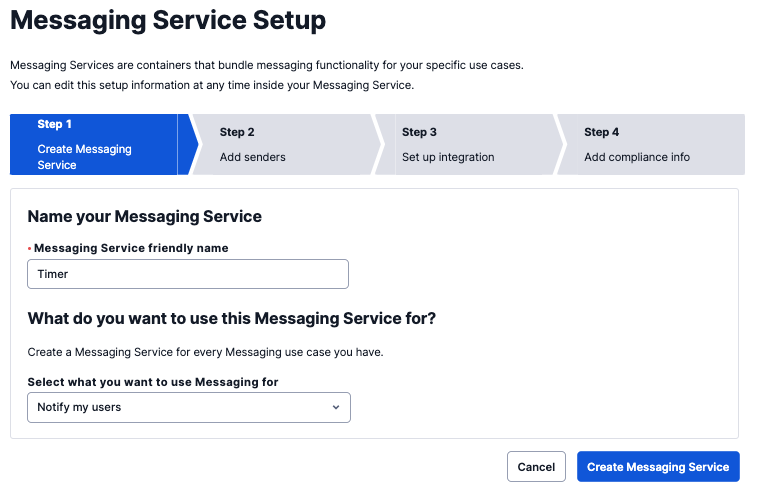
Click the “Create Messaging Service” button to move to the second step.
In this part of the configuration, you have to add the sender phone number(s) to the sender pool used by the service. Click the “Add Senders” button to add the Twilio phone number you acquired in the previous section.
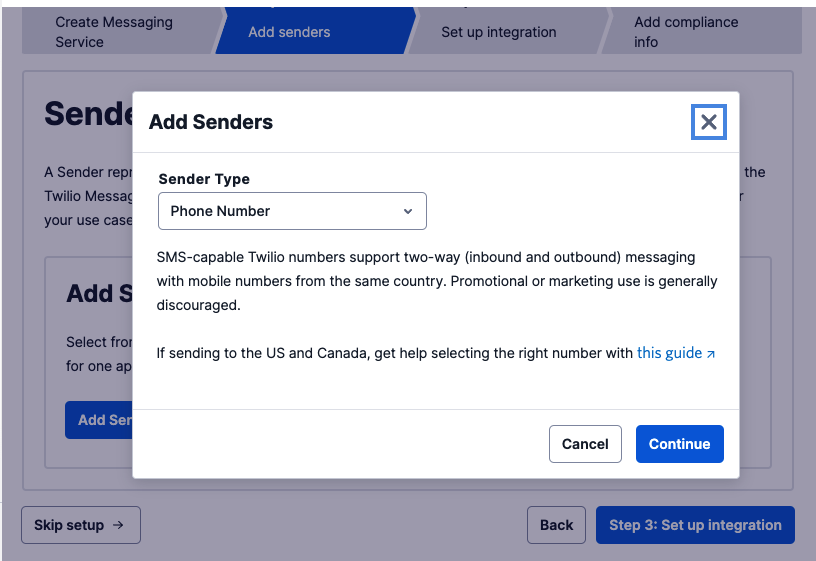
Select Phone Number in the “Sender Type” dropdown, and click “Continue”.
Add a checkmark next to the phone number you want to use as a sender, and click “Add phone numbers”.
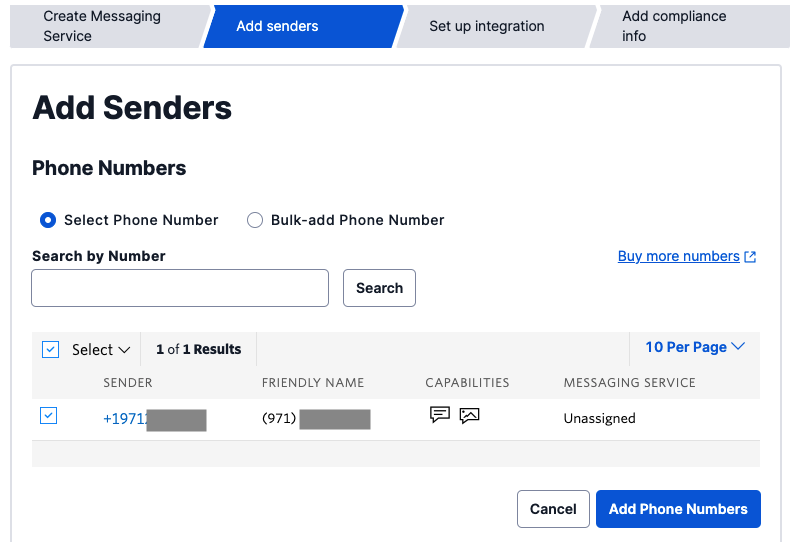
Click the “Step 3: Set up integration” button to move on to the next step. You don’t have to change any of the settings on this page, just click on “Step 4: Add compliance info”.
To complete the configuration of your Messaging Service, click on “Complete Messaging Service Setup”. You will now be offered the option to send a test message.
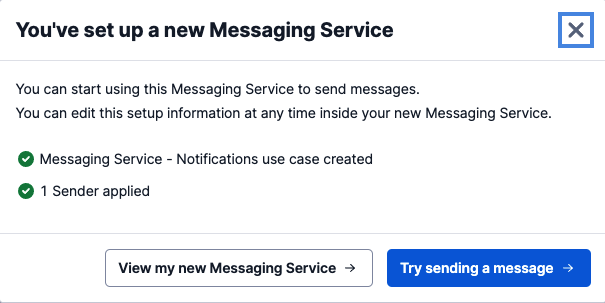
It is a good idea to test that your messaging service is able to send messages, so go ahead and click on “Try sending a message”.
In the “To phone number” pulldown, select your personal number, which should be registered and verified with your Twilio account if you have a trial account. In the “From Messaging Service SID”, select the Messaging Service you just created. In the “Body Text” enter some text to send yourself.
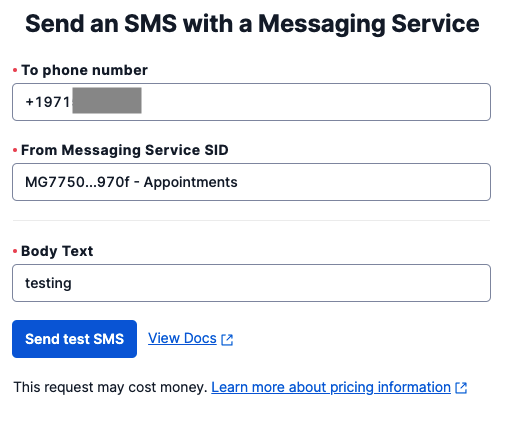
This image is reused and the Messaging Service SID name does not reflect the one used in this project.
Click the “Send test SMS” button, and make sure you receive the SMS on your phone.
Add the Twilio dependencies
Navigate to the pom.xml file to add the following dependencies between the <dependencies></dependencies> tags:
This dependency allows the Twilio Java Helper Library to be used and executed in this Maven project. This is essential for the controller class that will be created later on to handle the TwiML messages of this SMS project.
Save the file.
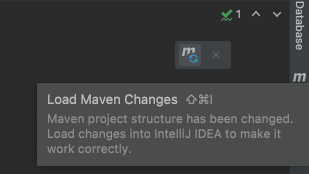
Look at the top-right corner of the IntelliJ IDEA and find the little icon with an "M" shape. Click it to load Maven changes.
Configure the environment variables
Locate the Run tab at the top of the IntelliJ IDEA console and select Edit Configurations… in the dropdown as seen below:
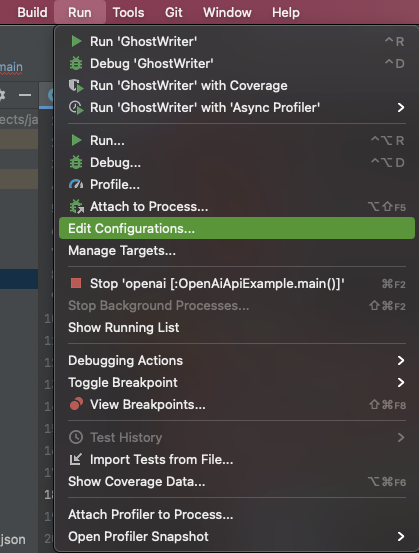
This image is reused and the project directory name does not reflect the one used in this project.
Another window displaying the "Run/Debug Configurations" will pop up with the details regarding the project. If there are no existing configurations for you to edit, click on Add New… on the left-hand side and create a new application named "ScheduledText".
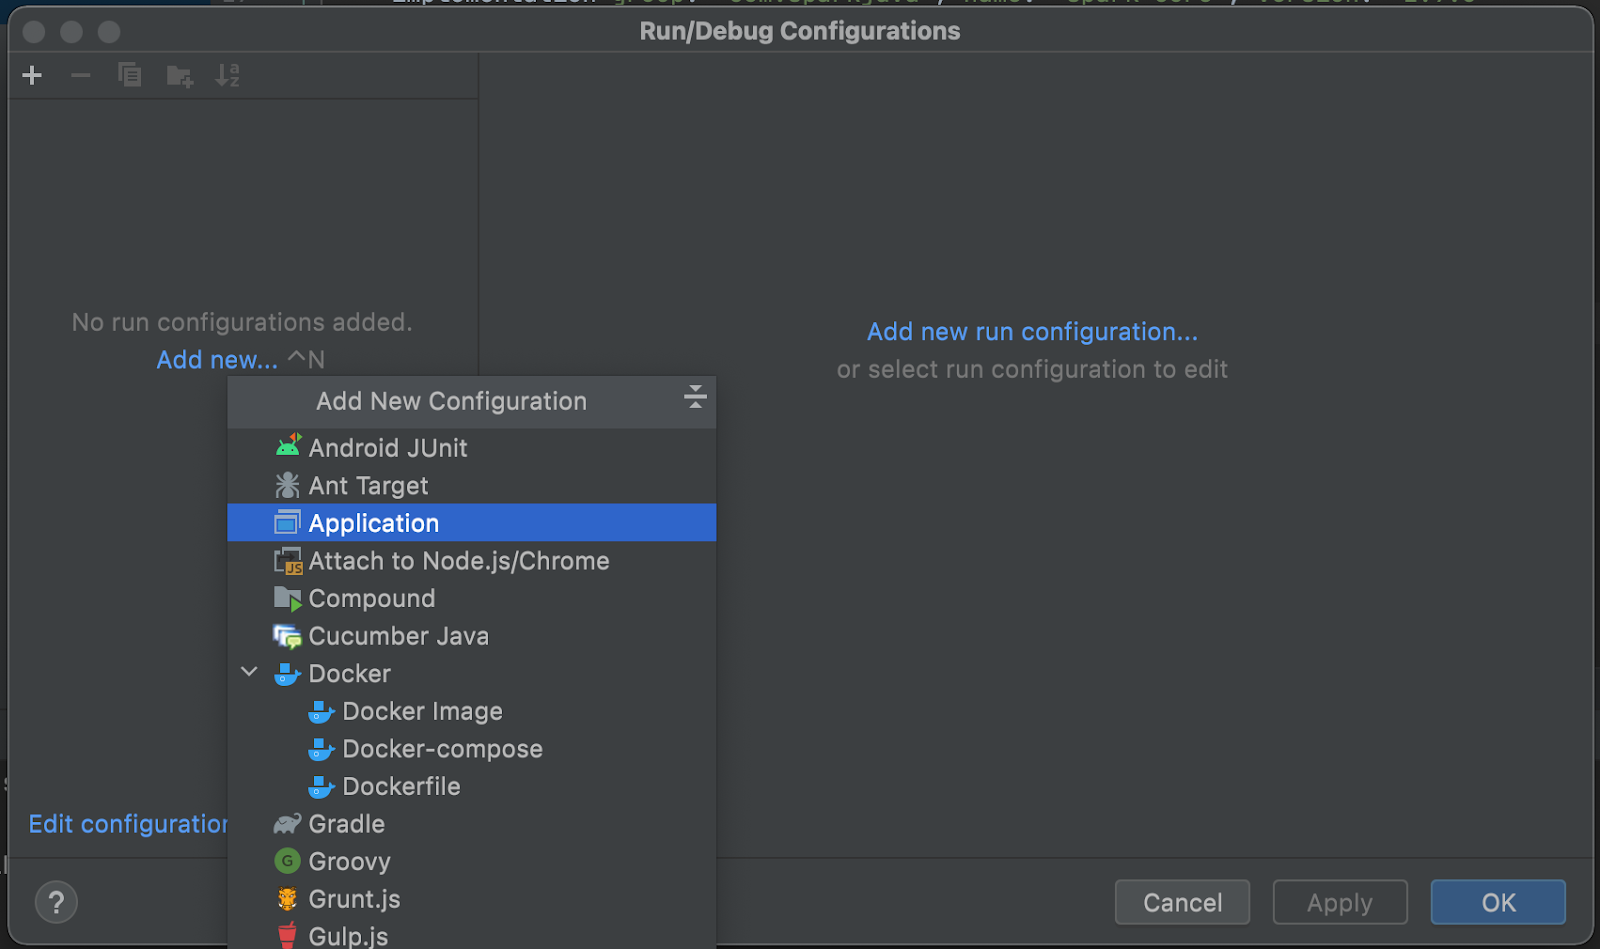
It is best practice to protect your Twilio account credentials by setting environment variables.
You can find your account credentials on the Twilio Console.
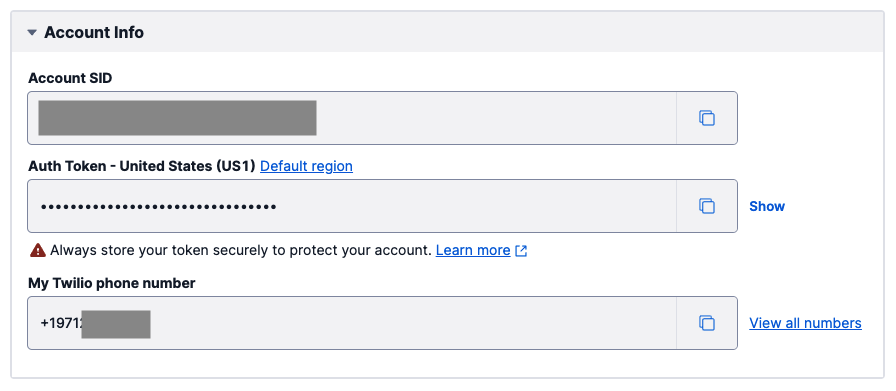
Refer to this article to set up and hide variables in the IntelliJ IDEA environment.
Not only is it mandatory to set the Twilio credentials as environment variables, it is also suggested that you store both your Twilio phone number and personal phone number as environmental variables. This would be helpful in the case that the code is shared on a public repository so that the phone numbers are not exposed.
Go ahead and follow the same instructions to store your phone number as the PHONE_NUMBER key in the IntelliJ IDEA environment. This must be stored in E.164 format such as "+19140201400".
Since a Messaging Service is used to schedule the SMS, another variable named TWILIO_MESSAGING_SERVICE_SID must also be created. You can find it in the Messaging Services page of the Twilio Console. This identifier starts with the letters MG.
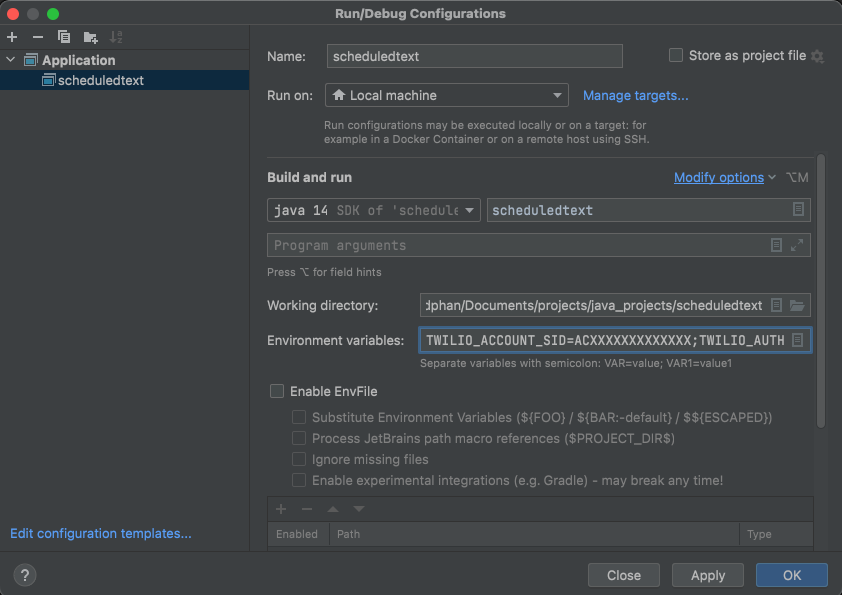
Click on the Apply button, and then OK once finished.
Create the HTML page
The objective of this application is to make a POST request whenever the user clicks on the timer. Once the timer is clicked, an HTTP request is fired. At the same time, an alert is made on the webpage to inform the user that an SMS is expected in 25 minutes.
Go ahead and place a picture that you would like to use as the pomodoro timer in the src/main/resources/static subfolder. The /static subfolder is a location for all static assets to be used and referenced throughout this project. You may also use the tomato picture on my GitHub for this project.
Find the src/main/resources/templates subfolder and create a new file named index.html. This file will be rendered when you visit the application's homepage.
Copy and paste the following code to the game.html file:
The image is given an id so that it can be retrieved from the Document Object Model (DOM). In the example for this article, a tomato is used, so the variable and id names will be related to the tomato. This tomato image is retrieved from the document in the JavaScript portion so that an onclick event function can be attached to the image.
The following logic is defined inside the function:
- Once the image is clicked on, an alert shows up to the user to let them know the SMS will be sent in 25 minutes.
- A fetch request is made to the
/timerroute.
Schedule an SMS with Java Spring Boot
After you’ve set up your application, navigate back to the WebController.java file that was created during the setup prerequisites, and replace the contents with the following code:
Remember that the package in the first line will vary depending on the name of your Java project. The project is named "schedulesmstwilio" in this tutorial.
The @RestController annotation marks the request handler required to build and provide the RESTful web service during runtime.
A MessageRestController constructor is created so that the Twilio client can be initalized once at the execution of the application, using the environment variables that were set.
The /timer route is where the scheduleSMS method will run.
A Logger is also initiated to print out the message SID.
Finish off the WebController.java file by adding the following lines to the WebController class:
Let's break down the code real quick.
The Message.creator() function is used to create and schedule the SMS as seen in the "Configure a Messaging Service" section earlier. The function takes in three arguments to define the recipient, sender, and body of the SMS, respectively. These arguments are the same for both immediate and scheduled sends.
The first line represents the "to" argument, so replace it with the PHONE_NUMBER variable defined earlier. For the "from" argument, the TWILIO_MESSAGING_SERVICE_SID of the Messaging Service is used. The last line represents the "body" argument and can be anything you’d like to send yourself.
The setSendAt() method is set to a ZonedDateTime object that represents the time at which the SMS should be sent. The Message Scheduling feature currently requires that this time is more than 15 minutes and fewer than 7 days ahead. A classic pomodoro timer is set for 25 minutes but you can change it as you please.
The remaining two arguments are used to tell Twilio that this SMS should be sent at a later time. The setScheduleType argument configures the type of scheduling that you want to use. As I’m writing this, the only allowed value for this argument is the string "FIXED".
The application prints the sid value assigned to the scheduled message. This is an identifier that you can use to cancel the message if you need to.
Ready to try this out?
Here's the completed code for the GitHub repository for your reference.
Save, build, and run the Spring Boot application. Go to the unique ngrok URL provided on your terminal and click on the tomato. A pop up alert will also appear on the web browser with the message "See you again in 25 minutes!".
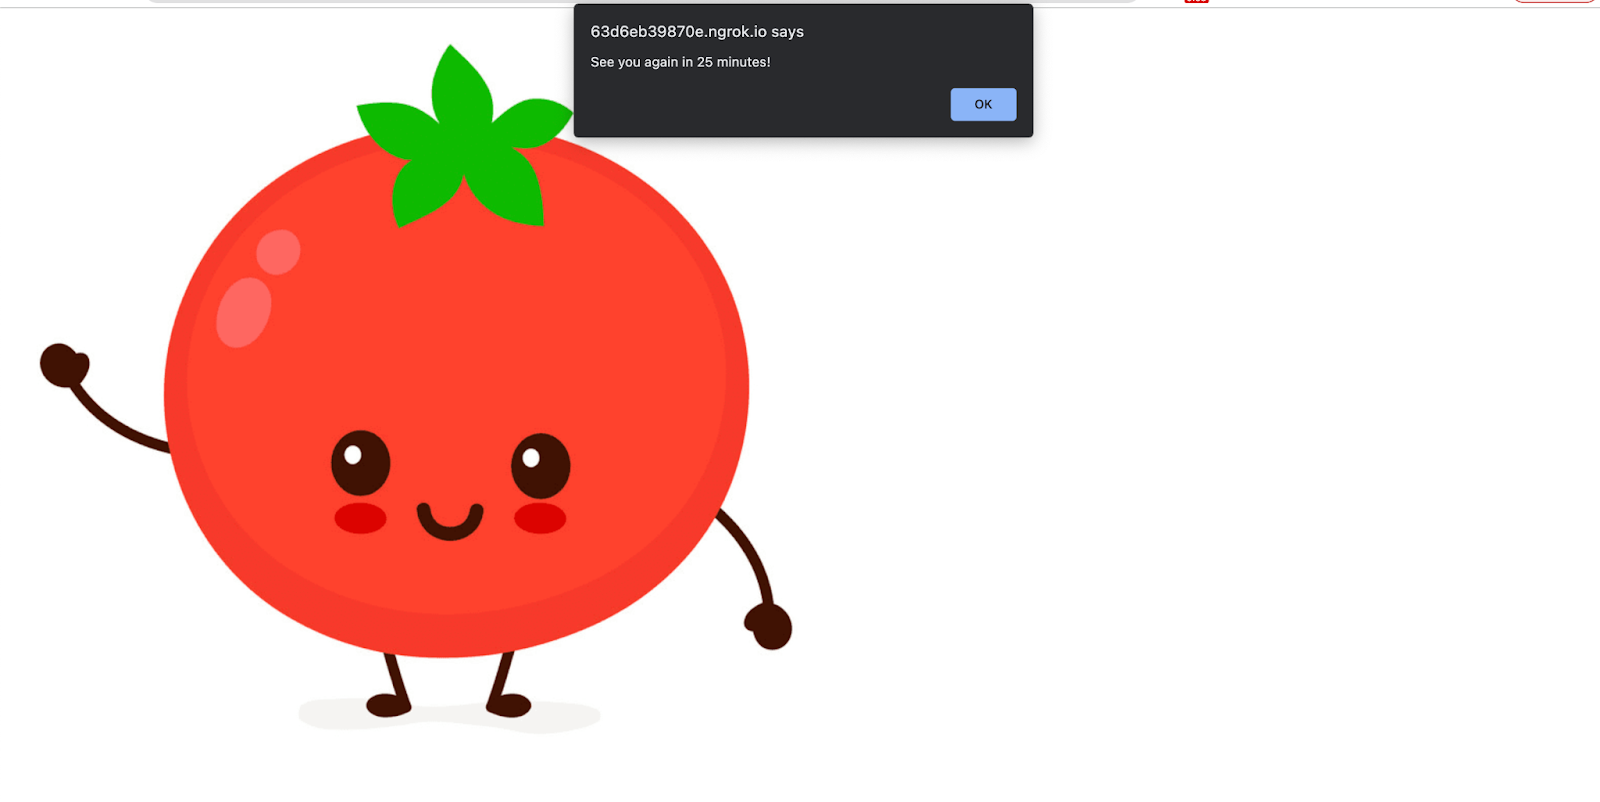
You should see a code printed to the terminal that starts with the letters SM. This is the identifier of your successfully scheduled message.
Now you have to wait 25 minutes to receive this SMS on your phone. In the meantime, you can view the message in the Programmable Messaging Logs section of the Twilio Console, under which the message will show with its status set to “Scheduled” until the time of delivery.

When the hour passes and your SMS is delivered, the status of the message will change to “Delivered”. You will also be able to see your Twilio phone number as the sender.

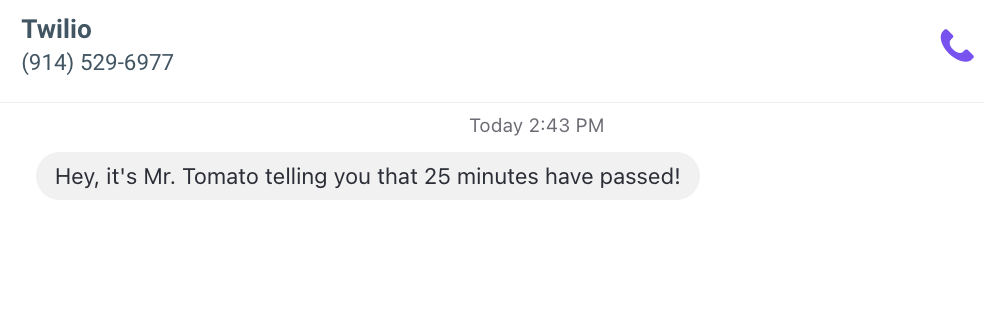
Once 25 minutes have passed, check your mobile device to hear from Mr. Tomato, as seen in the image below:
What's next for scheduling SMS applications?
Congratulations on learning how to build your own pomodoro timer! There are a number of resources on scheduling SMS that you may want to review to learn more:
- Make a cat clicker game with Java.
- Send a mysterious phone call with Twilio Voice and Java.
- Send group SMS with Twilio and Java.
Let me know what you're building with Twilio and Java by reaching out to me over email.
Diane Phan is a software engineer on the Developer Voices team. She loves to help programmers tackle difficult challenges that might prevent them from bringing their projects to life. She can be reached at dphan [at] twilio.com or LinkedIn.
Related Posts
Related Resources
Twilio Docs
From APIs to SDKs to sample apps
API reference documentation, SDKs, helper libraries, quickstarts, and tutorials for your language and platform.
Resource Center
The latest ebooks, industry reports, and webinars
Learn from customer engagement experts to improve your own communication.
Ahoy
Twilio's developer community hub
Best practices, code samples, and inspiration to build communications and digital engagement experiences.


