Send Scheduled SMS with Ruby and Twilio
Time to read:
January 31, 2022
Written by

Twilio is all about powering communication – and doing it conveniently and fast. Our Programmable Messaging service has been available for a long time, but until now, scheduling a message to be sent at a future time required a developer to use their own scheduling solution.
Fortunately, this is now a thing of the past! With Message Scheduling, you can send your scheduled SMS and MMS messages with a single API call, without using custom schedulers.
In this tutorial, you’ll learn how to send scheduled SMS notifications in Ruby.
Tutorial requirements
- Ruby version 3 or newer. If your operating system does not provide a Ruby interpreter, you can go to ruby-lang.org to download an installer.
- Bundler installed, to manage your Ruby dependencies.
- A Twilio account. If you are new to Twilio click here to create a free account now and receive $10 credit when you upgrade to a paid account. You can review the features and limitations of a free Twilio account.
- A smartphone able to receive SMS, to test the project.
Buy a Twilio phone number
If you haven't done so already, your first task is to purchase a Twilio phone number to send SMS.
Log in to the Twilio Console, select Phone Numbers, and then click on the “Buy a number” button to buy a Twilio number. Note that if you have a free account, you will be using your trial credit for this purchase.
On the “Buy a Number” page, select your country and check SMS in the “Capabilities” field. If you’d like to request a number that is local to your region, you can enter your area code in the “Number” field.
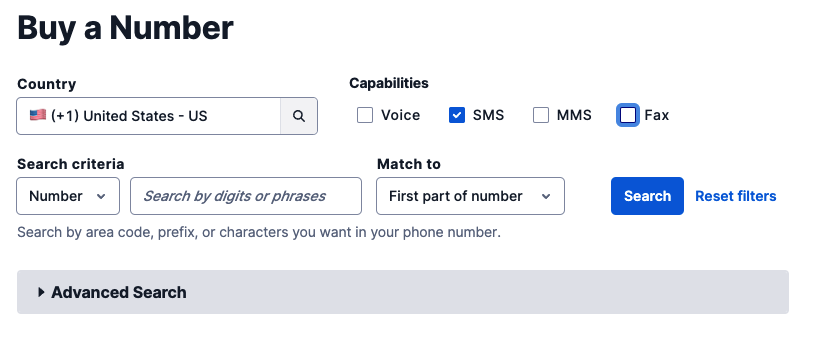
Click the “Search” button to see what numbers are available, and then click “Buy” for the number you like from the results. After you confirm your purchase, click the “Close” button.
Configure a Messaging Service
Scheduled messages can only be sent from a Messaging Service at this time, so the next step is to configure one and add your Twilio phone number to it.
Still in the Console, find the “Messaging” product and click on its Services option. Then click the “Create Messaging Service” button.
On the first page of the creation process, enter a friendly name for the service, such as “Appointments”, and select “Notify my users” in the “Select what you want to use Messaging for” dropdown.
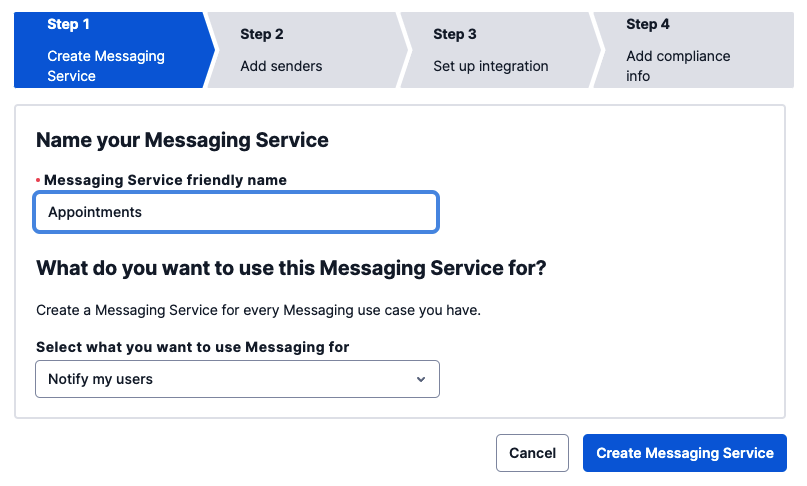
Click the “Create Messaging Service” button to move to the second step.
In this part of the configuration, you have to add the sender phone number(s) to the sender pool used by the service. Click the “Add Senders” button to add the Twilio phone number you acquired in the previous section.
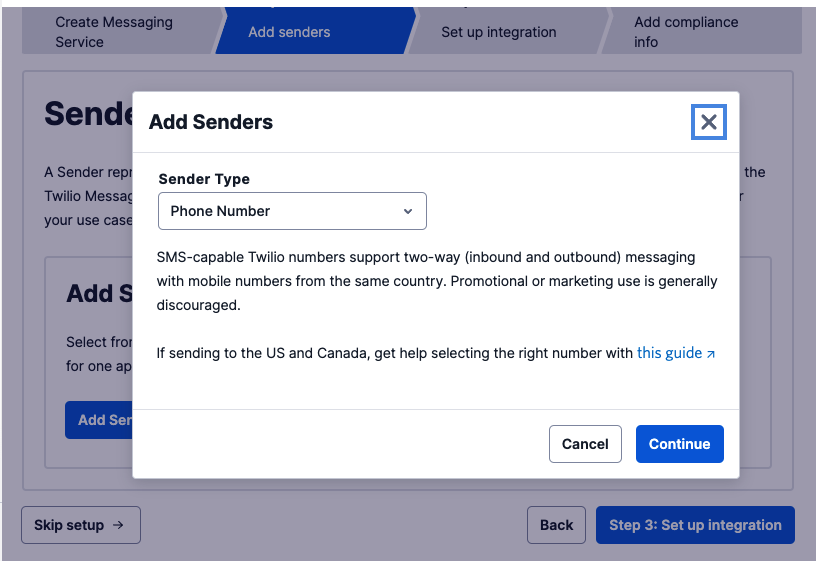
Select Phone Number in the “Sender Type” dropdown, and click “Continue”.
Add a checkmark next to the phone number you want to use as a sender, and click “Add phone numbers”.
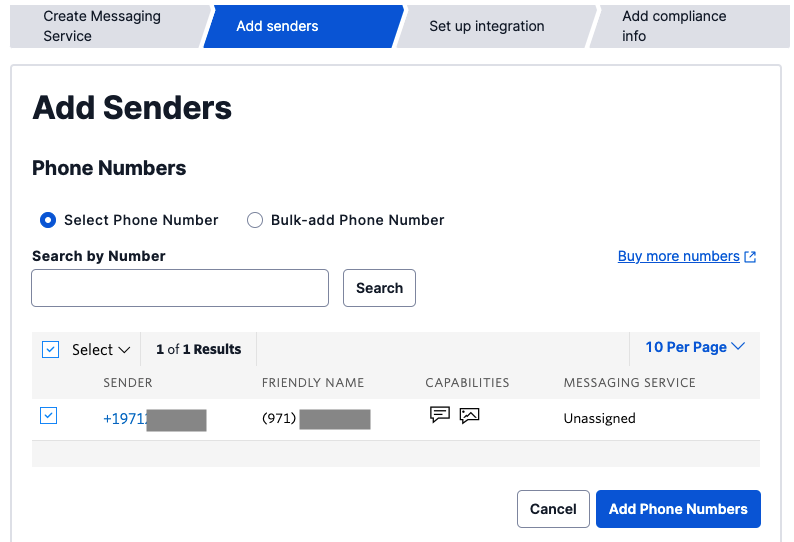
Click the “Step 3: Set up integration” button to move on to the next step. You don’t have to change any of the settings on this page, just click on “Step 4: Add compliance info”.
To complete the configuration of your Messaging Service, click on “Complete Messaging Service Setup”. You will now be offered the option to send a test message.
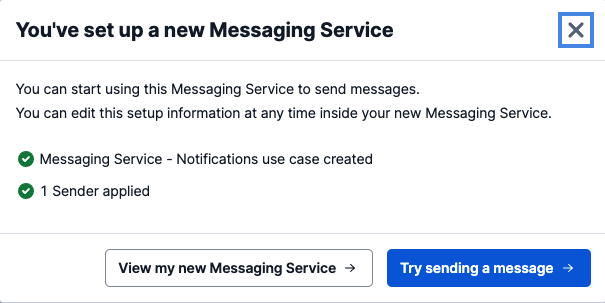
It is a good idea to test that your messaging service is able to send messages, so go ahead and click on “Try sending a message”.
In the “To phone number” pulldown, select your personal number, which should be registered and verified with your Twilio account. In the “From Messaging Service SID”, select the Messaging Service you just created. In the “Body Text” enter some text to send yourself.
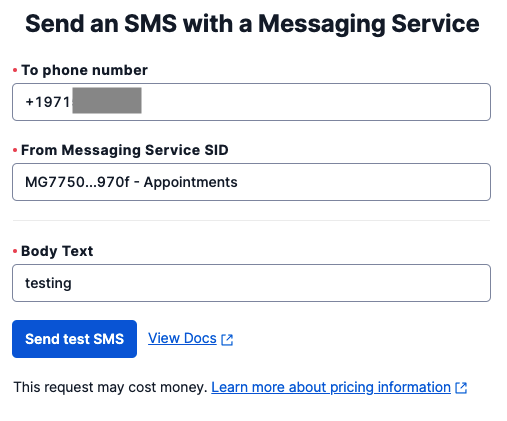
Click the “Send test SMS” button, and make sure you receive the SMS on your phone.
Ruby project setup
In this section, you are going to set up a brand new Ruby project. To keep things nicely organized, open a terminal or command prompt, find a suitable place, and create a new directory where the project you are about to create will live:
Next, create a local Gemfile in this directory by running this command:
Now you are ready to install the Twilio helper library for Ruby:
To send an SMS with Twilio, the Ruby application needs to have access to your Twilio account credentials to authenticate. Also, it will need the SID associated with the Message Service you just created.
The most convenient way to define these configuration values is to set environment variables for them. In a bash or zsh session, you can configure these settings as follows:
If you are following this tutorial on Windows, use set instead of export in your command prompt window.
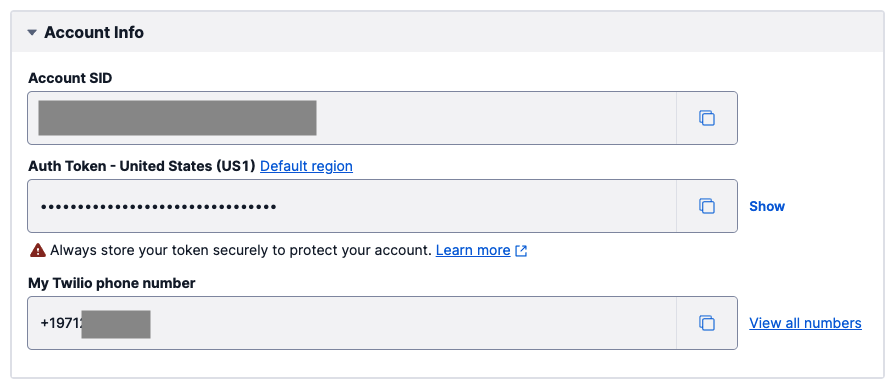
You will need to replace all the xxxxxxxxx placeholders with the correct values that apply to your account. The first two variables are your Twilio “Account SID” and your “Auth Token”. You can find them in the dashboard of the main page of the Twilio Console, under “Account Info”:
The TWILIO_MESSAGING_SERVICE_SID variable is the SID assigned to the Messaging Service. You can find it in the Messaging Services page of the Twilio Console. This identifier starts with the letters MG.
Send a scheduled SMS with Ruby
You are now ready to start coding the Ruby application.
Open a new file named scheduled_sms.rb in your text editor or IDE and enter this code in it:
This short application creates an instance of the Twilio client object and initializes it with the Account SID and Auth Token values that come from the environment variables you configured earlier.
The send_when variable is set to a DateTime object that represents the time at which the SMS should be sent. The Message Scheduling feature currently requires that this time is more than 15 minutes and fewer than 35 days ahead. Since this is just an exercise, I set the delivery time to be 61 minutes later, to get the SMS as quickly as possible.
The @client.messages.create() function is used to create and schedule the SMS. This function takes the standard from, to and body arguments to define the sender, recipient, and body of the SMS, respectively. These arguments are the same for both immediate and scheduled sends.
For the from argument, the SID of the Messaging Service is used. For to, enter your personal phone number in E.164 format. The body argument can be anything you’d like to send yourself.
The remaining two arguments are used to tell Twilio that this SMS should be sent at a later time. The schedule_type argument configures the type of scheduling that you want to use. As I’m writing this, the only allowed value for this argument is the string ’fixed’. The send_at argument configures the time when the message should be sent. This argument is given in ISO 8601 format.
The application prints the sid value assigned to the scheduled message. This is an identifier that you can use to cancel the message if you need to.
Ready to try this out?
Make sure you’ve entered your own phone number for the to argument of the client.messages.create call, and then run the Ruby script in the root directory of the project as follows:
You should see a code printed to the terminal that starts with the letters SM. This is the identifier of your message. If you see this code, then you know that the message was successfully scheduled.
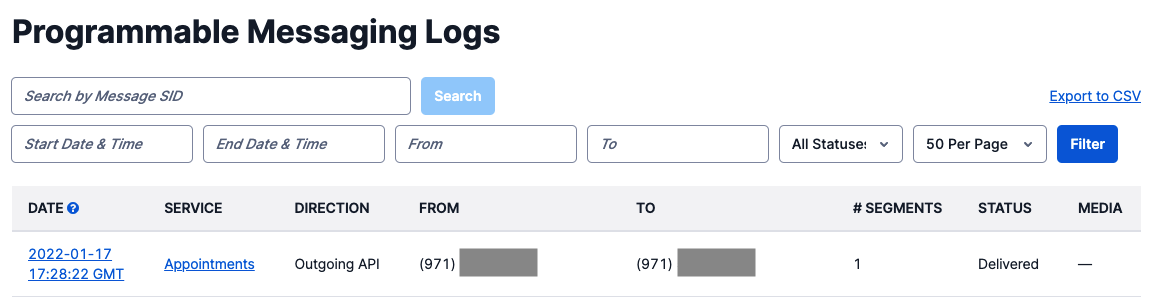
Now you have to wait 61 minutes to receive this SMS on your phone! In the meantime, you can view the message in the Programmable Messaging Logs section of the Twilio Console, under which the message will show with its status set to “Scheduled” until the time of delivery.
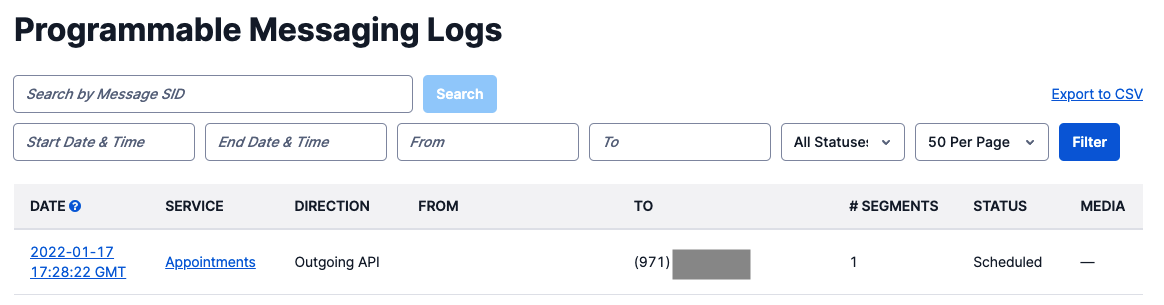
When the hour passes and your SMS is delivered, the status of the message will change to “Delivered”. You will also be able to see your Twilio phone number as the sender.
Next steps
Congratulations on learning how to send scheduled SMS with Ruby! There are a number of resources on scheduling SMS that you may want to review to learn more:
- How to schedule a message (API documentation)
- How to cancel a scheduled message (API documentation)
- Message Scheduling Public Beta announcement
- Message Scheduling FAQs and Beta Limitations
I’d love to see what you build with Twilio and Message Scheduling!
Miguel Grinberg is a Principal Software Engineer for Technical Content at Twilio. Reach out to him at mgrinberg [at] twilio [dot] com if you have a cool project you’d like to share on this blog!
Related Posts
-
 How to embed Twilio Conversations in a Retool app for bidirectional messagingEvan Weiss
 -
March 2026 Fraud Update: AIT Tactics, Weaponized Trust, and a New Fraud Response GuideDan Nieters Alena Eissman
-
Introducing the Twilio MCP Server and Skills: Give Your Coding Agents Native Access to 1,800+ Twilio APIsSeline Chen Christopher Lintz
Related Resources
Twilio Docs
From APIs to SDKs to sample apps
API reference documentation, SDKs, helper libraries, quickstarts, and tutorials for your language and platform.
Resource Center
The latest ebooks, industry reports, and webinars
Learn from customer engagement experts to improve your own communication.
Ahoy
Twilio's developer community hub
Best practices, code samples, and inspiration to build communications and digital engagement experiences.