Build an SMS Service to Contact Your Local Representatives with Twilio and SendGrid
Time to read:
June 27, 2022
Written by
Reviewed by

Communicating with local and elected officials is the way to go when effectively raising public concerns and voicing your opinions. With Twilio and SendGrid, finding your local officials and contacting them can be made seamless.
In this tutorial, you’ll learn how to leverage Twilio Studio, Functions, and Programmable SMS to create an SMS service to find and grab contact information of your local representatives. You’ll also learn how to integrate the service with Twilio SendGrid to directly email an official through SMS. Google’s Civic Information API will be used to fetch local representative info.
Let’s get started!
Prerequisites
What you’ll need for this tutorial:
- A free Twilio account – sign up for free using this link and receive $10 in credit when you upgrade your account!
- A free SendGrid account – with a verified Sender Identity
- A Twilio phone number
- An API key for the Google Civic Information API – Click here for instructions
- A smartphone to test out your app
Overview
Before you start building, let’s take a look at how everything will work. Your Twilio number will be configured with Twilio Studio to handle incoming text messages.
On the first message to your Twilio number, you will be greeted and prompted to enter your address. Once you enter your address, your studio flow will redirect your input to a Twilio Function that will search for and output your local representatives using the Google Civic Information API with their representativeInfoByAddress endpoint. You will then have an option to view contact information of a chosen representative or head back to the main menu to enter another address.
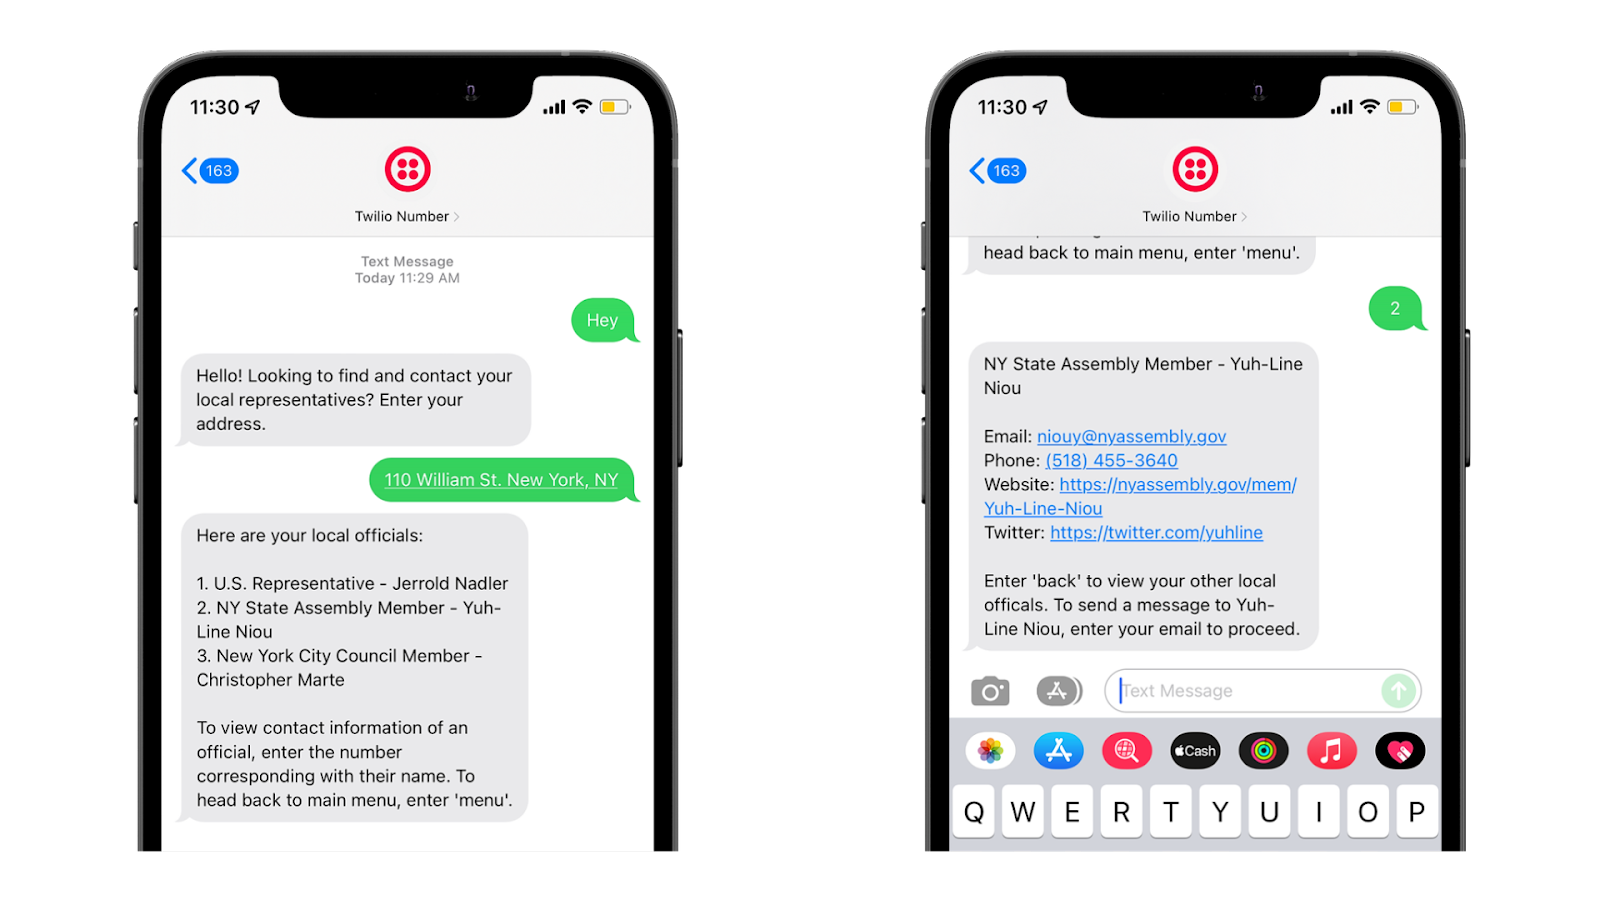
After choosing a representative, their contact information as well as their website and social media accounts (if they have any) will be displayed. Depending on if the representative's email is provided by the Google Civic Information API, you will be asked to enter your email address if you’d like to send a message to them. You will then be asked to enter the subject line of the email, the body of the message, and then finally be asked to confirm your email to the representative.
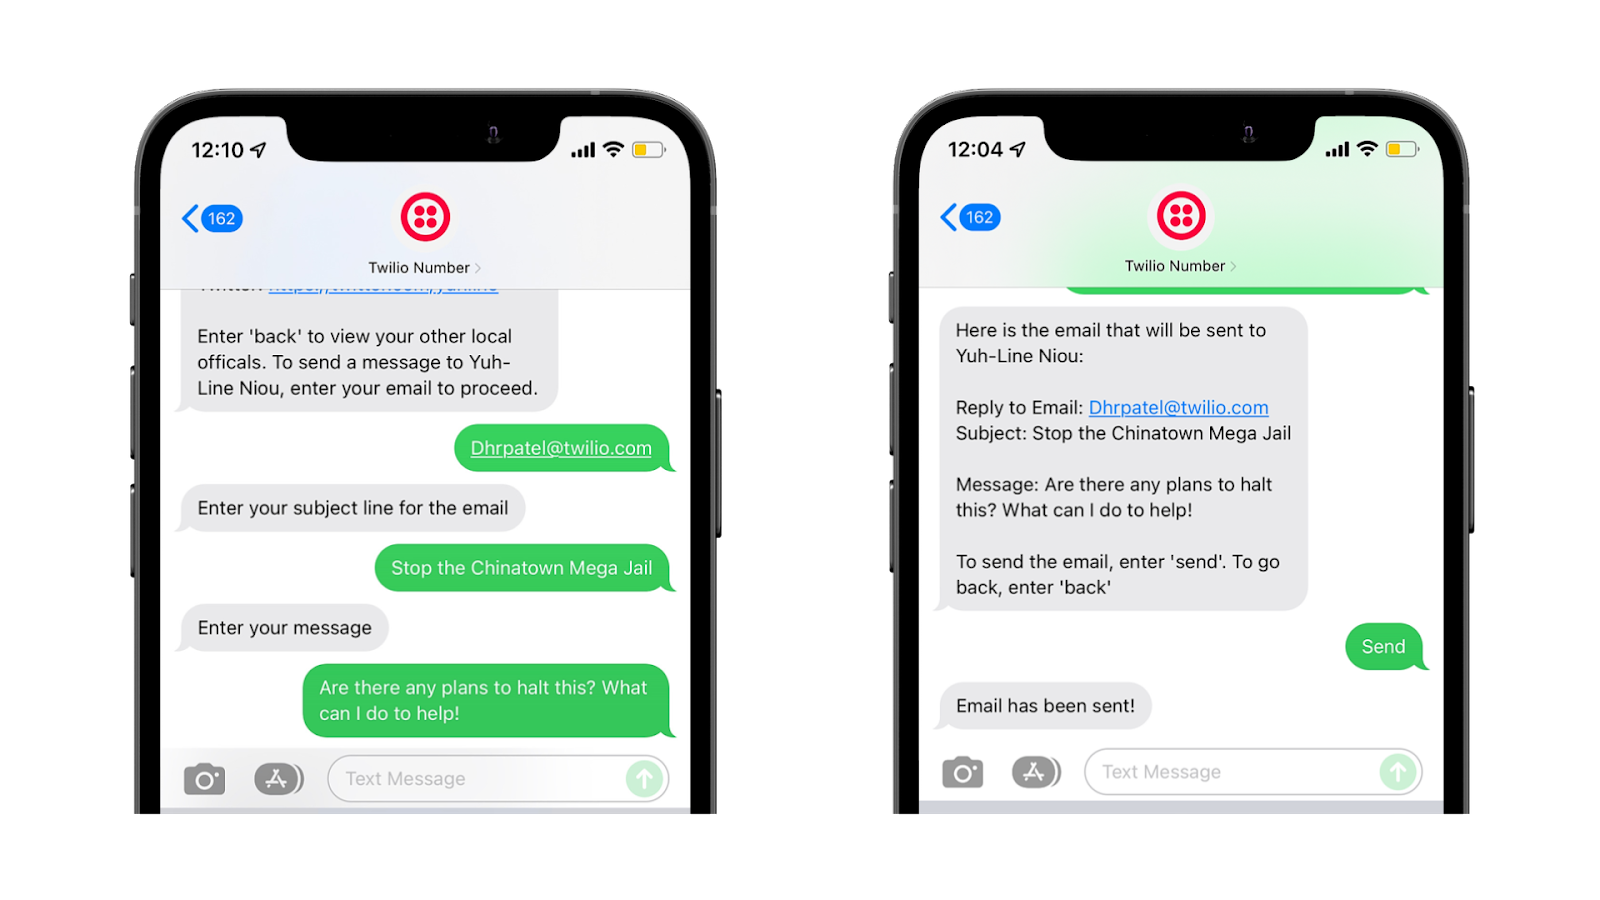
The inputs are then sent to a Twilio Function that will use SendGrid’s API to send out the email using the Mail Send endpoint. The email provided by the user will be placed in the reply_to parameter of the endpoint so that if the email gets a reply back, it will be directly sent to the user.
Twilio Functions Service
You’ll need to configure two webhooks for your SMS service:
- One to fetch representative data from the Google Civic Information API
- One to email a representative using the SendGrid API.
You will use Twilio Functions to create these webhooks, which offer a serverless way to build and run Twilio applications.
Create a service
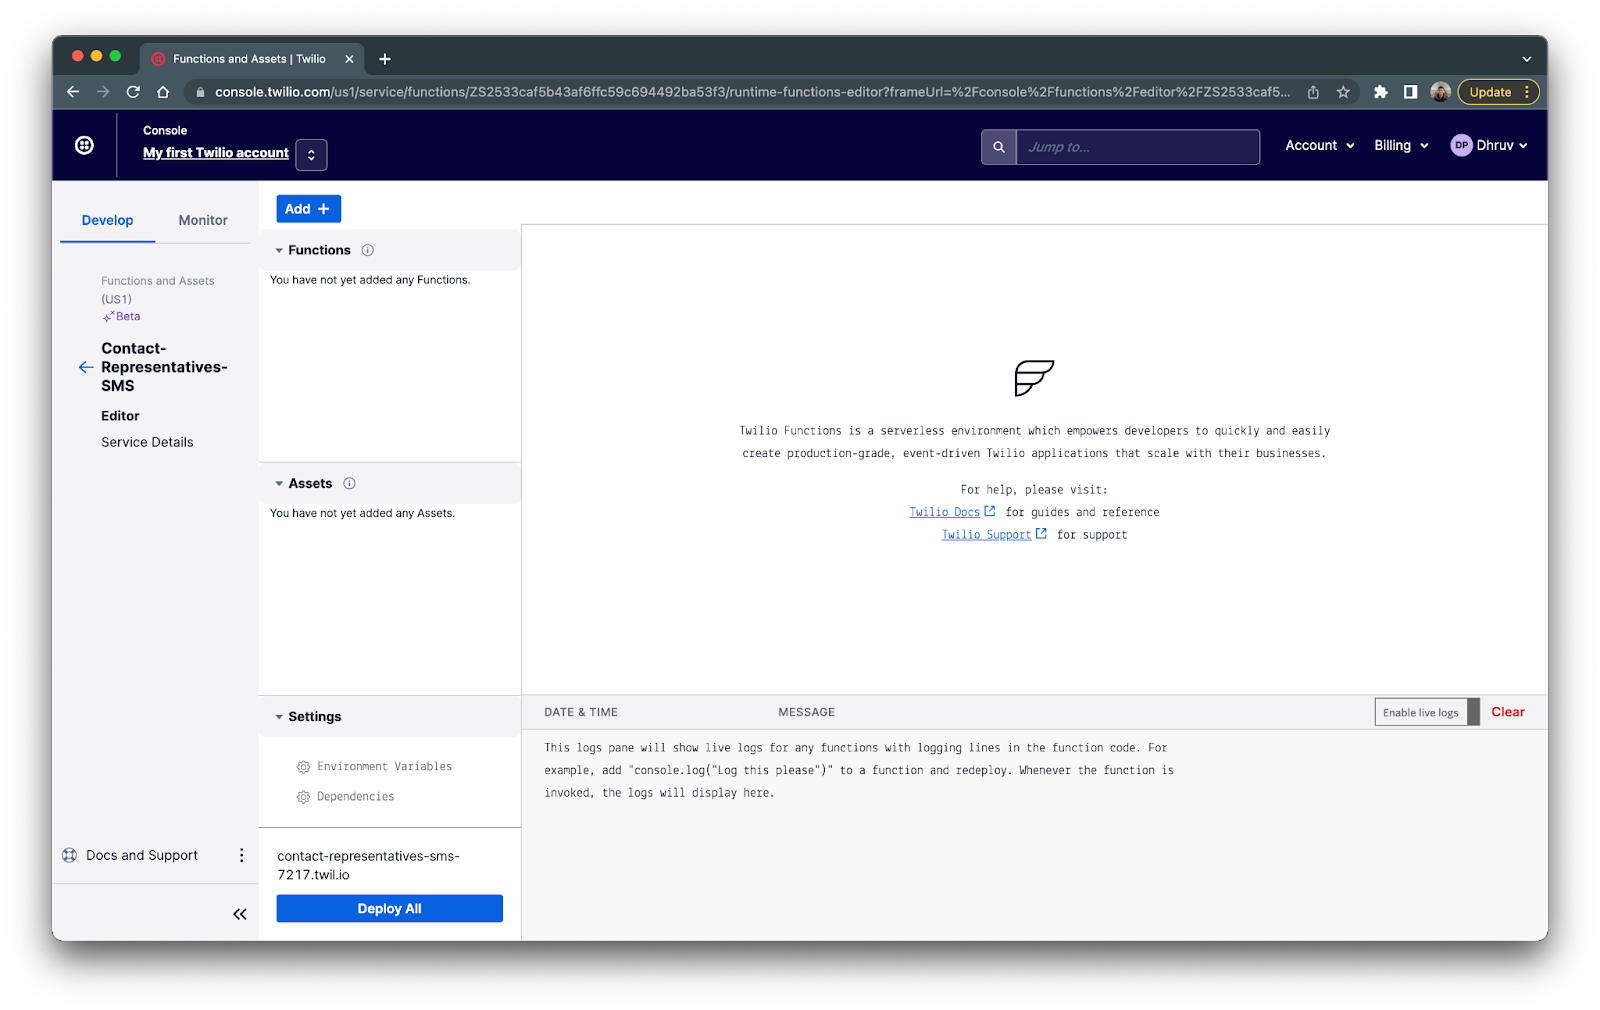
Log in to your Twilio Console and navigate to the Functions and Assets > Services tab on the left side (or click here). Click the blue Create Service button, enter Contact-Representatives-SMS as the name for your service, and click the blue Next button. You will then be directed to your newly created service.
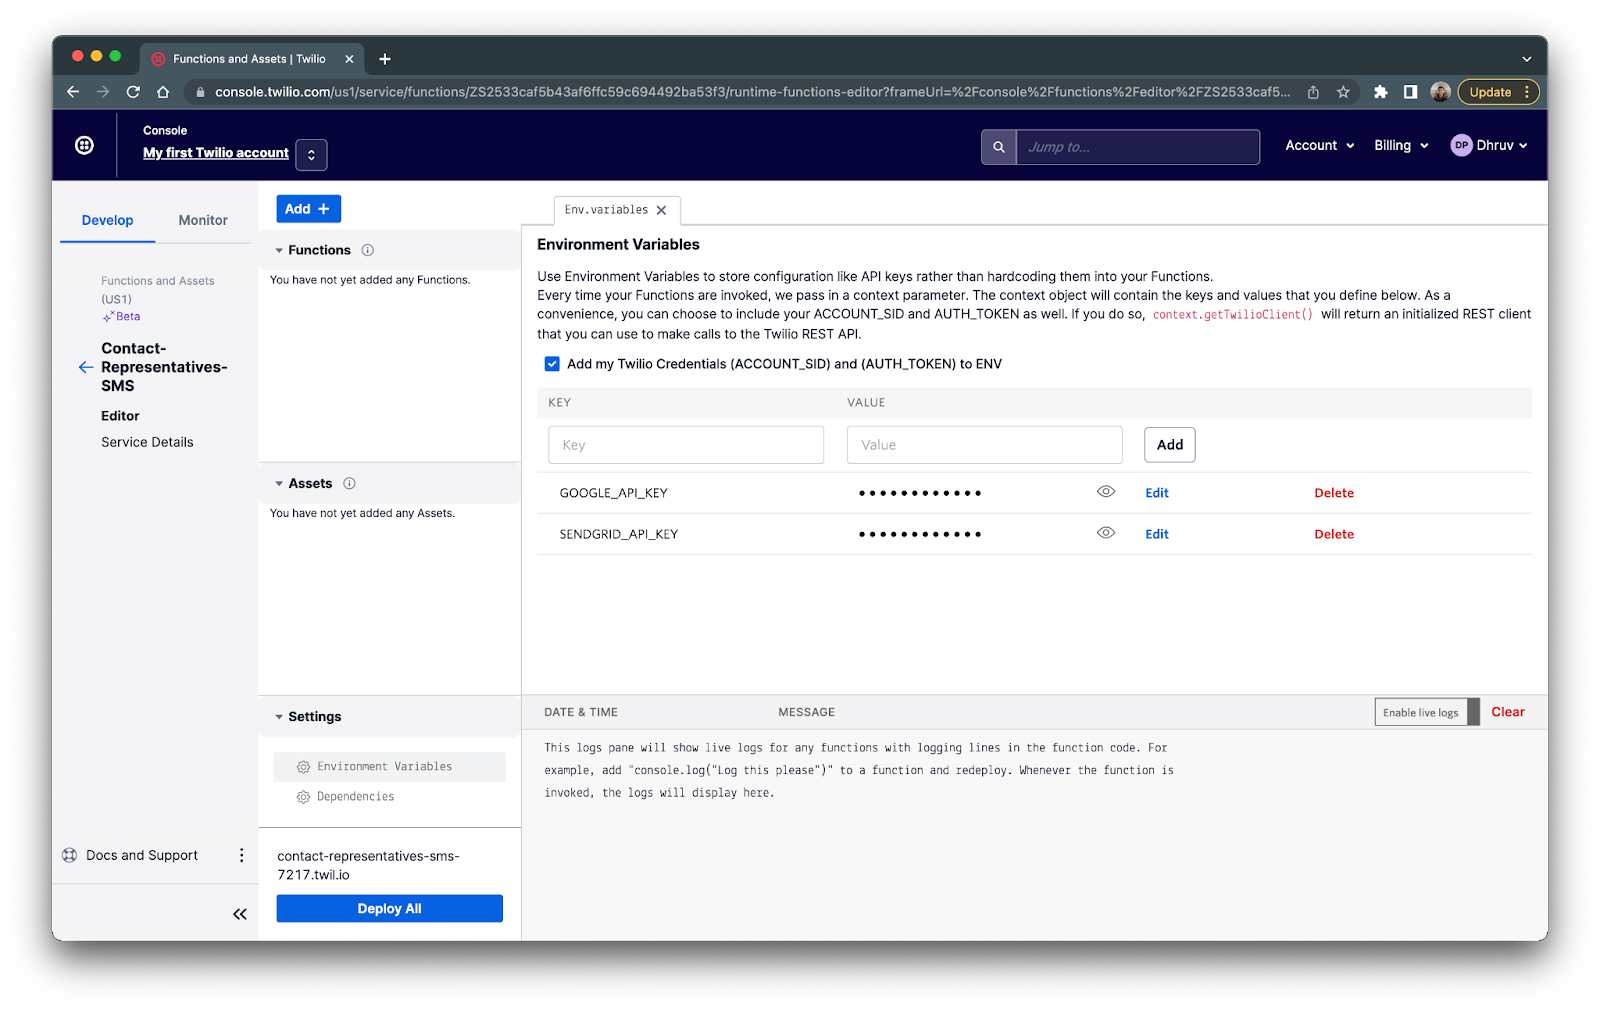
Configure the environment variables
Twilio Functions offers you to store environment variables like phone numbers, API keys, and URLs rather than hardcoding them into your Functions code. Using Environment Variables ensures that your code is portable and that simple configuration changes can be made instantly.
Click on Environment Variables under the Settings tab in your new Twilio Functions page. Here is where you will store your Twilio phone number and your API keys.
At this point, you should have your Google API key (if not, here are instructions to obtain one). To get your SendGrid API key, navigate to your SendGrid dashboard, and head to the API Keys section by heading to the settings tab on the left-hand side and clicking API Keys.
Click the blue Create API Key button on the top right and a form will appear.
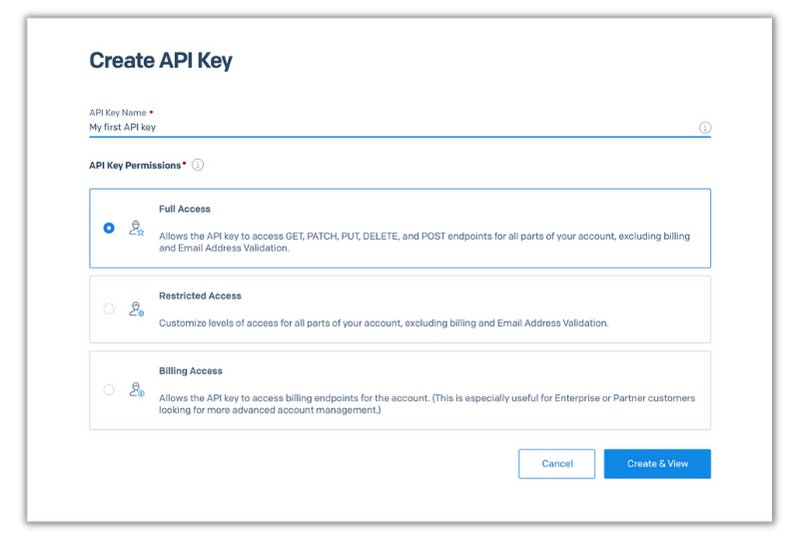
Enter whatever name you’d like for your API key and click the blue Create & View button and then copy your API key.
Head back to the environment variables section of your Twilio Functions service and type SENDGRID_API_KEY for the key and paste in your API key you just copied as the value and click Add. Now add your Google API key: enter GOOGLE_API_KEY as the key and the actual API key as the value and then click Add.
Your environment variables section should look like the following:
Add dependencies
Now under the Settings tab, click Dependencies. Here is where you’ll add the Dependencies that will be needed for your Functions. We will need to add two npm modules: axios to send out API requests to the Google Civic Information API and @sendgrid/mail to send out emails to representatives.
Let’s first add the axios package: In the Module textbox enter axios and in the Version textbox enter latest and click Add. Now add the SendGrid package: enter @sendgrid/mail as the module and latest as the version and then click Add.
Your dependencies section should look like the following:

Add the Functions
As mentioned before you’ll need to add two Functions to your service: /findRepresentatives which will take in an address and provide representatives for that address and /sendEmail which takes in a recipient email (which should be the representatives email), a reply to email (which should be the users email), a subject and the message body and will be used to send out the email.
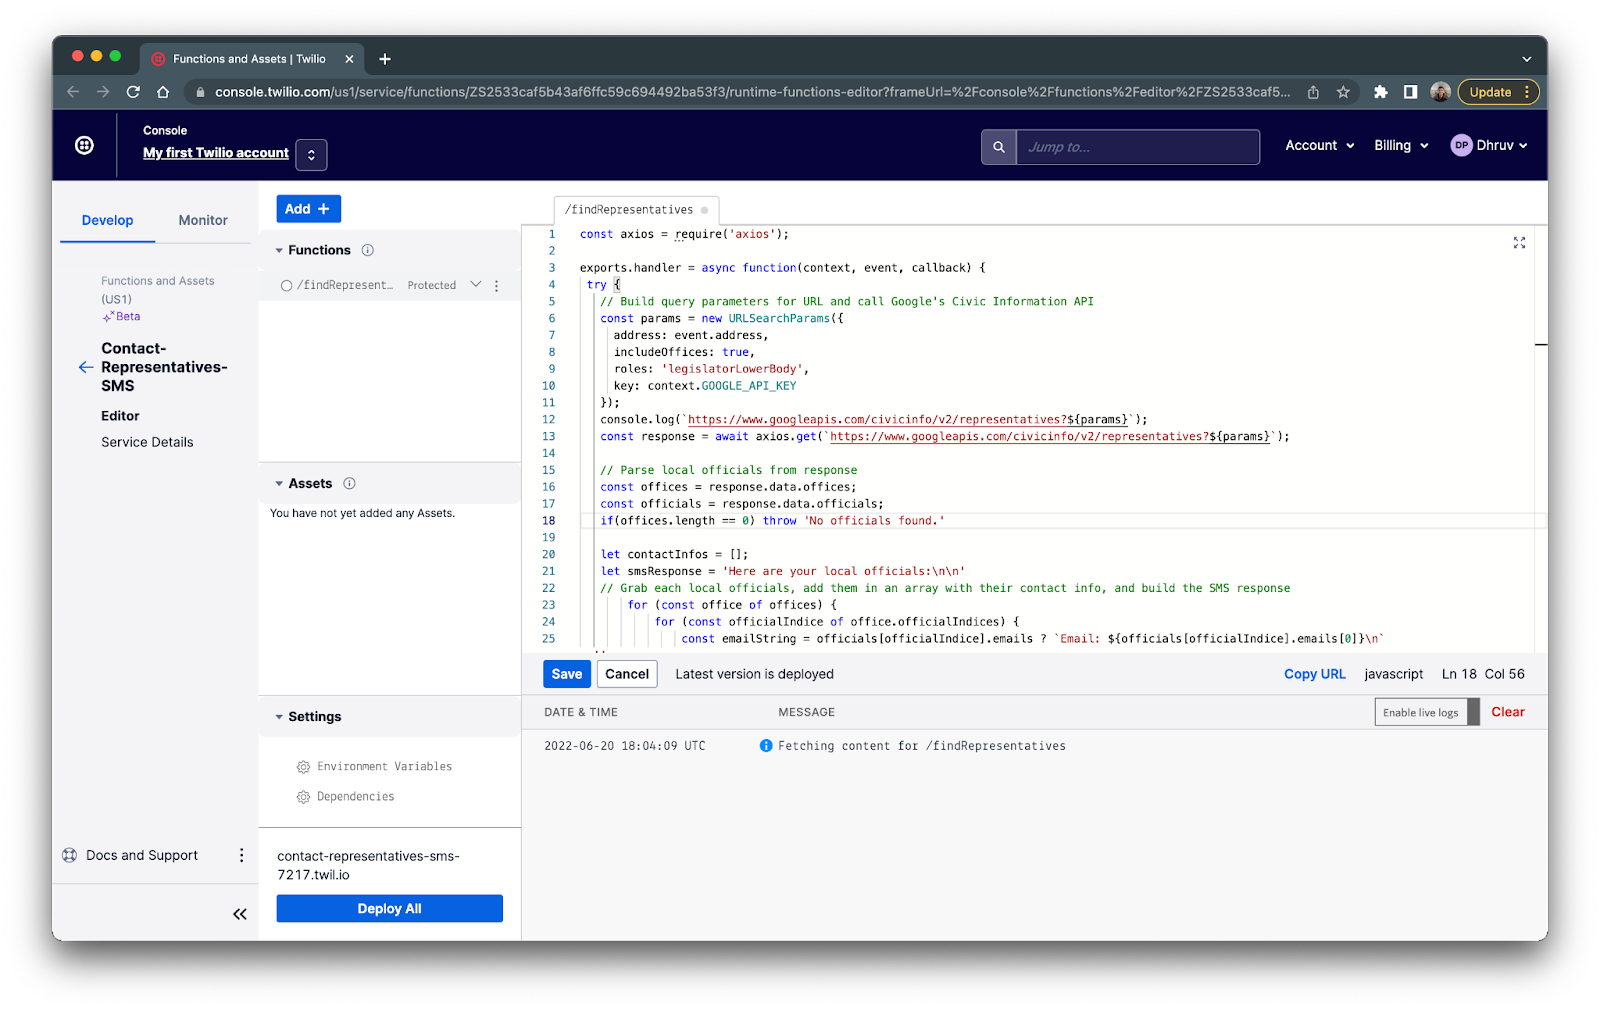
/findRepresentatives
Click on the blue Add + button, and then click Add Function from the dropdown to add a new Function and name it /findRepresentatives. Replace the existing default code in the text editor with the following:
Whenever this Function gets called, it starts off by building the URL for the API request to the Google Civic Information API with the address provided from the user through Twilio Studio, and your API key from the environment variables. The URL calls the representativeInfoByAddress endpoint using axios and filters representatives by legislatorLowerBody which shows members of the lower body of a bicameral legislature.
The Function then loops through all the provided representatives and parses their contact info – which includes their email, phone number, website URL, Facebook profile and Twitter profile – into an object which is then pushed into the contactInfos array. As the Function loops through each representative, it also builds out the smsResponse variable which will be sent as a response to the user.
Once the loop is finished, the contactInfos and smsResponse variables are placed in the callback() function which is then sent back to the Twilio Studio flow.
The /findRepresentatives Function should look like the following:
Click the blue Save button to save the Function’s code.
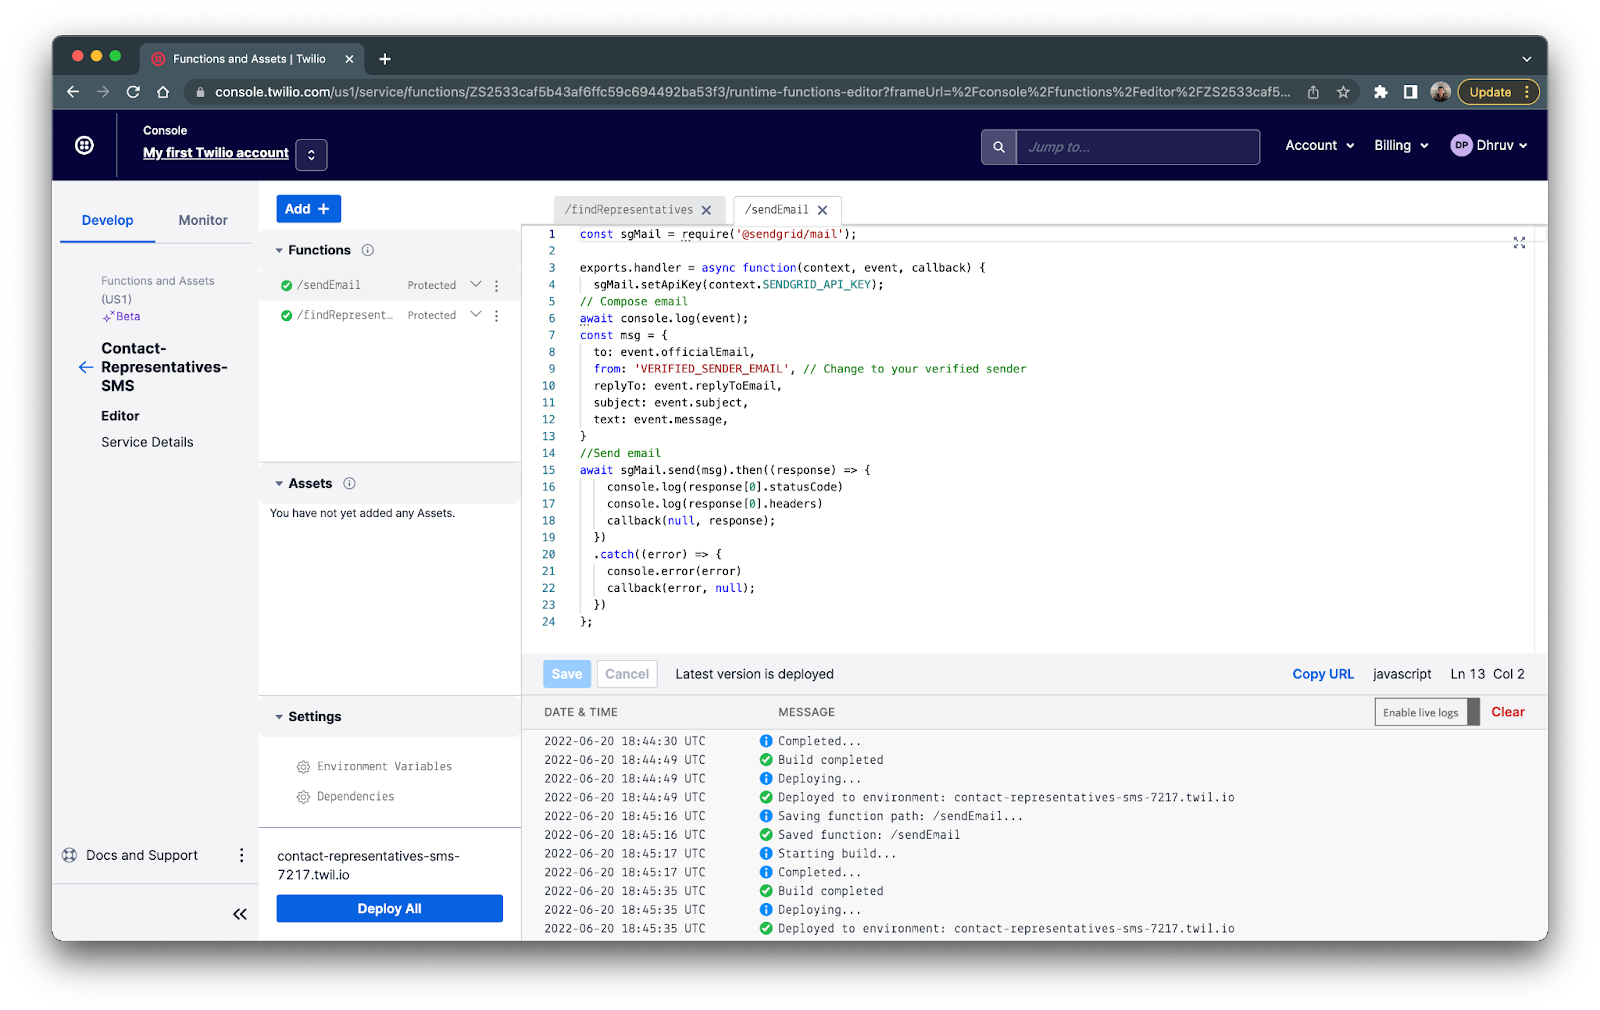
/sendEmail
Click on the blue Add + button, and then click Add Function from the dropdown to add a new Function and name it /sendEmail. Replace the existing default code in the text editor with the following:
Replace the VERIFIED_SENDER_EMAIL placeholder with the email that was used to verify your Sender Identity on your SendGrid account.
This code will compose and send out an email with the given parameters from the event object. The officialEmail, replyToEmail, subject and message parameters will be provided by the user from the Twilio Studio Flow. The callback() function will then be called and sent back to the Twilio Studio flow confirming whether the email was successfully sent or not.
Click on the blue Save button and then the blue Deploy All button at the bottom of your Functions Service. After it’s finished building and has been deployed, your finished Functions Service should look like this:
SMS Flow with Studio
Now that your two Functions are finished and ready to be used, let’s create your Twilio Studio Flow!
If you aren’t familiar with Twilio Studio, it’s a no-code tool that allows you to build Twilio apps. The user interface lets you drag and drop widgets to create communication workflows for your service or app.
Rather than having you individually drag, drop, and configure each widget for this tutorial, you’ll be able to copy and paste the JSON flow to your Studio application and your flow will automatically be built out for you. However, you will need to manually configure some settings that are unique to you, such as connecting your Twilio phone number to your flow and connecting your Functions to their respective widgets.
Create your flow
In a new tab, head to the Studio Flows page by clicking Studio > Flows from the left tab on your Twilio Console. To create the flow, click on the blue + button and enter Contact Representatives as your flow name and then click the blue Next button.
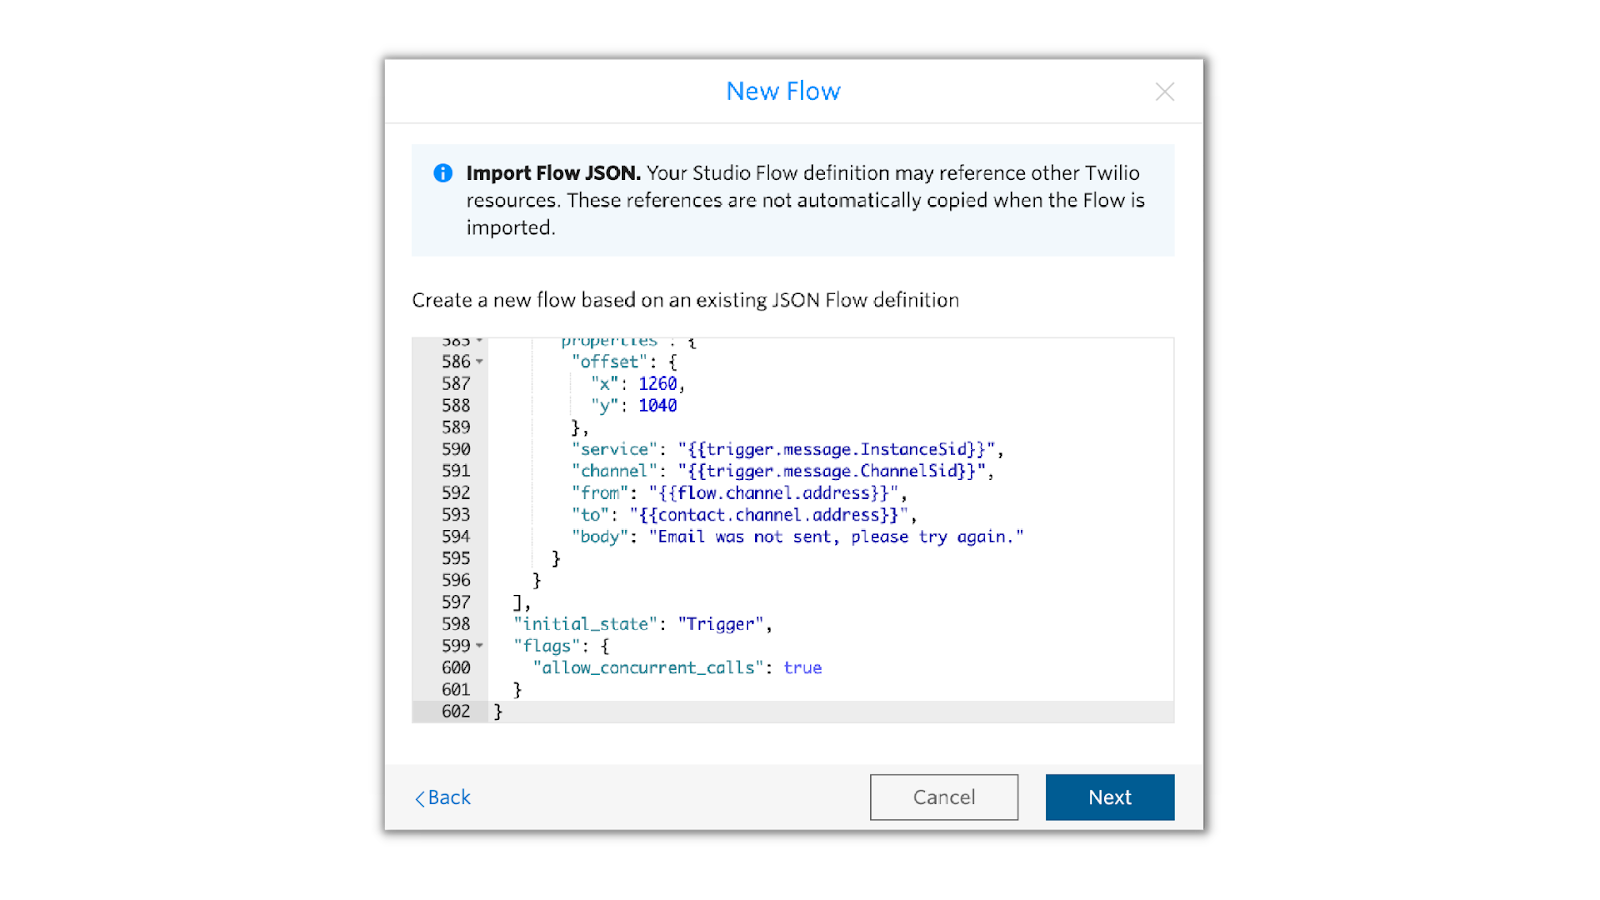
The next section will allow you to choose if you want to build your Studio Flow from scratch or from a template. Scroll down, click the Import from JSON option and then click the Next button:
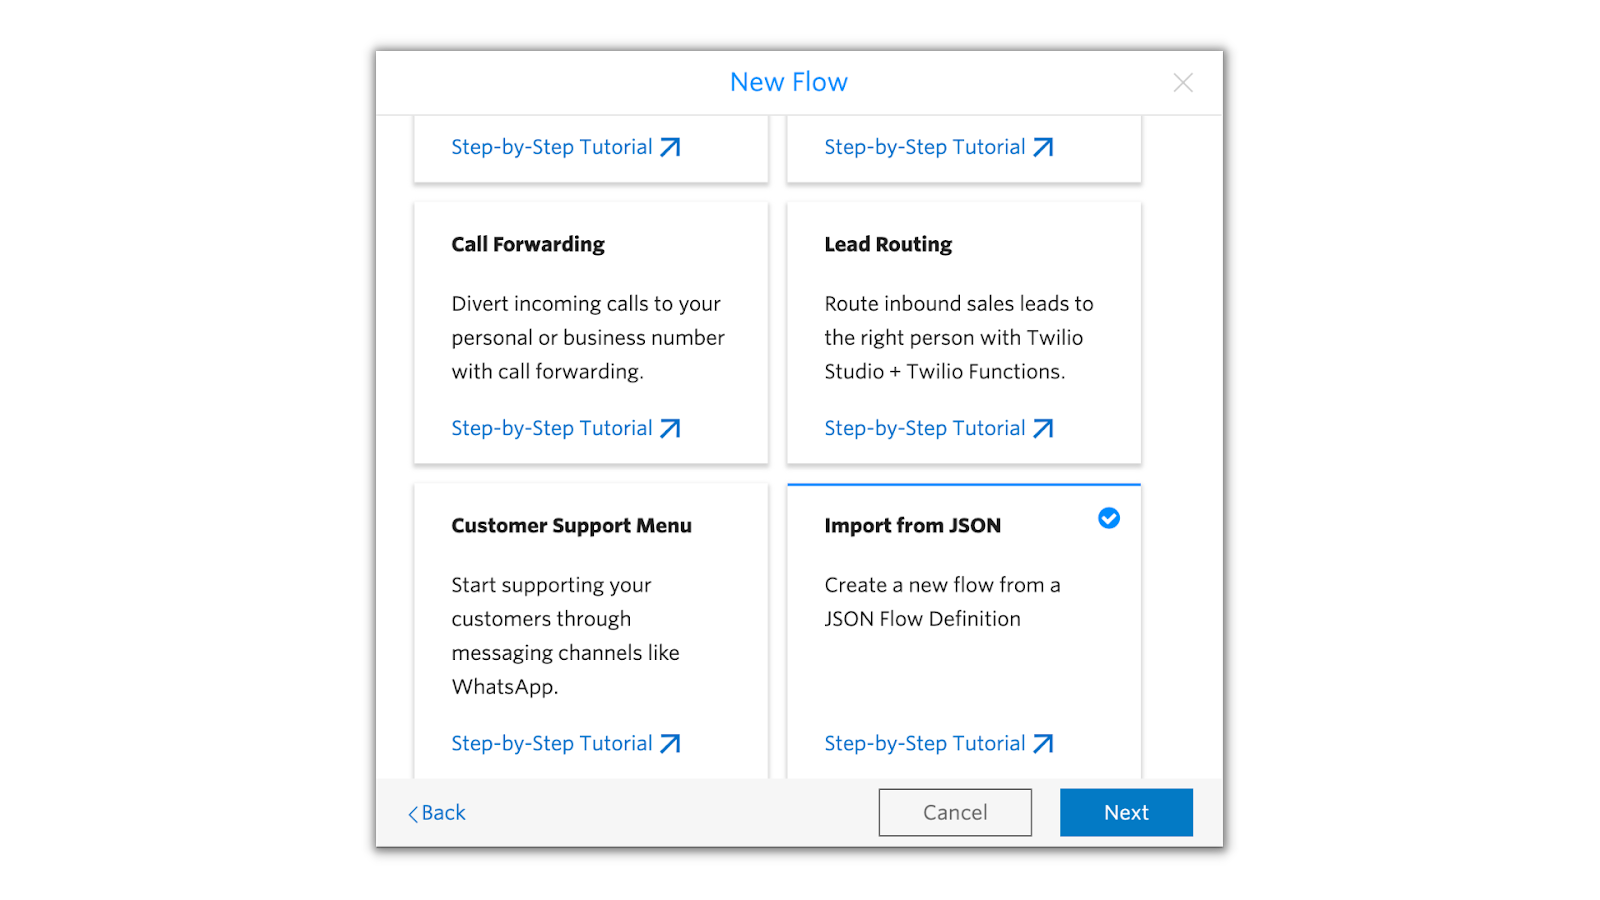
Here is the gist for the JSON Studio flow. Copy it and paste it in the textbox and click the Next button:
Your Flow will take a moment to load from the JSON you entered. Once loaded, your Twilio Studio editor and Flow should look something like this:
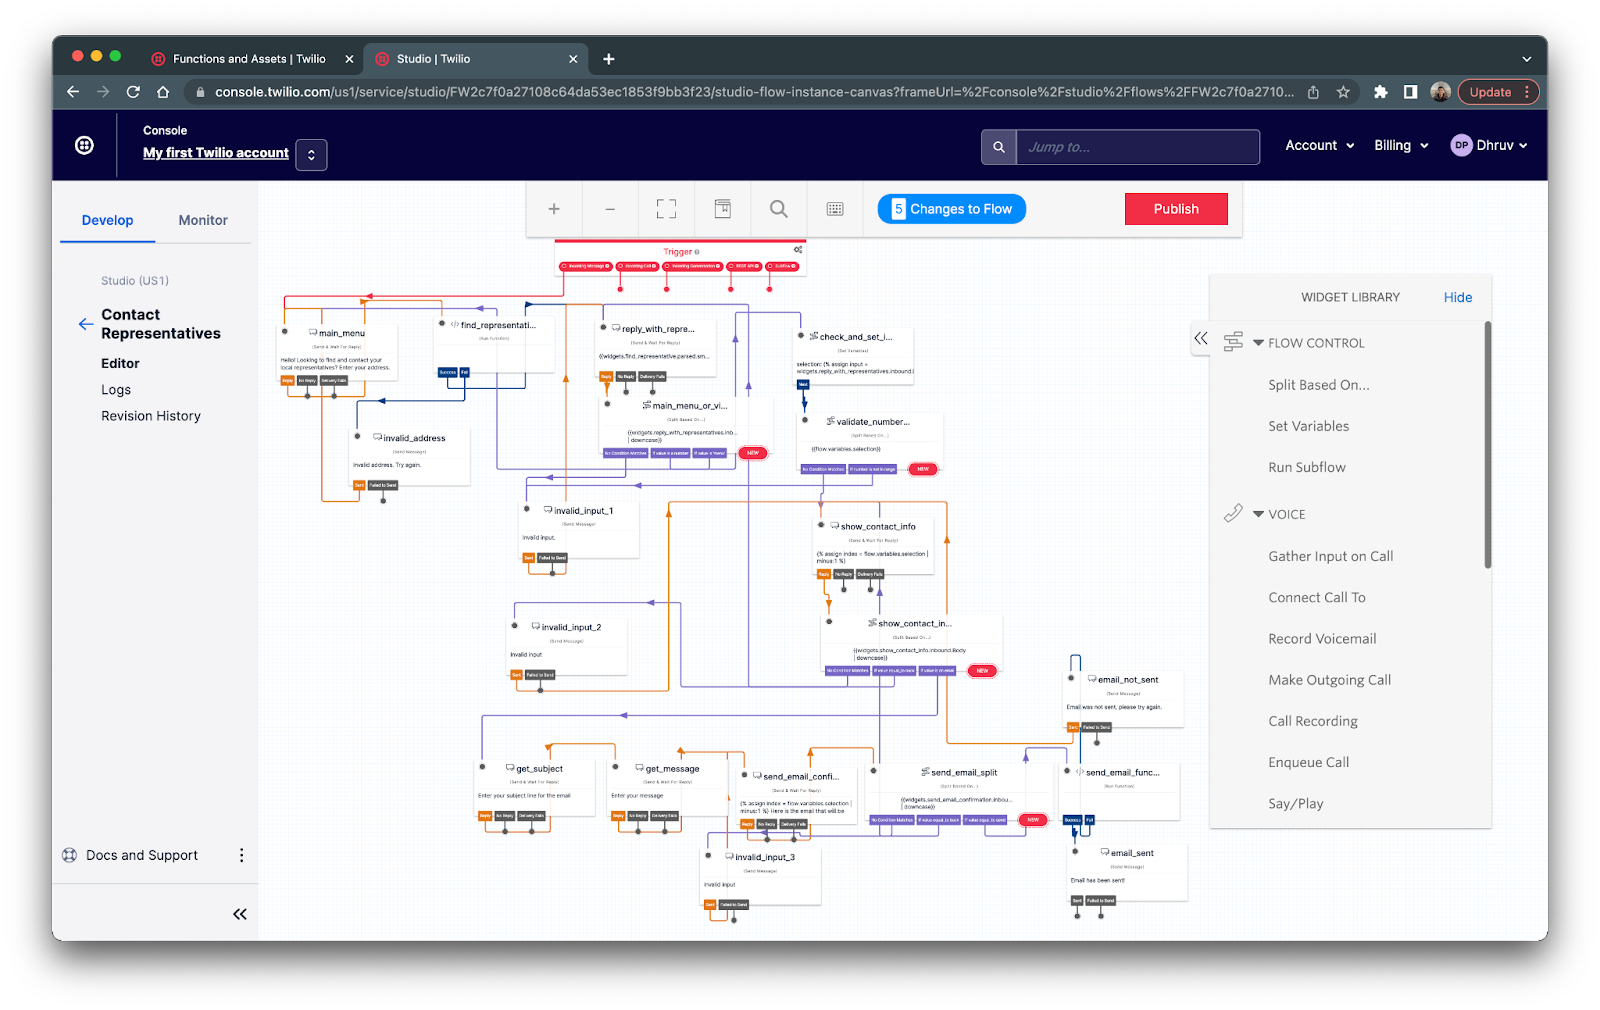
The flow diagram looks intimidating but don't worry, it’ll be easy to understand once we go over the flow. As you go over the flow and through each widget, I recommend you click on each widget to see how it’s configured and how I used the Liquid Template Language to make the SMS content dynamic.
Overview of the flow
Before you configure your Twilio number and Functions to your flow, let's see how the flow works by going through a successful flow where the user is able to email their representative:
- The flow starts off at the Trigger which is whenever there is an incoming message to your Twilio number. Next, it will head to the main_menu widget which will ask the user to enter an address.
- The find_representative widget will call the /findRepresentative Function while passing the user's reply in the
addressparameter. - Depending on the Functions callback response, the flow can either go in the Success or Fail route.
- If the callback returns the object with the
contactInfosandsmsResponsewithout an error, the flow will head to the reply_with_representatives widget. - If the callback returns an error, the flow will go to the invalid_address widget which will notify the user to try again and then will head back to the main_menu widget.
- If the callback returns the object with the
- The reply_with_representatives widget will output the
smsResponsefrom the findRepresentatives Function. It will respond with the representatives and ask the user to either choose a representative by replying with their respective number to view their contact information or head back to the main menu. - After a reply from the user, the flow will head to main_menu_or_view_contact widget. This widget is a Split Based on... Widget, which will redirect the flow depending on the user's reply.
- If the user’s reply is a number, it will head to the check_and_set_input widget.
- If the user’s reply is “menu”, it will head to the main_menu widget.
- If the reply is anything else, it will head to the invalid_input_1 widget which will notify the user that their input is invalid and will head back to the reply_with_representatives widget.
- Assuming the user replied with a number, the check_and_set_input will verify the number is valid and is one of the selections. This widget is a Set Variables widget and is configured to assign a value to the
selectionvariable. Feel free to click on the widget to see how the Liquid template language is used to determine if the number is valid.- If the user's input is a valid number, it will assign the number to the
selectionvariable. - If the user's input is not a valid number, it’ll assign
nullto theselectionvariable.
- If the user's input is a valid number, it will assign the number to the
- The validate_number_range widget will evaluate the
selectionvariable- If it was assigned a number, it will direct the flow to the show_contact_info widget.
- If the variable is
null, it will head to the invalid_input_1 widget and then back to the reply_with_representatives widget.
- Using Liquid, the show_contact_info widget will use the
selectionvariable to grab and display the representative’s contact information from thecontactInfosarray from the /findRepresentatives Function. The user will then have an option to head back to view the other representatives or to email the representative (if their email is present). - The show_contact_info_flow widget will evaluate the user's reply
- If the user's reply is “back”, the flow will go to the reply_with_representatives widget.
- If the user reply is an email address – which is checked by an email address regex – the flow will head to the get_subject widget.
- If the reply is anything else, the flow will head to the invalid_input_2 widget and then back to the show_contact_info widget.
- The get_subject widget will ask the user for the subject line of the email and then head to the get_message.
- The get_message widget will ask the user for the message that will be sent with the email and then head to the send_email_confirmation widget.
- The send_email_confirmation widget will display a confirmation of the email that will be sent. It will display the reply to email, subject line, message and then who the email will be sent to. It will then ask the user to send the email or go back.
- The send_email_split widget will then evaluate the user's reply.
- If the reply is “back”, the flow will direct to the show_contact_info widget.
- If the reply is “send”, the flow will direct to the send_email_function widget.
- If the reply is anything else the flow will direct to the invalid_input_3 widget and then back to the send_email_confirmation widget
- Assuming the user responds with “send”, the send_email_function widget will call the /sendEmail Function while passing in the representative's email, reply to email, subject, and message given by the user.
- Depending on the Functions callback response, the flow can either go in the Success or Fail route.
- If the callback returns without an error, the flow will head to the email_sent widget.
- If the callback returns an error, the flow will go to the email_not_sent widget which will notify the user to try again and then will head back to the show_contact_info widget.
- The email_sent widget will notify the user the email has been sent and will stop the flow.
Now that you know how this flow works, let’s finish configuring it so you can publish it!
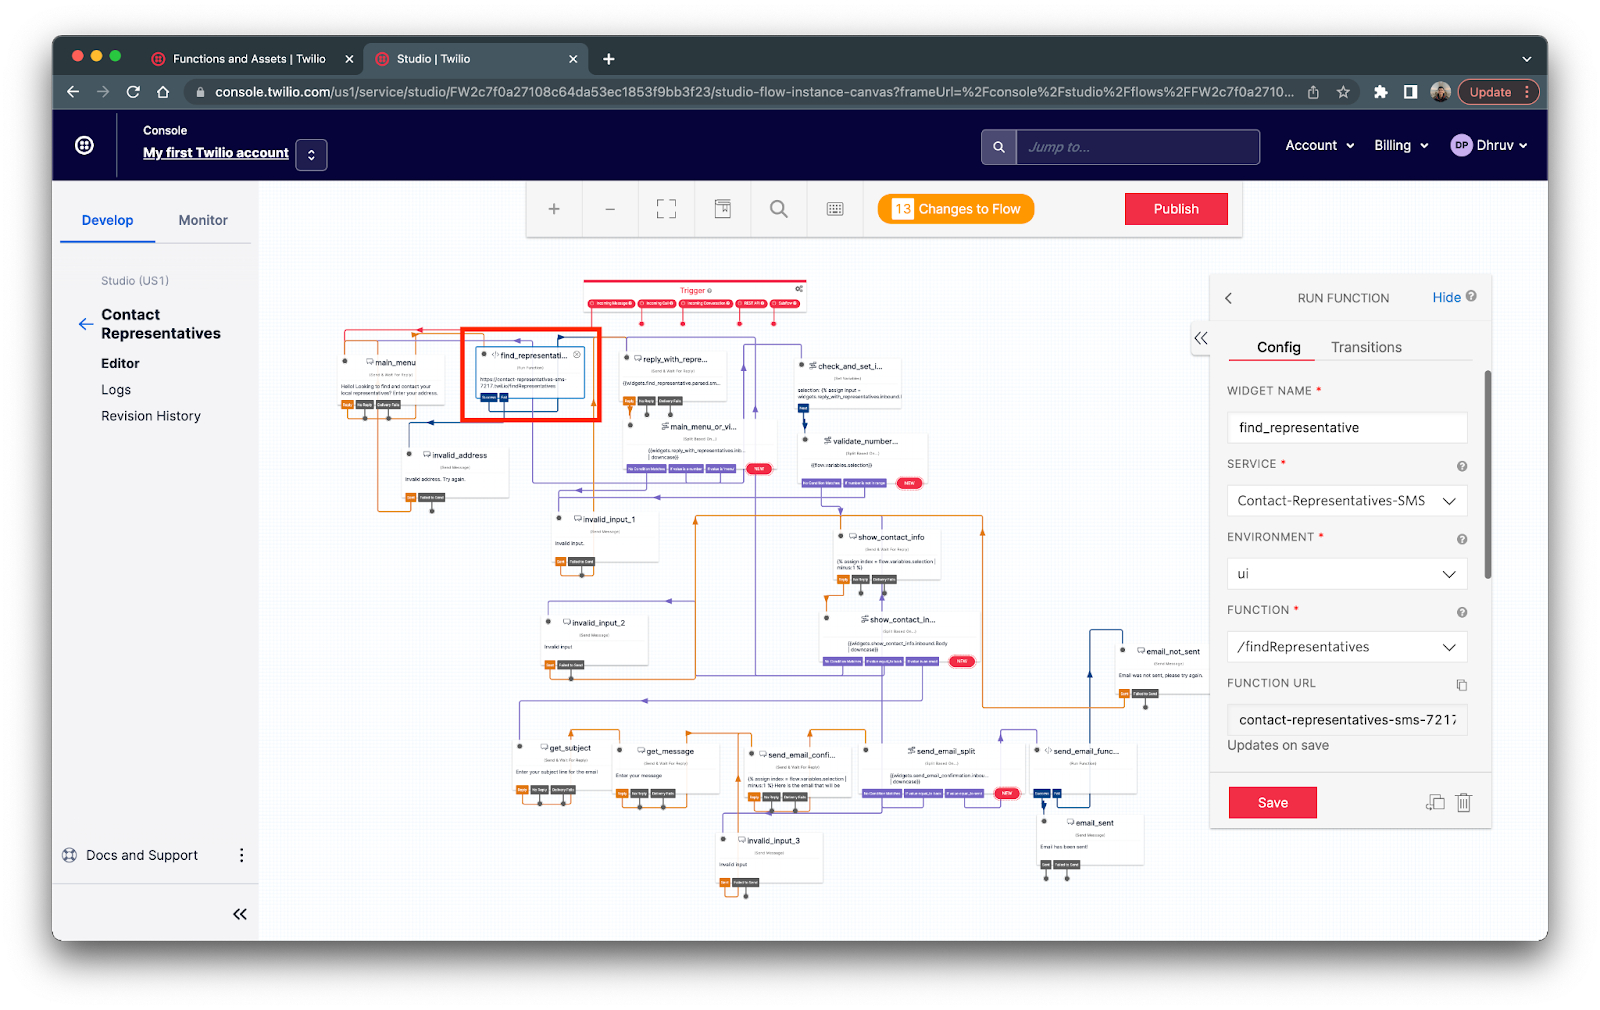
Configure your Functions to the Functions widgets
The first Function you’ll configure is the /findRepresentatives Function. Click on the find_representative widget (shown below in the red box) and the Config tab will be shown on the right. For the SERVICE, select Contact-Representatives-SMS. For the ENVIRONMENT, select ui. For the FUNCTION, select /findRepresentative. Finally, click the red Save button.
After configuring these values, the Config tab of find_representative widget should look like this:
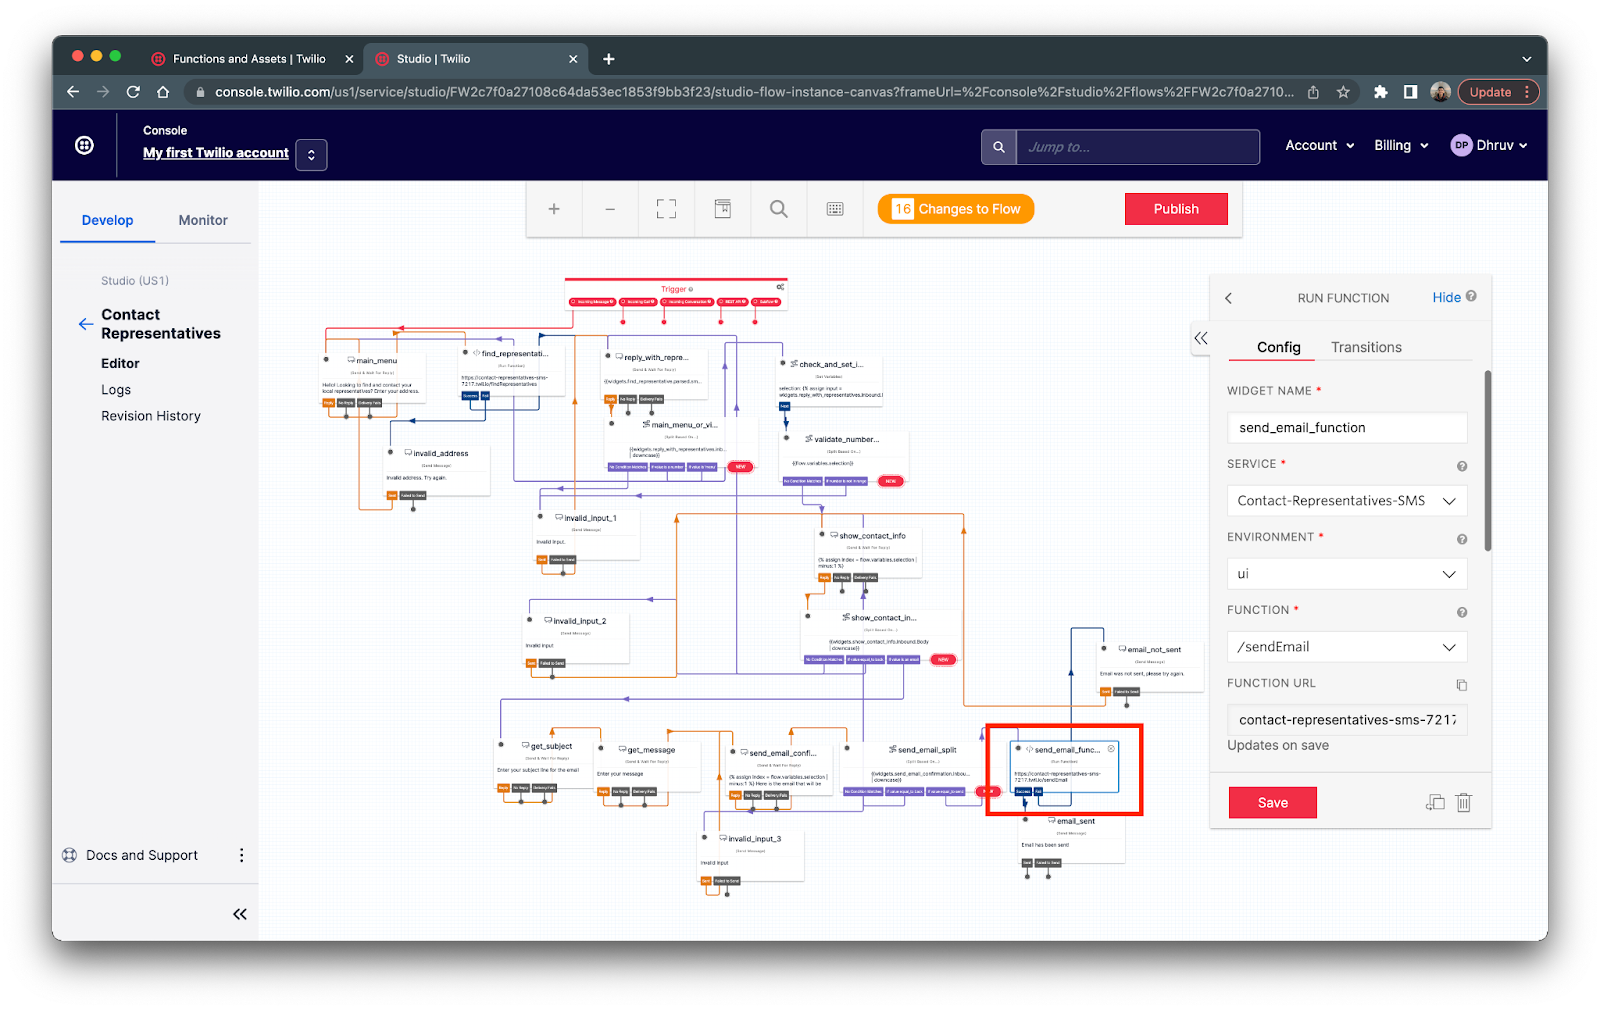
Next, let's configure the /sendEmail Function to its respective widget. Click on the send_email_function widget (shown below in the red box) and the Config tab will be shown on the right. For the SERVICE, select Contact-Representatives-SMS. For the ENVIRONMENT, select ui. For the FUNCTION, select /sendEmail. Finally, click the red Save button.
After configuring these values, the Config tab of send_email_function widget should look like this:
Finally, click on the red Publish button at the top of the Twilio Studio UI.
Configure the flow to your Twilio number
In a new tab, navigate to the phone numbers section of your Twilio Console. You can head there by clicking Phone Numbers > Manage > Active numbers from the left tab on your Console.
Now click on the Twilio number you’d like to use for the SMS service and scroll down to the Messaging section. Beneath A MESSAGE COMES IN, select Studio Flow for the first dropdown and then select Contact Representatives for the second dropdown
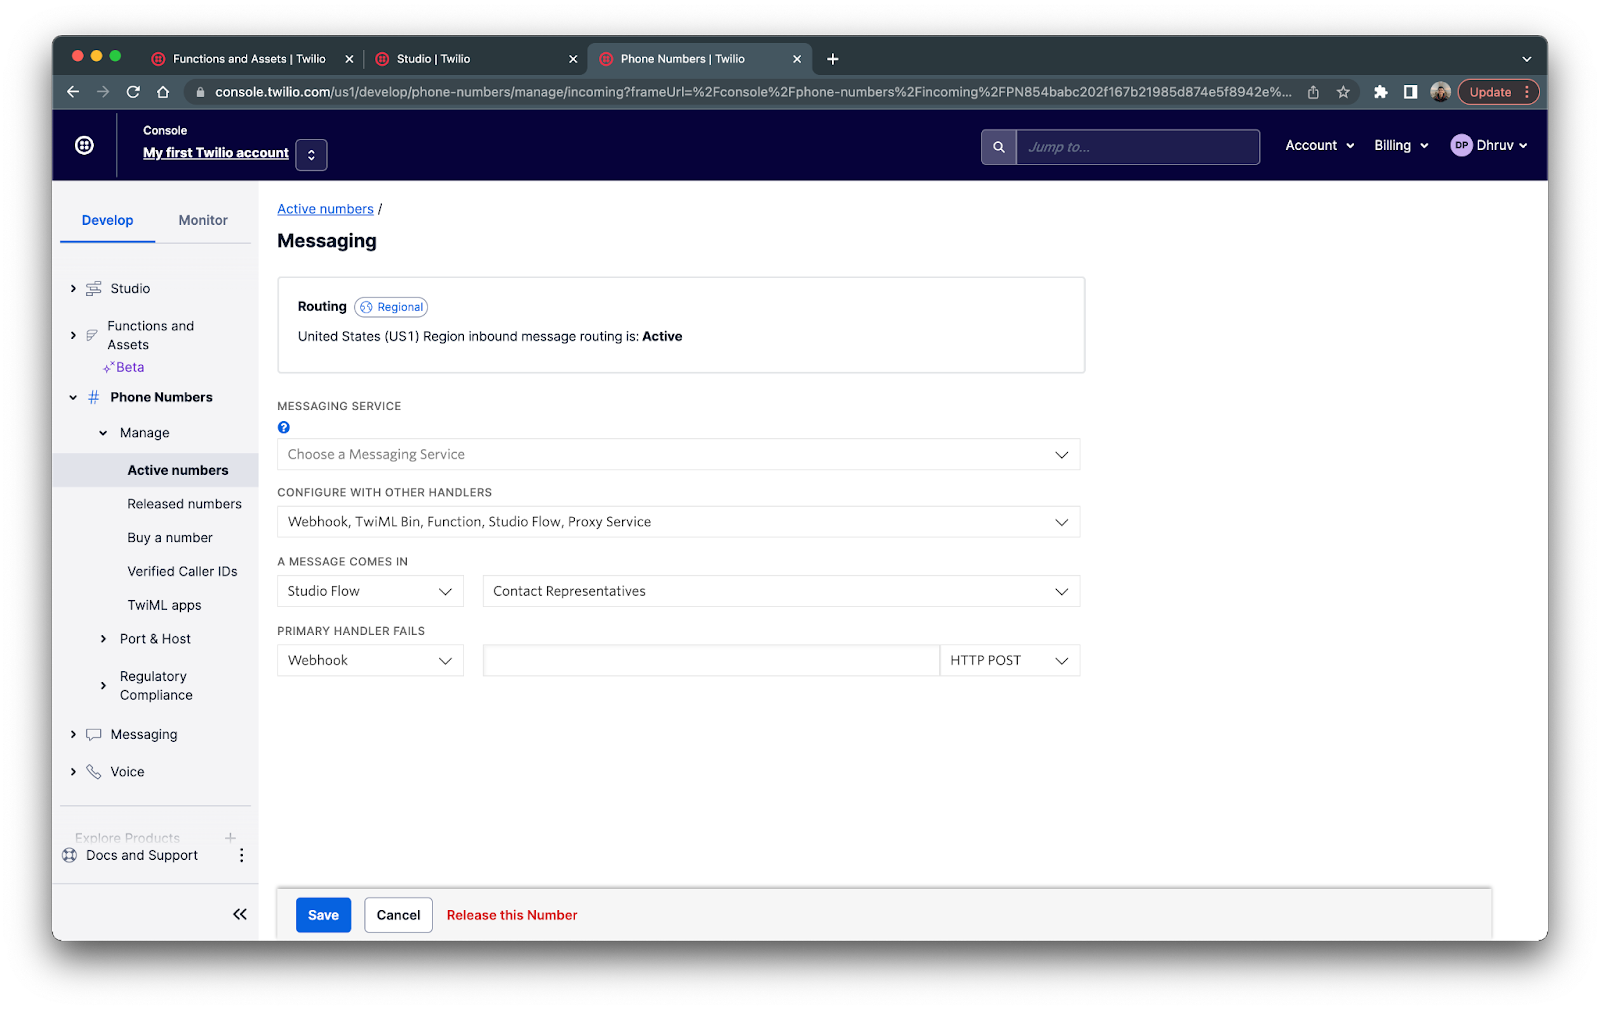
Once you’ve configured your Twilio number to your new Studio Flow, click the blue Save button.
Your SMS service is finally ready to be used! Grab your phone and text your Twilio number to get started.
Conclusion
Congrats! You’ve just built an SMS application all through the Twilio Console. Twilio Studio allows you to explore the many opportunities of Twilio technology to use in your everyday life even when it comes to civic engagement.
For more projects using Twilio Studio, take a look at these Twilio Blogs:
- Build an App without Coding: Simple SMS Survey with Twilio Studio
- How to Make a Wordle Solver with Twilio Serverless, Studio, and SMS
- How to do phone verification in Twilio Studio
Happy building!
Dhruv Patel is a Developer on Twilio’s Developer Voices team. You can find Dhruv working in a coffee shop with a glass of cold brew or he can either be reached at dhrpatel [at] twilio.com or LinkedIn.


Related Resources
Twilio Docs
From APIs to SDKs to sample apps
API reference documentation, SDKs, helper libraries, quickstarts, and tutorials for your language and platform.
Resource Center
The latest ebooks, industry reports, and webinars
Learn from customer engagement experts to improve your own communication.
Ahoy
Twilio's developer community hub
Best practices, code samples, and inspiration to build communications and digital engagement experiences.