How to do phone verification in Twilio Studio
Time to read:
June 09, 2022
Written by
Reviewed by

If you operate a contact center that allows users to access sensitive account information or make payments or changes to the account, you'll want to have a strategy for verifying those users' identities. Twilio's Verify API makes it easy to send one-time passcodes for phone verification or two-factor authentication (2FA) to a variety of channels including email, SMS, and WhatsApp.
Twilio Studio is a great tool for building complex low-code workflows including IVRs and contact centers. Studio is also extremely extendable and powerful. Studio Subflows are a great way to create reusable snippets of functionality. This blog post will show you how to create a Studio Subflow for sending an SMS one-time passcode (OTP) that can be used for phone verification or 2FA.

Prerequisites for building a Verify subflow in Studio
To follow along with this tutorial you'll need the following:
- A Twilio account - sign up or sign in
- A Twilio phone number
Create a Studio Subflow for phone verification
Head over to the Studio Dashboard in the Twilio Console and create a new Studio Flow. I named mine "Verify Subflow". You'll see a few templates presented. Scroll down to the bottom of the options and select "Import from JSON". Press “Next” to continue.
Delete the default {} in the JSON entry box, paste in the JSON in this Gist, and click "Next".
Your Studio flow will look like this:
Add Twilio Verify to Studio
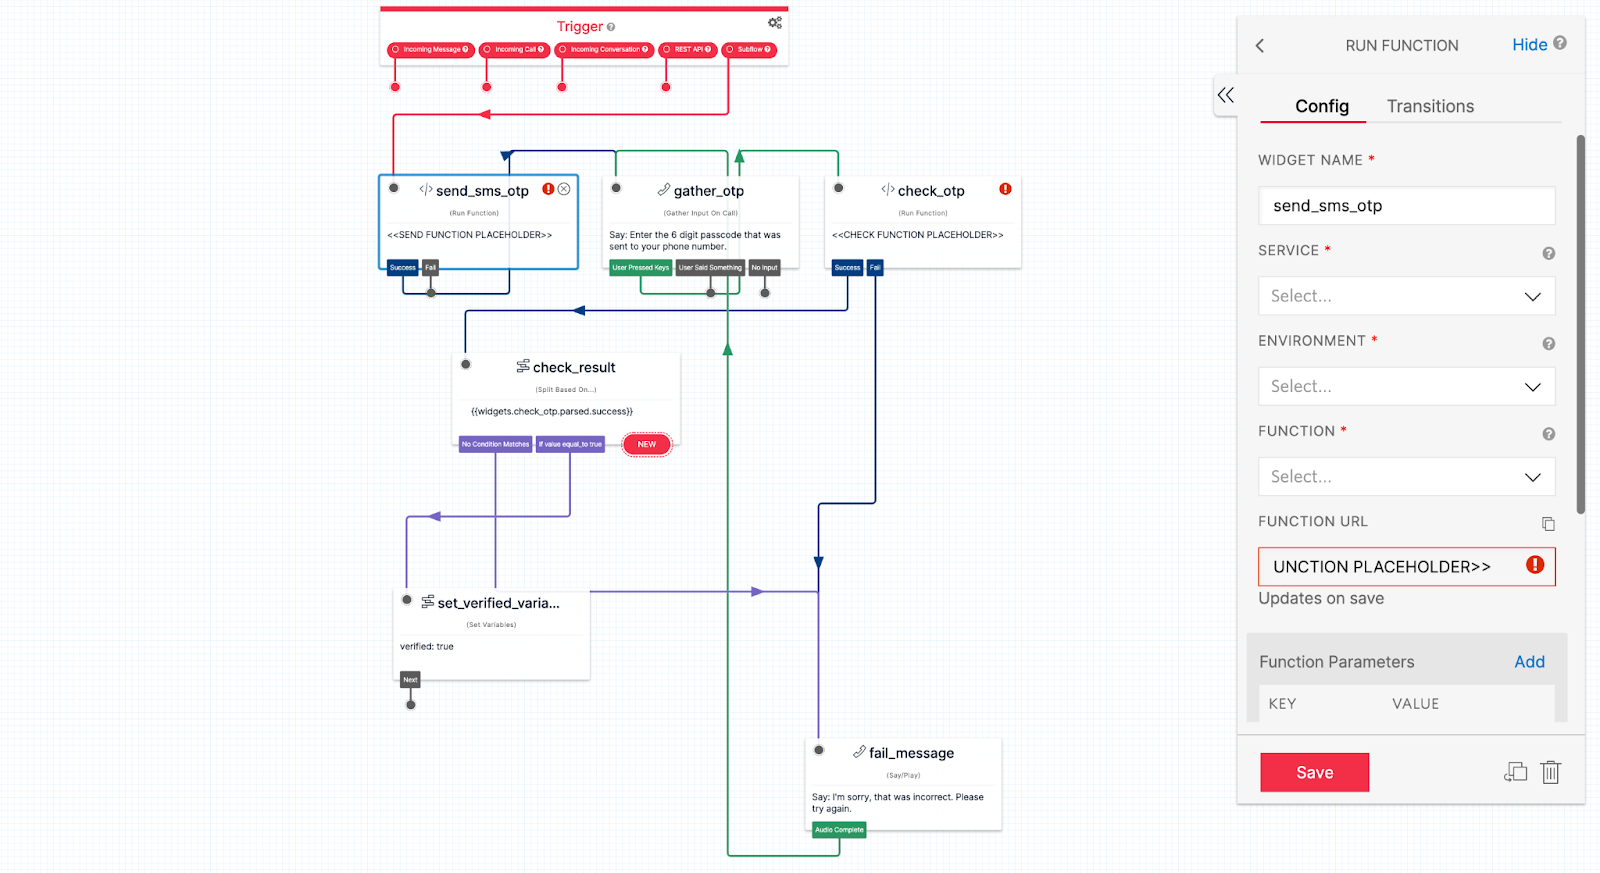
The send_sms_otp and check_otp widgets will have errors and show placeholder URLs. Next, create the functions that we can add here in order to send and check an OTP.
First, create a Verify Service in the console then head over to the Twilio CodeExchange and follow the instructions to deploy the OTP project. This will direct you to a handy user interface for sending and checking OTPs if you want to play around with Verify using different channels. However for this project you'll only be using the backend functions that power the interface behind the scenes.
Select the send_sms_otp widget and choose the following settings in the widget configuration.
- Service: verify
- Environment: verify
- Function: /start-verify
The function URL will automatically populate. The function parameters are already set: this function will send the SMS OTP to a variable that gets passed into the subflow. Learn more about passing variables between flows.
Repeat these steps for the check_otp widget:
- Service: verify
- Environment: verify
- Function /check-verify
The check OTP function uses the same to variable that gets passed into the subflow and also uses the Digits that are collected in the gather_otp step.
The flow will only exit once the user has successfully verified the OTP. You could always edit this to forward the call or use another method for verification or 2FA.
Now you have a completed Subflow for SMS OTP verification. Publish your subflow and head back to the Studio Dashboard to create a Parent flow to test this out.
Create a parent studio flow and connect to your subflow
Create a new Studio flow (or use an existing flow). Select "Import from JSON" again and add the JSON in this Gist and click "Next".
Now you can build out your parent flow to do whatever you want, but to illustrate the subflow this plays a basic welcome message and then checks the result from the variable that's set in the subflow.
Click on the subflow widget with a Flow SID that reads "PLACEHOLDER" and select your subflow.
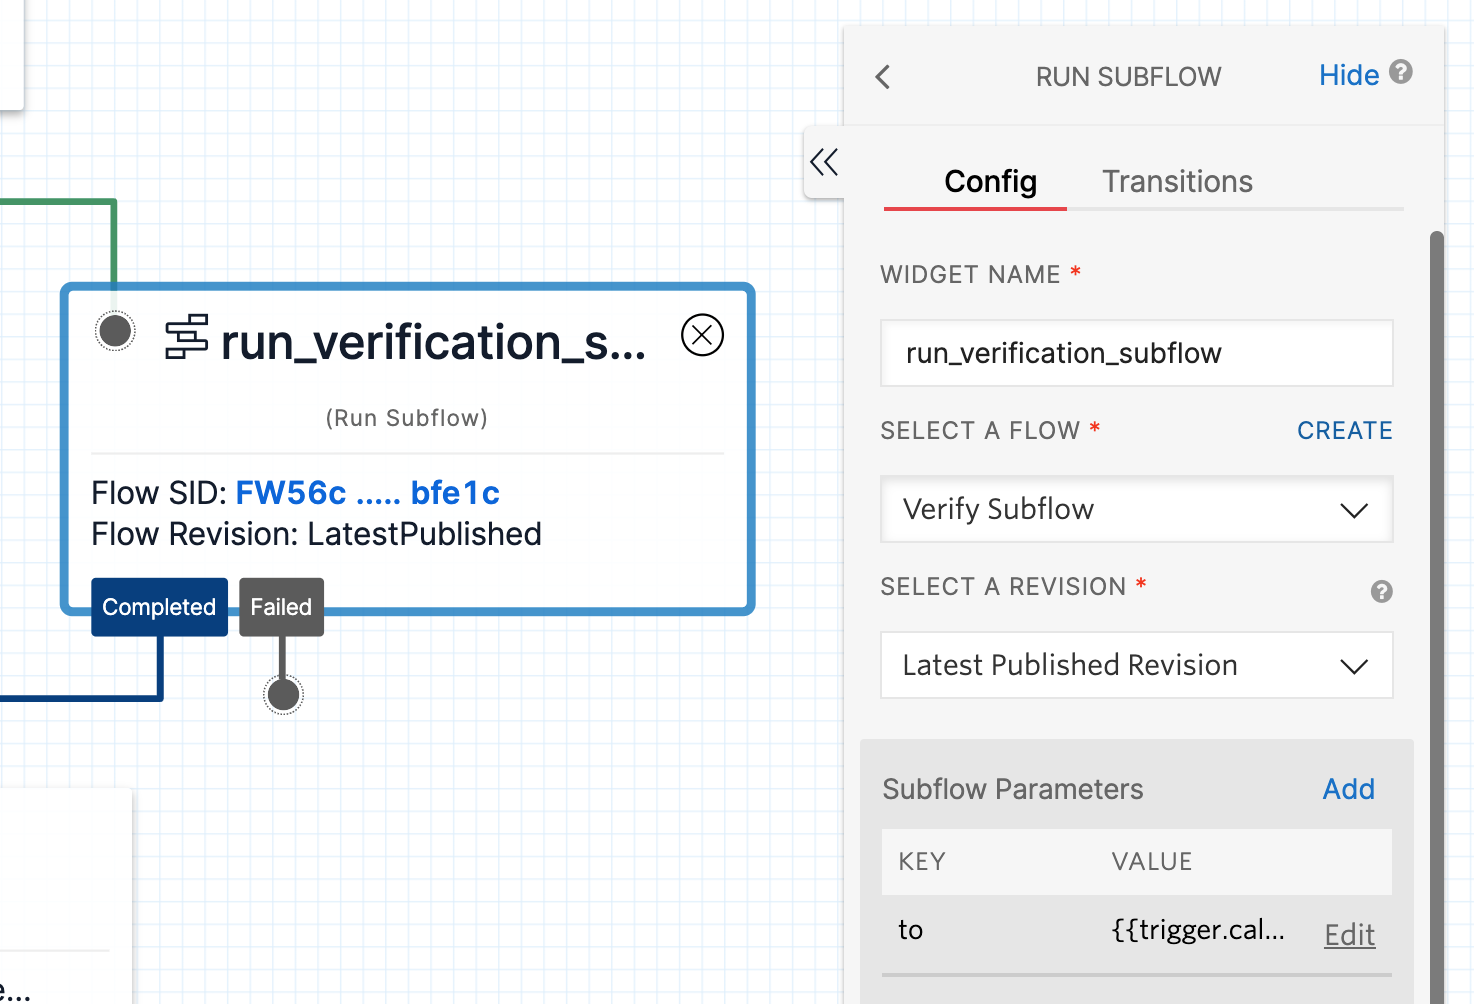
The "Subflow Parameter" included in the JSON import is important: you must pass the "to" parameter so the Subflow knows where to send the OTP. For this example I set the variable to use the caller's "From" number ({{trigger.caller.From}}) which protects against phone number spoofing. Other options include looking up the caller's phone number in your database by their account number, social security number, or email address.
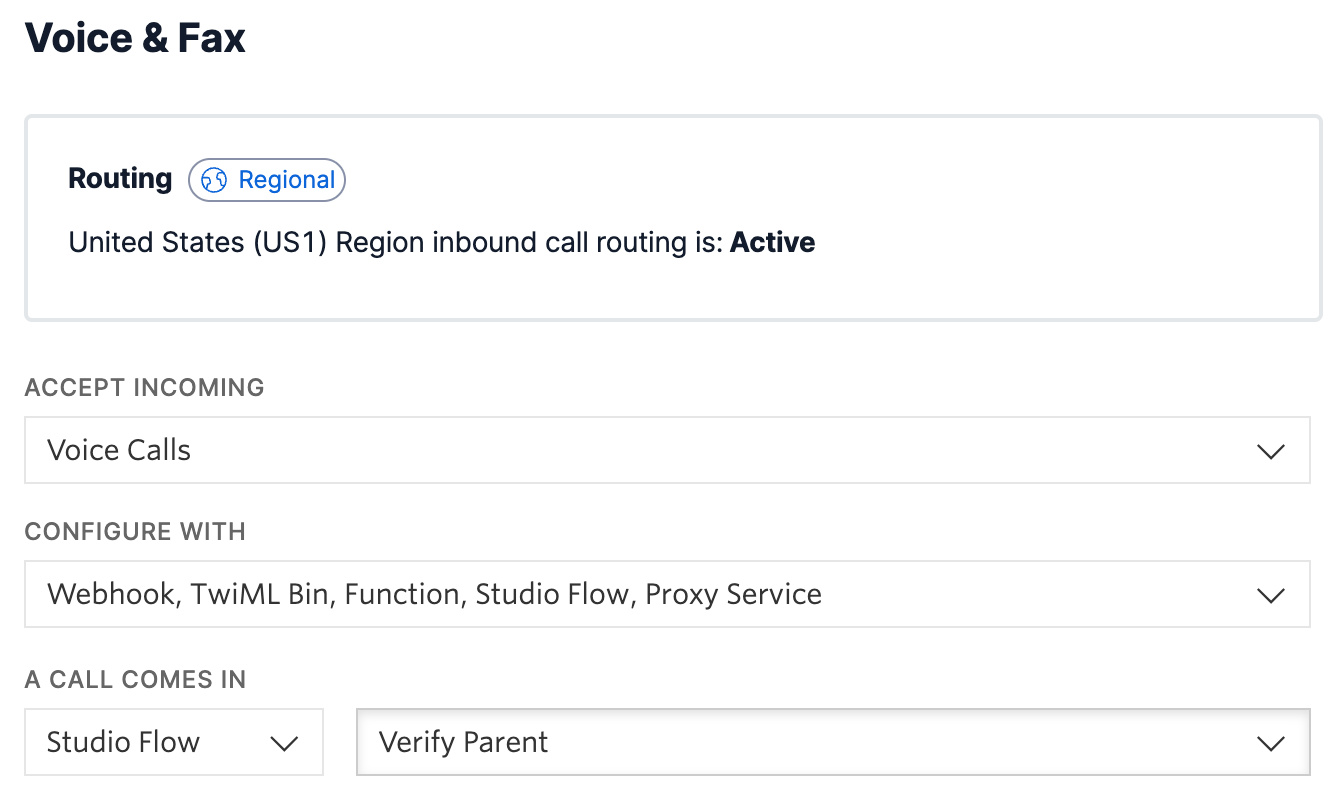
Publish your flow. Finally, head over to your phone number and change "when a call comes in" to a Studio Flow and select your parent flow.
Test it out by calling your phone number. Once you input the correct OTP, you should hear a success message!
Best practices for user authentication in contact centers
Contact center security is a pervasive issue but a super interesting problem to solve. Learn more about our recommendations for securing inbound calls to your contact center on the blog.
You might also enjoy some of our other content around account security, like:
- Best practices for phone number validation during new user enrollment
- 5 reasons SMS 2FA isn't going away
- Is email based 2FA a good idea?
I can't wait to see what you build and secure.


Related Resources
Twilio Docs
From APIs to SDKs to sample apps
API reference documentation, SDKs, helper libraries, quickstarts, and tutorials for your language and platform.
Resource Center
The latest ebooks, industry reports, and webinars
Learn from customer engagement experts to improve your own communication.
Ahoy
Twilio's developer community hub
Best practices, code samples, and inspiration to build communications and digital engagement experiences.