Add Realtime Push Capabilities in Symfony With Mercure
Time to read:
September 07, 2023
Written by
Reviewed by
A testament to the complexity of modern web applications is the sheer volume of data generated per second. This has made it inefficient for the client to simply poll the server, in hopes of receiving an update. Now, the server should be able to send updates to the client at will, just as the client can to the server.
In this series, I will show you how you can use the Mercure protocol in your Symfony applications to broadcast updates to the frontend. The Symfony documentation describes Mercure as:
> An open protocol designed from the ground up to publish updates from server to clients. It is a modern and efficient alternative to timer-based polling and to WebSocket.
The first part of this series will show you how to set up a Mercure Hub for a Symfony application. A hub is a dedicated server that handles persistent SSE (Server-Sent Events) connections with the clients. The Symfony app publishes the updates to the hub which in turn broadcasts them to clients.
You can set up a hub in two ways, either through Docker integration or by using the standalone binary. While I will show you how to do both approaches, you’re free to choose one path for the duration of the series, as it is a matter of personal preference and application stack. In addition to setting up a hub, I will show you how to dispatch and subscribe to hub updates.
Prerequisites
To follow this tutorial, you will need the following things:
- A basic understanding of and familiarity with PHP and Symfony
- PHP 8.2 or above
- Composer globally installed
- The Symfony CLI
- Docker desktop (if you want to use the Docker integration for your Mercure Hub)
Getting started
Create a new project and change into the new project directory, using the following commands.
Next, add the project dependencies using the following commands.
Here’s what each package does:
- Maker: This will help us with creating controllers, entities and the like.
- Mercure: This bundle is provided by Symfony to simplify the process of pushing updates. It also provides a Twig service for subscribing to and receiving updates.
- Profiler: This bundle provides helpful debug information on different aspects of your application, including Mercure.
- Twig: Twig will be used to render our HTML templates
While the Mercure bundle is installing, you will see the following prompt
If you want to use the Docker integration for the Mercure Hub, respond with y. If not, enter n.
Next, update the environment variables for Mercure. Start by creating a .env.local file from the .env file, which Symfony generated during creation of the project, by running the command below.
Then, update the values in .env.local as shown below.
For this tutorial, the Mercure Hub will be served on port 3000.
Configuring Docker integration for Mercure Hub
If you opted to allow the Mercure recipe to set up the requisite Docker files, you will have a file named docker-compose.yml located at the root of your project folder. Update the code in the file to match the following.
This is similar to the default configuration, save for two changes:
- Port 3000 on your development machine is bound to port 80 on the container, the default port for the Mercure server.
- The modification of the
MERCURE_EXTRA_DIRECTIVESconfiguration to allow anonymous connections as well as requests from any origin.
Start your Mercure server using the following command.
Your Mercure Hub will be running on port 3000.
Configuring the Mercure Hub as a static binary
To configure the Mercure Hub as a static binary, download the archive corresponding to your operating system and architecture and extract it.
Once downloaded, look for an executable file named mercure and move it to the bin folder in your project.
The binary you downloaded is a custom build of the Caddy web server which includes the Mercure.rocks module. The easiest way to configure it is via a Caddyfile. At the root of your project folder, create a new file named Caddyfile.dev and add the following code to it.
The first thing you specified in the Caddyfile configuration is the port. By specifying :3000, the server will be available at port 3000. The log directive enables Caddy’s logging facilities.
Next, you have your route configuration. The redir directive reroutes all requests to the index route to /.well-known/mercure/ui/. Following that, you have your Mercure configuration which specifies the publisher_jwt, subscriber_jwt and so on. Additionally, anonymous requests (as well as requests from all origins) are permitted.
Finally, for any request to a route that does not satisfy the previously specified conditions, a 404 NOT FOUND response is returned.
Start your Mercure server using the following command.
Create a controller
To test the newly set up hub, create a new controller named IndexController. This controller will have two endpoints. One will render the index page, while the other will publish an update to the Mercure Hub.
In a new terminal window/session, create the new controller with the following command.
Open the newly created file (src/Controller/IndexController.php) and update it to match the following.
The index() function is responsible for rendering the index page of the application. The publish() function is responsible for publishing updates to the Mercure Hub. The Mercure component provides a publisher service which is injected into the function definition via autowiring.
Next, an Update() object is created and passed to the publisher service. This object takes two parameters — the topic (the unit to which one can subscribe to changes), and the data for the update. Finally a JSON response is returned.
Subscribe to updates from the Twig template
To get things started, an additional script will be added to the Twig template responsible for rendering the index page. This script will add an event source to the topic you specified in the publish() function. When it receives an update, it will log them to the browser's console.
Open templates/index/index.html.twig and add the following at the bottom of the file.
Running the application
At this point, you will be able to test your setup to ensure that it is working. If you stopped your Mercure Hub, you can start it again using the appropriate command below.
Next, start your Symfony application. If you use the Symfony Local Web Server (which this article recommends), you must start it with the --no-tls option, using the command below.
By default, this application will be served on port 8000.
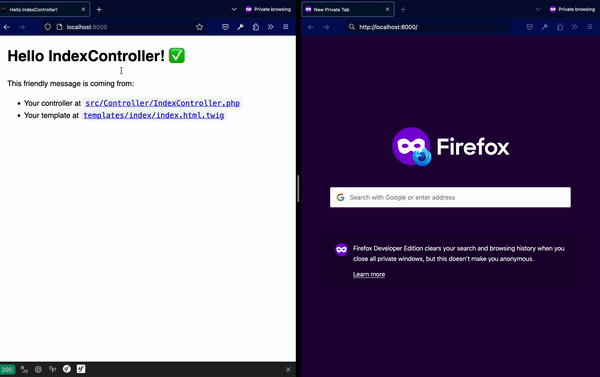
Next, open two new tabs in your browser. In the first tab, open the index page and pull up the Web Console. In the second tab, navigate to the publish endpoint and reload the page a few times. Then, switch back to the first tab and notice the updates written to the Web Console.
That's how to add realtime push capabilities in Symfony with Mercure
There you have it. While it may not look like much in terms of the final product, you have taken a massive step towards implementing real time synchronisation between the backend and frontend of your application. In case you get stuck at any point, feel free to access the codebase here. Until next time ✌🏾
Joseph Udonsak is a software engineer with a passion for solving challenges – be it building applications, or conquering new frontiers on Candy Crush. When he’s not staring at his screens, he enjoys a cold beer and laughs with his family and friends. Find him at LinkedIn, Medium, and Dev.to.

Related Resources
Twilio Docs
From APIs to SDKs to sample apps
API reference documentation, SDKs, helper libraries, quickstarts, and tutorials for your language and platform.
Resource Center
The latest ebooks, industry reports, and webinars
Learn from customer engagement experts to improve your own communication.
Ahoy
Twilio's developer community hub
Best practices, code samples, and inspiration to build communications and digital engagement experiences.