Add a Volume Slider to Your Livestream App
Time to read:
November 30, 2021
Written by
Reviewed by

If you've had a chance to try out my previous video livestreaming tutorial, you might already know how to build your own Twilio Live video streaming application with experiences for both the streamer and the audience.
In the starter project, however, the audience members do not yet have a way to control the volume of the livestream they are listening to from the UI of your application. This quick tutorial will build on the previous one, showing you how to add a volume slider to the audience side of your application.
Let's get started!
Prerequisites
- A free Twilio account. (If you register here, you'll receive $10 in Twilio credit when you upgrade to a paid account!)
- Node.js v14+ and npm installed on your machine.
- ngrok
- The code from the previous tutorial. Clone the repository here and follow the steps in README.md to get set up.
Add an input range slider to the audience UI
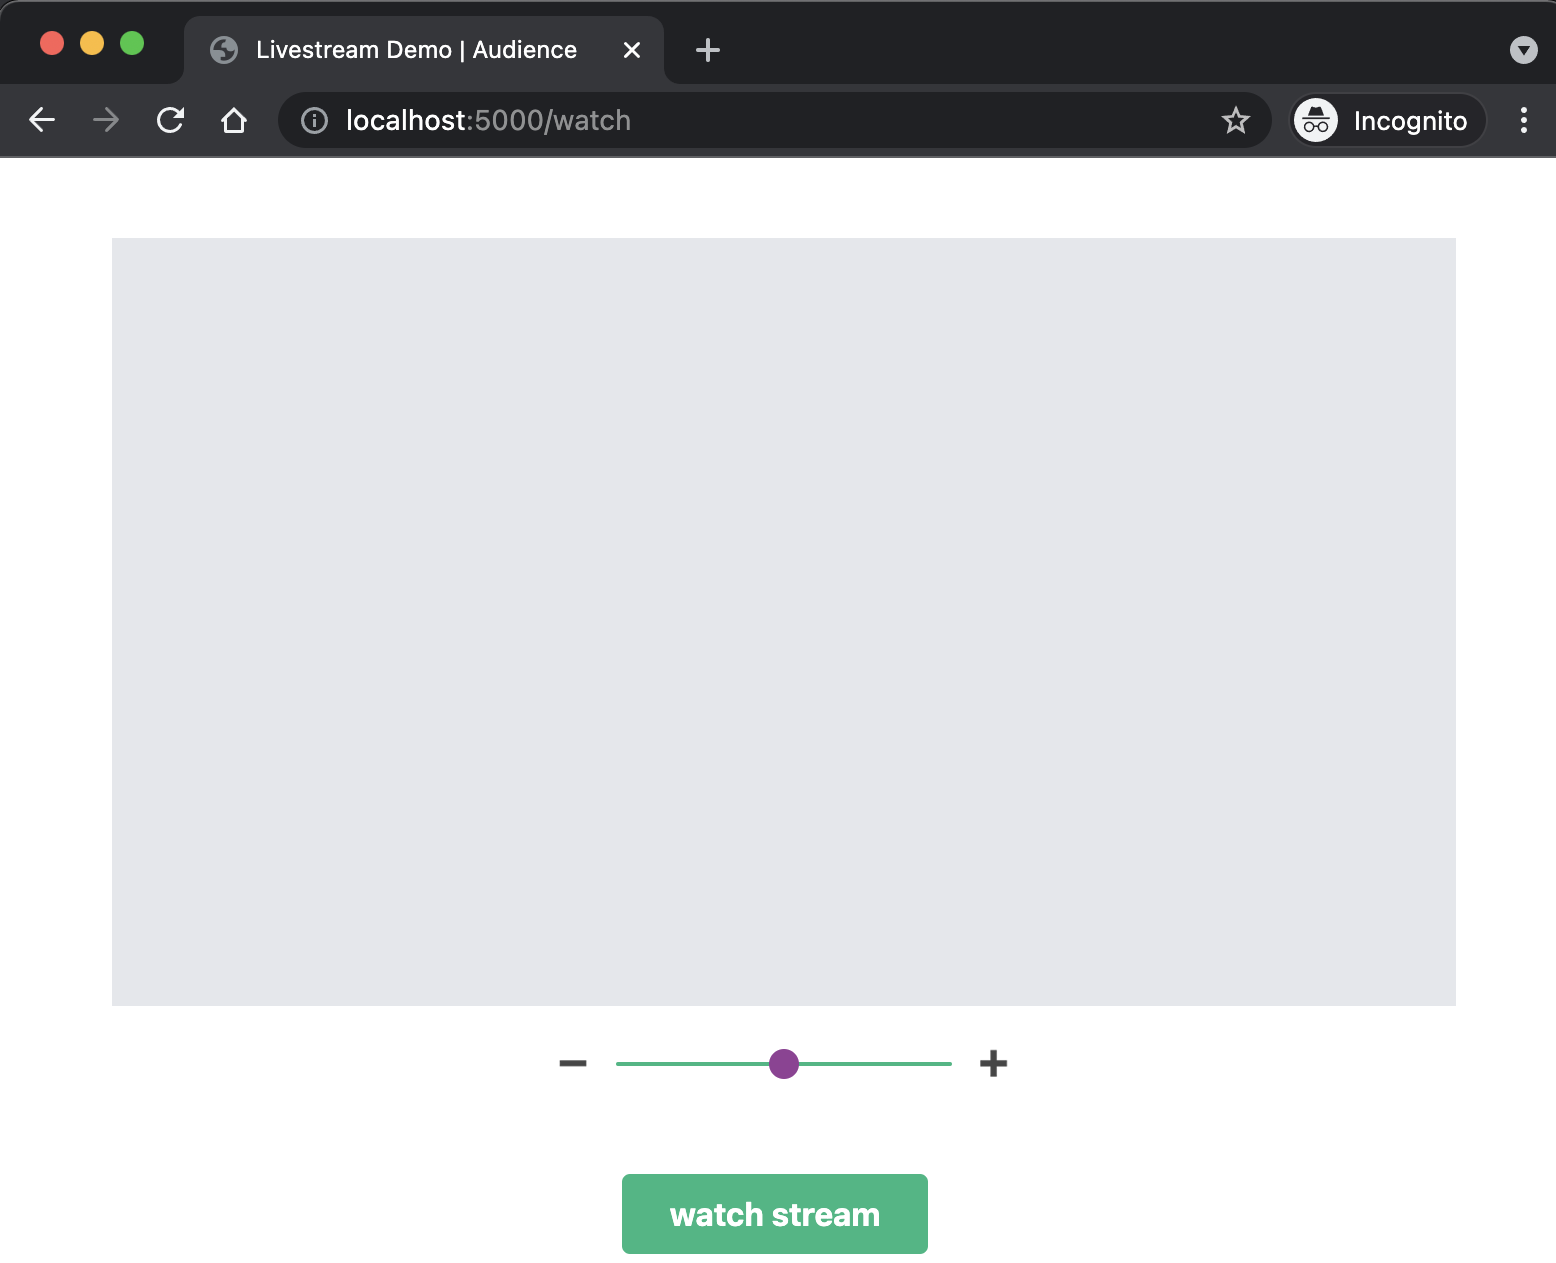
Open public/audience.html in your code editor. This file contains the HTML for the audience experience, and currently has a container div with the player div and a button to watch the stream.
Just below the div with the id of player, add the following HTML code that creates a new div called volumeControl:
This new div contains an input range slider that will allow the audience member to decrease the volume by sliding closer to the minus image and increase the volume by sliding closer to the plus image.
If you open http://localhost:5000/watch in your browser, you will see the volume slider and can also try moving it back and forth.
Now that you have the slider element, it's time to add the logic that will allow you to use this element to control the player's volume.
Add logic to control volume by moving the slider
Open public/audience.js in your editor. This is the file that contains the logic to control the audience side of your application, as well as where the Twilio Live Player SDK is used to actually play the livestream.
In the previous step, you added an input slider with the id of currentVolume. At the top of public/audience.js, add a new variable for this element:
If you look at the documentation for the Player SDK, you can see that the live player has a setVolume() method that you can easily use to set the stream's volume.
In public/audience.js, just above the event listeners at the end of the file, add a new function called changeVolume(), which will set the volume of the livestream based on the value of the currentVolumeInput slider:
Finally, add an event listener at the end of the file that will call changeVolume() when the audience member changes the input's value:
Now you have everything you need to control the volume of the livestream.
Test your application
It's time to test the code you just wrote. If you followed the setup instructions in README.md, you already have ngrok running. (If not, now is the time to run it!)
Open the https ngrok forwarding URL in your browser window. Click the link to start a livestream. Enter your name and your livestream's name in the input boxes, then click the start stream button.
Once you've started the stream, the LIVE marker will appear — you are now live!
Now you can test the audience experience. Open a second browser tab and navigate to the ngrok forwarding URL. This time, click watch a livestream.
You will see the UI layout that now includes the volume slider. Click the watch stream button to connect to the stream and begin watching. The live video feed will replace the gray box in the UI.
Once you can hear the audio from the livestream, try moving the volume slider to increase or decrease the volume. You will see that the volume of the stream changes to match! If you want, you can send the /watch URL to a friend so they can test this new feature as well.
When you are finished with testing, make sure you click the end stream button on the streamer's side of the UI to clean up the livestream resources and avoid unnecessary charges to your Twilio account.
What's next for livestreaming video?
If you would like to add even more features to this video livestreaming app, why not learn how to add a realtime viewer count to your application? If you're looking to try another kind of Live project, there are also tutorials that will help you learn to live stream your screen or even build an audio-only livestreaming app.
I can't wait to see what you build with Twilio Live!
Mia Adjei is a Software Developer on the Developer Voices team. They love to help developers build out new project ideas and discover aha moments. Mia can be reached at madjei [at] twilio.com.
Related Resources
Twilio Docs
From APIs to SDKs to sample apps
API reference documentation, SDKs, helper libraries, quickstarts, and tutorials for your language and platform.
Resource Center
The latest ebooks, industry reports, and webinars
Learn from customer engagement experts to improve your own communication.
Ahoy
Twilio's developer community hub
Best practices, code samples, and inspiration to build communications and digital engagement experiences.