Building a Serverless WhatsApp Chatbot using Python, Google Cloud Functions and Twilio
Time to read:
March 25, 2021
Written by

A chatbot is a software application used to automate interactions and conversations with people via messaging platforms. Common uses of chatbots include request routing, customer service, and information gathering.
Serverless architecture is a design pattern where applications are broken up into individual functions that can be invoked and scaled separately. The goal is to abstract the process of building and running applications from the complexities of developing and deploying infrastructure required to run them.
In this tutorial, I am going to show how you can build a serverless WhatsApp chatbot using Twilio’s WhatsApp API and Python functions in Google Cloud. The chatbot will accept a country name and return information about it. The country data will be retrieved from the REST Countries public API.
Tutorial requirements
To follow this tutorial you need to have:
- Python 3.7 or newer. If your operating system does not have a pre-installed Python interpreter, you can download an installation file from python.org.
- A Google Cloud account. You can visit cloud.google.com to create it.
- An active WhatsApp account.
- A Twilio account. If you are new to Twilio create a free account now. You can review the features and limitations of a free Twilio account.
Set up the Twilio WhatsApp sandbox
Twilio provides a WhatsApp sandbox, where you can easily develop and test your application. Once your application is complete you can request production access for your Twilio phone number, which requires approval by WhatsApp.
Let’s start by testing out our WhatsApp sandbox. On your Twilio console, select Programmable Messaging from the menu on the left sidebar. Click on “Try it Out” and then “Try WhatsApp”. On the WhatsApp Sandbox page you will see the sandbox number and a code for joining.
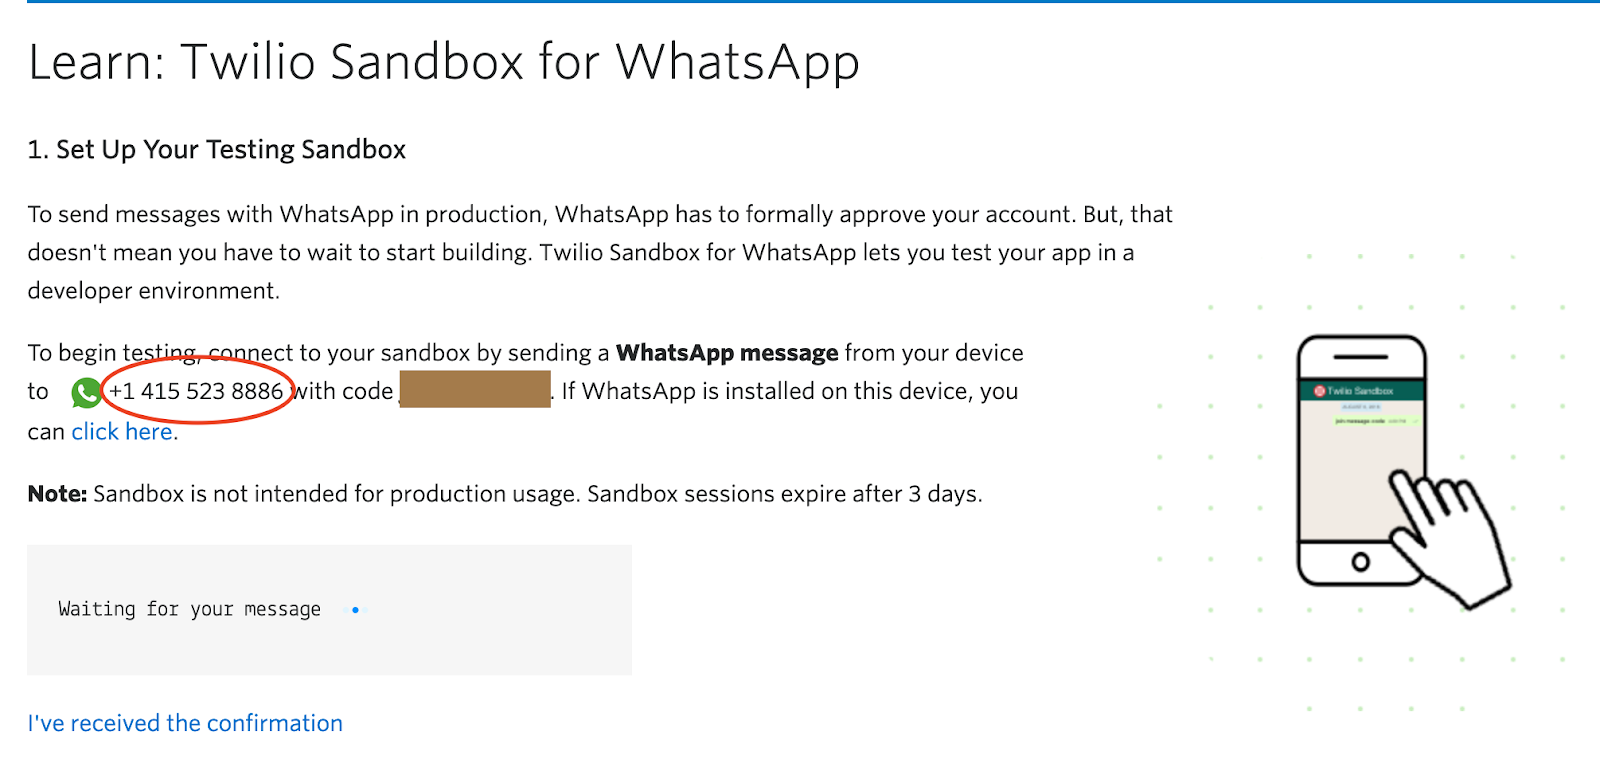
To join the sandbox, send a WhatsApp message to the sandbox number with the text “join <your sandbox code>”. You will receive a confirmation response from the sandbox once the code is accepted.
Create a Python virtualenv and install the requirements
In your local machine, create a folder where code for our chatbot will live and then set up a virtualenv inside this folder. The following commands will work for Unix and Mac OS platforms. Open a terminal and type:
On Windows platforms, use the following commands:
You can then proceed to install required packages using the following command:
This command installs 2 packages:
We should write the packages we have installed to a requirements.txt file, so that later the Google Cloud Platform can use them when installing the cloud function. Here is the command to do this:
As of the time of writing this article, these are the package versions in the requirements.txt:
Create a Google Cloud function
Google Cloud Functions can be called using HTTP or event triggers. Functions with an HTTP trigger are called when an HTTP request is sent to the function URL. Functions with event triggers are called when an event occurs in your GCP project. Examples of event sources are Pub/Sub, Firestore and Firebase.
To implement a WhatsApp chatbot, Twilio will need to invoke an HTTP webhook when a user sends us a message on WhatsApp. Based on this, we know that we need an HTTP invoked cloud function.
Creating the webhook
In our root folder, twilio-chatbot, create a file called main.py. This is where the code for the bot will live. Quick check-in: You should have 2 files in the folder so far - requirements.txt and main.py, plus the virtual environment directory.
Let’s create a function that will act as the entrypoint for the bot webhook in file main.py:
In the body of the function, we should start by retrieving the message sent by the user via WhatsApp. Here is how to do that:
If the API responds with a non HTTP 2xx status code, then it means that our request was not successful. We need to catch this error condition and inform the user. Here is the logic that achieves this:
The data returned by the API is a list of length 1. Inside the list we have a dictionary of the country data with keys such as name, region, capital, etc. In this example bot, we are going to extract the native name, capital, demonym, and region values. Feel free to change or add on to these values when building your bot. Here is the data structure model of the REST Countries API.
Now that we are aware that the data returned is an array, we can go ahead and update the if statement at the bottom of the function with the following changes to extract the four values mentioned above.
Using the 4 variables we extracted, we can construct a human readable response using Python’s f-strings:
Now that we can communicate with our external API and extract the data we need from its response, we need to think about how this data shall be passed to Twilio to deliver to the user. When Twilio invokes a webhook, it expects a response from the application in TwiML or Twilio Markup Language, which is an XML-based language. The Twilio helper library that we installed offers an easy way to create and structure this response in our code. Below you can see an example of how to structure the message body and include related media.
Let’s update our code so that our responses follow the expected language. Note that we are now passing the answer to both successful and unsuccessful requests to msg.body to generate the correct TwiML response, and we log e Below you can see the updated body of the whatsapp_webhook() function:
At this point we can bring it all together and complete our function. Below is how the complete main.py file should look, including all the necessary imports. Make sure your version looks the same.
Deployment
There are four common ways to deploy the cloud function we just built to the Google Cloud Platform:
- On the GCP dashboard
- Locally on our terminal
- From source control
- From the cloud functions API
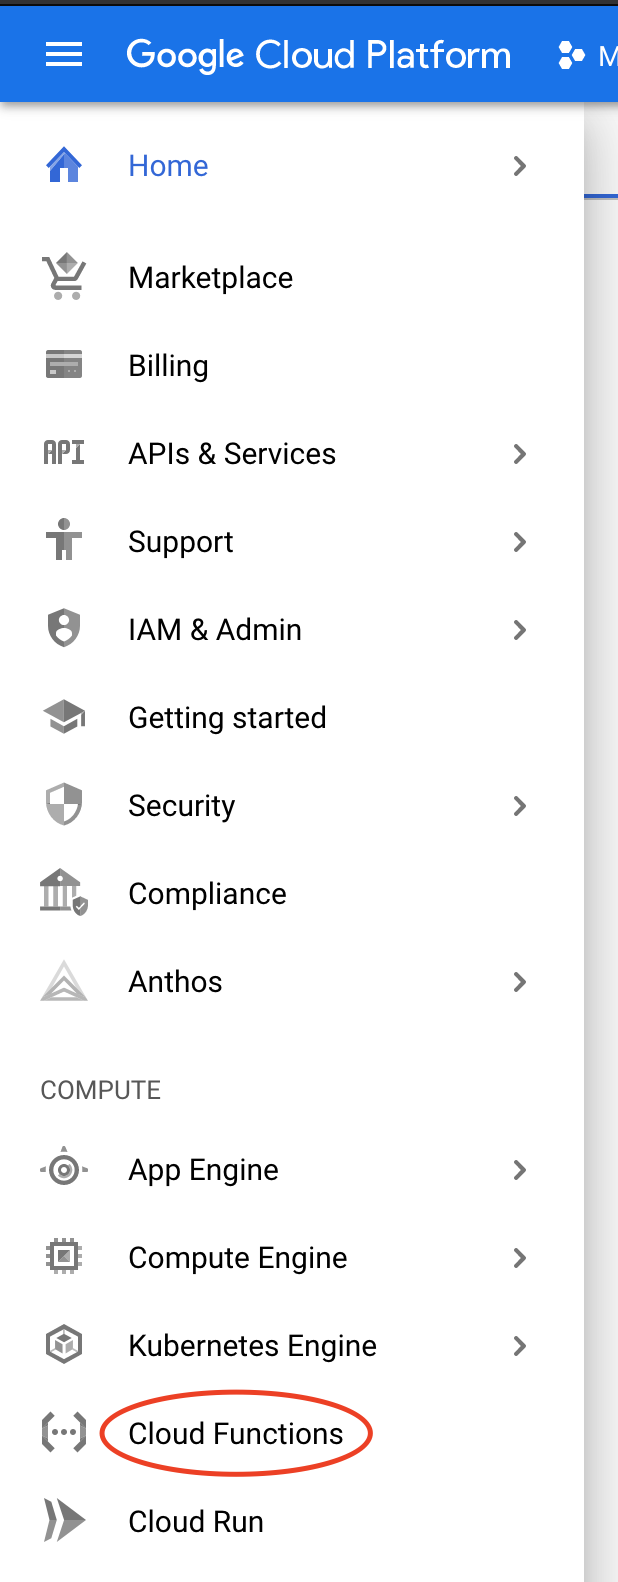
This tutorial will use the first option. Log in to your GCP account and navigate to your dashboard and on your sidebar menu click on “Cloud Functions”.
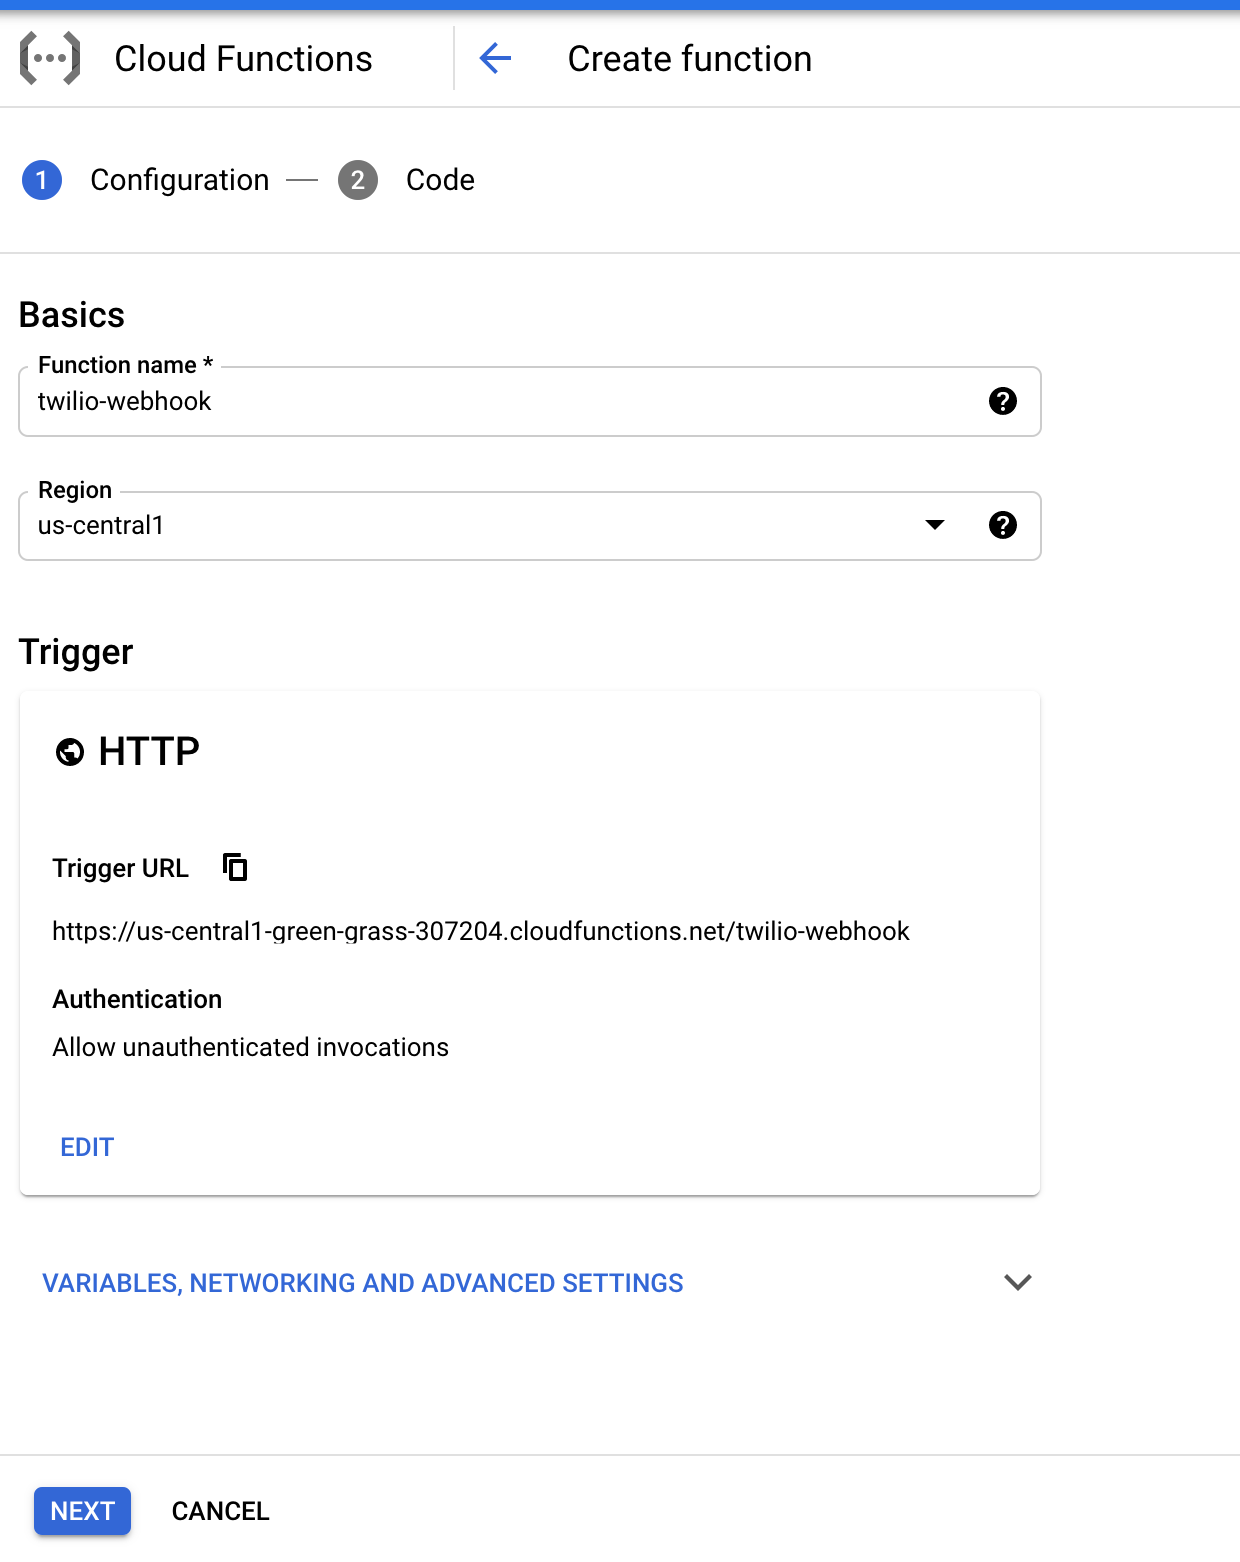
Click on “Create Function” and set your function name to twilio-webhook. Also check “Allow unauthenticated invocations” to make the webhook publicly available. Click on “Save” and you should see the following:
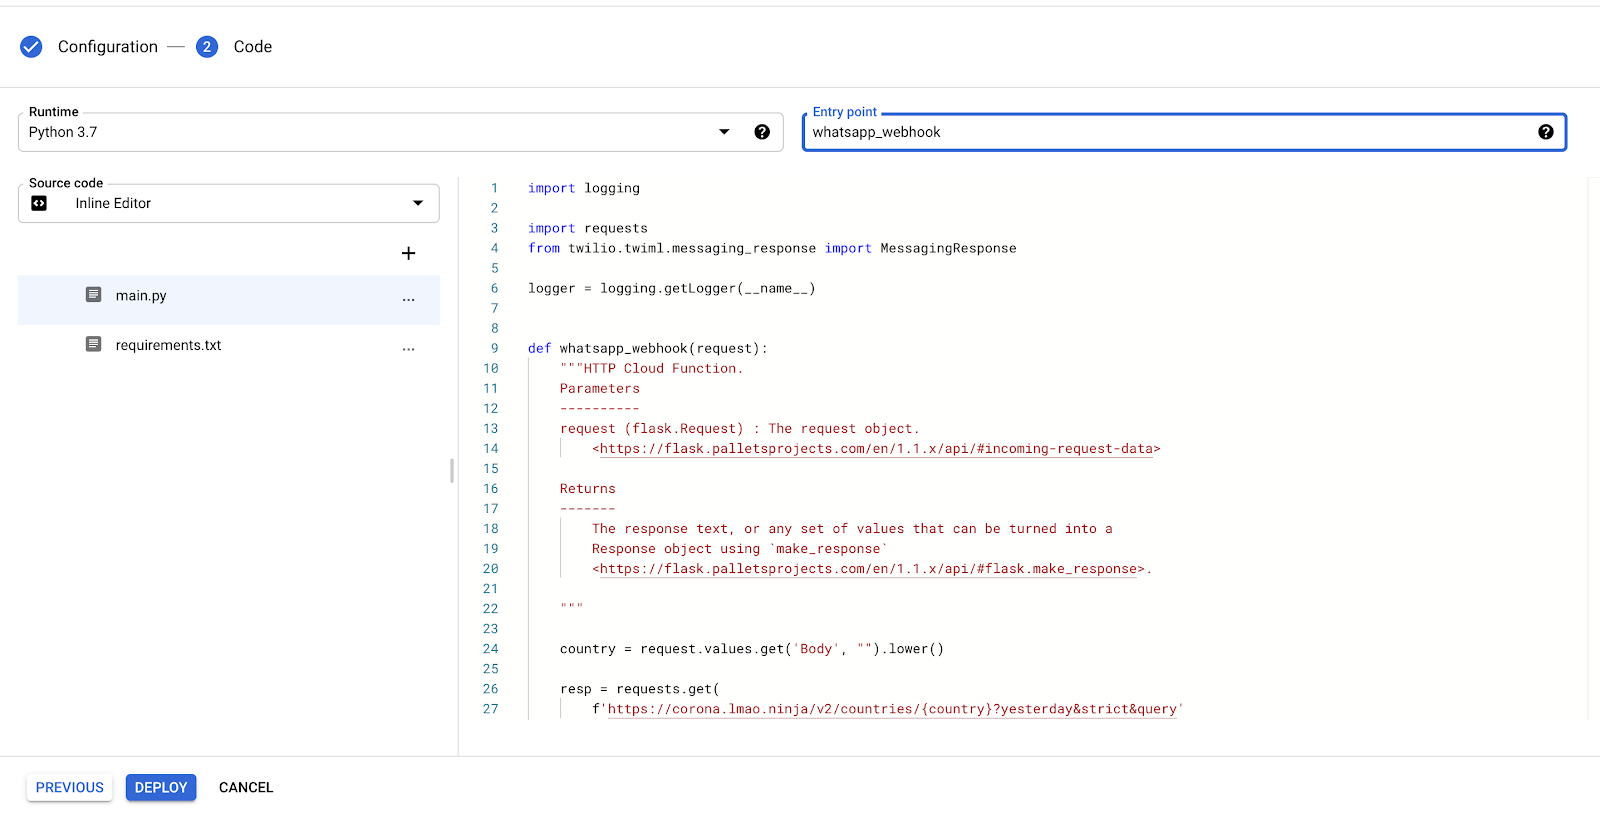
Click on “NEXT”, which should send you to the page where we input the cloud function code. Set the “Runtime” to ‘Python 3.7’ and the “Entry point” to ‘whatsapp_webhook’. Replace contents of the *main.py* file on the left with those from the main.py we created in the previous section. Do the same for the requirements.txt file. Once you are done, click on “DEPLOY”.
When successfully deployed, you will see a green tick next to your function name as shown below.

Configure the Twilio webhook
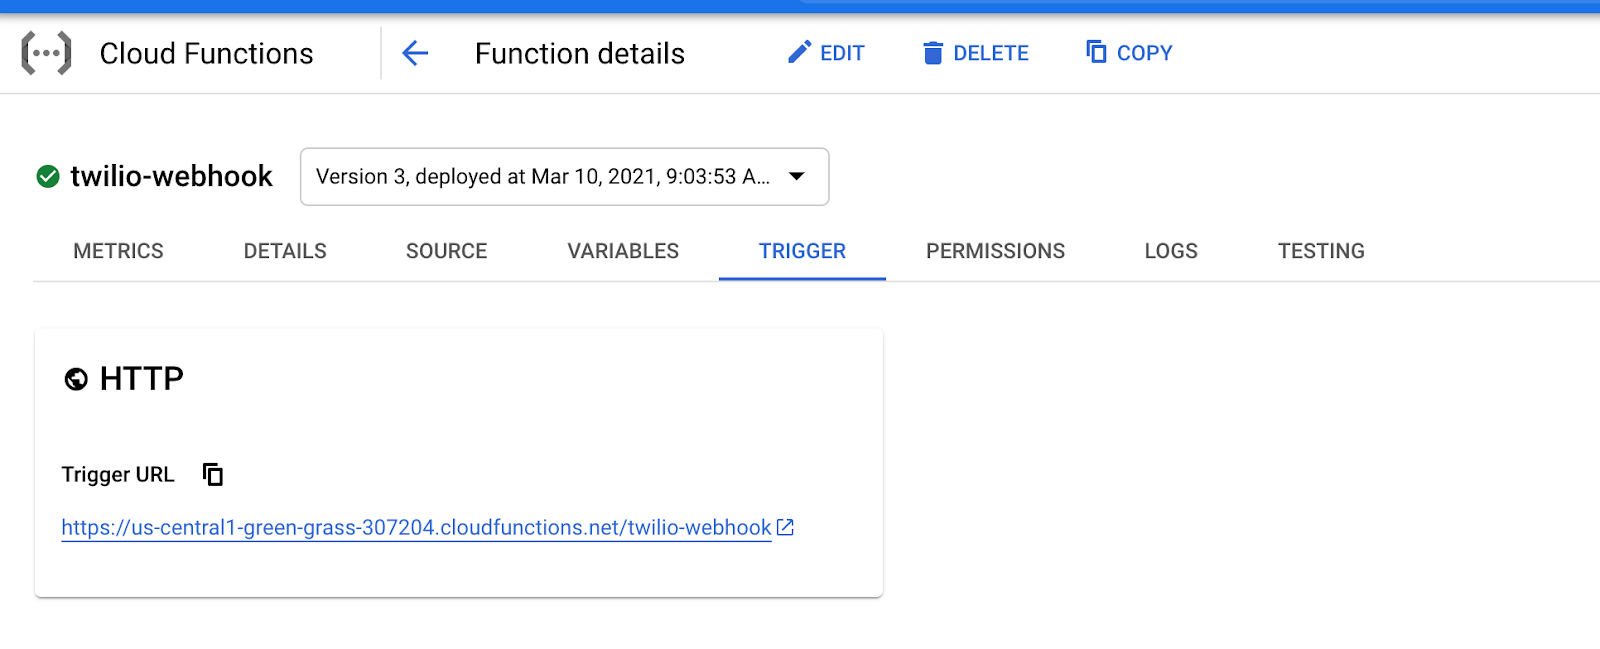
Click on the cloud function in the dashboard above and then click on the “TRIGGER” tab to display the Trigger URL.
Go back to the Twilio Console, click on Programmable Messaging, then on Settings, and finally on WhatsApp Sandbox Settings. Copy the “Trigger URL” from the cloud function and paste it in the “WhatsApp Sandbox Settings” in the “When a message comes in” field. Make sure the request method is set to “HTTP POST” and then click on “Save”.
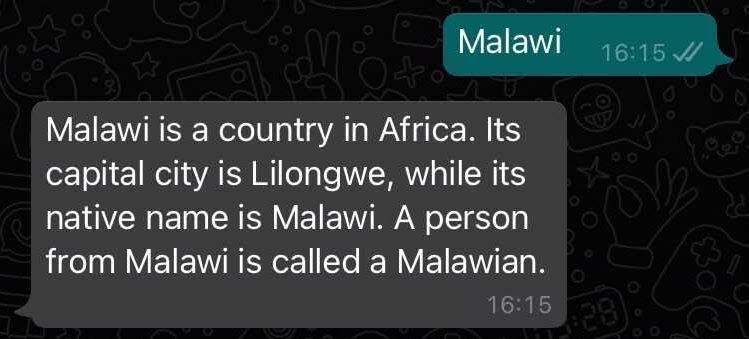
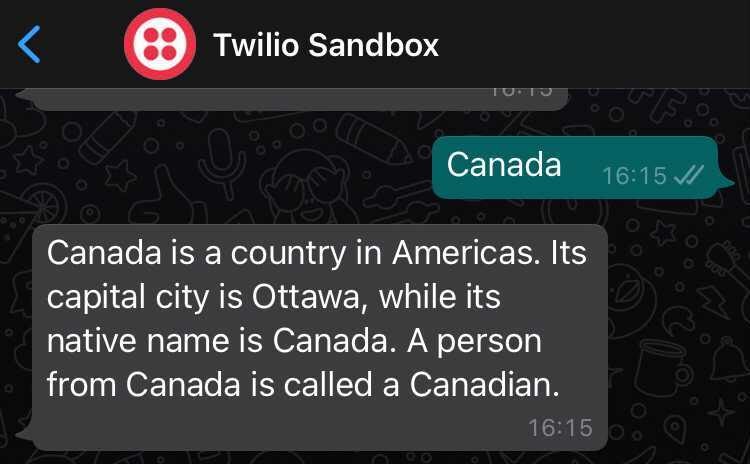
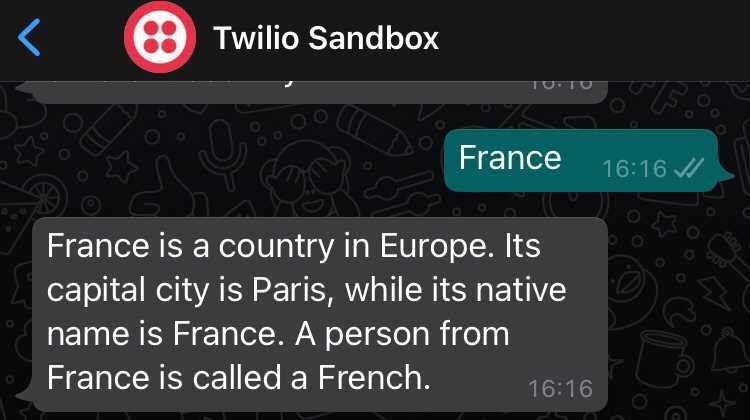
Using the WhatsApp number you connected to the Sandbox, you can now chat with the bot. Send the name of a country to it to get a response from the Python webhook running on GCP. See examples below:
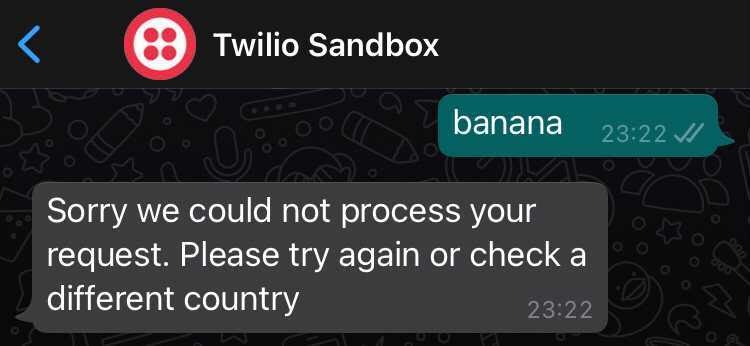
You can ensure that the bot handles errors well by sending a word that is not a country:
Alternative architectures
Serverless architectures offer you an opportunity to spin up a webhook without worrying about infrastructure and deployment. From our example above, we had an endpoint in less than 30 lines of code and we did not require a web framework to run it. Besides GCP cloud functions, AWS offers a similar product called AWS Lambda and Microsoft has Azure Functions.
For various reasons such as hosting costs, you may also consider a traditional endpoint built using a Python web framework for your webhook. If you decide to research this option, here is a tutorial on how you can build a WhatsApp chatbot using Python, Flask, and Twilio.
Mwangi Kabiru is a Data Engineer at Wellio and a Software Engineer at Andela. Reach out to him if you have any related questions or need clarification on topics covered in this tutorial.


Related Resources
Twilio Docs
From APIs to SDKs to sample apps
API reference documentation, SDKs, helper libraries, quickstarts, and tutorials for your language and platform.
Resource Center
The latest ebooks, industry reports, and webinars
Learn from customer engagement experts to improve your own communication.
Ahoy
Twilio's developer community hub
Best practices, code samples, and inspiration to build communications and digital engagement experiences.