Going Serverless with Twilio and .NET
Time to read:
December 15, 2017
Written by
This post is part of Twilio’s archive and may contain outdated information. We’re always building something new, so be sure to check out our latest posts for the most up-to-date insights.

Ahh the holidays are here. Christmas time makes me think of classic songs like Happy Holidays, Silver Bells, or It’s the Most Wonderful Time of the Year. Wouldn’t it be cool if we could crowdsource the music selection at holiday gatherings? This sounds like the perfect candidate for a serverless application powered by Twilio & Spotify. In this post, we will walk through creating an Azure Function to respond to text message requests.
Creating our Azure Functions project in Visual Studio
This project’s ingredients include:
- Visual Studio 2017 Community (at least version 15.5)
- During setup, install the “Azure development” workload
- If you’re using Windows, grab Azure Functions and Web Job Tools. This blog was written with version 15.0.31201.0, meaning there may be updates after this blog is published
- If you’re using a Mac, try grabbing Azure Functions and Web Job Tools from the Extension Manager
- A Twilio account and Phone Number
- Ngrok
After everything is installed, create a new Azure Functions project by starting up Visual Studio 2017 and going to File → New → Project. Click on the Cloud category and select the Azure Functions project.
I’ve named my project JukeboxFunctions. You can certainly use that or a different name for your project if you’d like.
When you click on the OK button, a prompt will pop up asking you to select a trigger and your desired Azure runtime version. Here’s where things get interesting. The premise of our Azure function is that it’s serverless. The code is deployed to Azure and will run when something triggers it to run. Azure functions support a number of triggers, which you can see here:
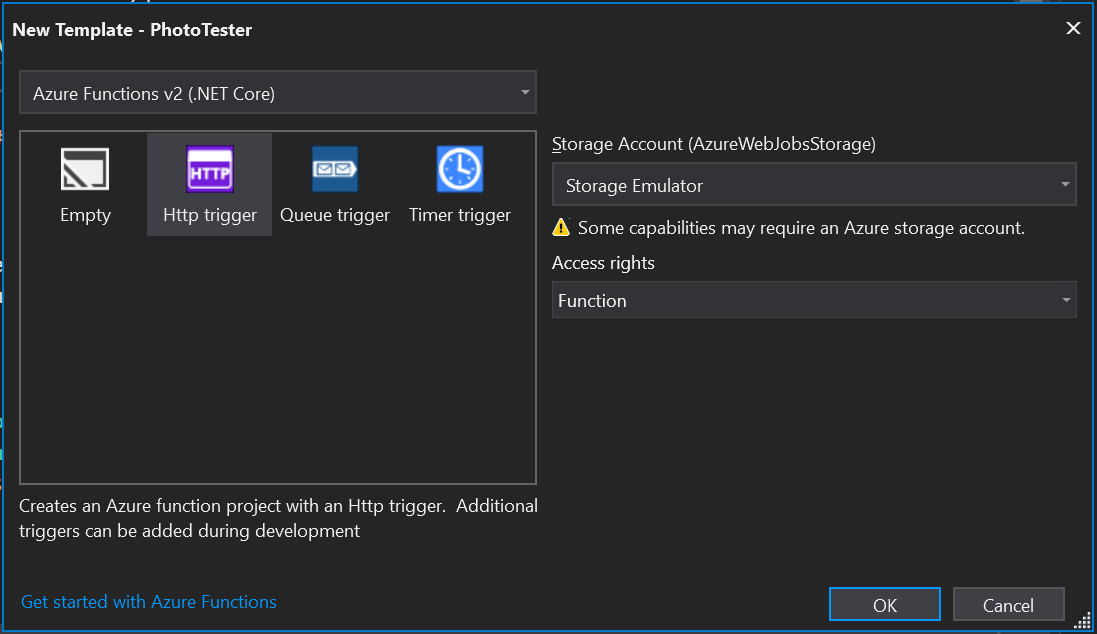
The runtime version we want is Azure Functions v2 (.NET Core) and the trigger we need is Http trigger since Twilio is going to make an HTTP request to our function when it receives a text message. Confirm that those two options are selected in the prompt and click the OK button. With our function created, time to reply to our text message request!
Add the Twilio Nuget Package in Visual Studio
Let’s add the Twilio library to our project. In the menu bar, click on Tools → Nuget Package Manager → Package Manager Console. When the Package Manager Console opens, type in Install-Package Twilio and hit enter.
Now to use the Twilio library, copy the code below to the very top of our code file, Function1.cs.
Creating a Twilio Response in .NET
With our Azure Function created, time to respond to incoming text messages. When someone texts our Twilio number, Twilio is going to send an HTTP request to our Azure function. We can reply back to Twilio with the code snippet below:
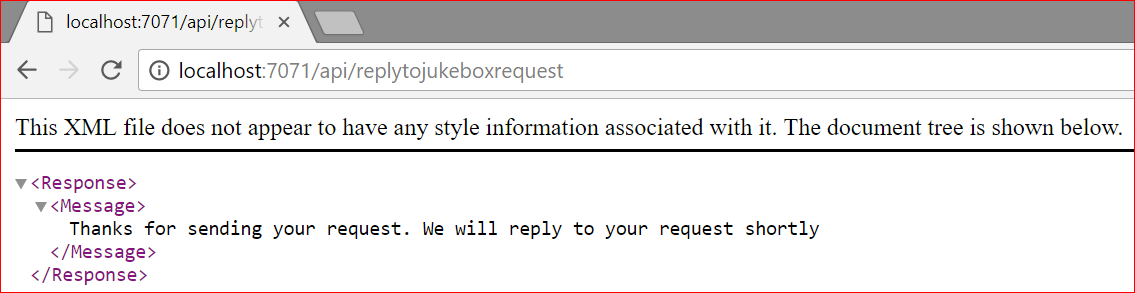
This code creates TwiML which is a set of XML instructions Twilio understands. In this case, we’re telling Twilio that we want to reply to the incoming message with a text message of our own. The message body is set to “Thanks for sending your request. We will reply to your request shortly”. Try changing the message to something you’d like to see.
Next, we’ll change the Azure function to have it return the generated TwiML. We’ll also tell the Azure function that we want to mark that content as XML since that is what Twilio expects to get back.
Time to replace the code in our Run method with our code snippets. Update the Run method so that it looks like the below, with our code highlighted:
Notice there is something else highlighted. The line FunctionName(“ReplyToJukeboxRequest”) is also highlighted. This update renames our Azure function to ReplyToJukeboxRequest, something more user-friendly.
We’ve written all of this code – GREAT! Now how do we test this thing? Hitting F5 on your keyboard builds the project, runs a local version of the Azure environment, and runs the function on a local web server. The console that opens will tell you the specific URL of your function.
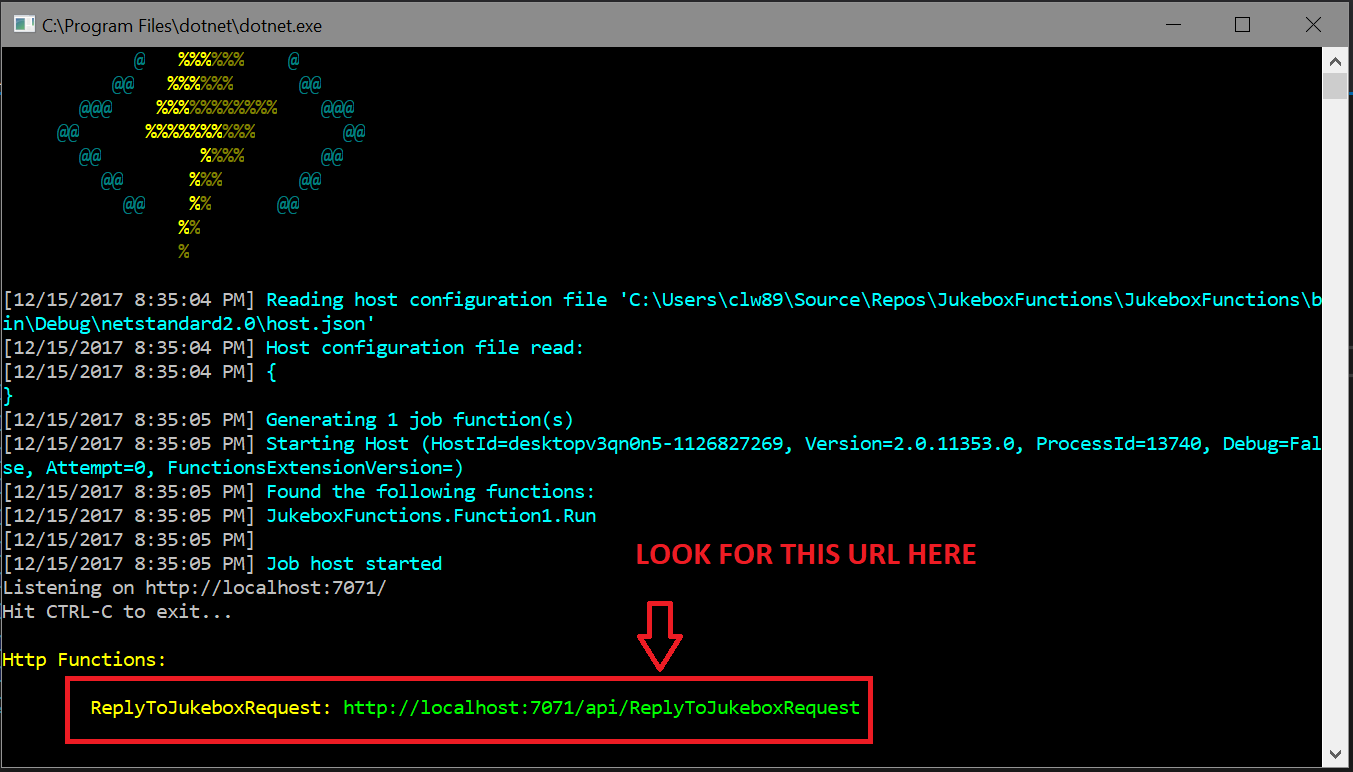
See how simple Visual Studio makes that!
Now in your browser, head to that URL. You should see some XML that looks like my browser in the photo below
Connect Your Azure Functions Project to Twilio
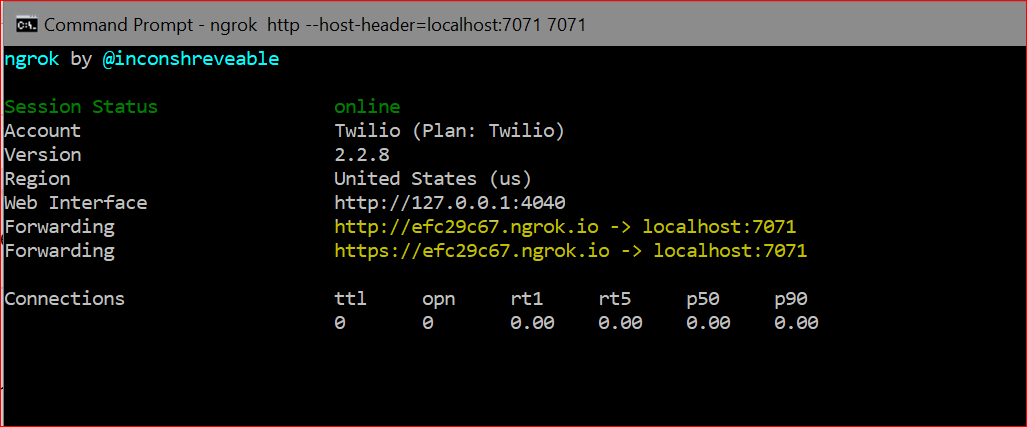
So how do we connect this to Twilio? Well, keep your project running. We are going to use ngrok to expose our local web server to the internet. Once you’ve got ngrok installed, open the command prompt or terminal and type ngrok http --host-header=localhost:7071 7071. You should get a forwarding URL that forwards traffic to your local code.
Then head over to the Twilio console, and update your Twilio phone number to use your ngrok URL when there are incoming messages.
Now try texting your phone number and see if your response matches mine below!
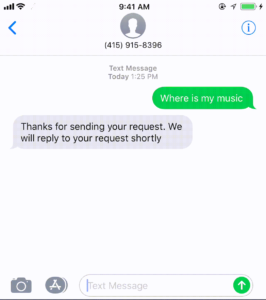
SUCCESS
Ladies and gentlemen, we’ve created an Azure functions project and connected it to Twilio. In another post, we are going to build out our jukebox by connecting this code to Spotify. If you want to see the completed code, check out the repo on Github. Reach out on Github, Twitter or email to share what you build. I can’t wait to hear from you!

Related Resources
Twilio Docs
From APIs to SDKs to sample apps
API reference documentation, SDKs, helper libraries, quickstarts, and tutorials for your language and platform.
Resource Center
The latest ebooks, industry reports, and webinars
Learn from customer engagement experts to improve your own communication.
Ahoy
Twilio's developer community hub
Best practices, code samples, and inspiration to build communications and digital engagement experiences.