Microservice for Sending Email using Twilio SendGrid Email API
Time to read:
October 24, 2023
Written by
Reviewed by
Twilio SendGrid is an extremely powerful platform for sending and receiving emails, but it does require some building. When talking to customers about using the SendGrid Email API, I often talk about a “communications layer” or a “microservice” or some way to enable an organization to effectively use email at scale. In these conversations, I have said many times that “if I were building this, I would do it this way…”
AWS is a leader in cloud computing and serverless technologies and event driven architectures can be especially attractive to email use cases where resources can be spun up and down on demand. In this series of three blog posts, I’ll use that approach heavily!
These posts use SAM (Serverless Application Model) templates, so anyone with some familiarity with AWS should be able to spin them up in a few minutes. If you use GCP or Azure, these templates should give you some ideas on building something similar using corresponding resources in those platforms.
Throughout everything, the blog posts and code make recommendations on best practices so you can get the most out of the SendGrid Email API.
Three part SendGrid Microservices blog posts:
- Serverless Microservice for Sending Emails using SendGrid Email API
- Serverless Microservice for handling SendGrid Event Webhooks
- Serverless Microservice for handling SendGrid Inbound Parse
Each blog has the content on the post, a companion video, and heavily-commented code! All three of these resources are valuable and provide different insights into the solutions. Be sure to check out all three. But for this post, I’ll show you a serverless microservice architecture to send emails using the SendGrid API.
Part 1: Serverless Microservice for Sending Emails using SendGrid Email API
Learning by video can be effective. You can watch the video before proceeding or come back to it later!
Here is the architecture we are going to spin up:
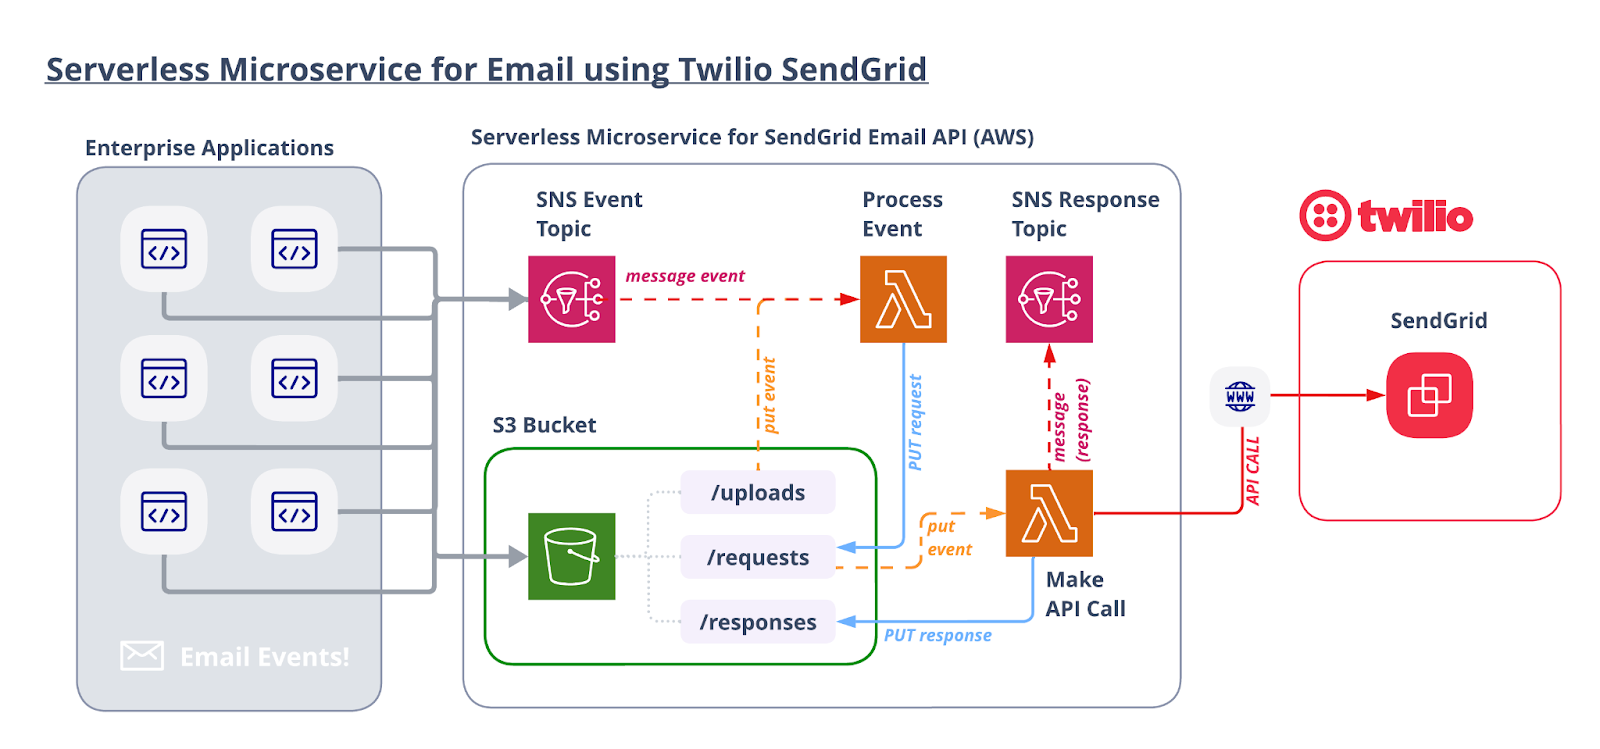
Let’s walk through the flow starting from the top left.
A. Enterprise Applications
You likely have multiple use cases that leverage email and multiple applications that need to trigger “email events” (a fancy way of saying “send an email to someone”).
Email events can be transactional or promotional. If you design things correctly, you can also use the Email API to orchestrate email “blasts” with your promotional content. Sending your emails through a consistent process flow will give your organization better control and visibility.
B. Process the Event
A Lambda function is triggered by an object loaded into the S3 Bucket or published to the SNS Topic. The Lambda generates a unique ID for this request so emails can be traced back to the originating request. Next, the Lambda parses the object and adds any additional configurations. For example, this step can automatically or programmatically add custom arguments, categories, a bcc (for archival purposes), or anything required to standardize your sending flow. Once properly configured, the new object is saved into the /requests folder in the S3 bucket.
A key to a successful SendGrid implementation is making sure that you are tracking all relevant data points. This “process event” step is where you can inject and format data before you make the API call to SendGrid. This will allow you to receive that same data back to track email events (opens, clicks, delivered, spam, etc.).
It is important to note that saving all requests into this S3 bucket before they are sent to SendGrid is an efficient (and cost effective) way to save a record of all of your outbound emails. While these are not copies of the emails, they do contain all of the relevant details. This could address keeping records for compliance or archival purposes. You can easily configure S3 Lifecycle Policies to delete any object (uploads, requests, and responses) saved to this S3 bucket after a defined period of time.
C. Make the API Call
The send-email Lambda function is triggered by the JSON object loaded into the /requests folder of the S3 bucket. This Lambda opens the object, injects a timestamp for additional tracking purposes, and then executes the API call to SendGrid.
4. Handle the Response
The API call will return a response which can also be saved to S3 or sent to an SNS topic for additional processing. Every successful response from SendGrid contains an x-message-id which will help identify any events generated by the email (open, click, unsubscribe, delivered). With the unique ID generated in step 2 to identify the request and this x-message-id to identify the actual email, you now have everything you need to track and analyze your emails!
If you have read this far, then I think you are ready to see how you can spin this up yourself!
Let’s get started…
AWS Resources
All of the AWS components of the serverless application are provided as "Infrastructure as Code" (oft-shortened to IaC) and deployed via CloudFormation into AWS. Here is an overview of the components:
- AWS SAM => an open-source framework that enables you to build serverless applications on AWS
- AWS CLI => the command line interface for AWS. It’s not required, but recommended because it simplifies credentials when deploying
- AWS Lambda => serverless compute service
- S3 => Object Storage
- SQS => Simple Queue Service
- SNS => Simple Notification Service
Prerequisites
This is not a beginner level build! You should have some knowledge of AWS, serverless computing, and programming.
- Twilio SendGrid Account. If you don’t yet have one, you can sign up for a free account here.
- An authenticated domain and a verified sender in your SendGrid account.
- AWS Account with permissions to provision Lambdas, step functions, S3 buckets, IAM Roles & Policies, an SQS queue, and SNS topics. You can sign up for an account here.
- AWS CLI installed with AWS credentials configured.
- AWS SAM CLI installed.
- Node.js installed on your computer.
Let’s Build it!
Here are the basic steps of our build today:
- Download the code
- Get and set your SendGrid Account API Key ID and API Key
- Deploy the stack
- Try it out!
1. Download the Code for this Application
Download the code from this repo, and then open up the folder in your preferred development environment.
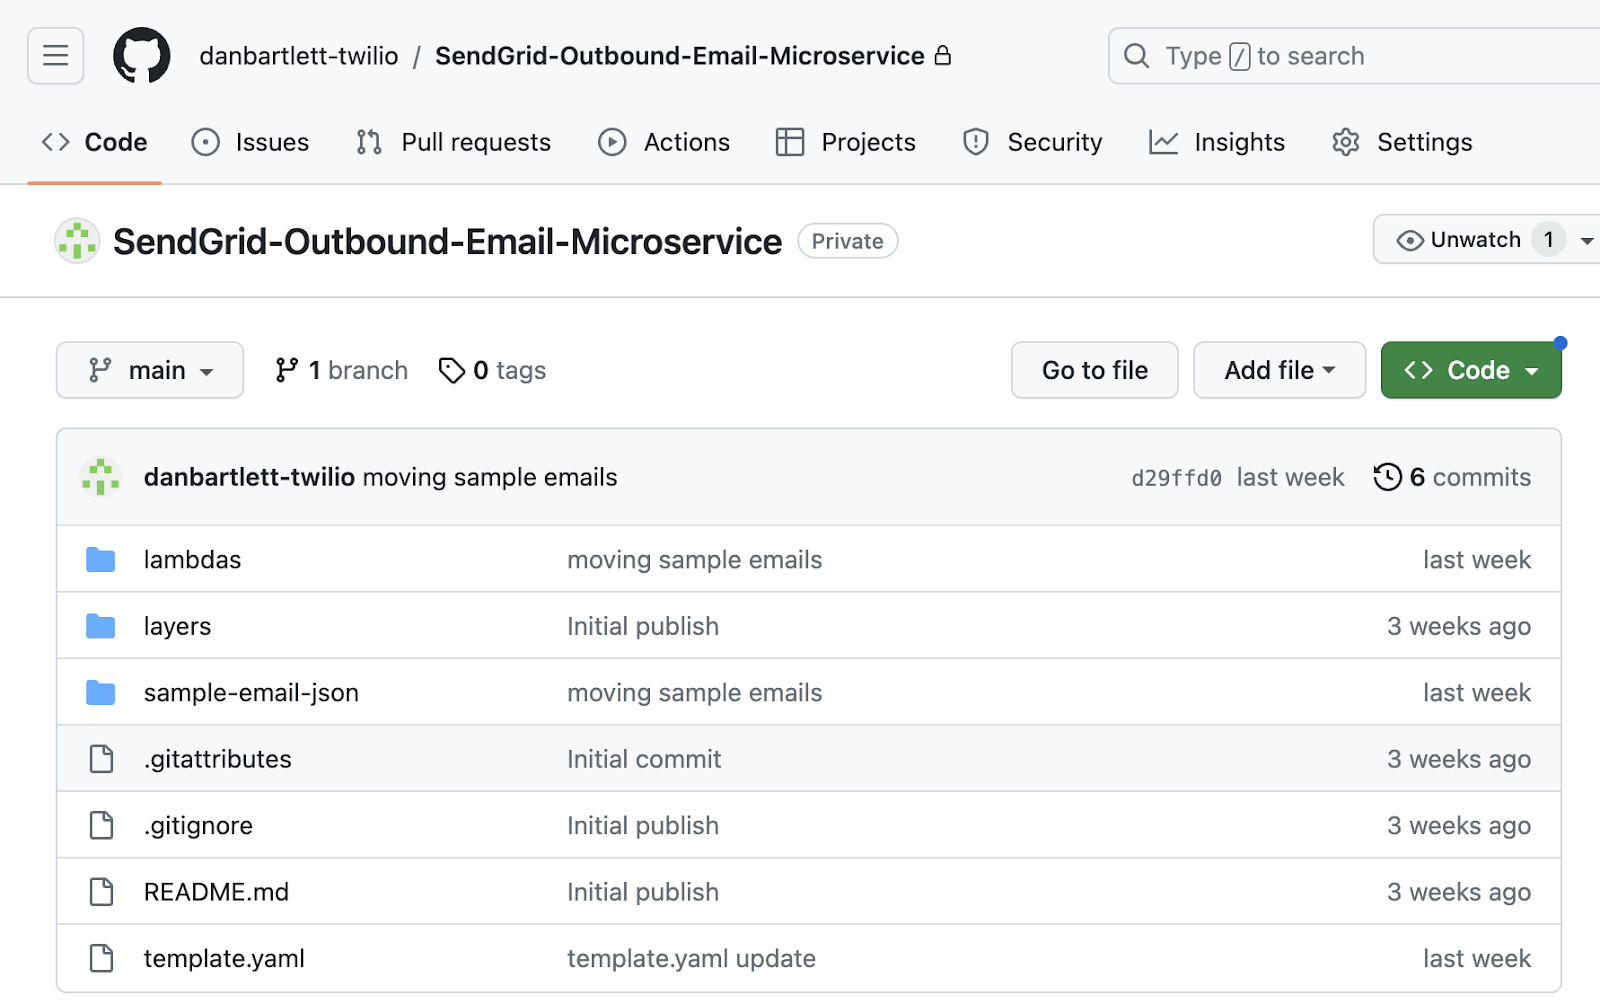
The repo contains all you need to spin up an AWS CloudFormation stack.
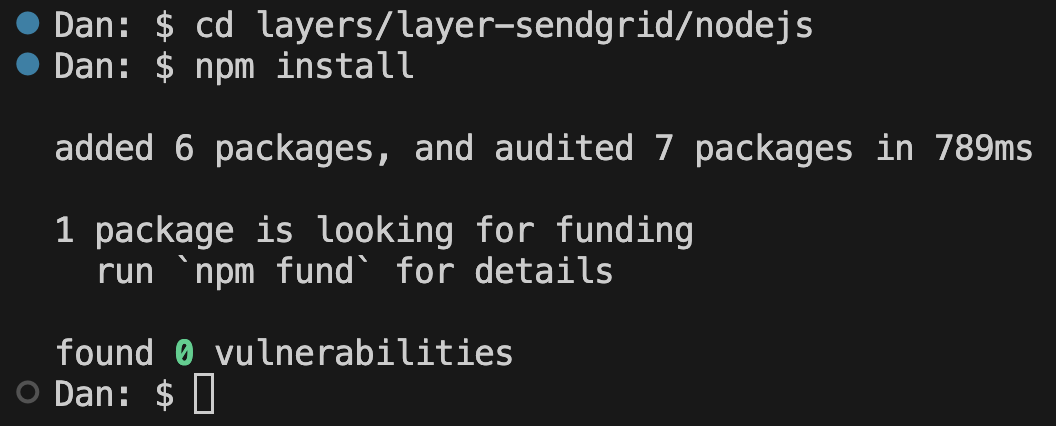
First we need to install a couple of node packages. From the parent directory, cd into the two directories listed below and install the packages. Here are the commands:
The first part of the command should look like this:
Now we are ready to enter our SendGrid credentials…
2. Enter your SendGrid Account Credentials
Open up the file template.yaml in the parent directory. This yaml file contains the instructions needed to provision the AWS resources.
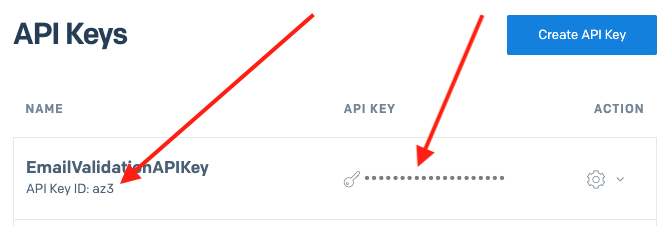
In order to make an API call to SendGrid, you’ll need an API key with the proper “Mail Send” privileges. If you haven’t done so already, create a new API key and copy both the API Key ID and the actual API Key. This template lays the foundation to be able to use multiple API Keys AND it is best practice to include the API Key ID in your calls for reporting purposes.
Here is a view of my API Keys page in my SendGrid console:
In your template.yaml file, use a FIND function to search for SENDGRID_API_KEY_ID. The block of yaml code will look like this:
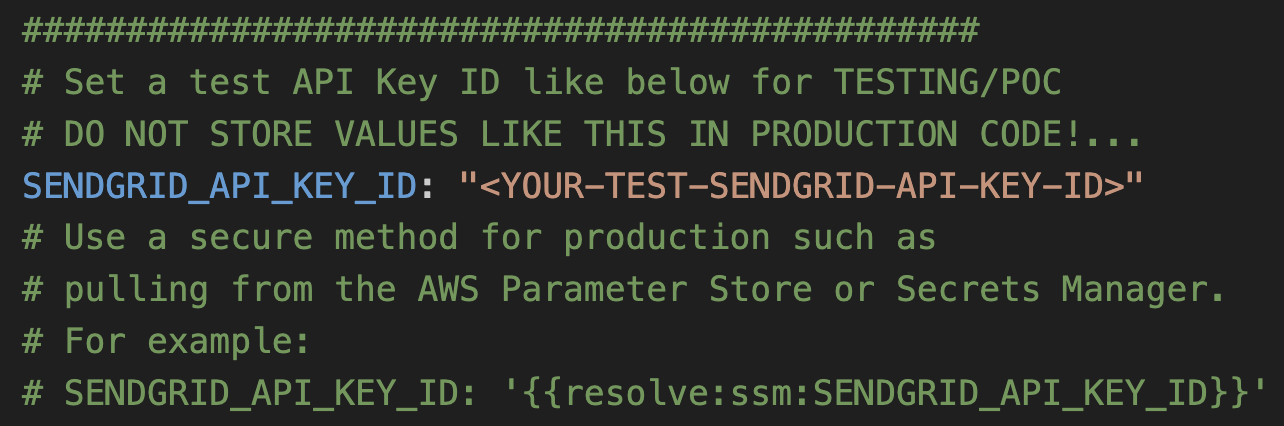
Replace <YOUR-TEST-SENDGRID-API-KEY-ID> with your SendGrid API Key ID. Please note, as indicated in the comments, that entering for anything other than a quick proof of concept, use AWS Parameter Stores or Secrets Manager to store your credentials.
Next, use a FIND function to search for YOUR-TEST-SENDGRID-API-KEY. That block of yaml code will look like this:
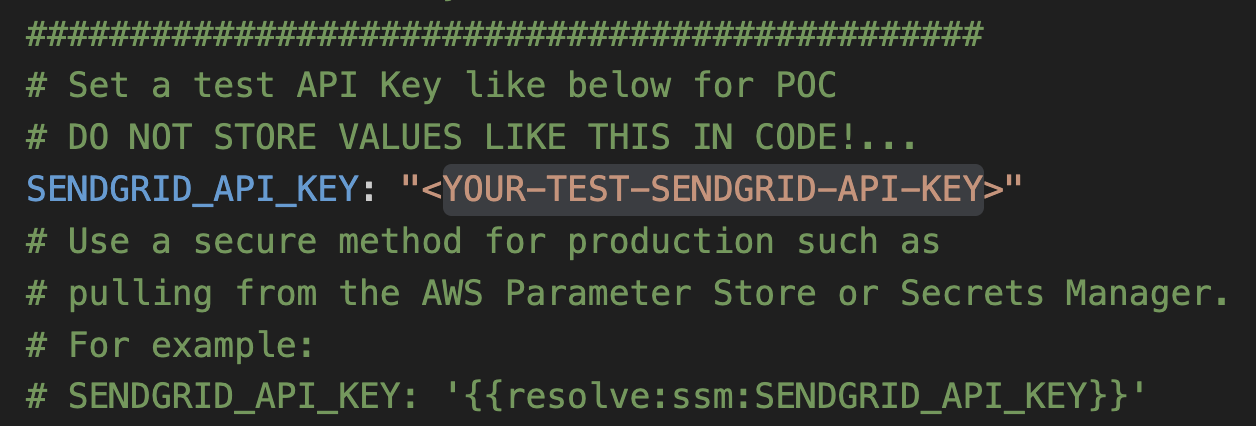
As above, swap in your API Key value.
Lastly, this AWS stack includes an “Alarm” topic that can send notifications out when certain errors occur. For example, if an API request is malformed, an error would be generated. You can optionally enter an email address to receive these error alerts. Use FIND and search for some-domain.com to reveal this block of yaml code:
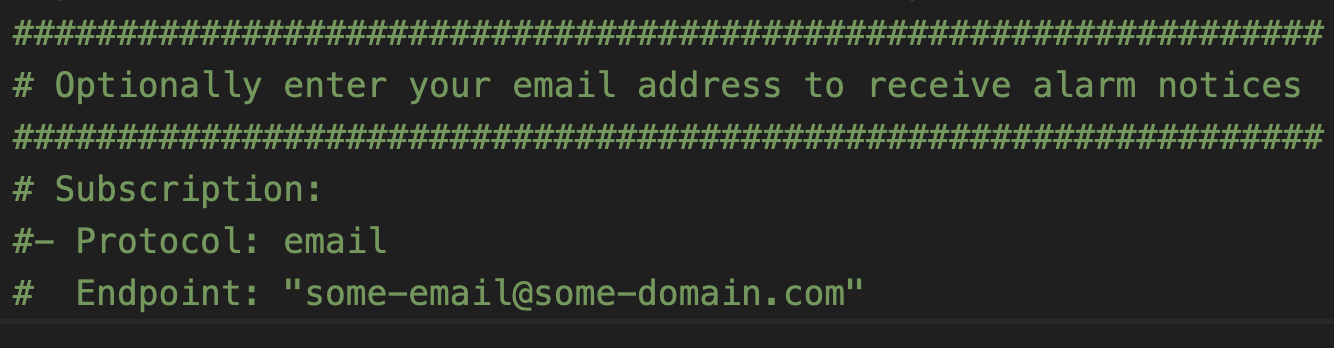
You can uncomment the last three lines and then swap in the desired email address.
3. Deploy Code
With those settings in place, we are ready to deploy! From a terminal window, go into the parent directory and run:
This command goes through the yaml file template.yaml and prepares the stack to be deployed.
In order to deploy the SAM application, you need to be sure that you have the proper AWS credentials configured. Having the AWS CLI also installed makes it easier, but here are some instructions.
Once you have authenticated into your AWS account, you can run:
This will start an interactive command prompt session to set basic configurations and then deploy all of your resources via a stack in CloudFormation. Here are the answers to enter after running that command (except, substitute your AWS Region of choice):
After answering the last questions, SAM will create a changeset that lists all of the resources that will be deployed. Answer “y” to the last question to have AWS actually start to create the resources.
The SAM command prompt will let you know when it has finished deploying all of the resources. You can then go to your AWS Console and CloudFormation and browse through the new stack you just created. All of the Lambdas, Lambda Layers, S3 buckets, IAM Roles, SQS queues, SNS topics are all created automatically. (IaC – Infrastructure as Code – is awesome!)

Also note that the first time you run the deploy command, SAM will create a samconfig.toml file to save your answers for subsequent deployments. After you deploy the first time, you can drop the --guided parameter of sam deploy for future deployments.
4. Send Some Emails!
As shown in the architecture diagram, this system receives email “events” from your internal applications. These events need to be properly formatted JSON objects and they can be either loaded into S3 or published to SNS (Simple Notification Service).
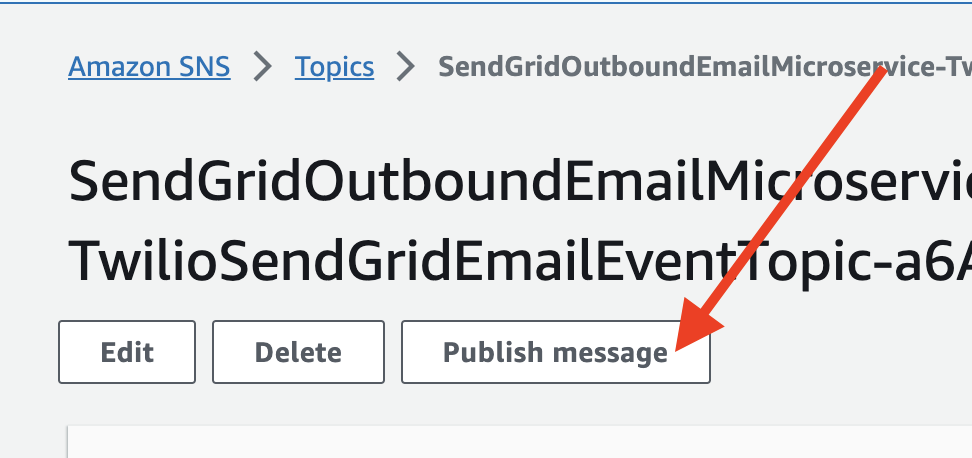
We can use SNS to send out some test emails. From your AWS Console, go to SNS and then click on the TOPICS link or tab on that page, and then select the SNS Topic that starts with SendGridOutboundEmailMicroservice-TwilioSendGridEmailEventTopic. Going through the AWS Console like this is mimicking how your enterprise applications can publish email events!
You can then click the button that says PUBLISH MESSAGE.
Back in the code base, open the directory called “sample-email-json/” and open the file simple-single.json. Copy the JSON and paste it into the Message body textarea back in SNS. It should look like this:
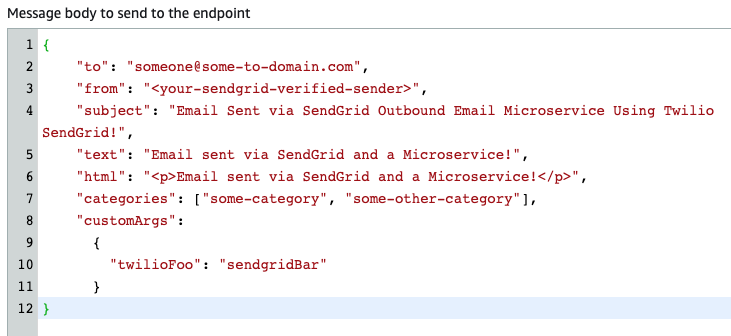
Swap out a new email address for the “to” field and enter one of your verified sender email addresses in the “from” field and then click PUBLISH MESSAGE!
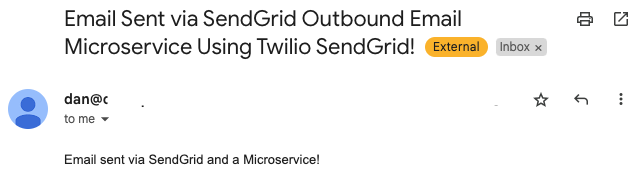
6. See the results…
First and foremost, you should have received an email:
That is straightforward enough, but let’s dig deeper. Go to S3 in your AWS Console and open up the bucket that starts with twilio-sendgrid-outbound-emails-. You will see folders for “requests” and “responses”.
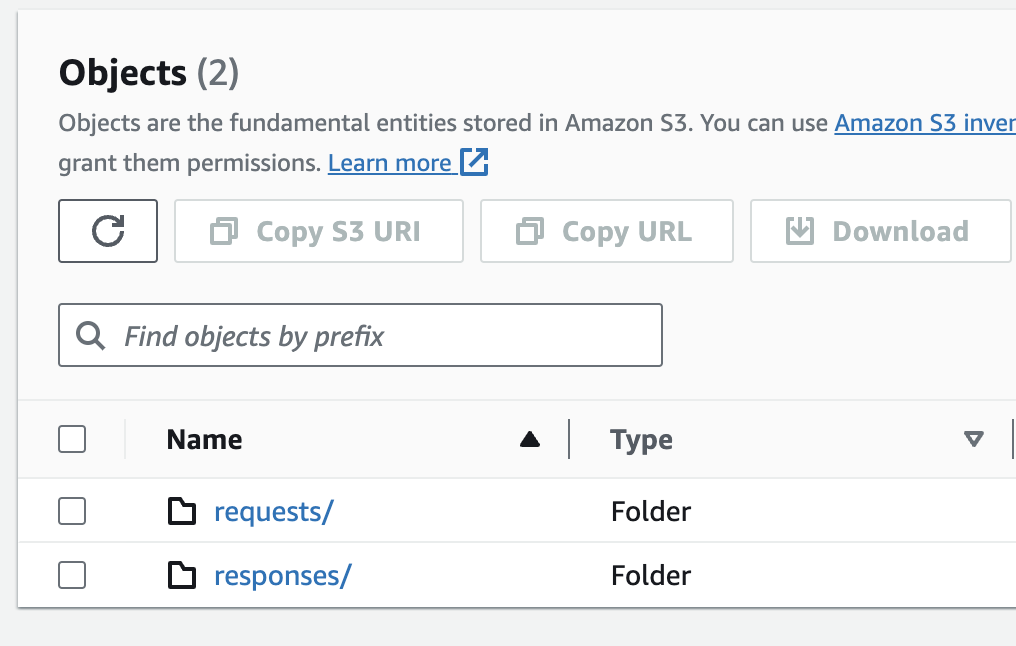
As you would expect, “requests” hold all of the json objects before they are sent to SendGrid, and “responses” hold the replies back from SendGrid. We will look at the requests first.
In the requests folder, you will see a single JSON object that is labeled with the request ID generated by this stack. All requests sent using this system will have an object saved to this folder.
Opening up a request, we can see that all of the information used to make the API call is stored in the JSON object:
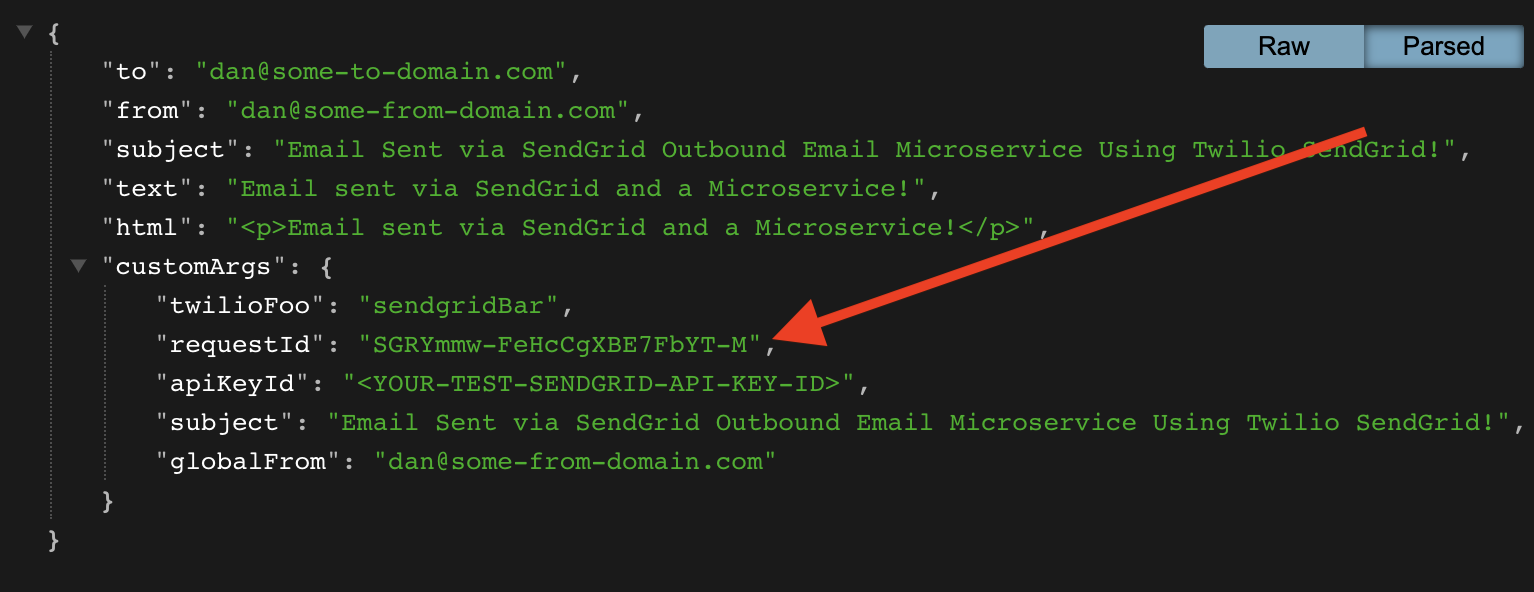
A few things to point out:
- This object contains all of the data and details in the outbound email and could satisfy the enterprise requirement to keep copies of outbound messages.
- Note that
customArgsinclude the key:value pairs from the email event published in the step above plus additional key:value pairs. CustomArgs are the best way to add tracking data into your emails. Be sure to review the lambda fileprocess-email-eventto explore what you can add into your email api calls and how to do it! All customArgs will be included in Event Webhooks! - You can, and should, include categories as well!
- The
requestIdis generated by this system and ties Event Webhook back to this specific request.
Now let’s look at the response back from SendGrid. Go into the responses/ folder in the bucket and open the JSON file.
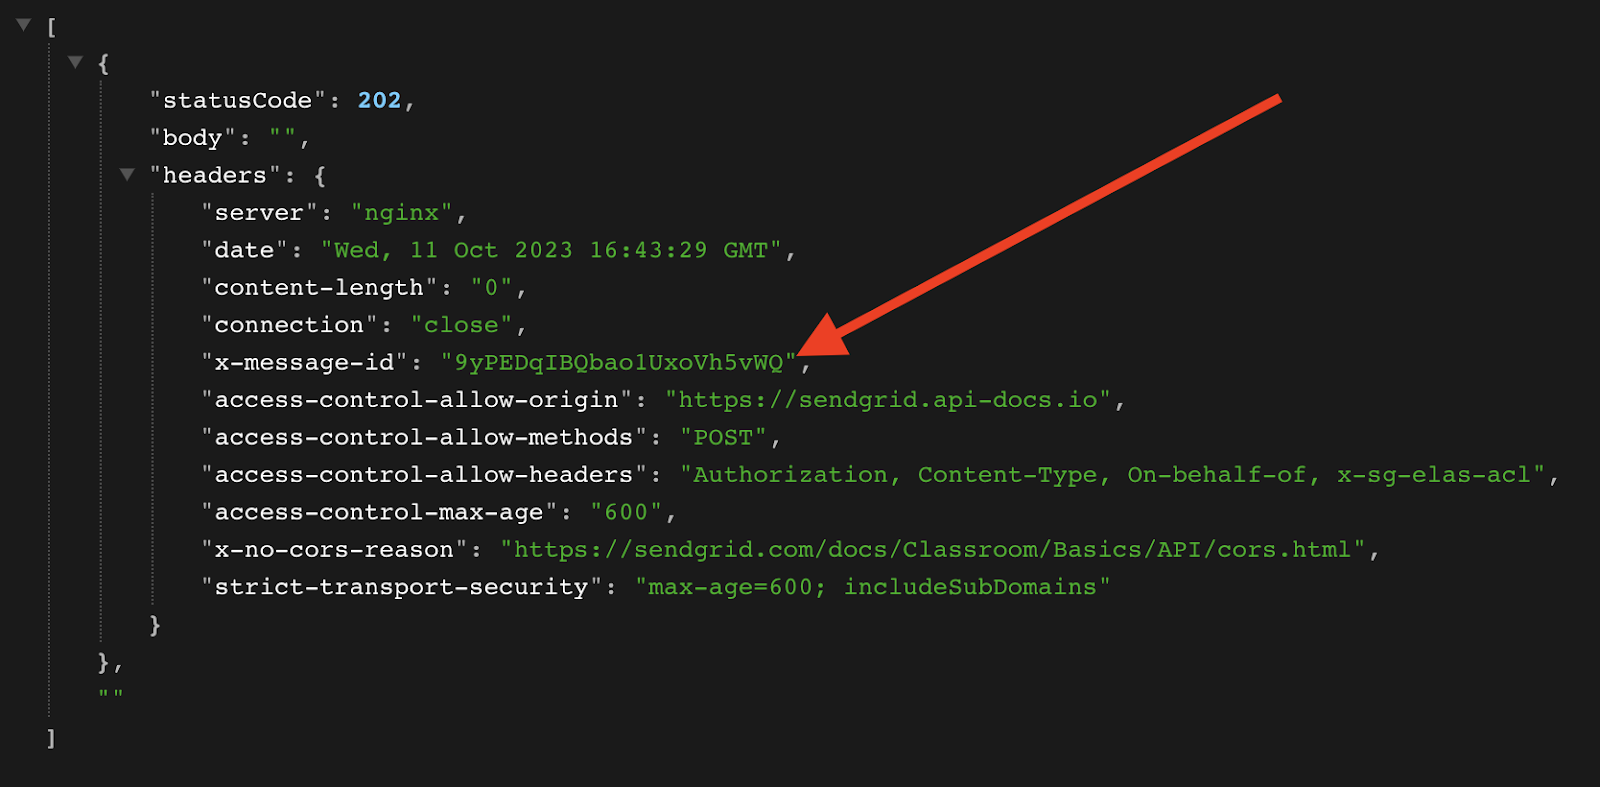
There is nothing too exciting about this 202 response except for the x-message-id! That id will be included in Event Webhooks so it makes sense to take note of this id (save it) and connect it to the request (and the user/campaign/case/whatever).
In addition to saving the response to the S3 bucket, the API response is ALSO sent to the SNS topic for additional processing. What additional processing could you do?
- Error handling: If any response is not a
202 success, handle it appropriately. - Store the
x-message-idin your database linking it to the request. - Saving sending statistics for metrics, reporting, or dashboards,
Bulk Email Sending
Many enterprises want to send email “blasts” to many of their customers. Can this system be used for this purpose?
Certainly. The SendGrid API can handle a tremendous amount of outbound emails and can help you scale to whatever throughput you require. You can build your enterprise system to send under these specifications by properly formatting the JSON objects sent into this flow. You could potentially put a queue in between the enterprise applications submitting email “events” if you wish to control throughput before entering this process.
This microservice for calling the SendGrid Email API should give you the theoretical and practical foundation to build a system to send your emails at scale.
Cleanup
To avoid any undesired costs, you can delete the application that you created using the AWS CLI and the console.
First, delete the S3 buckets. From the S3 “home” page, first empty the buckets by selecting the bucket and then select the EMPTY option. Next, delete the actual bucket by selecting the bucket and then the DELETE button.
Next, delete the stack from CloudFormation in the AWS console. Select the DELETE STACK option. AWS SAM also creates a stack and an S3 bucket to manage deployments. You can delete them from CloudFormation in the AWS console following the same procedure as above.
Deploy to production
While you can get this system working pretty quickly, it is not ready for your production environment.
Conclusion
In short order you have the foundation for a serverless microservice for sending outbound email “events” to SendGrid’s API!
The code is heavily-commented in the repo. Dive in and see how you can configure your enterprise systems to leverage this event-based microservice AND how you can use SendGrid’s robust tracking capabilities to get a much better sense of what you are sending and how your users are engaging with your emails.
Speaking of engaging with your emails, be sure to check out parts 2 and part 3 of this blog series to learn about SendGrid Event Webhooks AND Inbound Parse!
***
Dan Bartlett has been building web applications since the first dotcom wave. The core principles from those days remain the same but these days you can build cooler things faster. He can be reached at dbartlett [at] twilio.com.

Related Resources
Twilio Docs
From APIs to SDKs to sample apps
API reference documentation, SDKs, helper libraries, quickstarts, and tutorials for your language and platform.
Resource Center
The latest ebooks, industry reports, and webinars
Learn from customer engagement experts to improve your own communication.
Ahoy
Twilio's developer community hub
Best practices, code samples, and inspiration to build communications and digital engagement experiences.