Send Scheduled MMS and WhatsApp Messages with Go
Time to read:
August 28, 2023
Written by
Reviewed by
Late last year, Miguel Grinberg showed how to send scheduled SMS with Go and Twilio. His tutorial was an excellent start to learning how to integrate communications functionality into your Go applications.
SMS, however, is just the beginning for communicating with your users. Two further ways are MMS and WhatsApp. Through these two technologies, you can send more engaging messages and reach up to two billion monthly active users.
So, in this tutorial, I'm going to build on Miguel's tutorial and show how to send scheduled MMS and WhatsApp messages with Go and Twilio's Programmable Messaging API.
Prerequisites
You don't need a lot to follow along with this tutorial, just:
- A Twilio account, whether free or paid. If you are new to Twilio, click here to create a free account
- An MMS-enabled Twilio phone number and Messaging Service SID
- A mobile phone number that can receive MMS
- WhatsApp, whether on your mobile phone or desktop
- Go
- Your favourite IDE or text editor for writing Go code. I recommend Visual Studio Code
- Some prior experience with Go would be beneficial, though isn't necessary
Create a new Go project
The first thing to do is to set up a new Go project. To do that, change into the new project directory, and add module support to it, run the commands below.
Add the required dependencies
Next, you need to add two dependencies:
- godotenv: This loads environment variables from a flat file, typically .env in the project's top-level directory. That way, you keep configuration, sensitive, and confidential information out of your code
- Twilio's Go Helper Library: This simplifies interacting with Twilio's various APIs from Go.
To install them, run the following command.
Create the dot env file to store the environment variables
In the project's top-level directory, create a new file named .env, and in that file, paste the code below.
After that, retrieve your Twilio Auth Token, Account SID, and phone number from the Twilio Console Dashboard and insert them in place of the first three placeholders, respectively. Then, replace the fourth placeholder with the E.164-formatted phone number of the recipient; likely your mobile phone number.
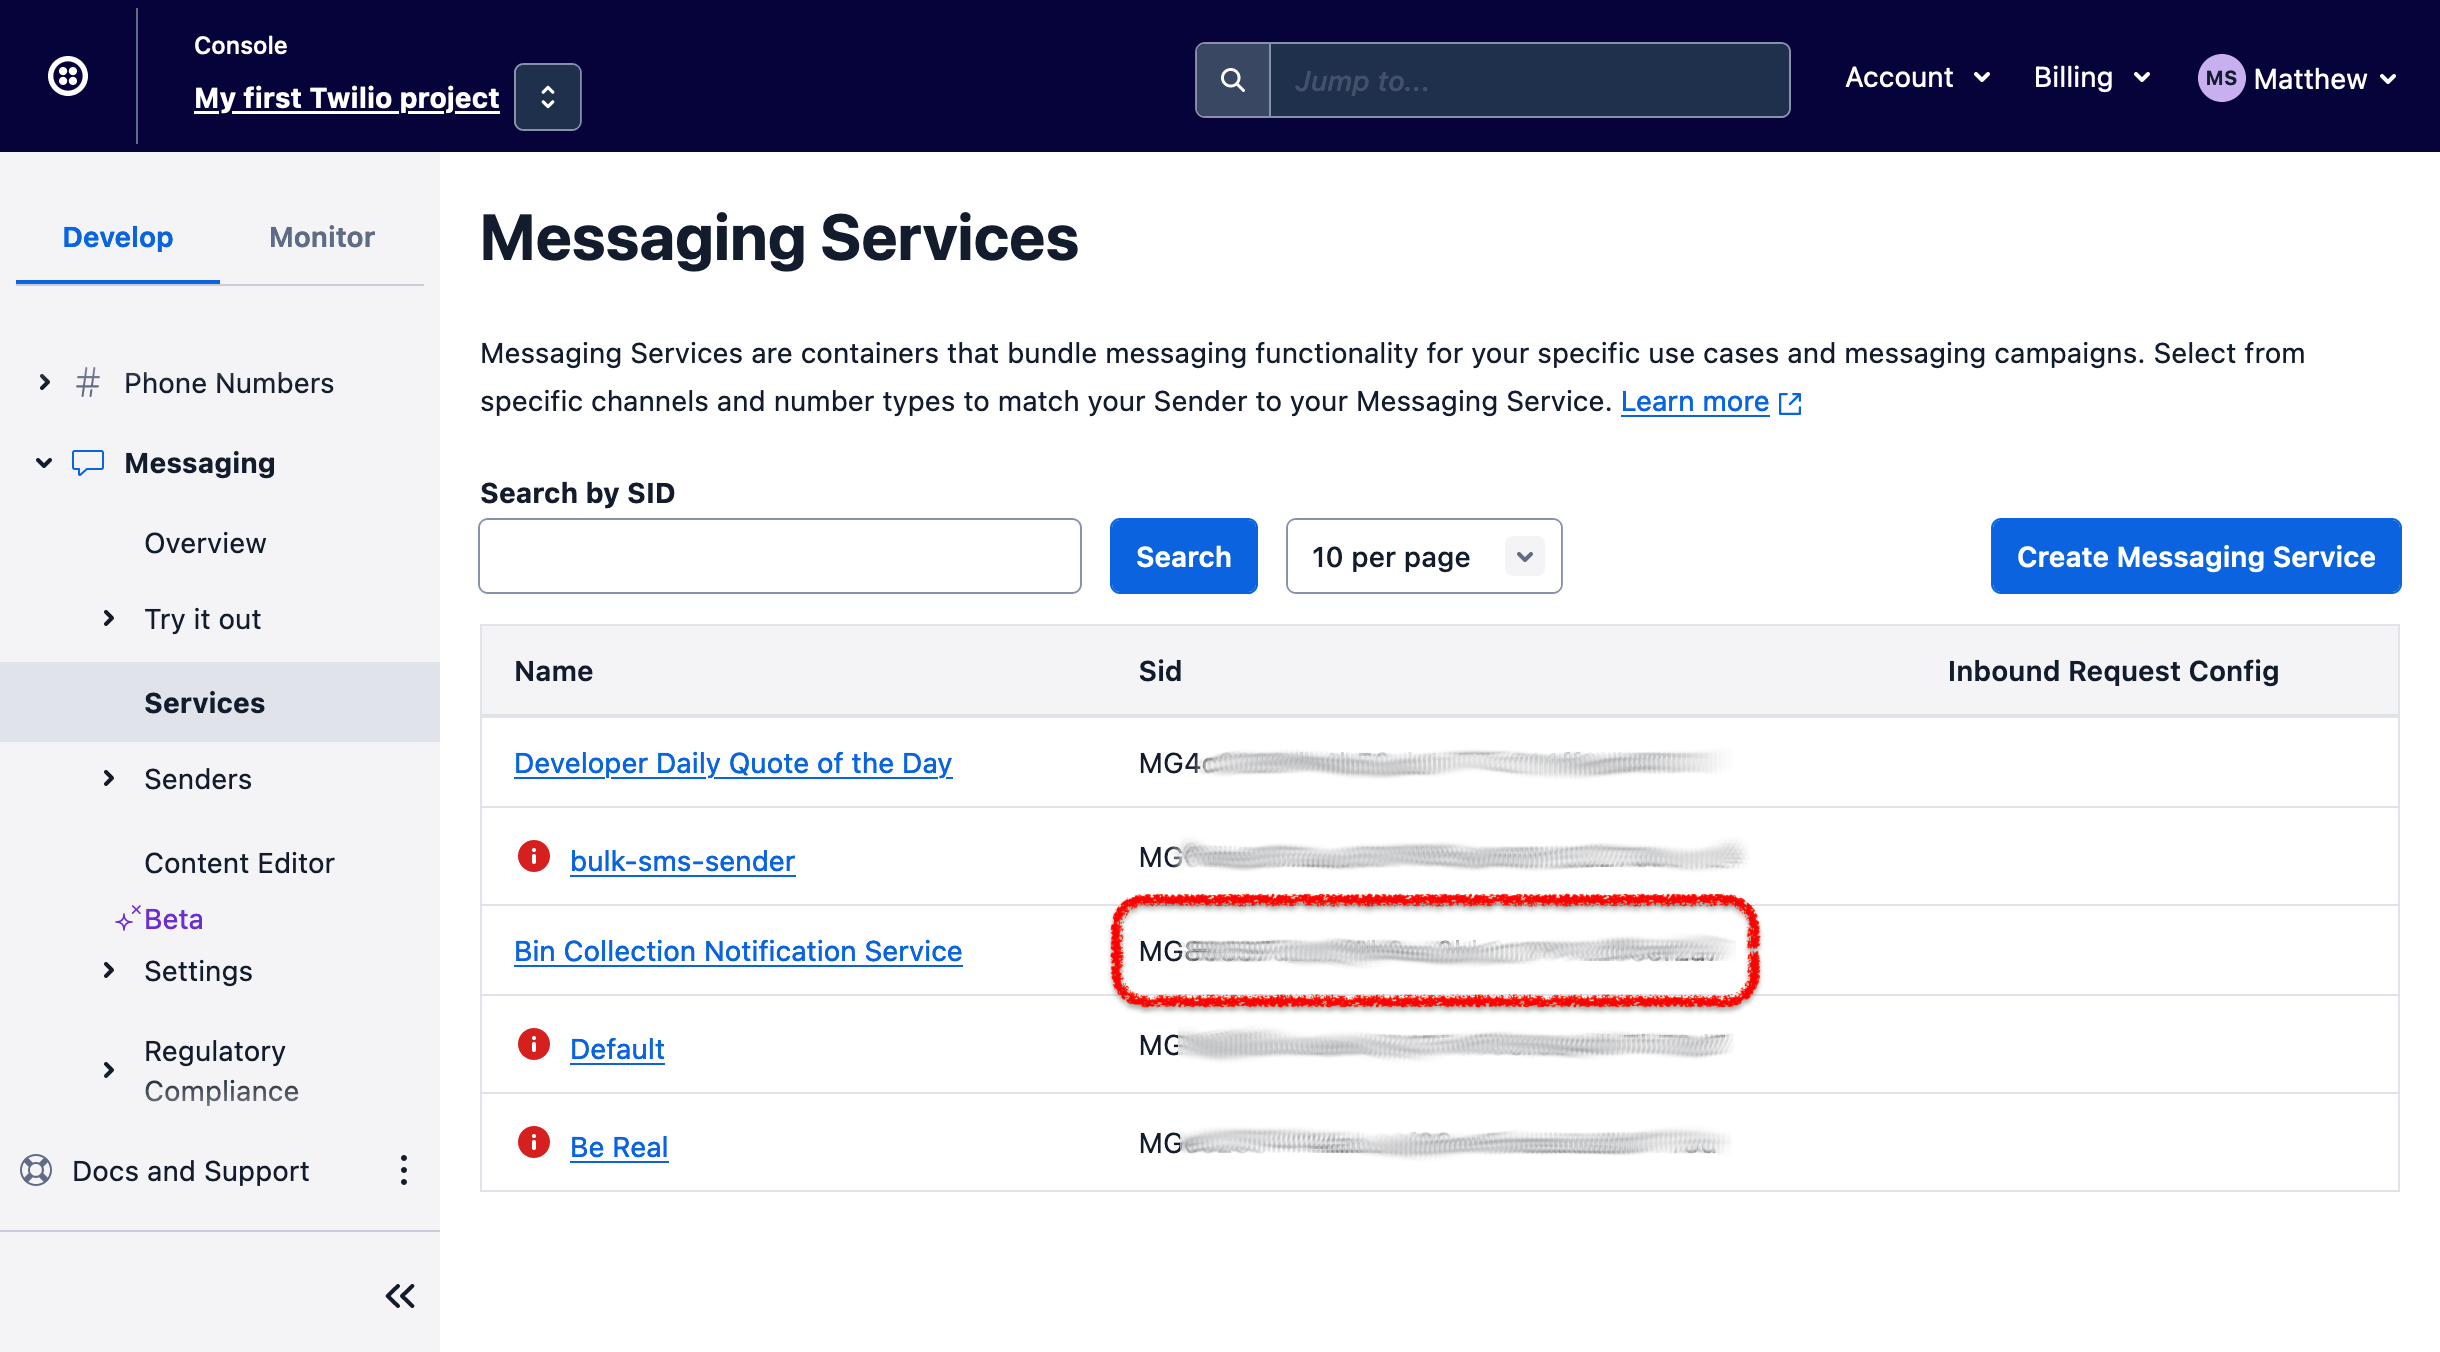
After that, retrieve your Twilio Messaging Service SID. Navigate to Explore Products > Messaging > Services. There, copy the value of the Sid column of your Messaging Service. Set the copied value as the value of TWILIO_MESSAGING_SERVICE_SID in .env.
Add the ability to send scheduled MMS
Now, it's time to write some code. The first thing we'll do is add the ability to send a scheduled MMS. To do that, create a new file named main.go, and in that file add the code below.
The code starts off by loading the environment variables from .env, before initialising the new message's parameters (params). It sets the sender and recipient phone numbers, the message's body, and the Message Service to use.
Then, a list of attachments to attach to the message, making it an MMS, is initialised. Each one of these must be publicly accessible, so that they can be downloaded and attached to the message.
After that, the message's validity period is set to three minutes. Then, the time that the message will be sent is initialised to seventeen minutes after the code is run. Feel free to change the duration to something further out in the future, if you desire. However, keep two things in mind when scheduling messages:
- They cannot be scheduled less than fifteen minutes beforehand
- They cannot be scheduled more than seven days in advance
Note that the schedule type is set to fixed, which is required for scheduled messages.
With the parameters initialised, they're passed to the call to create the scheduled message, client.Api.CreateMessage(params). If the message was successfully scheduled, its SID (the message's unique id) and status are printed to the terminal. Otherwise, the user is informed that the message could not be scheduled.
Test the code
With the code written, test it by running the following command.
You should see the message's id and its status printed to the terminal. For example:
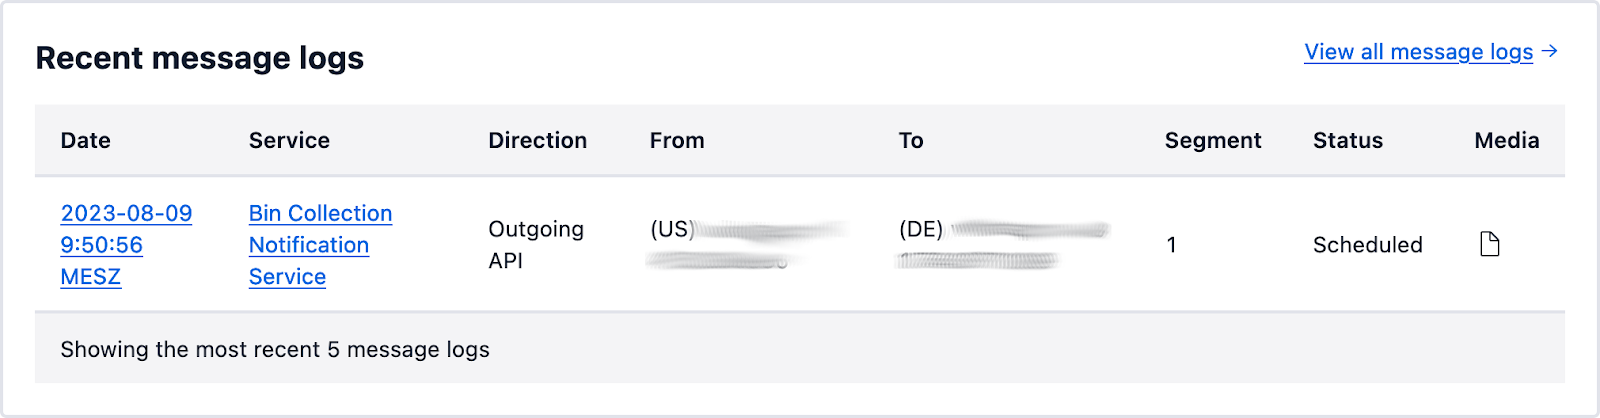
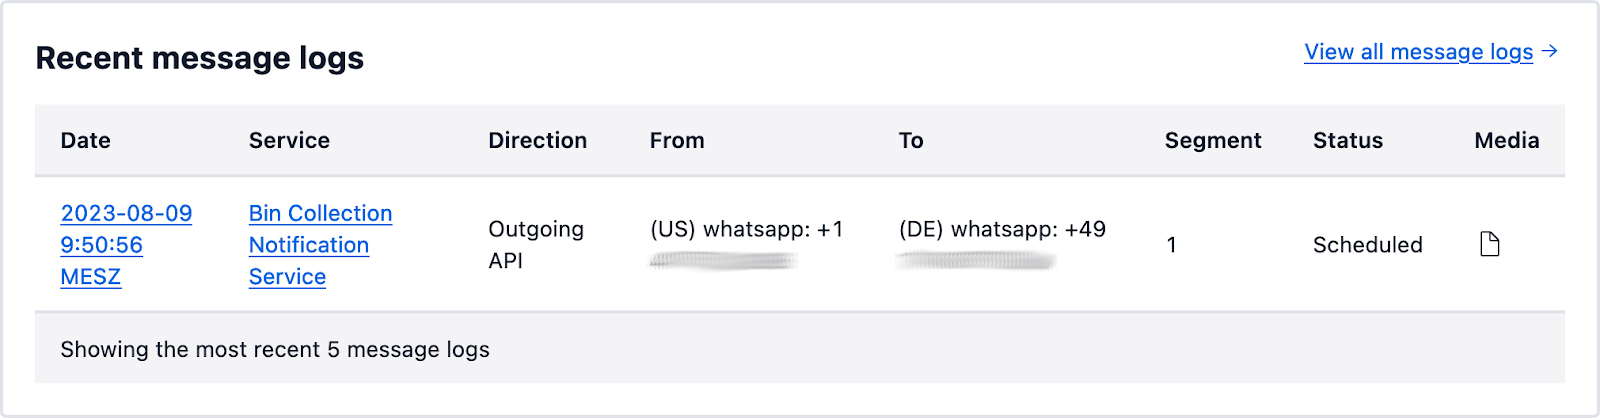
Now, navigate to Explore Products > Messaging > Overview. There, in the Recent messages logs table, you should see that the message is scheduled, similar to the screenshot below.
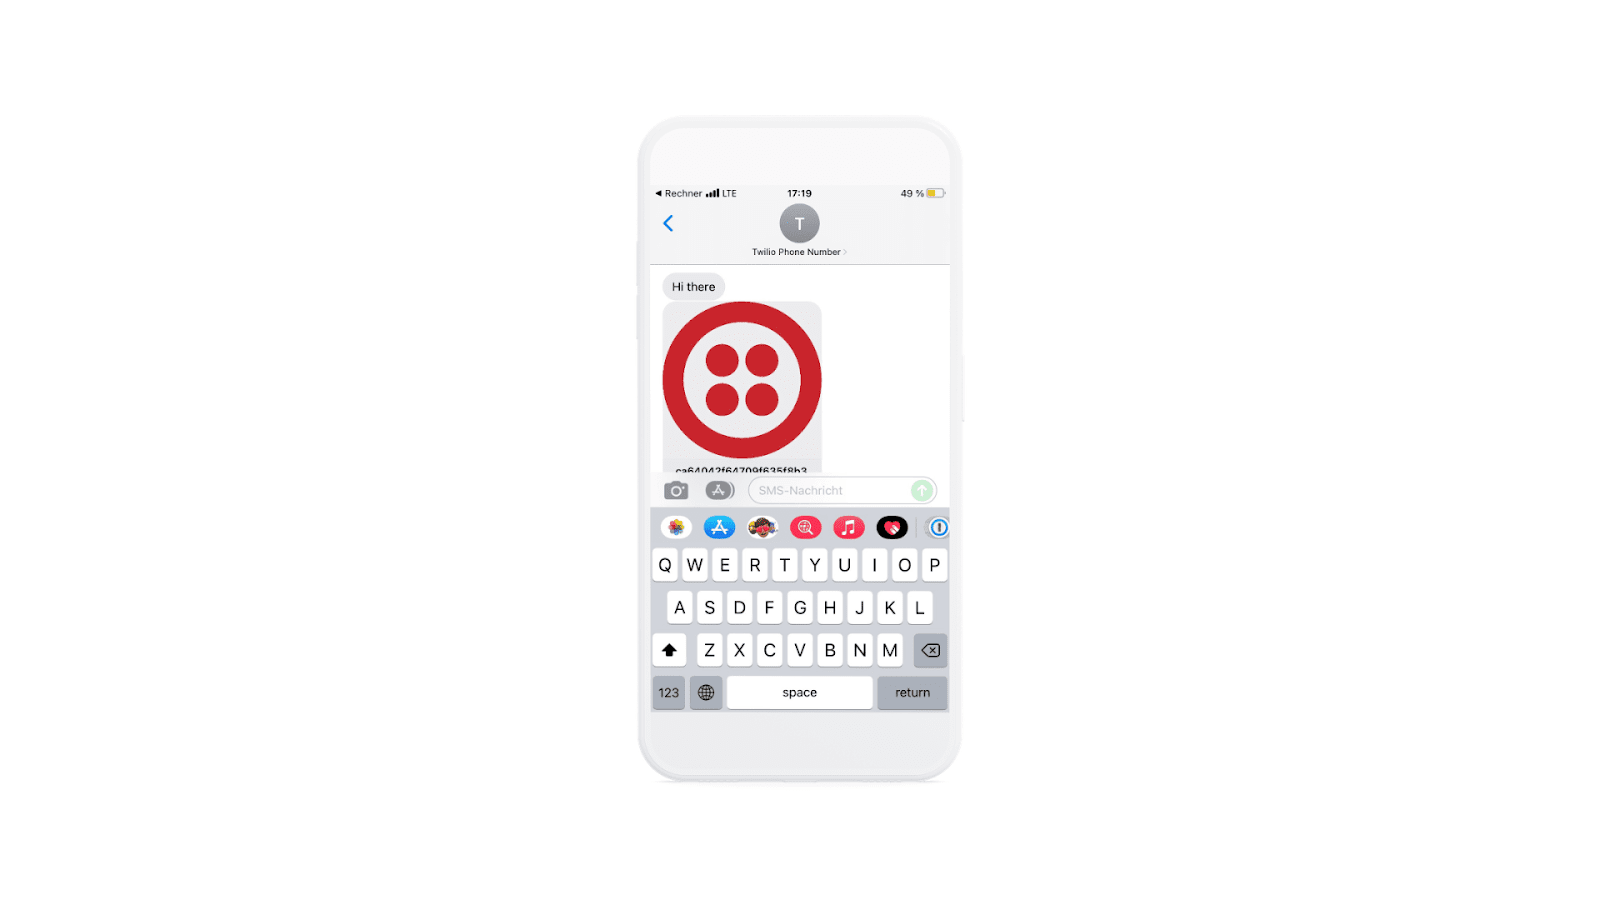
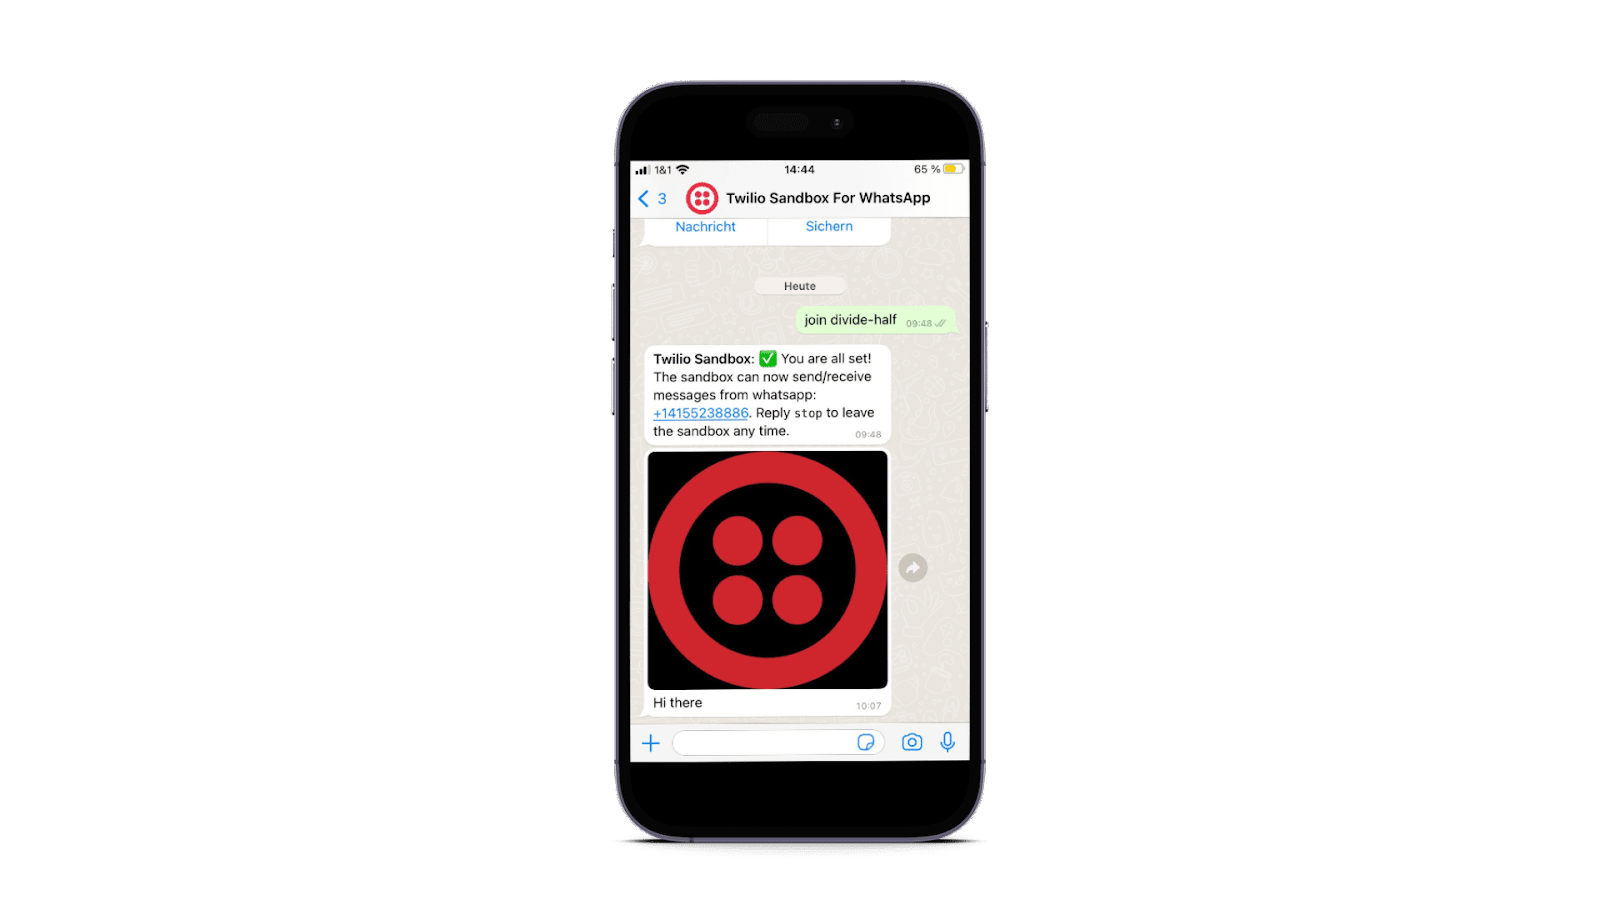
A little while later, you should receive an MMS, similar to the screenshot below.
Add the ability to send scheduled WhatsApp messages
Now, it's time to refactor the code to send a WhatsApp message. Gladly, there's very little to do.
First, activate the WhatsApp Sandbox by navigating to Explore Products > Messaging > Try it out > Send a WhatsApp Message. There, follow the instructions under Connect to WhatsApp Sandbox. Then, update main.go, changing the calls to SetFrom() and SetTo() as follows:
That's it! Now, thanks to Twilio's Programmable Messaging API and Go Helper Library, you're ready to schedule WhatsApp messages just as easily as you scheduled MMS.
Test the code
With the code written, test it by running the following command.
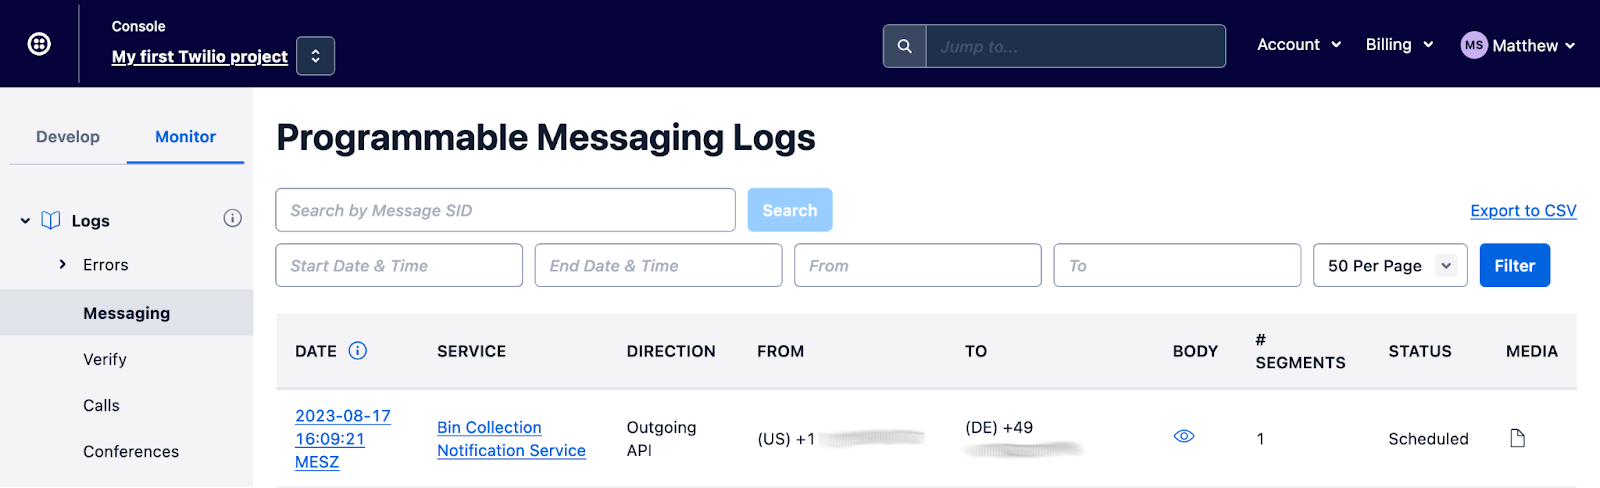
After you've done that, navigate to Explore Products > Messaging > Overview. There, in the Recent messages logs table, you should see that the message is scheduled, similar to the screenshot below.
A little while later, you should receive a WhatsApp message, similar to the screenshot below.
That's how to send scheduled MMS and WhatsApp messages with Go
Hopefully you can see that once you've added SMS functionality, there's not much more that you need to do than sending an SMS to send and schedule MMS and WhatsApp messages. Yet, you can significantly grow the reach of your applications.
If you have any issues following along, grab a copy of the code from GitHub. Otherwise, check out the Programmable Messaging API documentation for even more information about what you can do with the API.
Matthew Setter is a PHP and Go editor in the Twilio Voices team, and a PHP and Go developer. He’s also the author of Mezzio Essentials and Deploy With Docker Compose. You can find him at msetter[at]twilio.com. He's also on LinkedIn and GitHub.


Related Resources
Twilio Docs
From APIs to SDKs to sample apps
API reference documentation, SDKs, helper libraries, quickstarts, and tutorials for your language and platform.
Resource Center
The latest ebooks, industry reports, and webinars
Learn from customer engagement experts to improve your own communication.
Ahoy
Twilio's developer community hub
Best practices, code samples, and inspiration to build communications and digital engagement experiences.