How to Build an MMS Ticketing System Using PHP, Laravel and Twilio
Time to read:
September 30, 2014
Written by
This post is part of Twilio’s archive and may contain outdated information. We’re always building something new, so be sure to check out our latest posts for the most up-to-date insights.

Have you ever arrived at a movie, flight or concert and realized you’ve forgotten your paper ticket? Imagine how much worse it would be if you showed up at Willy Wonka’s front door, but forgot your golden ticket! To prevent an epic disaster such as this, we’re going to build an app that delivers Willy Wonka’s golden ticket directly to your phone using MMS. All the Oompa Loompas have to do is scan it. Not Willy Wonka? Don’t worry, this code should be useful for any app or company that distributes tickets. Hopefully computers are more helpful with the golden ticket than last time.
Our Delicious Ingredients:
- PHP >= 5.4
- Laravel
- Endroid QRCode Library
- Twilio PHP library, Twilio Account and MMS Enabled Twilio Number
- A lifetime supply of chocolate* (*not required)
I Want It Now!
Some people just can’t wait to get what they want. If you want to deploy this app right now use the heroku button below:

Laying Our Foundation with Laravel
Laravel is a PHP framework that let’s you write “PHP that doesn’t hurt”. If you haven’t used Laravel before, my fellow evangelist Kevin Whinnery wrote a great post showing you how to get started or you can check out the Laravel installation guide. Once you’ve got Laravel set up, let’s create a new laravel project called goldenticket:
Let’s hop into our goldenticket directory and start up the basic application to make sure everything looks good. Run the command:
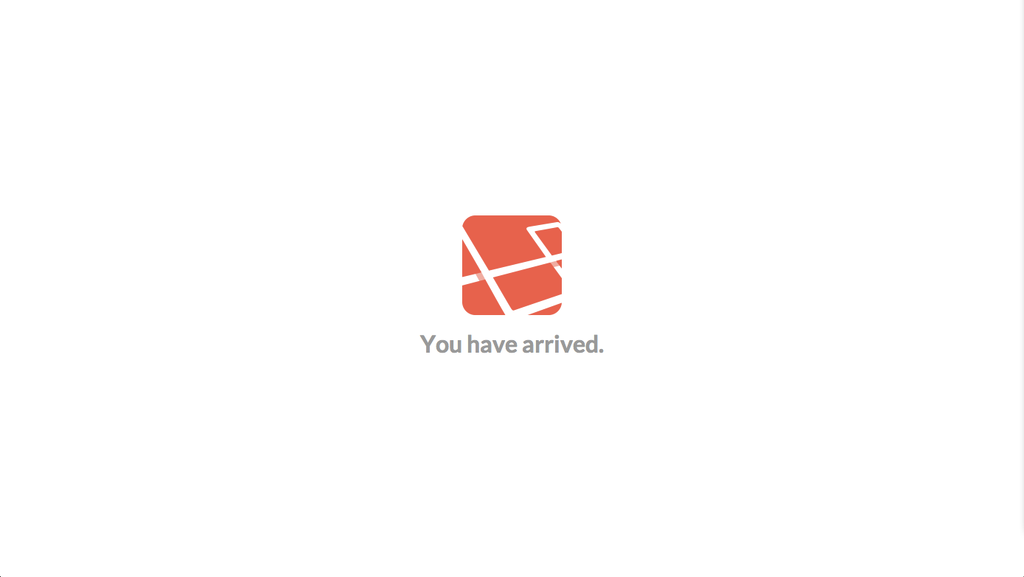
Now if you browse to http://localhost:8000/ you should see the following screen letting you know “You Have Arrived” and your Laravel project is setup correctly:
Before we start writing code, let’s update our configuration file to show debug info if we encounter any errors. Open up `app/config/app.php’ and update the debug option to true:
Now that we have our foundation in place, let’s make a simple form that we can use to send ourselves a new MMS ticket. Create a new view file in ‘app/views/’ called “home.blade.php”, and insert the following HTML:
Here we’ve created a basic HTML page that contains a form we’ll submit to create a new ticket. We’re also including bootstrap CSS to help make things look a bit prettier. By adding the .blade.php extension we’re making our view a Blade template. We won’t taking advantage of the templating till a bit later. Last, let’s make sure our route loads this view. You’ll already have a route for ‘/’ in app/routes.php so just update it to load our new view:
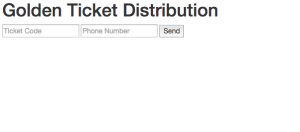
Visit http://localhost:8000 and you should now see our golden ticket distribution form:
Generating QR Codes
Now that we have our Laravel foundation in place, let’s work on generating an image of our golden ticket. In this case our ticket will actually be a black QR code but that just doesn’t sound nearly as cool. We’ll be using the Endroid QRCode library to generate our QR code, so let’s install it using Composer.
First, we’ll create a new route that outputs our QR code image. To make our code a bit cleaner let’s import our QrCode class so we can instantiate it by name only. Open up your ‘app/routes.php’ file and add the following line right after your opening
Now let’s add a new ‘/qrcode’ route after our ‘/’ route:
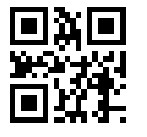
We’re instantiating a new QR code and using the setText function to set the content we want encoded in the QR code. We then get our image and return it our response making sure we properly set the headers. Kick off your server using ‘php artisan serve’ and browse to http://localhost:8000/qrcode. You should see a beautiful QR code that looks like this:
We don’t want to just show the same QR code all the time though. Fortunately it’s easy to update this code to generate the code based on some data we pass in our query string. For our use case we’ll just be concatenating our name and phone number and base64 encoding it. Let’s update replace the first three lines of route with with the following code:
We can now run our server and go to http://localhost:8000/qrcode?name=Charlie&phone_num=5555555 and see our dynamically generated QR code. Try switching the name and number data to see the code change.
Ultimately we’ll need Twilio to be able to access this image. As a result, if you’re running on localhost you’ll need a way to make that happen. Ngrok is a great tool for exposing your localhost to the outside world. If you haven’t used ngrok before you can kick off with our multi-platform or Windows focused tutorials.
Send MMS With Twilio
The next ingredient in our sweet new app is Twilio MMS. We were super excited to launch Twilio MMS on US and Canadian long codes two weeks ago. It allows you to send and receive multimedia messages of many different media types. This new API is just the ticket to securely distribute Wonka’s golden tickets in the form of an image sent over MMS. We’ll be using the Twilio PHP helper library to send our message. Let’s install it using Composer:
Remember that form we created at the beginning of this post? We’re going to have that submit to itself to send our ticket. Currently our ‘/’ route only accepts GET requests, so let’s update it to accept GET and POST requests:
Inside our route let’s check to see if the form has been submitted. If it has, let’s instantiate a new instance of our Twilio helper library and send our message. Replace the code inside your route with this:
If you’ve sent SMS using the Twilio PHP helper library before this code should look familiar. We instantiate the library using our Twilio credentials. You can find these in your Twilio dashboard. Then we call sendMessage using our from number, to number and body of our message. Make sure to update the from number with your Twilio number. The new part for MMS is the last argument we pass. This is a URL to the media we want to send. This is the publicly accessible URL where Twilio can access our QR code image, make sure you update this to your URL.
After you’ve updated the code with your ngrok url, start your php server up:
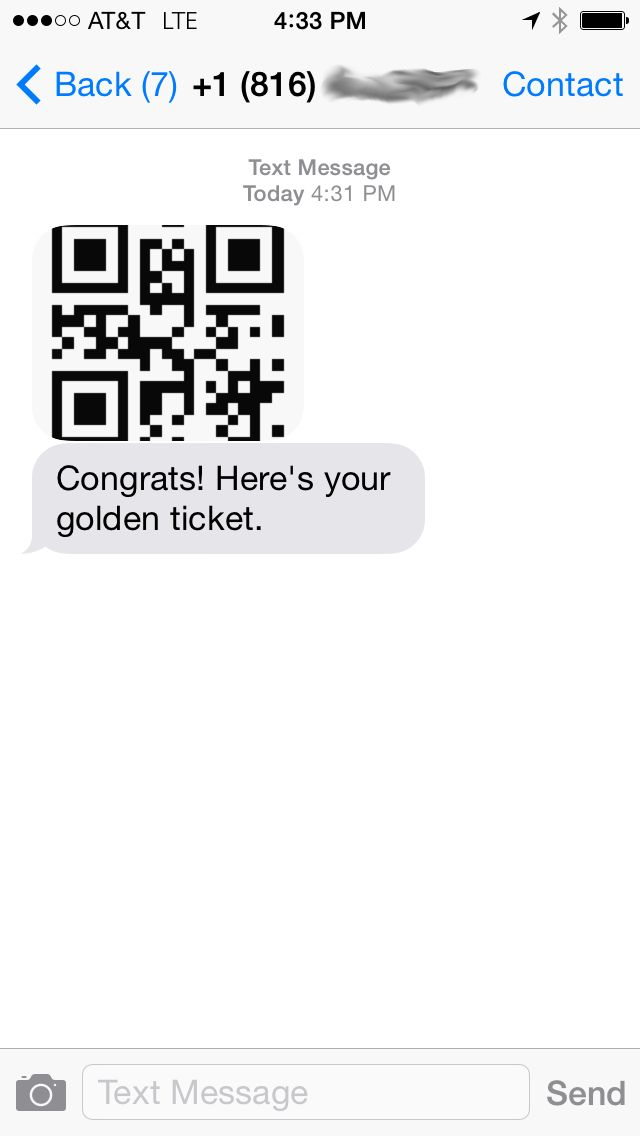
Load up the homepage and submit the form using whatever name you want and your phone number. Shortly, you should receive an MMS on your phone that looks something like this:
Putting the Packaging Together
Our app is now fully functional but all Wonka lovers know that you have to wrap your product up in nice packaging. Let’s do a few small updates to make sure our app is polished. First, let’s add an alert div that lets a user know that they’ve sent the message. Open your home view and add the following code right after the closing tag of your form:
This will check our session to see if we have an alert we need to show. If it does, we’ll show this div. We’ll be using flash data to store this alert. Flash data is session data that Laravel only stores for the next request. In our route, let’s add the flash data right after we send our message:
Now that we’re indicating to our user that form was submitted successfully, let’s also add some basic validation to indicate when something goes wrong. It’s our lucky day because Laravel makes validation easy. Let’s create a new validator right after we check that our form was submitted. We’re going to set name and phone_number fields to required:
When you create a new validator you pass two arguments. First, an array containing the data you want to validate. Second, an array containing the validation rules for that data. Now that we have a validator we just need to check if it has failed and display some information about what failed to the user:
We’re using flash data again and reusing the alert div we already created to show our validation messages. Rerun your code and leave the ticket code and/or phone number blank. You’ll now receive a message letting you know that those fields are required.
There’s a lot more we can do with validation but this should be enough to get Grandpa Joe out of bed.
A World of Pure Imagination
We’ve now streamlined the operations at Wonka HQ with our MMS ticket distribution system. What you do next is up to your imagination! You could use a system like this at your next conference, hackathon or Willy Wonka-themed birthday party. Or maybe you own an airline and want to improve the way you distribute boarding passes. Whatever you build, I’d love to see it. You can find me on twitter or e-mail.


Related Resources
Twilio Docs
From APIs to SDKs to sample apps
API reference documentation, SDKs, helper libraries, quickstarts, and tutorials for your language and platform.
Resource Center
The latest ebooks, industry reports, and webinars
Learn from customer engagement experts to improve your own communication.
Ahoy
Twilio's developer community hub
Best practices, code samples, and inspiration to build communications and digital engagement experiences.