How to Add Voice Calls to Your Yii2 PHP App
Time to read:
November 29, 2018
Written by
This post is part of Twilio’s archive and may contain outdated information. We’re always building something new, so be sure to check out our latest posts for the most up-to-date insights.

In today’s competitive world, the success or failure of a business is greatly tied to the Customer Relationship Management (CRM) used. The key objective of a CRM is to integrate and automate sales, marketing, and customer support. This is where Twilio Programmable Voice comes in handy. With Twilio Programmable Voice calls, you can improve the customer experience by automatically making calls to customers for key business tasks such as confirming their orders and informing them of new products.
By the end of this tutorial, we are going to learn how to generate TwiML that can handle incoming and outbound calls. The complete code for the tutorial can be found on Github.
Tutorial Requirements
For this tutorial, you will need:
- A Twilio Account
- A Yii2 basic application
- Composer installed globally
- Ngrok (optional)
Setup the Yii2 In Your Local Environment
We will first need to set up a Yii2 basic application. Yii2 is a secure and efficient PHP framework with a ton of features to help you fast-track development. A guide on how to set up Yii2 basic can be found in the official Yii documentation.
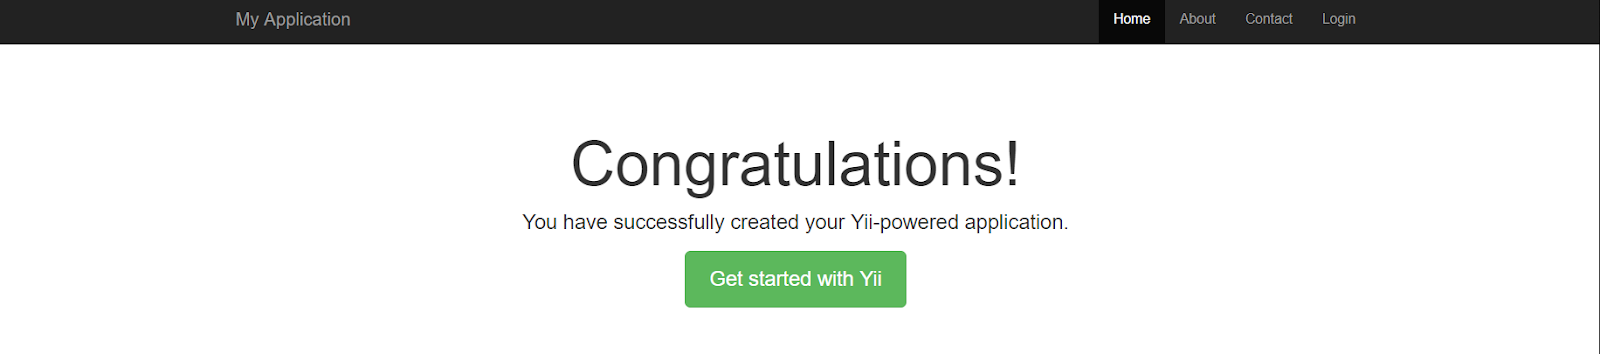
Upon successful installation, you should be able to see a view similar to this when you visit the homepage.
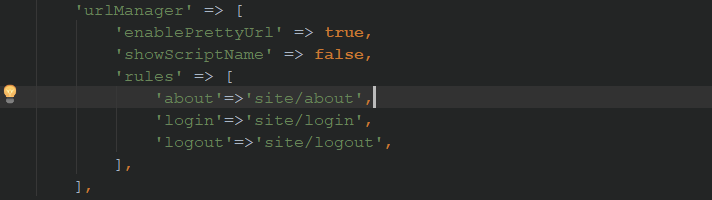
Before we proceed, let’s implement pretty URLs in our application to make the URL easy to read and also SEO friendly. The configuration file, web.php, is by default located in the config folder.
Open that file, uncomment the "urlManager" array, and edit it as shown below:
After the update, we should be able to access the login page using the following URL BASE_URL/login. BASE_URL is by default http://localhost:8080.
Require the Twilio PHP SDK
The next step is to install Twilio PHP SDK. Let’s go to the console and navigate to the Yii2 application we have just set up. In my case, I have named it twilio-voice.
Run the following command to install the SDK:
Once we have installed the SDK, we can then use it in our application.
Creating the TwiML
So what is TwiML? It’s Twilio’s Markup Language to help you easily build your SMS and voice applications. For more information on how to create TwiML, you can check out the full TwiML API reference.
To make this tutorial easy to follow, we’ll create the endpoints in the existing controller SiteController.php, located in the controllers folder.
Outbound Calls using TwiML
For this tutorial, let’s assume we’re developing an app for a restaurant that allows customers to make orders online. We will create TwiML to inform the restaurant of the order when it is placed to ensure on time delivery.
Add "use Twilio\Twiml;" to the list of existing namespaces in SiteController.php.
The endpoint for the outbound TwiML should be as follows:
Add a new rule to urlManager array in the web.php config 'POST notify' => 'site/notify'
Let’s test the output by accessing the endpoint BASE_URL/notify in the browser. You should be able to see the XML output below:

Incoming Calls with TwiML
Continuing with what we know about restaurants, we will assume that the restaurant accepts direct orders made through phone calls. Our next step is to create logic for handling an incoming call with TwiML. To do so, we’ll have two endpoints. One for gathering the inputs and the other to process the inputs gathered. Inside of SiteController.php, create the first endpoint as follows:
The response to handle the input from the customer’s call is as follows:
Add new rules to web.php config 'POST receivecall'=> 'site/receivecall’ and ‘POST respond’=> 'site/respond’. Test the endpoints by accessing BASE_URL/receivecall and BASE_URL/respond respectively in the browser.
Making an Outbound Call
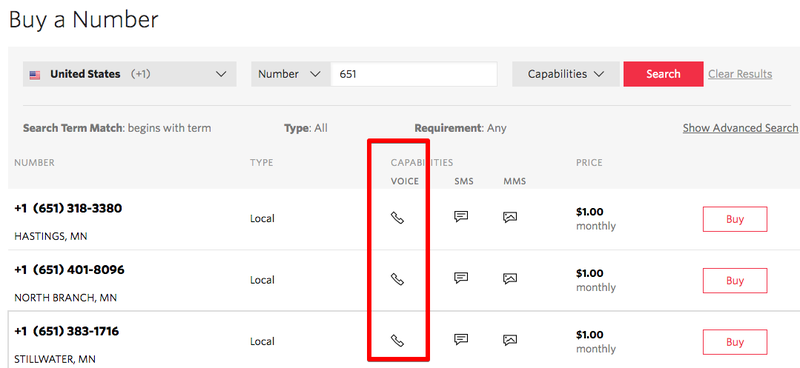
Now that we have created the TwiML endpoint for the outbound call, let’s put everything together and make a call to the restaurant to place an order. Login to your Twilio account. If you haven’t already done so, purchase an available phone number capable of making outbound calls. You'll use this phone number as the "From" phone number when you initiate an outbound call.
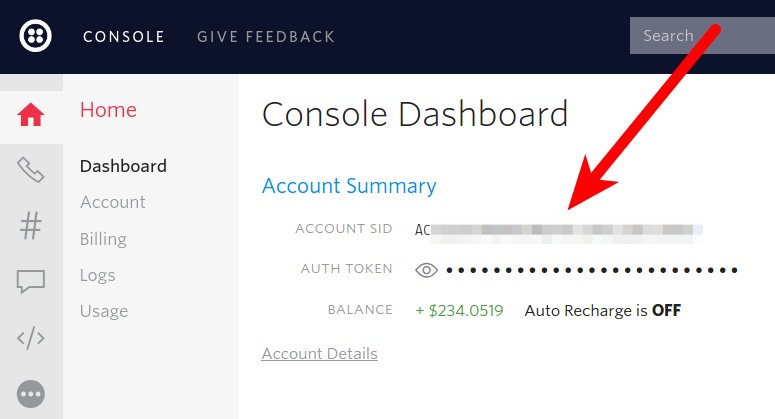
Also, remember to retrieve your account credentials; specifically the Account SID and Auth Token.
Inside of SiteController.php, add the following code:
Add a new rule to web.php config 'makecall' => 'site/makecall’
Receiving the Incoming Call
You can use the same phone number for both incoming and outbound calls. However, if you plan on receiving or making calls frequently like in the case of a restaurant, it is advisable to purchase two or more phone numbers to avoid delays.
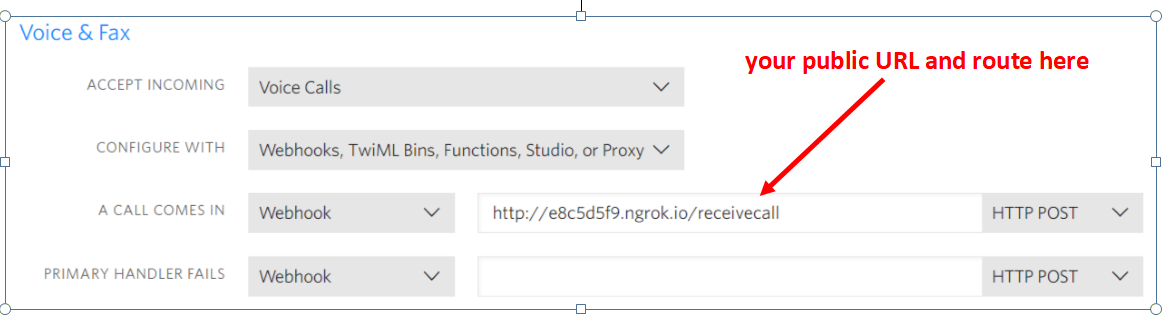
The next step is to set a webhook for incoming calls. The webhook makes an HTTP request to your application when an incoming call is made to your phone number. In our case, the webhook endpoint is http://localhost:8080/receivecall.
In order for the sample code to work, Twilio must send an HTTP request to your application over the Internet. In production, localhost would be your site’s domain. However, when testing locally, we need DNS software like ngrok that assigns a local port a publicly accessible URL over the Internet. If you don’t have a production URL, setup ngrok now.
Once ngrok is set up, run the command below to expose our local web server running on port 8080 to the internet.
Enable Receiving POST Data From External Source
Finally, to allow our application to receive POST data from Twilio, we need to disable csrf verification. Add the following code to SiteController class in SiteController.php:
Go to your Twilio account and set up the webhook as follows:
Voila! We are good to go. Our application can now receive incoming calls and also make outbound calls. Give your Twilio Number a call to try out the over-the-phone ordering or visit BASE_URL/makecall to test receiving an order confirmation.
Remember to update the URLs we defined earlier with your production or ngrok base URL.
Conclusion
The examples we have implemented above are just a tip of the iceberg. There is a ton of stuff we can implement using a TwiML and Twilio’s PHP SDK. For example, you can implement an IVR for your call center and other cool dynamic TwiML as per your requirements. The ball is on your court.
Happy coding!
- Website: www.talwork.net
- Twitter: @MikeLidbary


Related Resources
Twilio Docs
From APIs to SDKs to sample apps
API reference documentation, SDKs, helper libraries, quickstarts, and tutorials for your language and platform.
Resource Center
The latest ebooks, industry reports, and webinars
Learn from customer engagement experts to improve your own communication.
Ahoy
Twilio's developer community hub
Best practices, code samples, and inspiration to build communications and digital engagement experiences.