How to Automate WhatsApp Messages using Bottle and Twilio
Time to read:
September 06, 2022
Written by
Reviewed by

Automation is not a new topic in Python. In fact, it is one of the most widespread use cases of Python. To automate is to reduce the need for human intervention by implementing countermeasures or "future" actions that will be in effect for a particular task.
Automation has a general use, but we will give an insight into its process by showing how to automatically send WhatsApp messages using the Twilio services and Bottle web framework in Python.
Prerequisites
This project will show you how to expose a local server to the web using Localtunnel dynamically and how to use a URL as a callback in the Twilio Sandbox for WhatsApp. Thus, you will need the following to achieve this aim:
- A Twilio account.
- Python.
- Some coffee.
Let us begin!
Getting started
This section will talk about the following:
- Setting up the Twilio WhatsApp Sandbox.
- Sending an HTTP request using the Bottle framework.
- Exposing a localhost server to the web using Localtunnel.
Setting up the Twilio Sandbox for WhatsApp
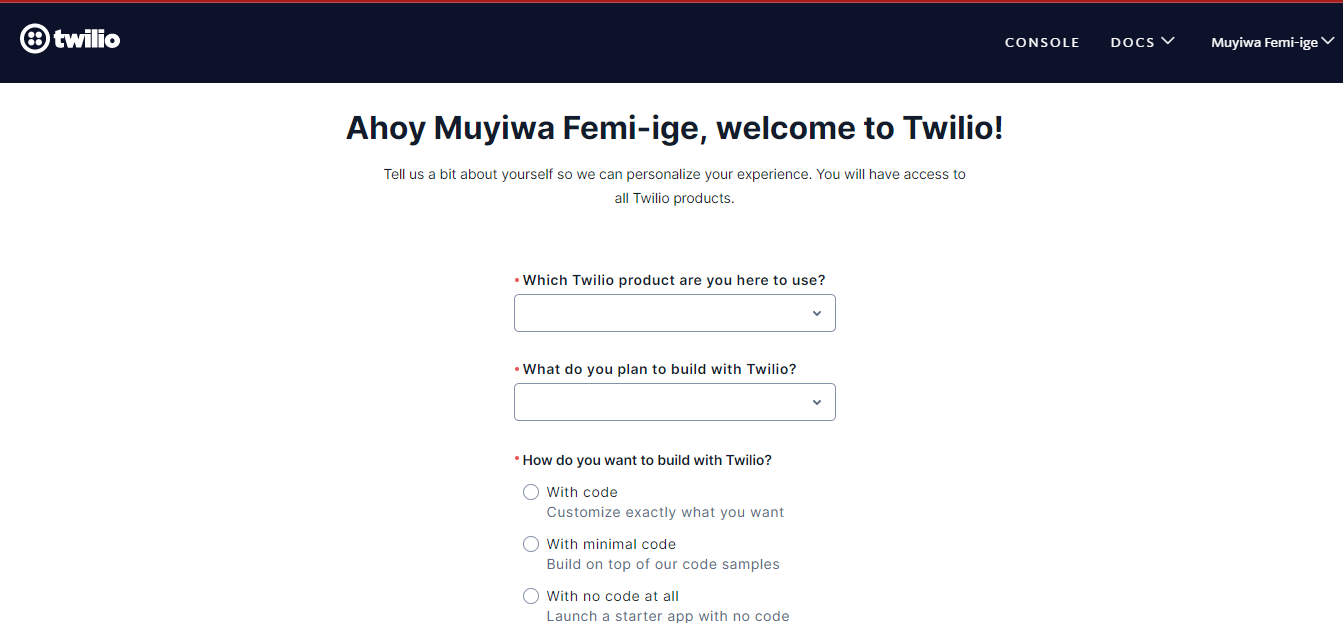
The Twilio Sandbox for WhatsApp consists of a pre-configured environment in the Twilio Console where one can test features like sending, replying, and configuring messages. After signing up for Twilio and following all the sign-up processes, proceed to fill in the prompts on the next page and click continue.
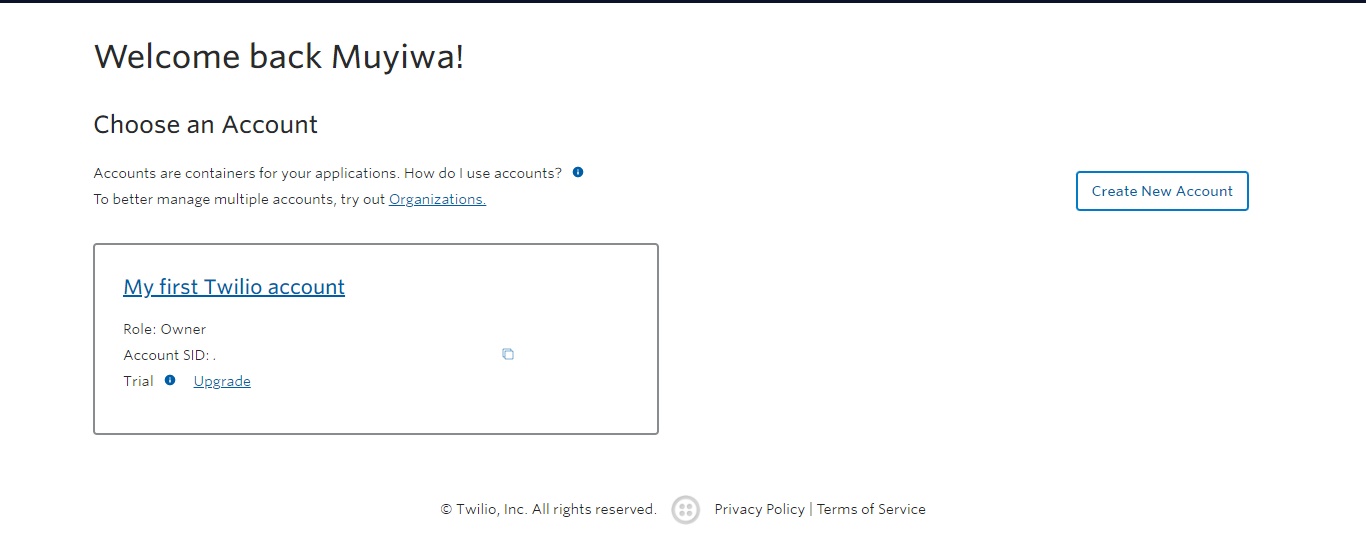
Twilio automatically creates a new account but if you want to create another account for this project, click on the icon at the top left corner of the page.
Doing that redirects the console to a summary page, and you will be able to create another account there.
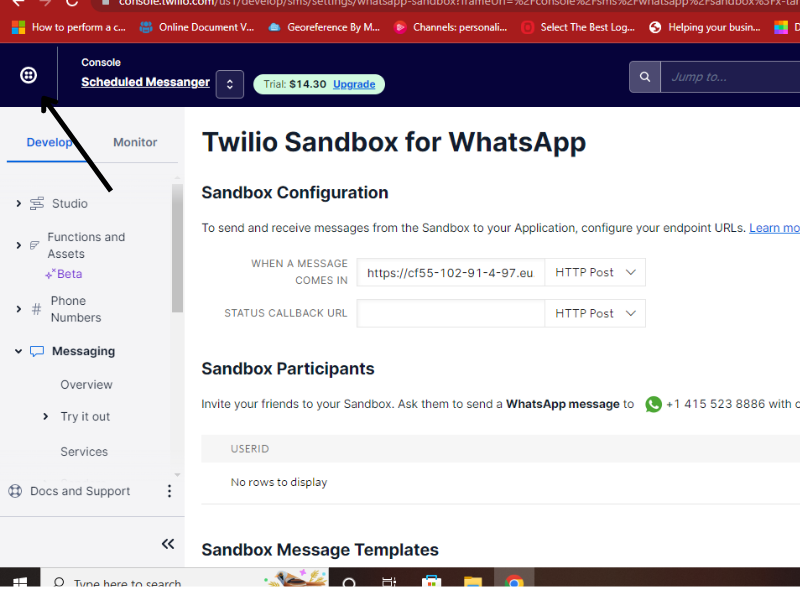
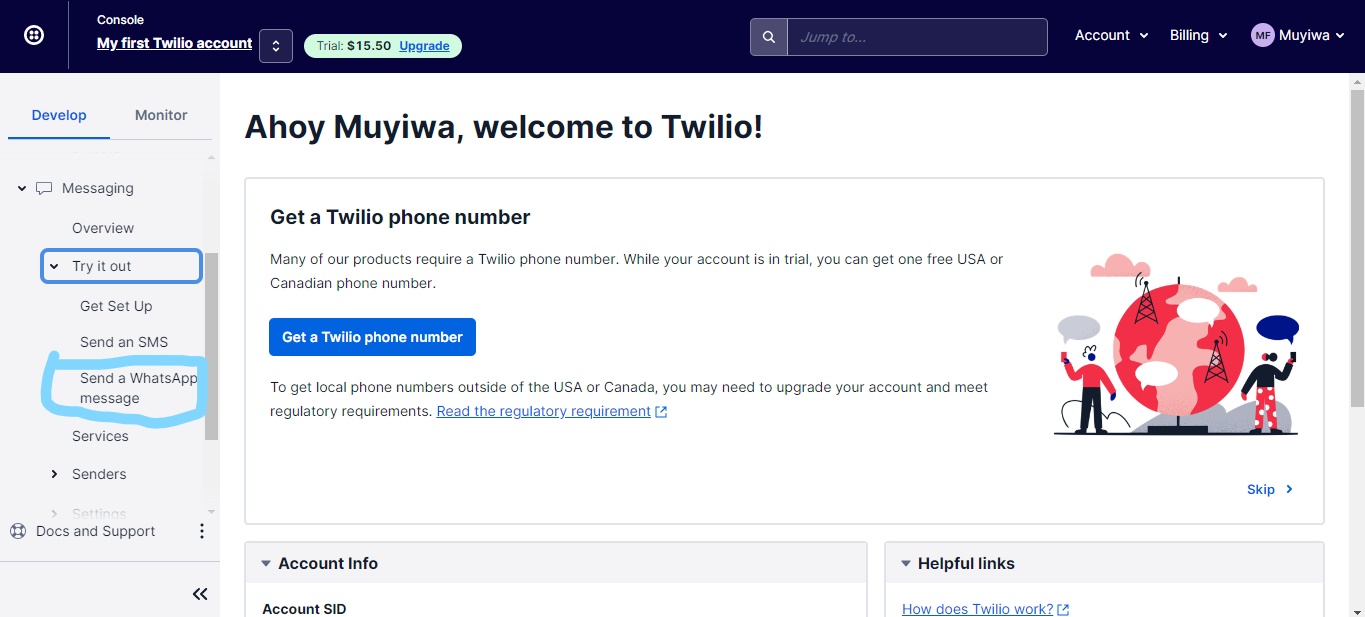
Back in the console, click on Messaging > Try it out > Send a WhatsApp message to set up the Sandbox.
There is a walkthrough of the Twilio WhatsApp Sandbox here, so feel free to go through the steps, or you can jump directly to the Sandbox settings by clicking the link above. To activate the Sandbox, you’ll need to send a special keyword message provided by Twilio to the WhatsApp number given.
The next step is to set up a callback URL. This will be the link between your WhatsApp Sandbox and the backend server you will create in the next step. When a user sends a message to the WhatsApp Sandbox, the backend server will process the message, and if there is a particular field (string) found in the WhatsApp body, the server will send a suitable preset response message back to the user.
Set up project files and install dependencies
Start by creating a Bottle web application as the backend server. To begin, navigate where you would like to set up your project. Then create and change into a new directory called bottle_messenger by running the following commands in your terminal.
Create a virtual environment, achieve this by running the terminal command below.
Once the environment has been created, use the command below to activate it if you're on a Windows machine.
If you are on a Mac or Linux machine, run the following command instead.
Next, install the Twilio and Bottle packages. Do this using the command below.
After installation is complete, create a simple Python app in the virtual environment, import the necessary modules from the Bottle and Twilio libraries within the app, and then create two functions: hello and reply. The reply function will be used for the WhatsApp automation feature.
Sending an HTTP request
If a user sends a POST request to the /message URL, the backend server will take the message body and store it in a variable msg, and check if the message meets any of the conditions provided. If so, it will return a suitable response attached to the condition stated. If the message body says otherwise, the response will echo back to the user.
Create and open a new file called index.py, then paste the following code into the file.
Now, in the bottle_messenger project directory, run the application using the following command.
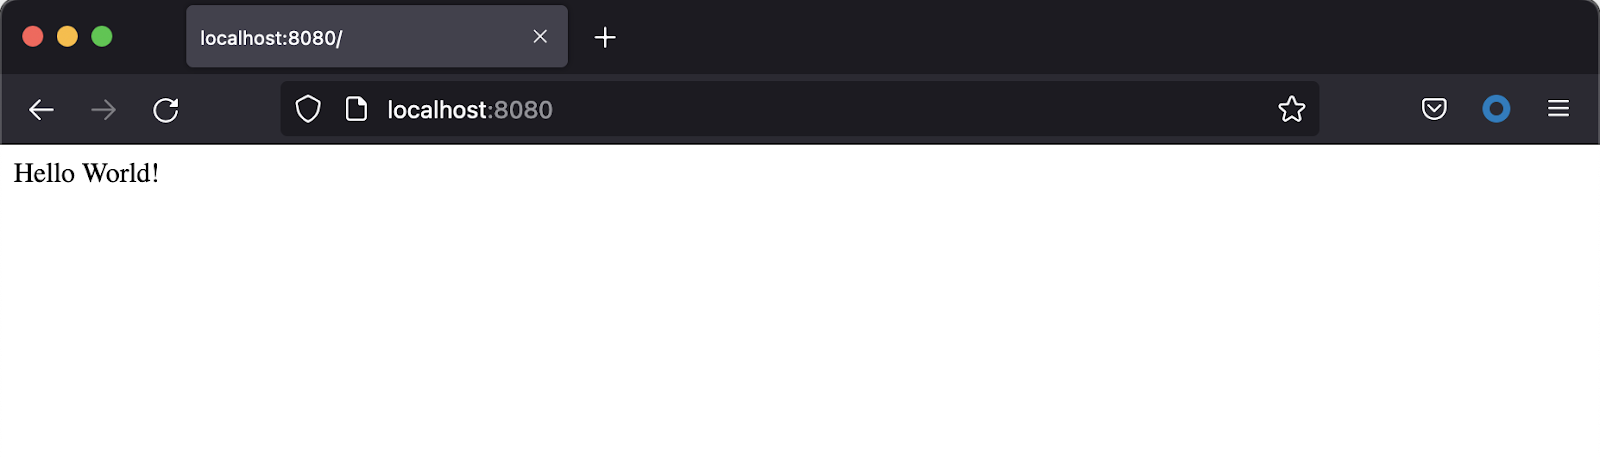
Now that your server is running, navigate to http://localhost:8080/ in your browser. There, you will see "Hello World!" on the screen, letting you know everything is working as it should.
Exposing a local port using Localtunnel
Tools like Ngrok, Serveo, Pagekite, Localtunnel, etc. can be used to expose the local port online dynamically. Localtunnel will be the preference for this tutorial because it is free and easy to use. To install Localtunnel, run the command below in the terminal:
After installing Localtunnel, use it to expose local port 8080 online. To do that, run the command below in your terminal:
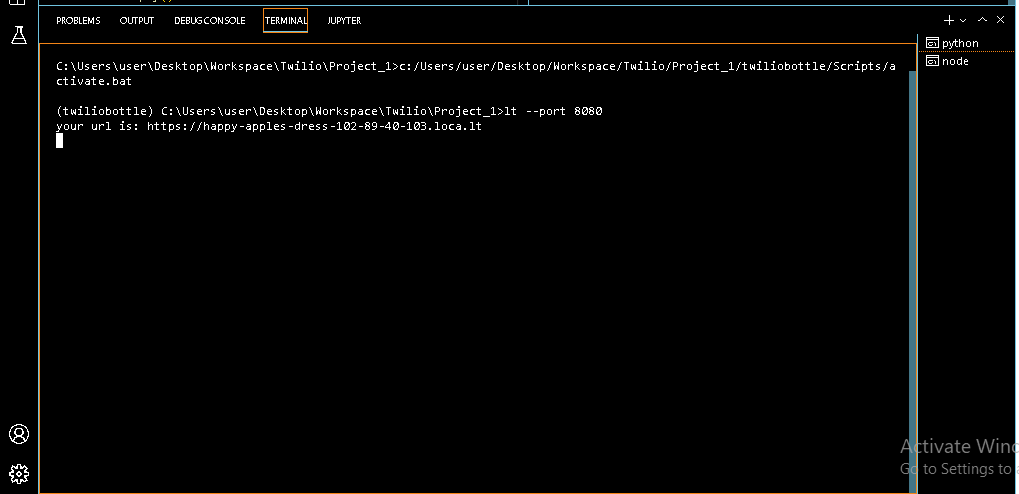
After using the command above, a URL will be displayed. Paste it into the browser, and voila! The backend code is available online and ready to use as a callback URL.
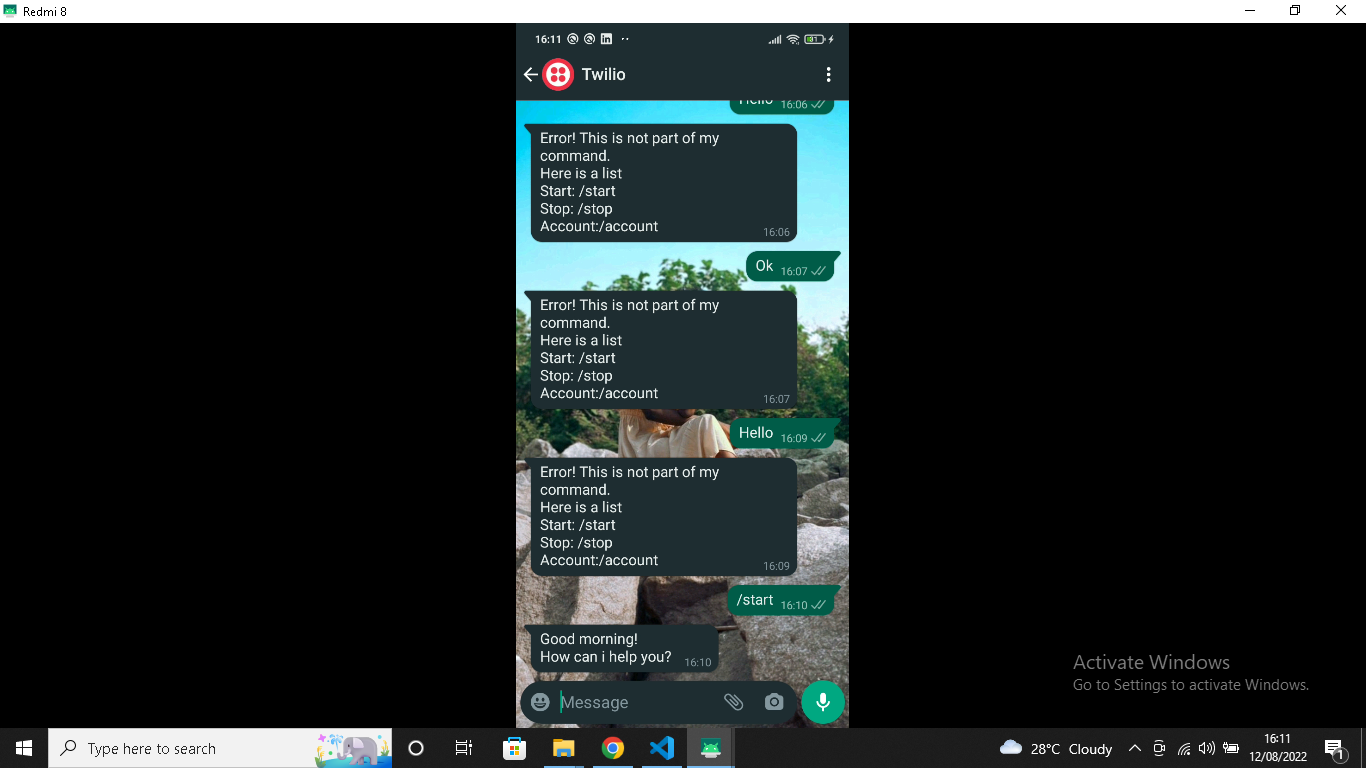
Now, head back to your Twilio Sandbox configuration page and paste the link provided by Localtunnel, with /message appended to it, as the webhook URL next to the WHEN A MESSAGE COMES IN label and save it. Next, join the Sandbox and type in some messages on WhatsApp. We are good to go!

The results are shown below, and now it’s possible to send automated two-way responses with the Twilio Sandbox.
Conclusion
This tutorial has covered the following topics:
- How to create a Twilio account and activate a Twilio Sandbox.
- How to create a Bottle web framework server and send an HTTP request with Bottle.
- How to automate a two-way message using the server and Twilio Sandbox.
- How to dynamically expose the server to the internet using Localtunnel.
Twilio is a growing company that offers numerous services. Thus, look through the official docs here to see what limitless possibilities Twilio provides. Thanks for reading, and Happy coding.
Muyiwa Femi-ige is a Web and app development enthusiast who has a knack for putting code into a well-documented format. You can reach out to Muyiwa via email femiigeoladele2000[at]gmail.com or on LinkedIn.


Related Resources
Twilio Docs
From APIs to SDKs to sample apps
API reference documentation, SDKs, helper libraries, quickstarts, and tutorials for your language and platform.
Resource Center
The latest ebooks, industry reports, and webinars
Learn from customer engagement experts to improve your own communication.
Ahoy
Twilio's developer community hub
Best practices, code samples, and inspiration to build communications and digital engagement experiences.