How to Build ADHD Lifehack Tools with Python, Google Sheets, and Twilio SMS
Time to read:
November 15, 2022
Written by
Reviewed by

I can say from experience that ADHD adds several layers of complexity to life on an already chaotic and distracting planet, and while we need all the help we can get, it’s often difficult to find tools that you stay in the habit of using and that actually help.
By building your own, not only will you be able to have a tool built custom for your brain, but the satisfaction of building something may encourage you to keep using and optimizing it!
In this tutorial, we'll be building three helpful tools:
- An SMS task-inbox-and-notetaking app
- A die roll app for moments of indecision
- A timer that texts you when time is up
The theme of the project examples in this post are all about getting things out of your head, and getting yourself out of your own head, two very common challenges for ADHD brains.
How will these apps work?
All the functionality of this app will be handled by a handful of Python scripts running on a server of your choice (a newer Raspberry Pi model would do the job nicely), Google Sheets as a database of sorts, and Twilio SMS.
Prerequisites
You'll need...
- A Twilio account with an SMS-capable number.
- Python 3
- Basic knowledge of Python, Google Sheets, REST APIs, Twilio SMS, and the command line.
Components of this project
Google Sheets
Because this project requires periodic storage and retrieval, we'll need some sort of database.
Since this is a relatively simple app, in lieu of a more robust solution like MySQL or SQLite, we'll be using Google Sheets as our "database" of sorts.
The biggest advantage of Google Sheets, other than its ease of use, is that it's inherently visual. You can view, edit, sort, and quickly scan all your data without needing to write your own front end from scratch or install a third-party tool.
Visibility is important for ADHD brains! In my case, if important information is difficult to visualize or quickly process, it might as well not exist.
Python
Python appeals to my brain immensely, in no small part because it's just so darn flexible and forgiving.
Each individual "app" will be a separate .py script, called from a main script which receives, routes, and returns data to Twilio SMS itself.
Twilio SMS
Twilio SMS will be our gateway for using the tools we'll build in this project. We'll use it in two different ways:
- With ngrok, for receiving incoming webhooks from SMS when a message is received.
- Using the Twilio SMS REST API. When responding immediately to an incoming message, we can simply include the content of the message as our response to the webhook. However, some components of this project send messages asynchronously, separate from any given incoming message. This is where the REST API comes in.
Set up your project
Make a new folder
Let’s make a new folder to contain our project files. I’ll be developing this project in /home/nick/adhd-lifehacks.
Install your dependencies
Next, create a Python virtual environment where you can install the dependencies for this project. If you are working in a Mac or Unix environment, run the following commands:
If you are working in a Windows environment, run the commands below instead:
We'll need the following dependencies for our project, which can be installed by entering the following in your command prompt:
- flask is a modern, powerful web application framework, which we’ll be using to build the back end.
- gspread is a handy Python API for manipulating Google Sheets.
- oauth2client handles account credentials so that we can securely access our Sheets.
- twilio is a helper library for using the Twilio platform with Python!
Set up your server
We’ll be using ngrok as a straightforward way of opening our app to the public web, which is necessary for Twilio webhooks.
Create a new free account by following the steps here: https://dashboard.ngrok.com/signup.
Next, download the ngrok executable and unzip it.
To connect to your ngrok account, specify your token, displayed on the login page:
Finally, check to see whether ngrok works:
You should see a screen that looks something like this:

You can verify that it worked by navigating to the https forwarding URL you see on your screen; it will be unique to your instance.
Following a prompt reminding you that you’re using the free tier of ngrok (we’ll address that later), you’ll see a screen like this:
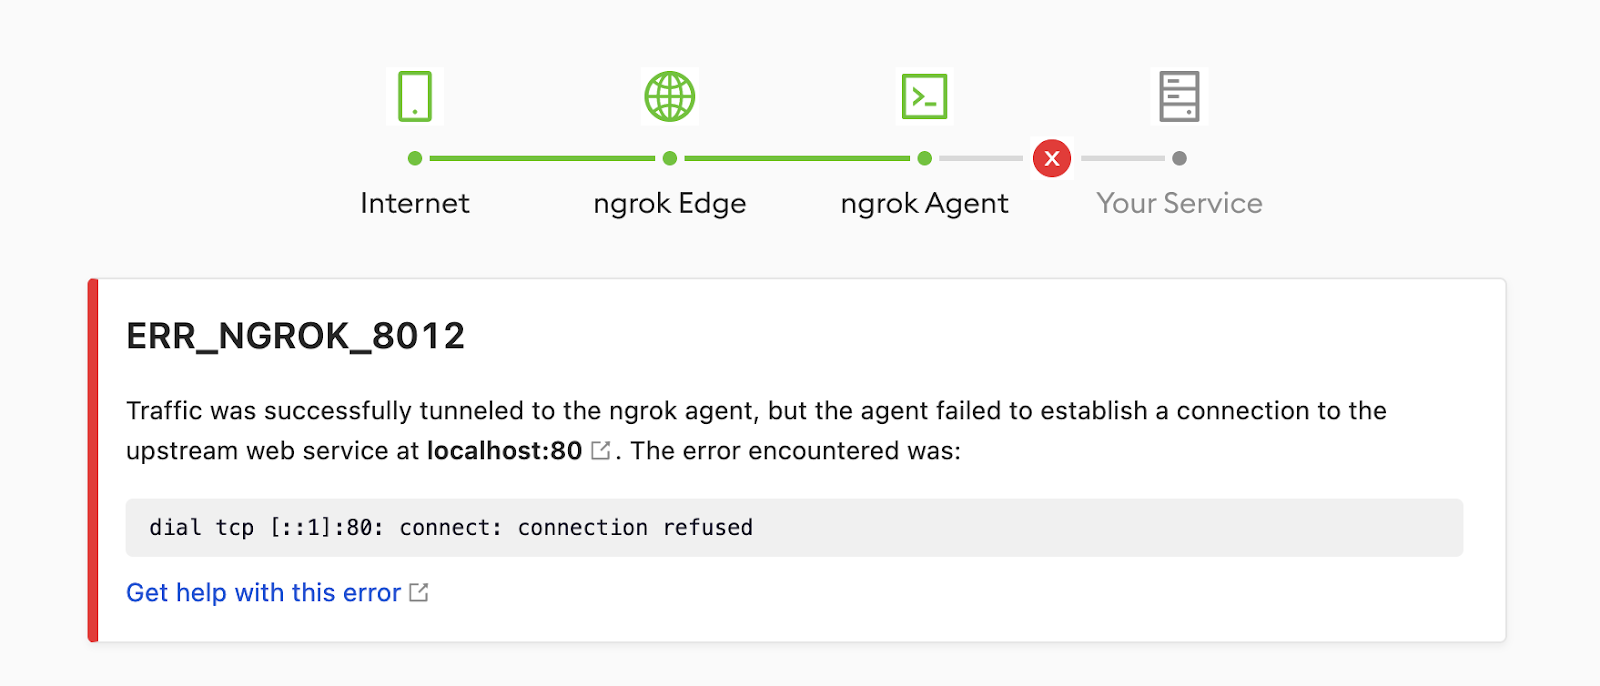
The error is simply because we haven’t written or run any code yet! Let’s get to that by starting out with a small test.
A small test
Let’s fire up our favorite code editor and create a new Python file called test.py…
To point Flask to this file, let’s open a new terminal window, navigate to the project directory, activate the virtual environment, and specify some environment variables:
Now, start Flask with the following command.
With ngrok still running in the original window (type ngrok http 5000 to restart it if you closed it before), let’s try the forwarding URL again.
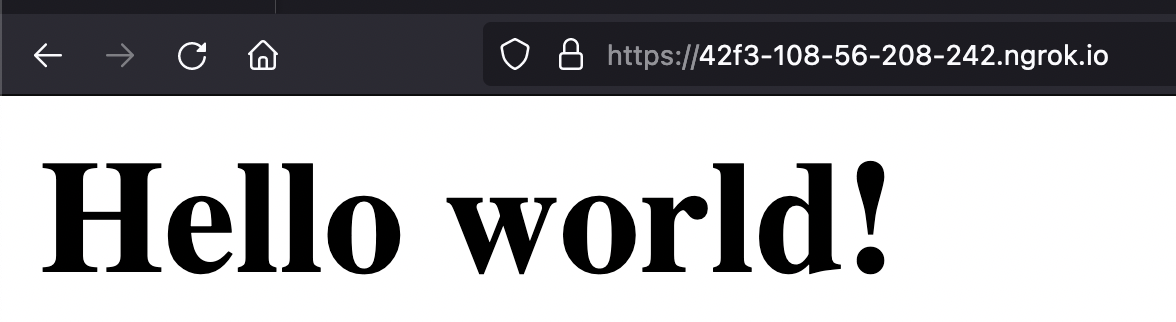
Voila!
Connect to Google Sheets
Now it's time to get connected to Google Sheets. This is a slightly complicated process, but you'll only need to do this once!
1. Create a new project in Google APIs & Services
- Navigate to the Google APIs & Services dashboard.
- Click the project drop-down menu and select New Project.
- Give your project a name, then click Create.
2. Add the Google Drive and Sheets APIs to your project
- Make sure your new project is selected in the drop-down menu.
- Click on Library on the left-hand menu.
- Search for "drive", then click the Google Drive API.
- Click Enable.
- Follow these steps to add the Sheets API.
3. Create credentials
- Click Credentials, and then click Create Credentials.
- Choose "Service Account"; our app is a robot that won't require a human to sign in.
4. Go through the credential configuration steps
- Choose a name, then click Create and Continue.
- Choose the Project -> Editor role to allow our app full editing capabilities.
- The final step can be skipped.
5. Grab a private key file
- Select your new service account.
- Navigate to the Keys tab.
- Click Add Key -> Create New Key.
- The default JSON option is what we want. Click Create.
- A new private key file will be downloaded to your computer.
6. Move your secrets file to your project folder
- Rename the file to client-secrets.json (or whatever you prefer).
- If planning to track this project with Git or similar, be sure to add a line containing “client-secrets.json” to .gitignore (or the equivalent action in your version tracking system of choice).
7. Invite your "user" to be an editor of your Sheet
- Open the client-secrets.json file in your text editor of choice.
- Find the "client_email" field and copy it.
- Open Google Sheets and make a new spreadsheet called "Todo". This will be used for our first app.
- Click Invite, then invite the email address you just copied. Doing this will grant editor permissions to our scripts the same way you'd invite a human user.
Let's see if it worked
Phew! That was many steps. After all that, how can we be sure it all worked correctly?
Let's go back to our test.py script and add a few more lines of code.
Now, every request you send to the app under the Body field will be logged to the table! Neat, huh?
Configure Twilio SMS
Almost to the finish line! Once this is set up, we'll have a robust foundation for all sorts of SMS-powered apps, not just those of the ADHD lifehack variety.
Add a Twilio phone number
First, log into your Twilio account (or create one if you don't already have one).
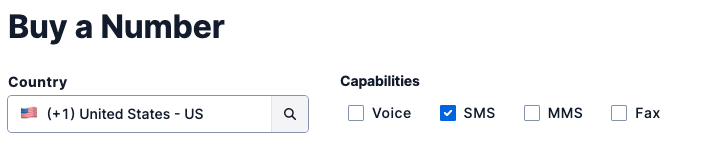
Navigate to Phone Numbers > Manage > Buy a number:
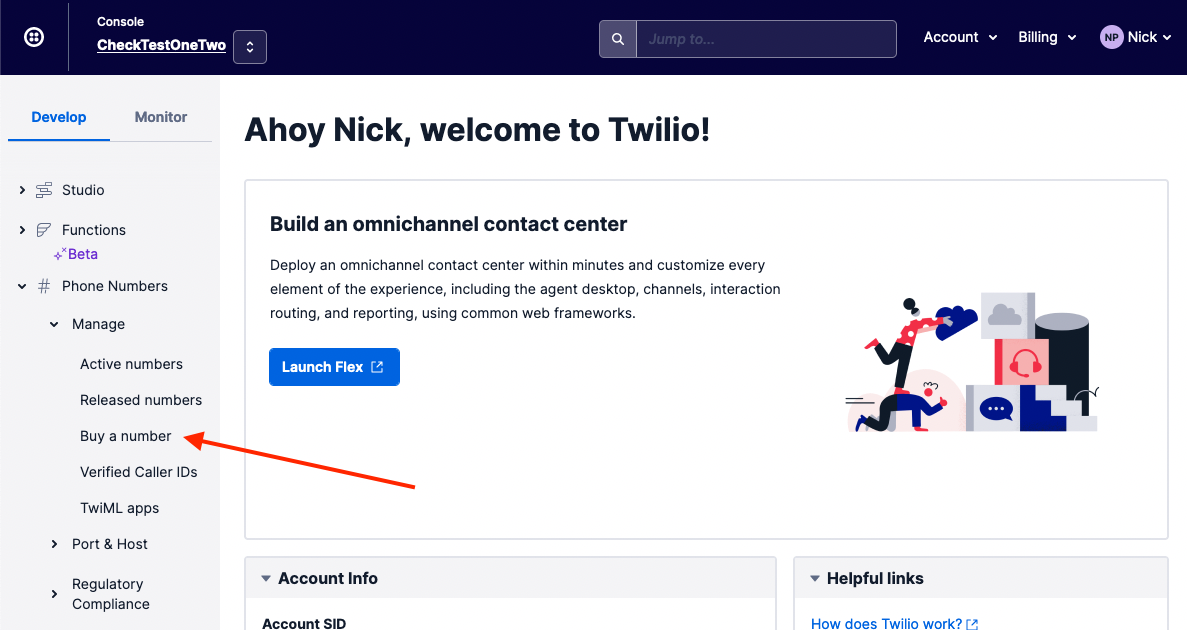
You can choose any number you want, provided it supports SMS.
Configure your webhook
Next, click on the phone number you just created.
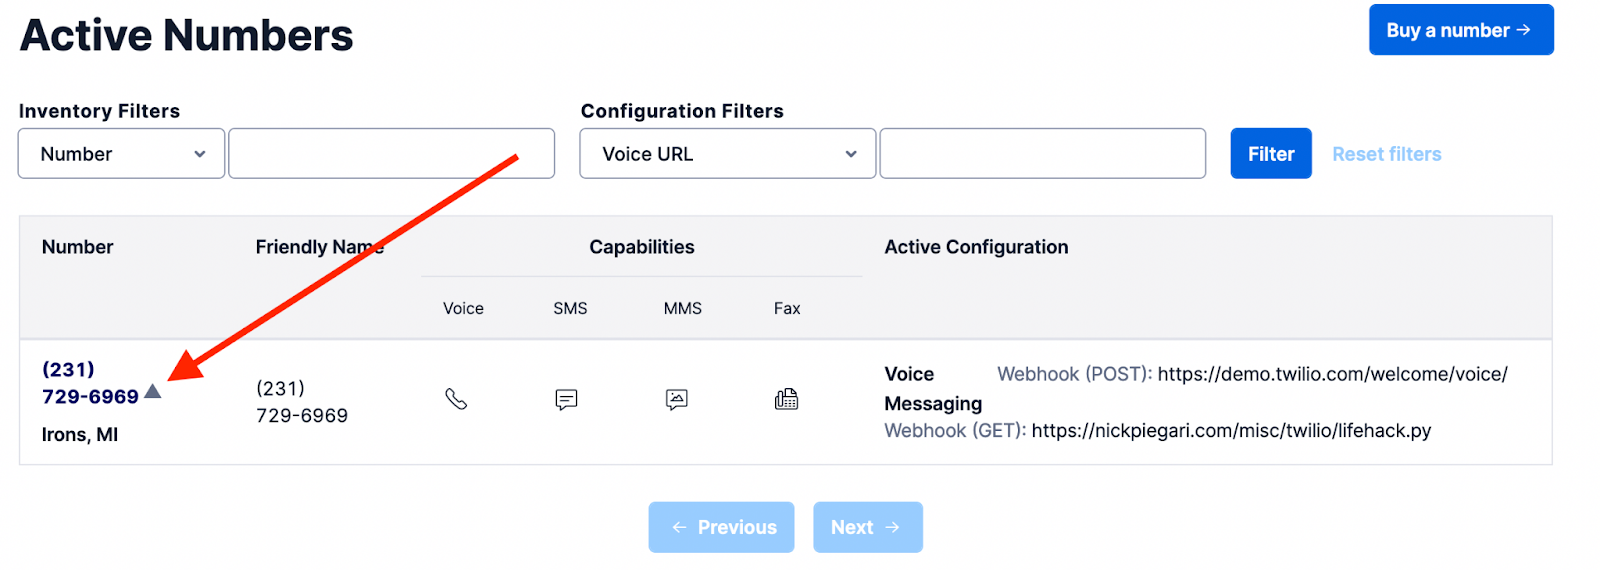
Scroll down to Messaging.
Under "A Message Comes In"...
- Choose "Webhook" as our message type.
- Enter your ngrok forwarding URL, as discussed earlier.
- Choose "HTTP POST".
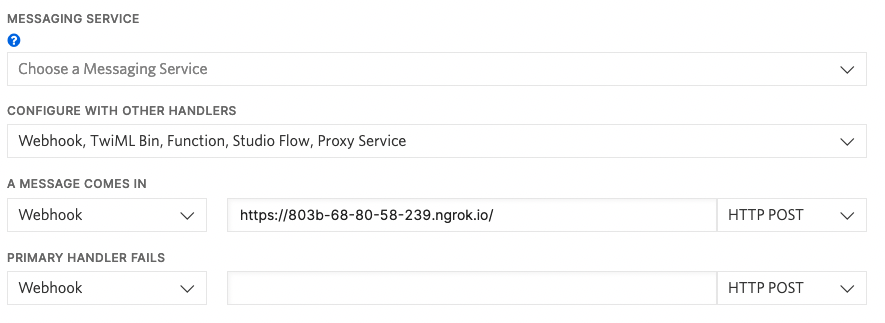
Click the Save button when finished.
Now, when you text this number, it shows up in the table!
Pretty cool, huh? :)
Now let's move on to the fun stuff!
Twilio secrets
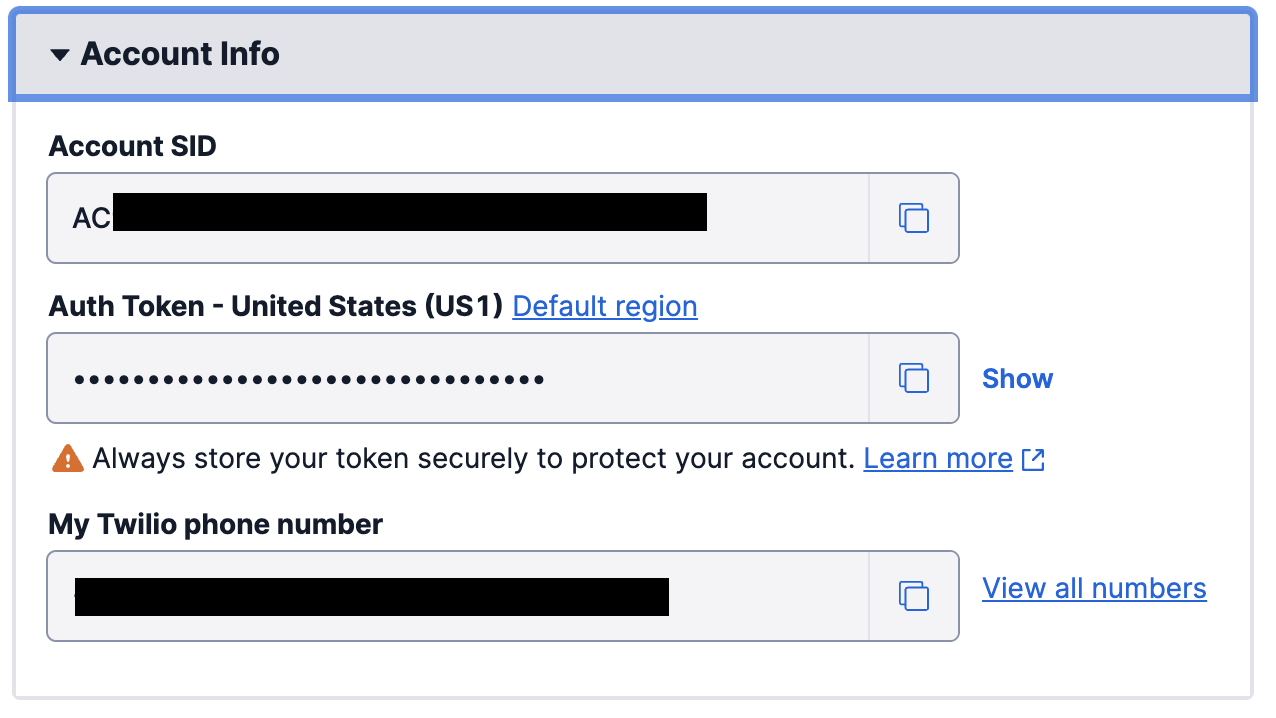
For the purpose of asynchronously sending outgoing SMS messages (as opposed to immediately responding to incoming webhooks), we'll need to grab our account SID and auth token.
These can be found on the front page of your console. Remember to keep them secret!
Back on our server, let's make a new file in the same directory as client-secrets.json. We'll call it twilio-secrets.json, and it should look something like this:
Replace the placeholder text above with your own values.
App 1: Todo Inbox
Thanks to the work we put in building our foundation, surprise surprise, our first app is basically already finished!
In keeping with the theme of getting things out of our brain and into a more concrete form, our first app is a simple inbox system!
The concept: when an idea or task pops into your brain, instead of the thought vanishing away into the ether, simply text your thought to your Twilio number and it'll log it in the Todo sheet you just created.
Build a main script to act as a hub for your apps
Let's make a new file called lifehack.py. We'll tell Twilio SMS to send incoming messages to this script. Once received, lifehack.py will send the request to the appropriate app based on a keyword at the beginning of the message.
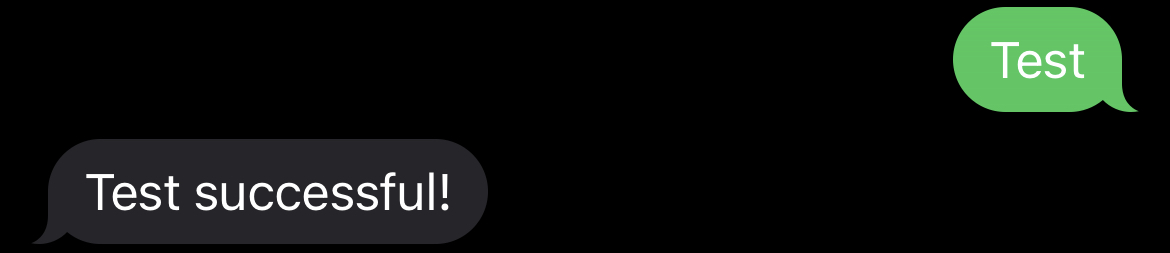
We'll add our apps to appList as we create them, starting with a test function.
Next, stop your Flask server and change your environment variable to point to the new file before restarting Flask…
Now, when you text the word 'Test' to your number, you should see this:
Time for todo.py
Moving on, let's make a new file called todo.py.
NOTE: Remember to change the path of your keyfile! (We'll move this into a separate config file later so it's not hard-coded.)
We'll need to add this new app to lifehack.py…
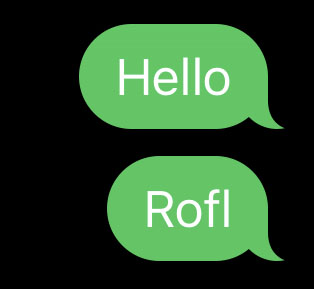
Now, when you preface a message with Todo, followed by a message of your choice (where a pipe | symbol will indicate a column split, for convenient and flexible categorization), you should see this:

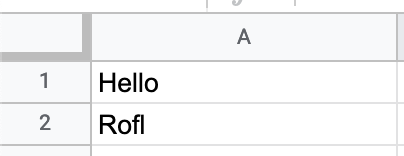
These entries should also appear in your Todo sheet:
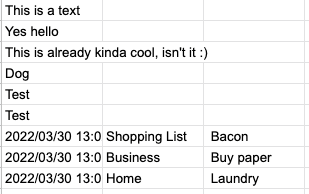
The benefit of having category columns is that you can conveniently turn a mess like this…
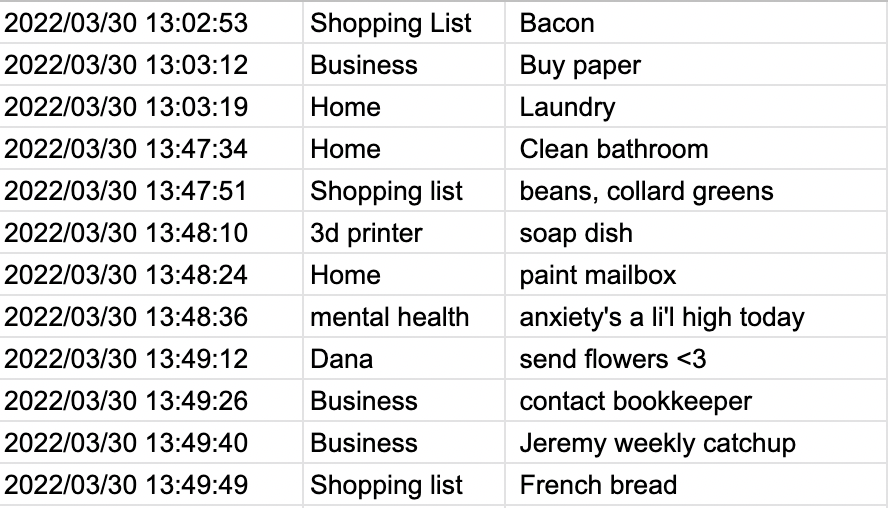
... into this, simply by sorting alphabetically by category!
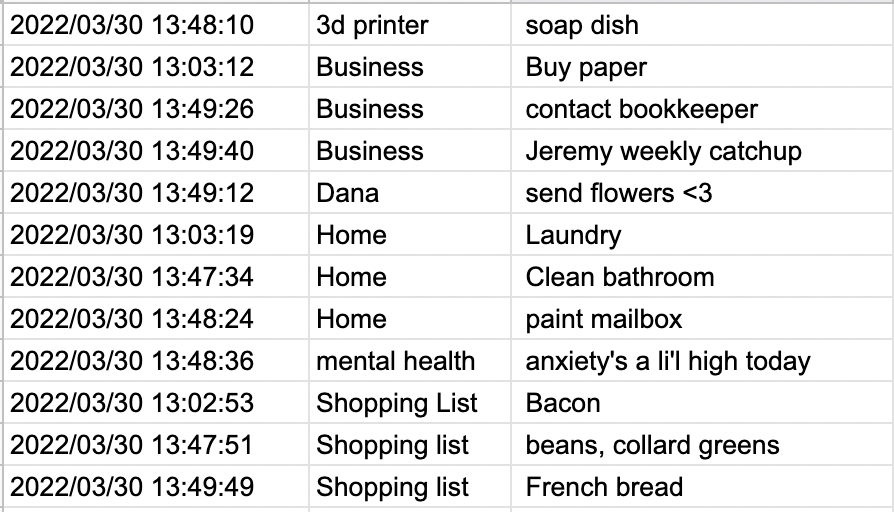
This illustrates one of my favorite things about using Google Sheets as your database: you already have a basic front-end UI!
App 2: Random Number Generator (Die Roll)
Indecision is a key component of many flavors of ADHD. I mean, how are most people so easily able to decide what to have for lunch, or what they should do to relax in the evening, or what tasks to work on? I'll probably never know! There are so many options and they're all awesome, or at least all need to get done.
I personally can attest to the power of the One Thing as a way to beat decision paralysis. The process only has a few steps:
- Make a list of all possible options.
- Ask yourself, "Which one of these options would make the others easier or unnecessary?"
- Go with that option, and then apply the One Thing principle to that, et cetera.
For instance, say you need to...
- Schedule a doctor's appointment
- Order dog food
- Plan your vacation
- Look into hiring a virtual assistant
- Search for replacement components on Aliexpress
Given that a virtual assistant could do all those other tasks for you, it's the obvious choice as the option that would make the others easier or unnecessary.
But sometimes your to-do list looks a bit more like this:
- Finish bookkeeping before Q2 tax deadline
- Review lengthy email from attorney
- Approve invoices
- Prepare notes for weekly catch-up meeting with Bioviz Inc.
None of these are really more or less valuable or important than the others; you've gotta do them all. But how do you decide? Do the least boring one first? The most urgent? (Are any of them more urgent than the others?) Do the most exciting one first? (Are any of them exciting?)
This is when it can be handy to simply assign each task a number and roll the dice. In this instance, if you roll a 3, it's invoice time!
Unfortunately, dice aren't always available, especially not with the same number of sides as the options available. As such, let's build an electronic die roller with only a few lines of code
rng.py
Let's make a new file called rng.py. (RNG, for the record, stands for “random number generator”.)
Just five lines of code! Next, let's add this script to lifehack.py…
Now, send a text to the bot with the format “RNG x”, where “x” is a number from one to the maximum number of options; you can think of it like a six-sided die, a twenty-sided die, et cetera:
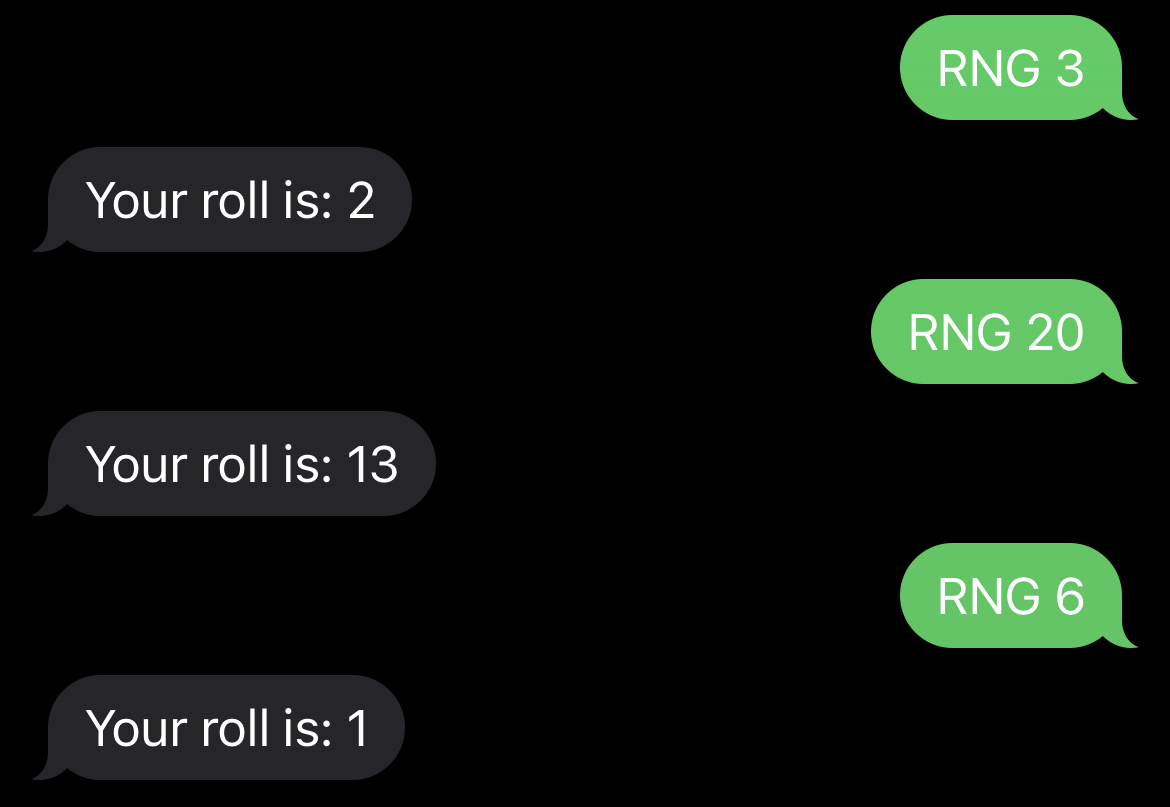
This would, of course, also make an excellent tool for tabletop roleplaying.
App 3: Timer
Now that you've had a machine decide which task you're working on, how can you be confident you'll actually get it done? How much do you need to get done now? The whole thing? A certain part?
I've found that timeboxing is an extremely effective strategy for keeping myself on task. I know what I'm doing, and now I know how long I'll be doing it.
First, let's make a new spreadsheet called Timers.
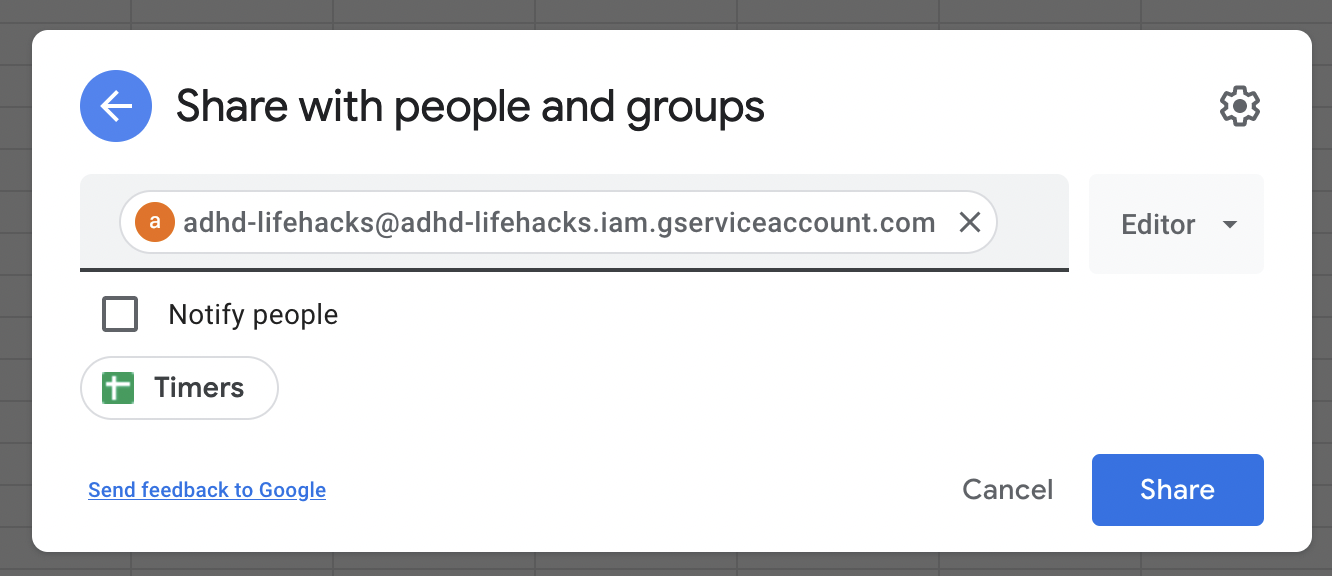
Once again (and for any other table you'll want to incorporate into your code), you'll need to invite your client_email as an editor:
Next up, let's make a new file called timer.py. Add the following code to the file:
#!/usr/bin/python3
import gspread
from oauth2client.service_account import ServiceAccountCredentials
from datetime import datetime, timedelta
def timer(body):
scope = ['https://spreadsheets.google.com/feeds', 'https://www.googleapis.com/auth/drive']
creds = ServiceAccountCredentials.from_json_keyfile_name('client-secrets.json', scope)
client = gspread.authorize(creds)
try:
minutes = int(body.split(' ')[1])
except IndexError:
return "Please specify a time in minutes! Syntax: 'Timer [minutes] [expiration message]"
try:
message = body.split(' ', 2)[2]
except IndexError:
return "Please specify a message to be sent to you upon expiration! Syntax: 'Timer [minutes] [expiration message]"
now = datetime.now()
expirationTime = now + timedelta(minutes = minutes)
sheet = client.open("Timers").sheet1
sheet.append_row([minutes, message, str(expirationTime), 'active'])
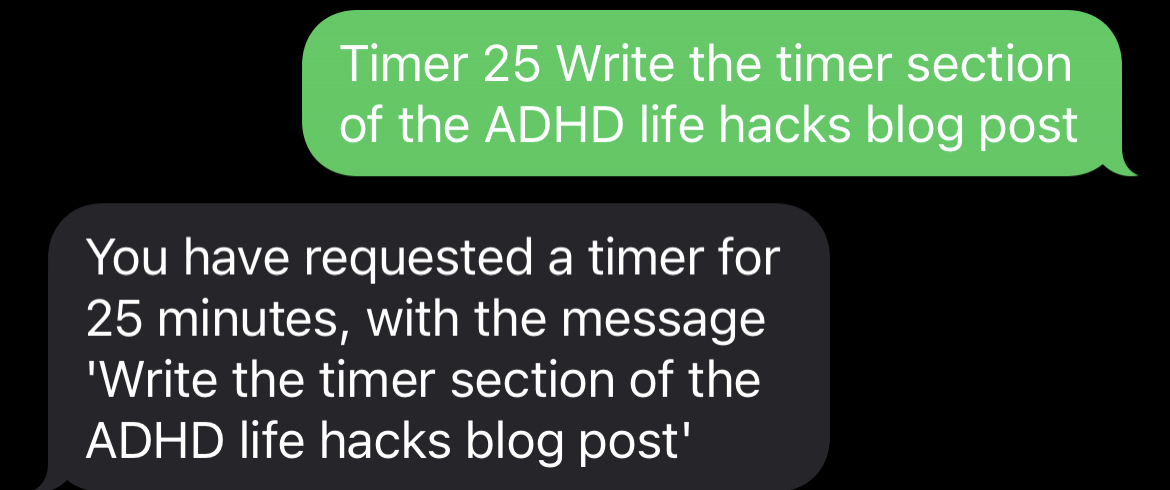
return "You have requested a timer for {minutes} minutes, with the message '{message}'".format(minutes = minutes, message = message)Now go ahead and add the new app to lifehack.py, as before:
Going asynchronous
But wait!, you might be saying. Sure, we've added a timer to a list, but how are we supposed to tell the user when the timer is up? Obviously we can't send that message as part of our response!
To do this, we'll need to use the Twilio API directly.
Let's make a new Python file called timer-sender.py. Add the following code to the file:
This script, when executed, will scan the entire list of timers and see if any are 1. active, and 2. past their expiration time. If so, this is a newly expired task! We send the message to the user, and then mark that timer as expired.
This, however, only happens once, which obviously will not do. We need to check for expired tasks at least every minute in order for the timer to be accurate.
I’ve added a section to this bit of code allowing you to specify the absolute location of the secrets files. This will become necessary in the next step.
Setting up a cron job
On Unix machines (including Linux and Mac OS), we can run tasks at set times using a daemon called cron. Cron runs continuously in the background and runs tasks based on a file called a crontab.
Let's set up our cron job! Go to the command line and enter:
The format for cron jobs is structured thusly:
- Minute (m)
- Hour (h)
- Day of month (dom)
- Month (mon)
- Day of week (dow)
- Command
Because we want our bot to run every minute, our cron job will be exceedingly simple: five asterisks for each field, where asterisks represent "every" (every minute of every hour of every day etc.)
With this line added to the bottom of the crontab, this script should execute at the top of every minute.
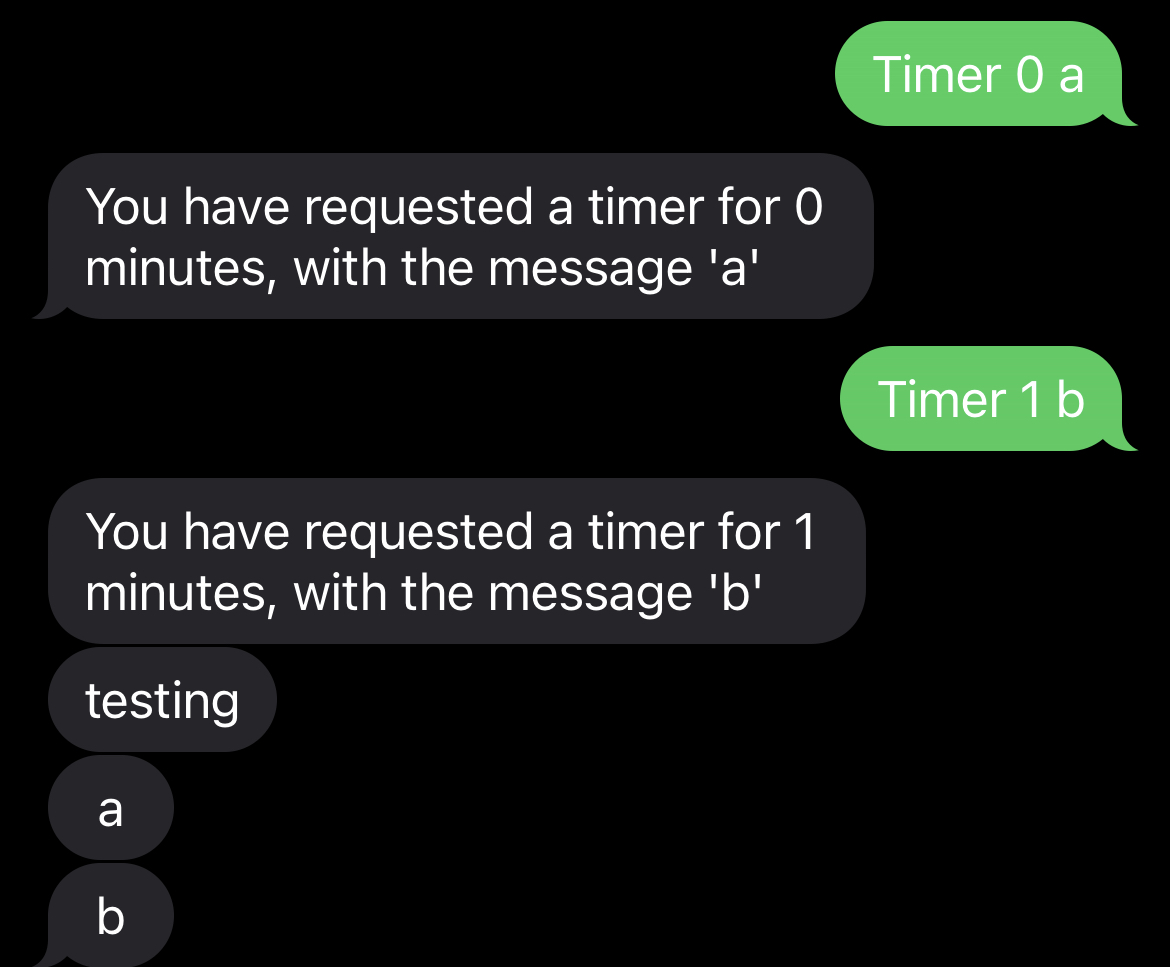
You can quickly test whether it works by sending a timer with a duration of 0 (that is, it'll expire immediately the next time the script runs).
Now, you may also be asking, what's the point of this app when you can just use the timer on your phone?
The answer is simple: accountability!
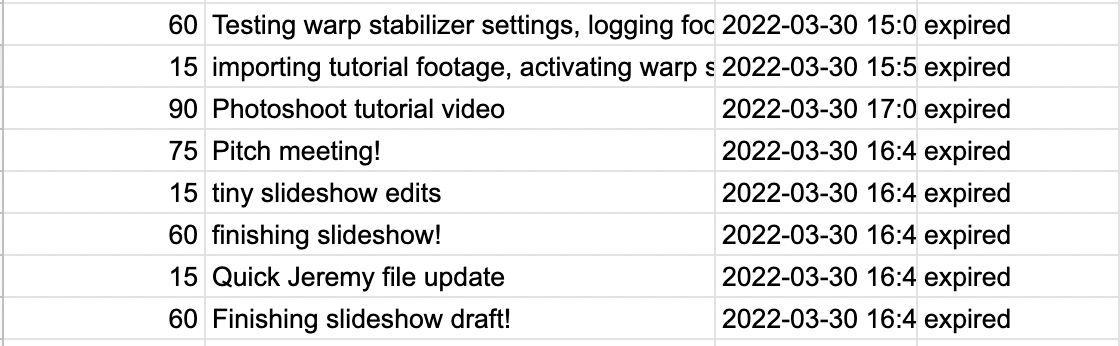
By leaving a paper trail of all the timers you've set, you can get a quick glance of what you did and when.
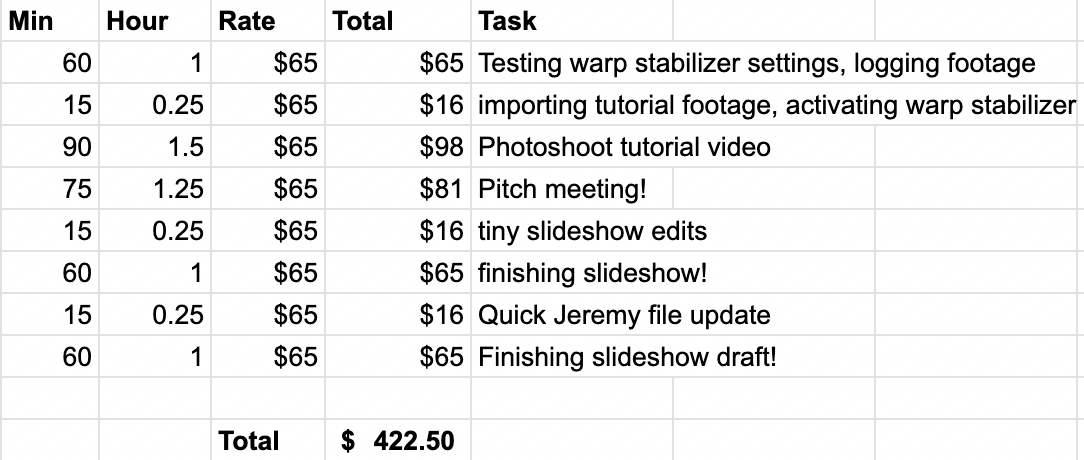
This could even be used for simple client time-tracking just by multiplying billed tasks by your hourly rate:
Conclusion
As stated at the beginning, the point of all this DIY work is so that you can build a system that works for your brain. No brain is alike, neurodivergent or not, and what works wonderfully for one person can be a train wreck for another.
- Are you finding yourself not sticking with some part of your system? Try something else, even if only for the sake of novelty! ADHD brains are notorious for needing something to change for no other reason than that it's new and different.
- Feeling overwhelmed by some component? Tone it down, or try a different approach!
- Be creative! I hope this article serves as inspiration and not just as a series of steps to follow.
Coming up in part 2 of this series...
We'll expand on what we've already built! We will...
- Tidy up and abstract-ify some of the code we've already written and add a few quality-of-life improvements
- Build a system for recurring tasks and keeping track of habit streaks, a la Wordle or Duolingo
- Make a bot that summarizes everything we accomplished yesterday and reminds us of what's on deck for today
- Make another bot that sends us gentle reminders if we've forgotten to finish a task by the end of the day
See you then!
Nick Piegari is a Swiss-army-knife (but primarily web) software developer, recovering video producer and motion graphics designer, and mad scientist. When not engaged in some big project like programmatically converting an entire site from one CMS to another, you can probably find him tinkering with an ESP8266 dev board or (very, very slowly) learning to fly helicopters.

Related Resources
Twilio Docs
From APIs to SDKs to sample apps
API reference documentation, SDKs, helper libraries, quickstarts, and tutorials for your language and platform.
Resource Center
The latest ebooks, industry reports, and webinars
Learn from customer engagement experts to improve your own communication.
Ahoy
Twilio's developer community hub
Best practices, code samples, and inspiration to build communications and digital engagement experiences.