Build an Email Newsletter with Django and Twilio SendGrid
Time to read:
January 17, 2020
Written by

In recent years, email newsletters have become an increasingly popular way for content creators to reach their audiences. In software development, newsletters from Sacha Greif’s Sidebar to the now multi-line Cooper Press have found success distributing curated links and original articles. A number of services exist to solve the myriad of technical and non-technical barriers to reliably distributing to a large mailing list, including Twilio SendGrid’s own official solution and resources on starting a newsletter. While what we develop in this tutorial may not be as fully-featured as the off-the-shelf product, today we’ll take a dive into creating our own minimal email newsletter backend using Python’s Django Web Framework and Twilio SendGrid’s core email-sending API.
Tutorial Requirements
To complete this tutorial, you’ll need the following:
- Python 3.6 or newer. If you don’t have a previously installed Python interpreter, you can go to python.org to download an installer.
- Django. We will install Django later to develop our web application.
- Two or more active email addresses that can receive email.
- A Twilio SendGrid account (note: this is different than a Twilio account). You can log in here or set up a free account and review the generous free resources provided with your new account.
Optionally, feel free to download the finished project on GitHub and follow along with the rest of the tutorial. The README file contains altered setup instructions for the finished code.
Create a Python Virtual Environment
In accordance with Python best practices, we are going to develop our application in its own directory and virtual environment. Then, we’ll install our Python packages and create our Django project.
If you’re using a Unix or MacOS system, you can achieve this by opening a terminal and running the following commands:
On Windows, you can do the same with the command prompt:
The last line uses pip, the Python package installer, to install our two packages for the project:
- Django, the web framework for our application
- The SendGrid Python package, to access SendGrid resources
At the time of writing, this tutorial is tested on the following package versions, included in the finished project's requirements.txt file:
Configure Twilio SendGrid
After logging in to Twilio SendGrid, navigate to the API Keys page. Click on “Create an API Key.”
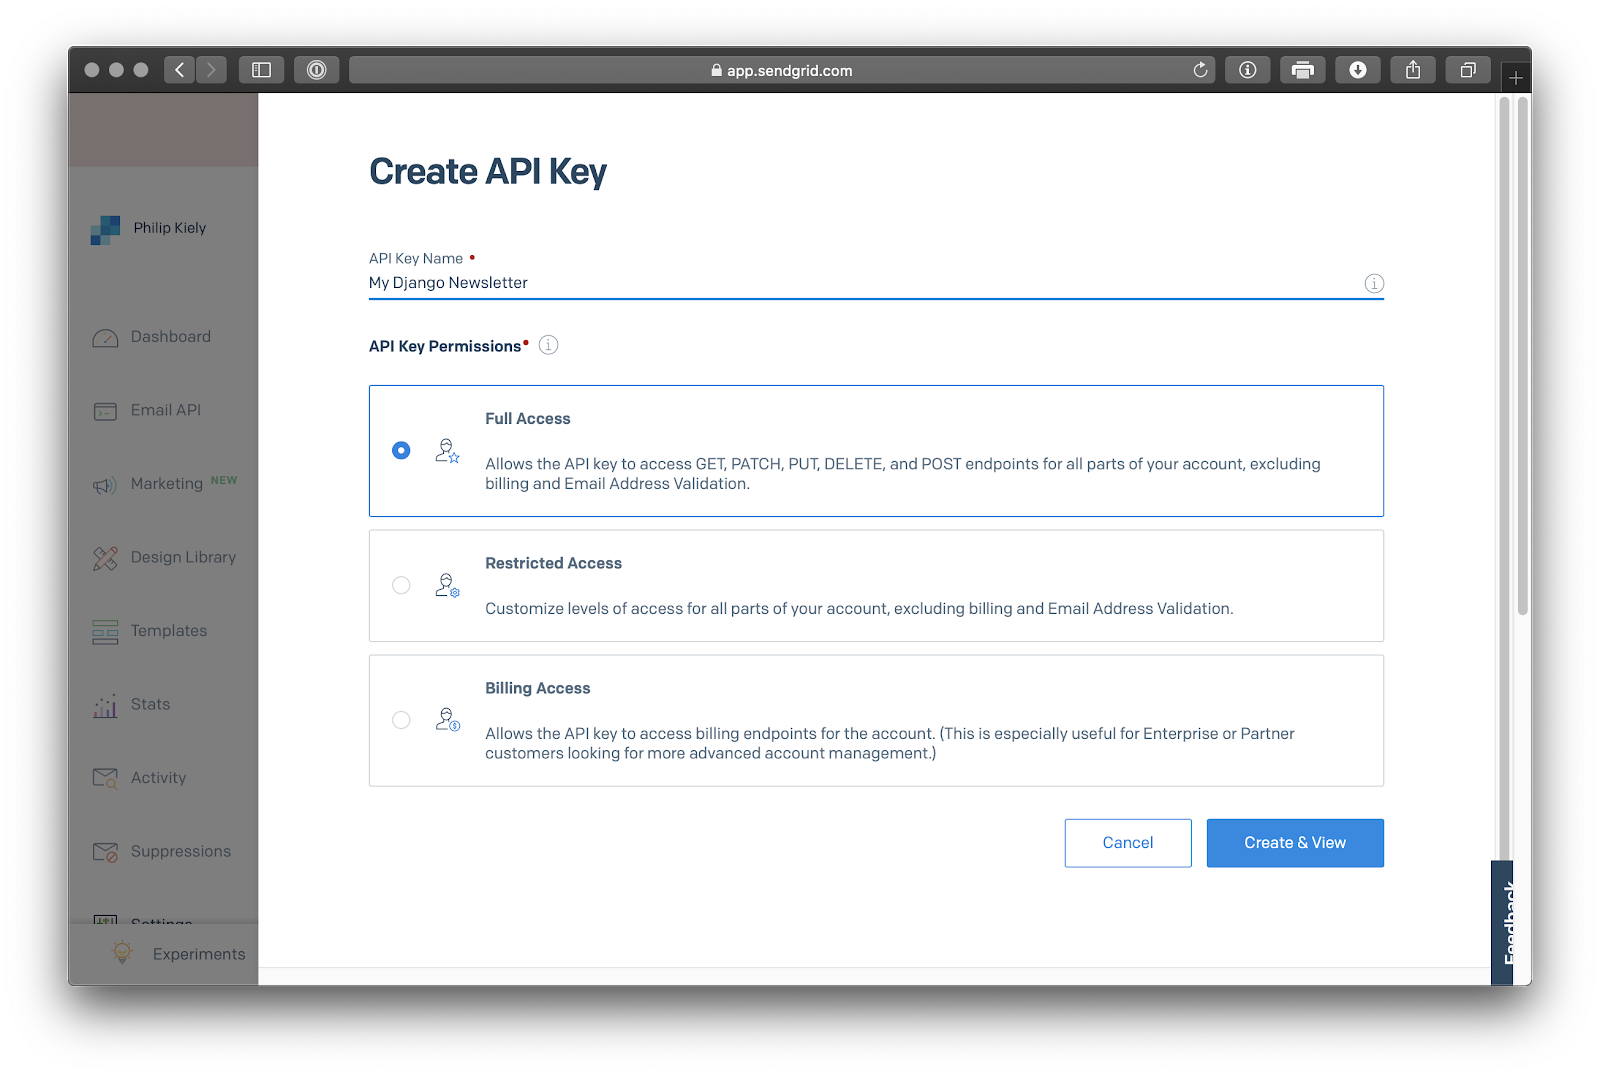
You should give your API key a meaningful name like “My Django Newsletter.” I created my key with “Full Access” so that it can perform any action in my account; if you want a limited-access key you can configure the options yourself after creating a “Restricted Access” key. When you click the “Create & View” button, you will be given your key. Copy it into a secure file; if you lose your key you will have to create a new one. You’ll need to set an environment variable SENDGRID_API_KEY equal to the value of the copied string, as that is how the Django program will access the key. Setting an environment variable is easy on MacOS, Linux, and Windows, as explained here.
Building an Email Newsletter Backend
Now that the configuration is handled, we're to the good part: creating our application with Django. Before we get started coding, let's go over the requirements for the software.
Formulating the requirements as user stories, we can see that there are four main things to accomplish:
- A new subscriber should be able to enter their email address into a form, receive a confirmation, and click to confirm their subscription.
- An existing subscriber should be able to unsubscribe using a personalized link.
- The administrator should be able to upload and send a file as a formatted email.
- The administrator should access a dashboard to view subscribers and sent emails.
While this may seem like a considerable list, built-in capabilities of both Django and SendGrid are going to make this easier than you'd expect to implement.
Setting up Django
Django will provide a good scaffolding for the project with the django-admin startproject PROJECTNAME command. Then, in the created directory, we'll use python manage.py startapp APPNAME to finish the boilerplate code with a Django app. Conceptually, a project can hold one or more apps, each of which has code for routes, models, and views. This application is straightforward and will use a single-app architecture for simplicity, though larger programs may factor out common code into discrete apps. The two migrations-related commands will handle the initial database setup and create a file-based database using the SQLite engine, which you can swap in the settings for PostgreSQL or similar if you wish. In your environment and directory, run:
In a Django project, you need to register your apps with the main settings. In newsletter/settings.py, add the app name 'core' to the end of the INSTALLED_APPS list. If this project included multiple apps, you would need to include each of them in this list. This is how the INSTALLED_APPS list should look like after your changes:
While we're editing the settings, let's set up the two entries we'll need to use SendGrid and the URL to include in emailed links. Assuming you worked through the configuration, here's what you'll need to add to the end of newsletter/settings.py:
Note that the FROM_EMAIL setting should be changed to a real email address that you can send and receive email from.
Finally, we'll create a superuser to administer the application. This superuser represents the user sending the email newsletter and will have access to the admin panel. From your terminal, run:
The command-line interface will walk you through picking a username, email, and password for the superuser.
With the project structure in place, we'll work through the four user flows individually.
Adding Subscribers
To create a subscriber list, we'll first need a way to represent subscribers in the database. We can use Django's models.py file in the core app to create a model. For each subscriber, we'll store their email address, an email address confirmation boolean, and a random number used to confirm or delete their email. This data is represented as follows in core/models.py:
Every Django model has a __str__ function that generates a string representation of the data for each instance. We'll use that in the admin panel that we will set up momentarily. Also, note that conf_num, which is a verification code we will use when confirming the subscriber, is stored as a string representation of a number, as it will be more convenient to work with it in that format.
Each time you add or edit a model, you need to migrate your database to handle the new data schema. To do so after creating the subscriber model, run:
Now, we're ready to set up the admin panel. The reason we'll be able to administer the email newsletter is because of the powerful functionality that Django provides out of the box. First, we have to register the Subscriber model in the core/admin.py file like so:
Then, running the server with:
You can navigate to http://127.0.0.1:8000/admin/ and log in using the superuser credentials you created earlier.
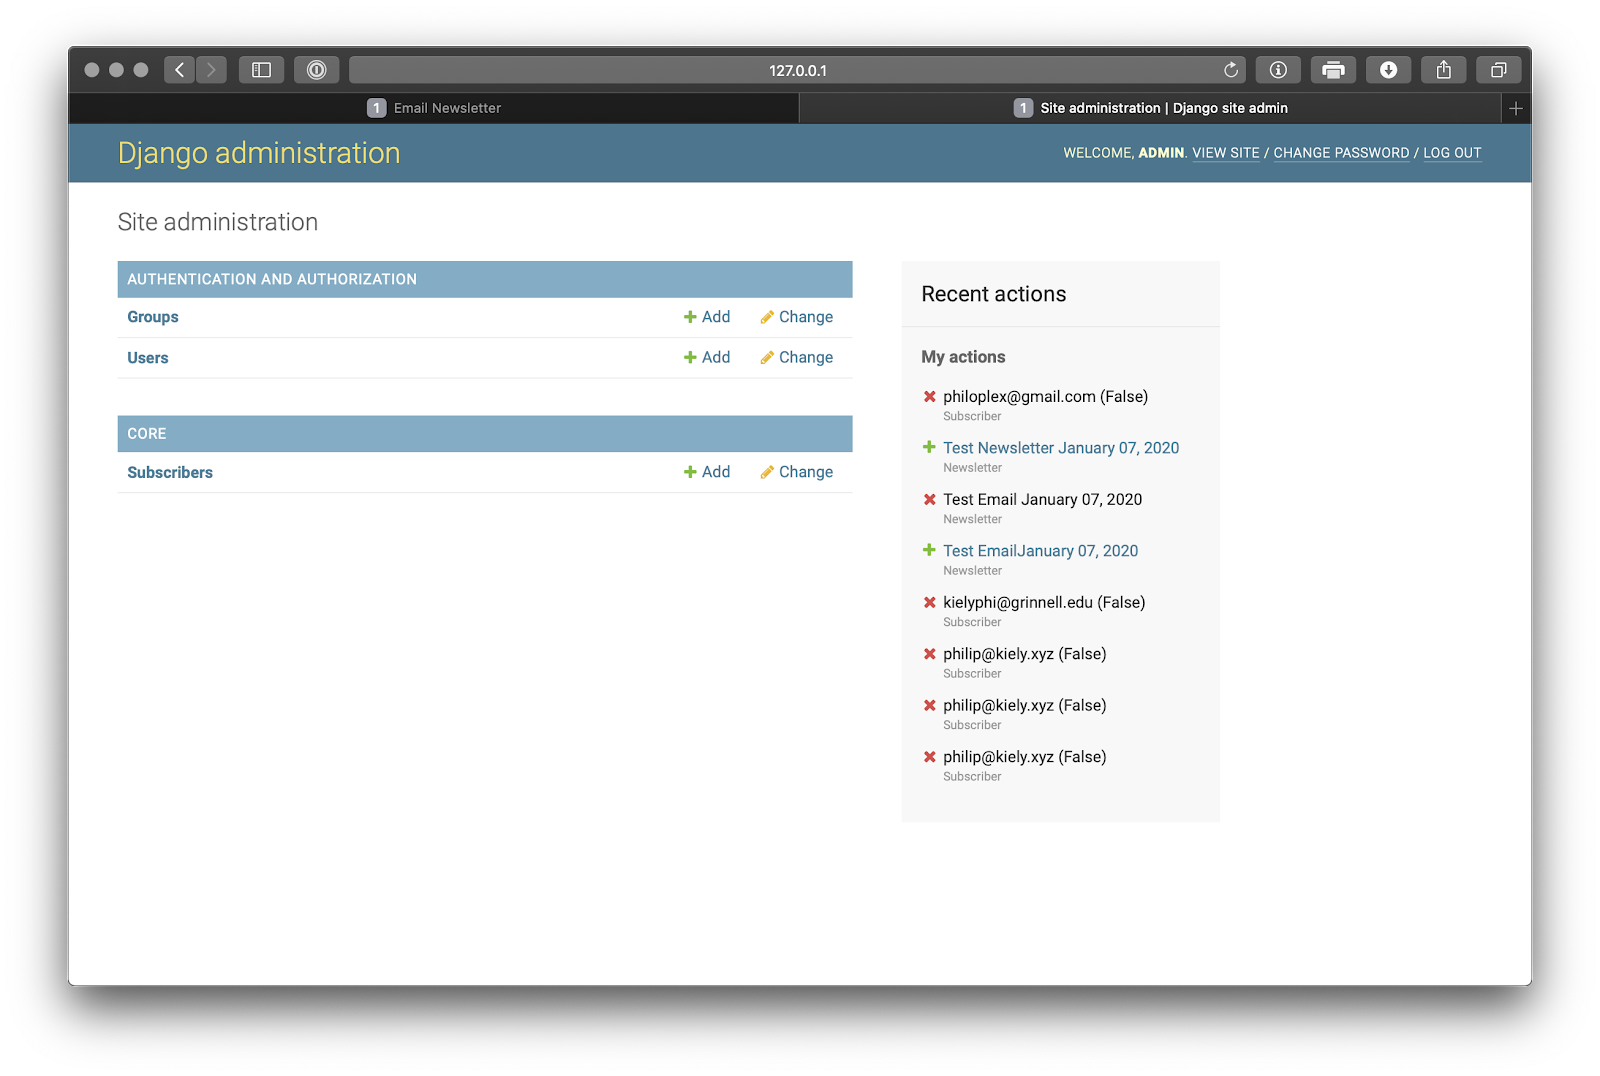
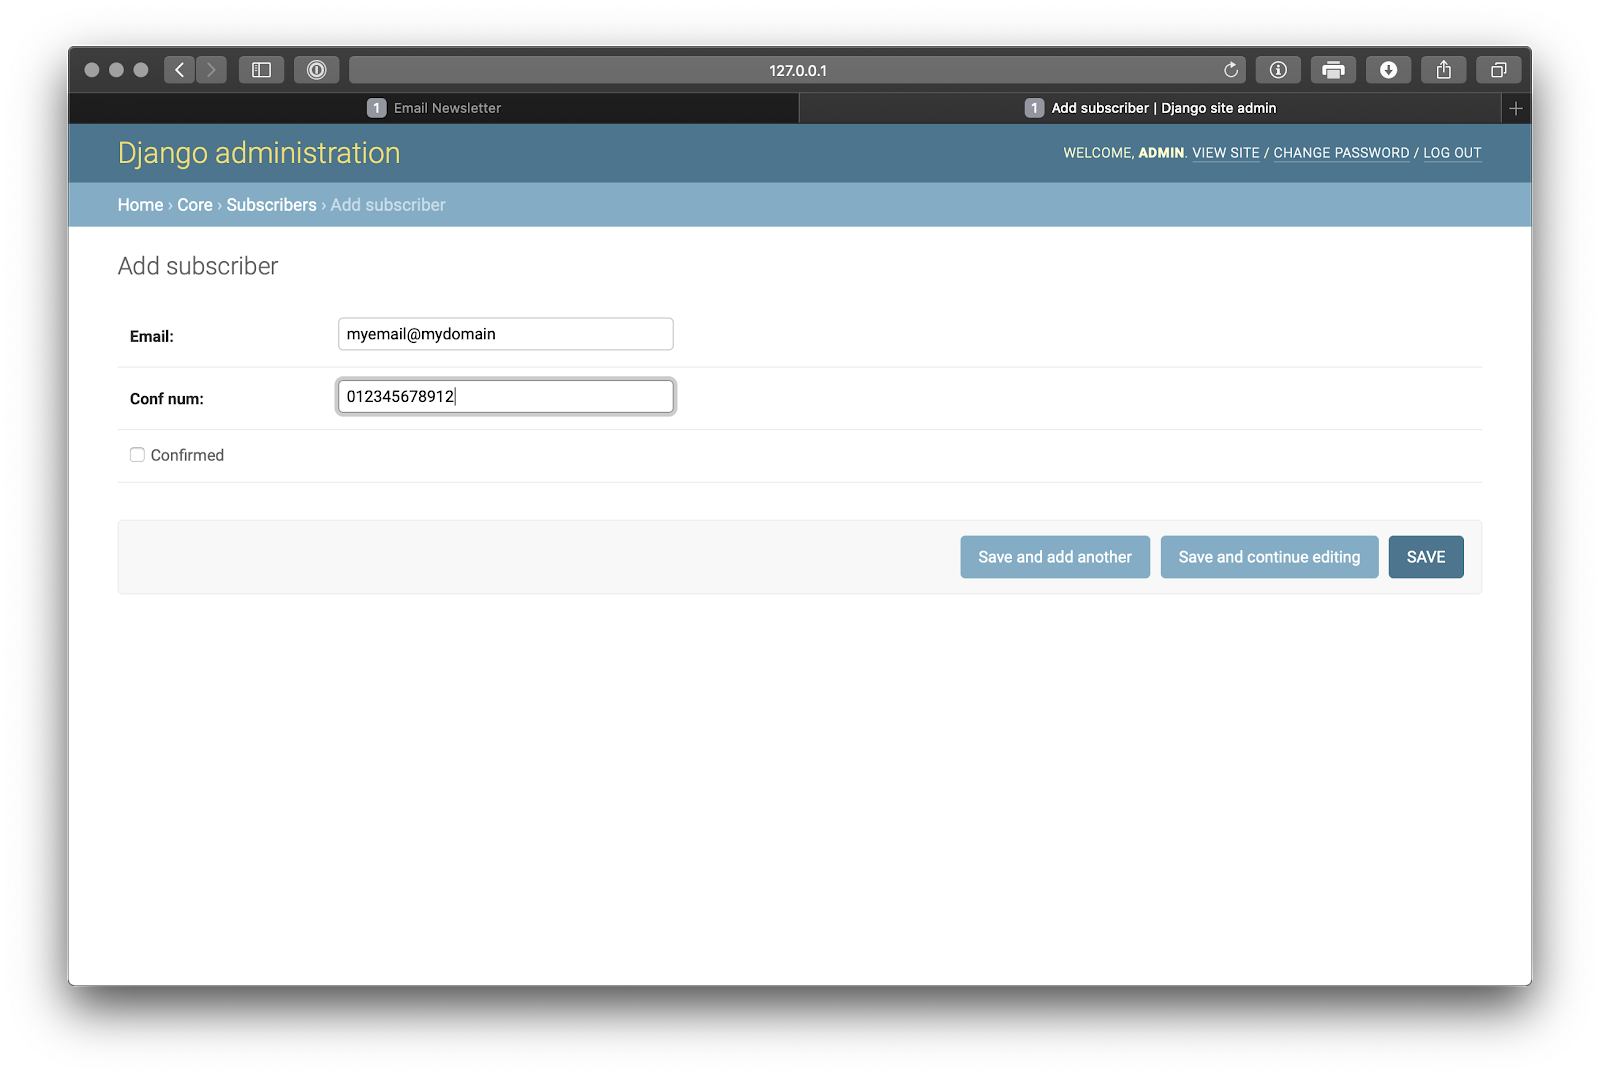
This dashboard will include create, read, update, and delete with zero configuration for all models. You can test this by clicking the "Subscribers" entry to navigate to http://127.0.0.1:8000/admin/core/subscriber/ and using the "Add Subscriber" button on the upper-right hand side of the screen to add a subscriber.
However, the point of this section is to create a page to let people register themselves. To do that, we'll need to create a view, and for that, we'll first need a route. In newsletter/urls.py, we'll add a /new/ URL below the existing /admin/:
The user interface for subscriber management is fairly straightforward, just a form with a single field for the email address. When the prospective subscriber visits the /new/ URL, they will be able to use the form to add their email address as a subscriber. However, we don't want people signing up with an address that is not theirs, so we'll use SendGrid to deliver a confirmation email. Adjust core/views.py as follows:
This is a pretty big chunk of code, so we'll break it down a bit at a time. The new() function will be invoked when the user visits the /new/ URL on their browser, both for GET and POST requests. In a POST request, which is triggered by a form submission, we start by creating a Subscriber object according to our data model, using the email submitted with the form and a 12 digit random number (with leading zeroes if necessary). After saving the subscriber to the database, we create and send an email with a confirmation link using the SendGrid settings that we configured earlier. The request.build_absolute_uri() function ensures that the absolute URL is correct in both local and a deployed environment. Then, it returns the webpage so that the user can enter another email address. Otherwise, if the page is loaded for the first time by visiting the URL as normal, which would trigger a GET request, we just render the index.html page we’re about to write.
You may have noticed that the page that we render relies on something called SubscriberForm to represent the web form that will appear on the HTML page. We can define this form in core/forms.py, which is a new file that needs to be created:
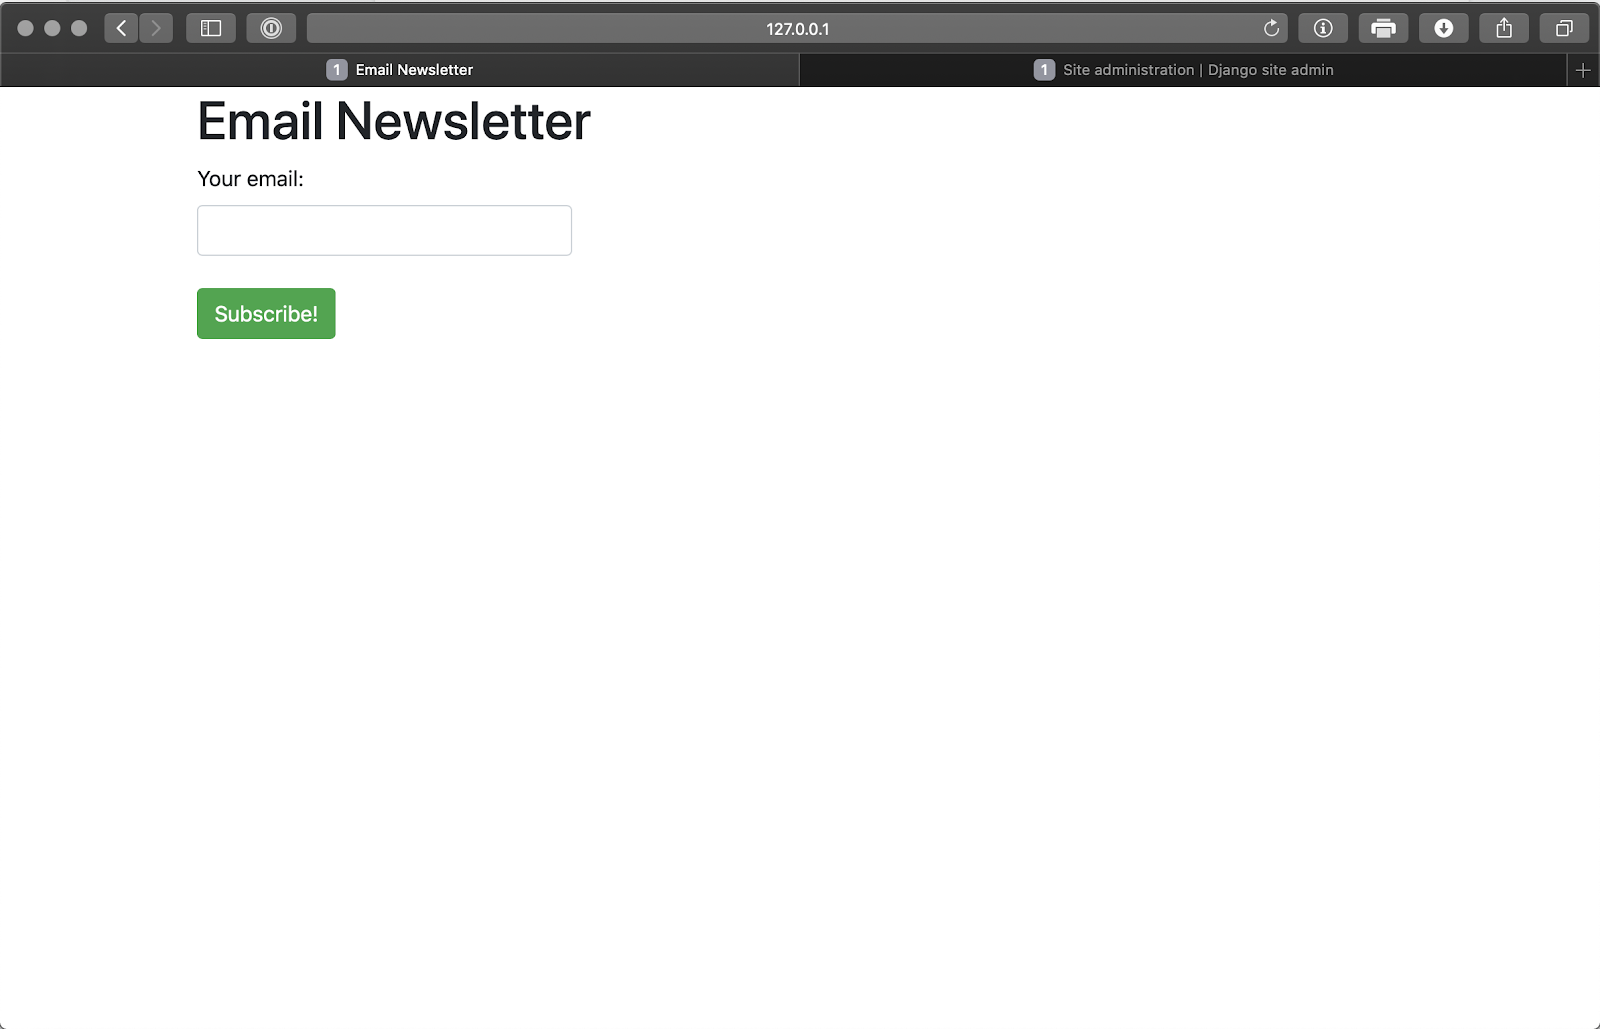
Finally, we'll need a webpage to let people add their emails. The design of this page is minimal, with just a touch of Bootstrap 4, but we can create a basic template. First, create a directory core/templates, then in that folder create a file index.html, which will handle all of our template needs. Paste these contents:
If you stopped the server now restart it, visit http://127.0.0.1:8000/new/ and use the form to enter your email address.
Assuming everything is correctly configured and you used a real email address, you should receive a confirmation email within a minute or so (be sure to check your spam). Before you click on the confirmation link, we need to add in the confirm view in file core/views.py:
You might notice that this view uses a "GET" request even though it modifies the database. This is not how HTTP methods are supposed to work! However, because the link to confirm is in an email rather than a request generated by a form, we need to use a "GET" request so it can be triggered by the browser when the link is clicked in the email. This deviation from convention will be repeated for the "unsubscribe" link we create in the next section.
Furthermore, note that we check the confirmation number (provided as a query parameter in the URL) before marking the address as confirmed. This is to prove that the person actually received an email from us. However, this is not really a security feature as the data is stored and transmitted in plain text, and these random confirmation numbers should not be treated as passwords or any other strong authentication factor. A more robust method where security is important would be to use end-to-end encryption with a secure HTTP web server, SSL certificate and a JSON Web Token with a short expiration time.
Add the /confirm/ URL to the urlpatterns list in newsletter/urls.py:
Now, with the server running, you're finally ready to click the link in the email. Congratulations! You've set up a method to create and confirm subscribers.
Removing Subscribers
If you send a marketing or other mass email, you should include a link at the bottom of the email giving people the option to unsubscribe. Technically, this is almost identical to the confirm function, the only difference is that it deletes a subscriber rather than confirming them. The code in core/views.py follows:
Add the URL to the urlpatterns array in newsletter/urls.py:
As with the confirmation function, this is a "GET" request even though that's not the proper HTTP method as it must be a clickable link through a browser, and the confirmation number is plain text and thus not a security feature.
Sending Newsletters
Now that you have your list of subscribers, you'll want to send them the brilliant, insightful content that they signed up for. While we could build out webpages in the main application to handle uploading and sending newsletters, instead we're going to take a deeper dive into using the admin panel's more advanced features to handle a lot of that work for us.
Before we can get started programming, we'll need a place to store uploaded files. Django provides a generic way to store file uploads, documented here. Create a folder at the project root (the same directory with manage.py in it) called uploaded_newsletters/. Then, add MEDIA_URL = 'uploaded_newsletters/' to your settings.py right below the STATIC_URL variable. The newsletter contents that the admin uploads will be stored in this uploaded_newsletters/ directory.
First, we're going to need a way to represent the newsletters in the database, so it's back to core/models.py to create a Newsletter model! It will be helpful to know when we created and updated each newsletter, so there will be two datetime fields to represent those values. Every newsletter needs a subject, a string that goes into the email subject line, and contents, a file that will be uploaded to the media folder that we just created. The model to represent that is:
After writing this, make sure to run:
And register the model in core/admin.py as we did before with the Subscriber model:
Now, you can use the admin dashboard to upload newsletters in HTML format. You can create these HTML newsletters using any text editor, save them as files to your computer and then upload them. Note that the dashboard supports file uploads right out of the box! Here’s an example newsletter (note that it does not need <head> and <body> tags like a webpage). You could save the following anywhere as test_email.html.

The final part of this project is to send the newsletters to all confirmed email addresses. This too we can accomplish from the admin panel by creating an admin action. First, we'll write the send function as a method of the Newsletter model in core/models.py:
We perform the file read and subscriber database lookup operations only once each, then iterate over confirmed subscribers to create and send email using SendGrid's straightforward API.
Invoking this function is also straightforward as an admin action in core/admin.py:
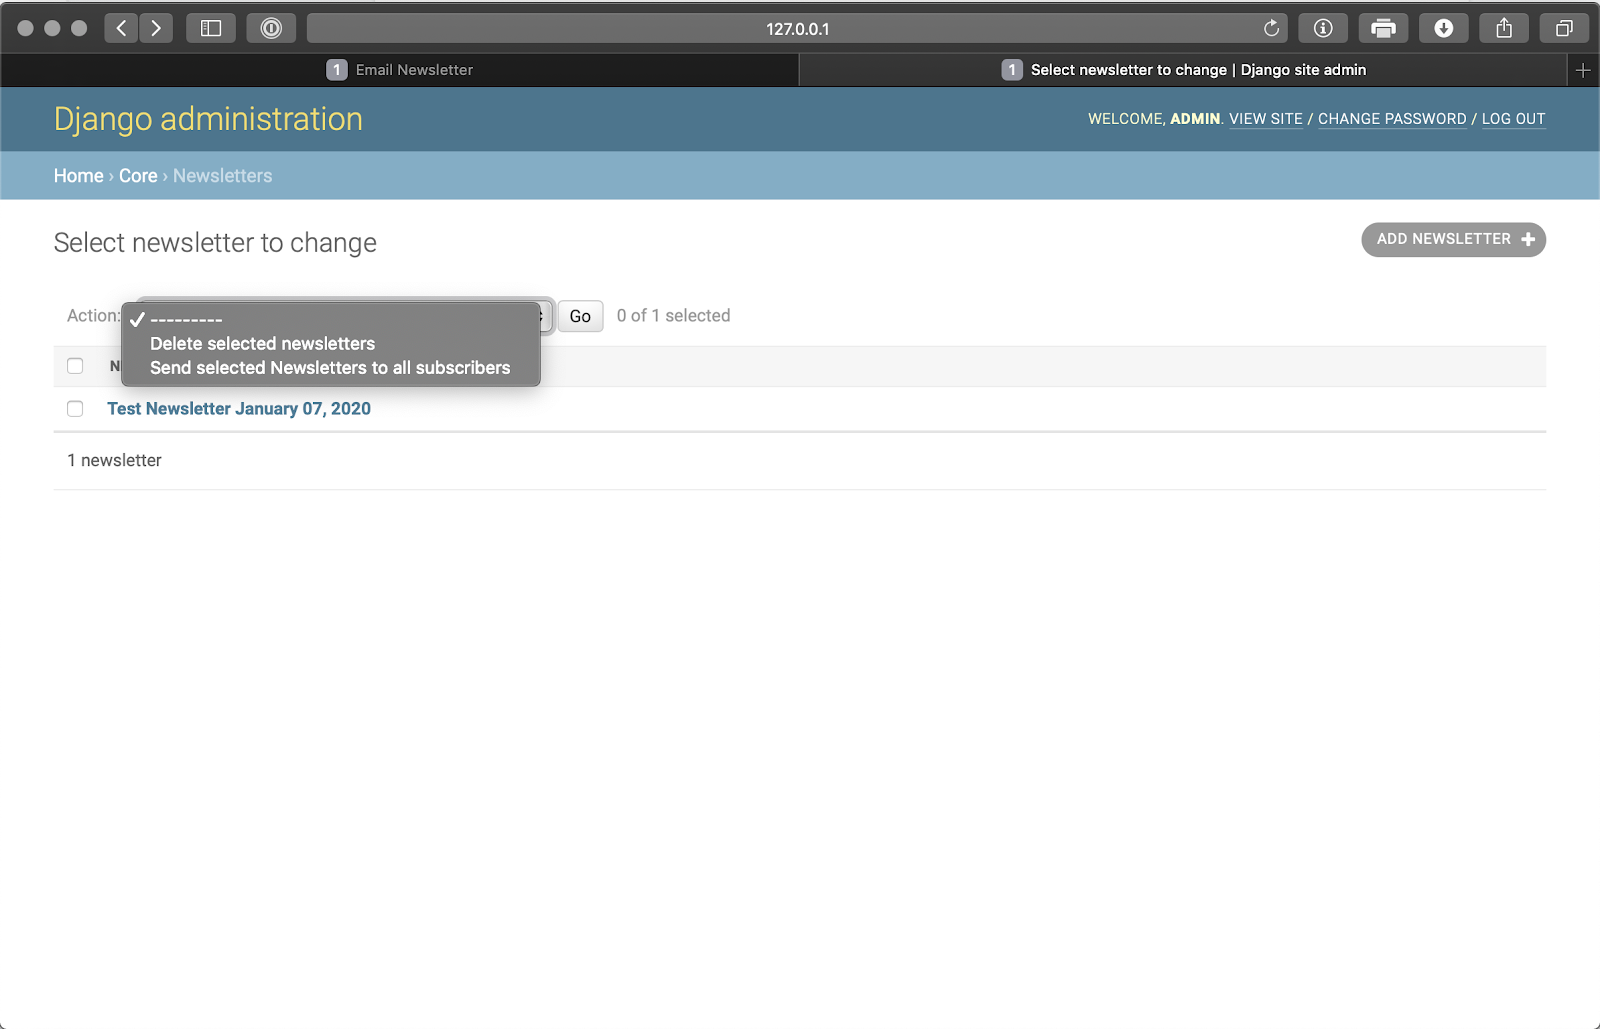
Admin actions (in our case the send_newsletter function) have something of a clunky interface as they require three positional arguments (modeladmin, request, and queryset) even though in our case we only need two, the request to build the absolute URL for /delete/ and the queryset that returns the selected newsletters, even though we probably only send one at a time. That said, returning to the admin panel shows this function conveniently added to the dropdown menu on the page http://127.0.0.1:8000/admin/core/newsletter/, allowing us to send our newsletter off with just a few clicks. Note that the dropdown menu only appears once you have one or more newsletters in the database. Leveraging these built-in capabilities saved us hours of work in setting up our own forms and pages.
Viewing a Dashboard
In our user story list, we said: "The administrator should access a dashboard to view subscribers and sent emails." The admin dashboard provided by Django lets the sender view a subscriber count & list and write & send newsletters. To monitor email delivery, head over to your SendGrid account dashboard. This story is complete with no further code needed, although one limitation of the system is that it does not track which subscribers were sent a given newsletter.
Conclusion
While this is far from the fully-featured, hosted, managed email newsletter solution that Twilio SendGrid offers, we have developed the basic features in about 2,500 words as a beginner's Django project. Django's extensible admin interface makes it easy to build complex admin-restricted applications with minimal code and configuration. SendGrid's email API lets us send emails in just a few lines of code with fast, reliable delivery.
That said, there are a number of steps to complete to deploy even a simple application like this one. Django requires some substantial configuration changes for deployment, including a different database (MySQL or PostgreSQL instead of SQLite). However, I hope it demonstrated to you the powerful use cases for the technologies we've covered here. If you are interested in deploying this application, check out this guide for AWS or this one for Digital Ocean.
Philip Kiely is a developer, writer, and entrepreneur. He is an undergraduate at Grinnell College (class of 2020). You can find his work at https://philipkiely.com and https://github.com/philipkiely and connect with him at https://linkedin.com/in/philipkiely.


Related Resources
Twilio Docs
From APIs to SDKs to sample apps
API reference documentation, SDKs, helper libraries, quickstarts, and tutorials for your language and platform.
Resource Center
The latest ebooks, industry reports, and webinars
Learn from customer engagement experts to improve your own communication.
Ahoy
Twilio's developer community hub
Best practices, code samples, and inspiration to build communications and digital engagement experiences.