Make a Phone Call Using Python and Twilio Programmable Voice
Time to read: 4 minutes
March 15, 2021
Written by
Reviewed by
Twilio Programmable Voice allows you to make and receive voice calls directly from your application. In this tutorial, I’ll show you how to use Programmable Voice to make a voice call in Python.
Prerequisites
- Python 3.6 or newer. If your operating system does not provide a Python interpreter, you can go to python.org to download an installer.
- A Twilio account. If you are new to Twilio click here to create a free account now and receive $10 credit when you upgrade to a paid account. You can review the features and limitations of a free Twilio account.
- A phone that can make phone calls, to test the project.
Set up your environment
In this section you are going to set up a brand new Python project. To keep things nicely organized, open a terminal or command prompt, find a suitable place and create a new directory where the project you are about to create will live:
Creating a virtual environment
Following Python best practices, you are now going to create a virtual environment, where you are going to install the Python dependencies needed for this project.
If you are using a Unix or MacOS system, open a terminal and enter the following commands to do the tasks described above:
If you are following the tutorial on Windows, enter the following commands in a command prompt window:
The only Python package used by this project is the Twilio Python Helper library, which is used to work with phone calls.
Defining Twilio credentials
To be able to access the Twilio service, the Python application will need your Twilio account credentials to log in and authenticate. The most secure way to define these credentials is to add them as environment variables.
The information that you need is the “Account SID” and the “Auth Token”. You can find both on the dashboard of the Twilio Console:
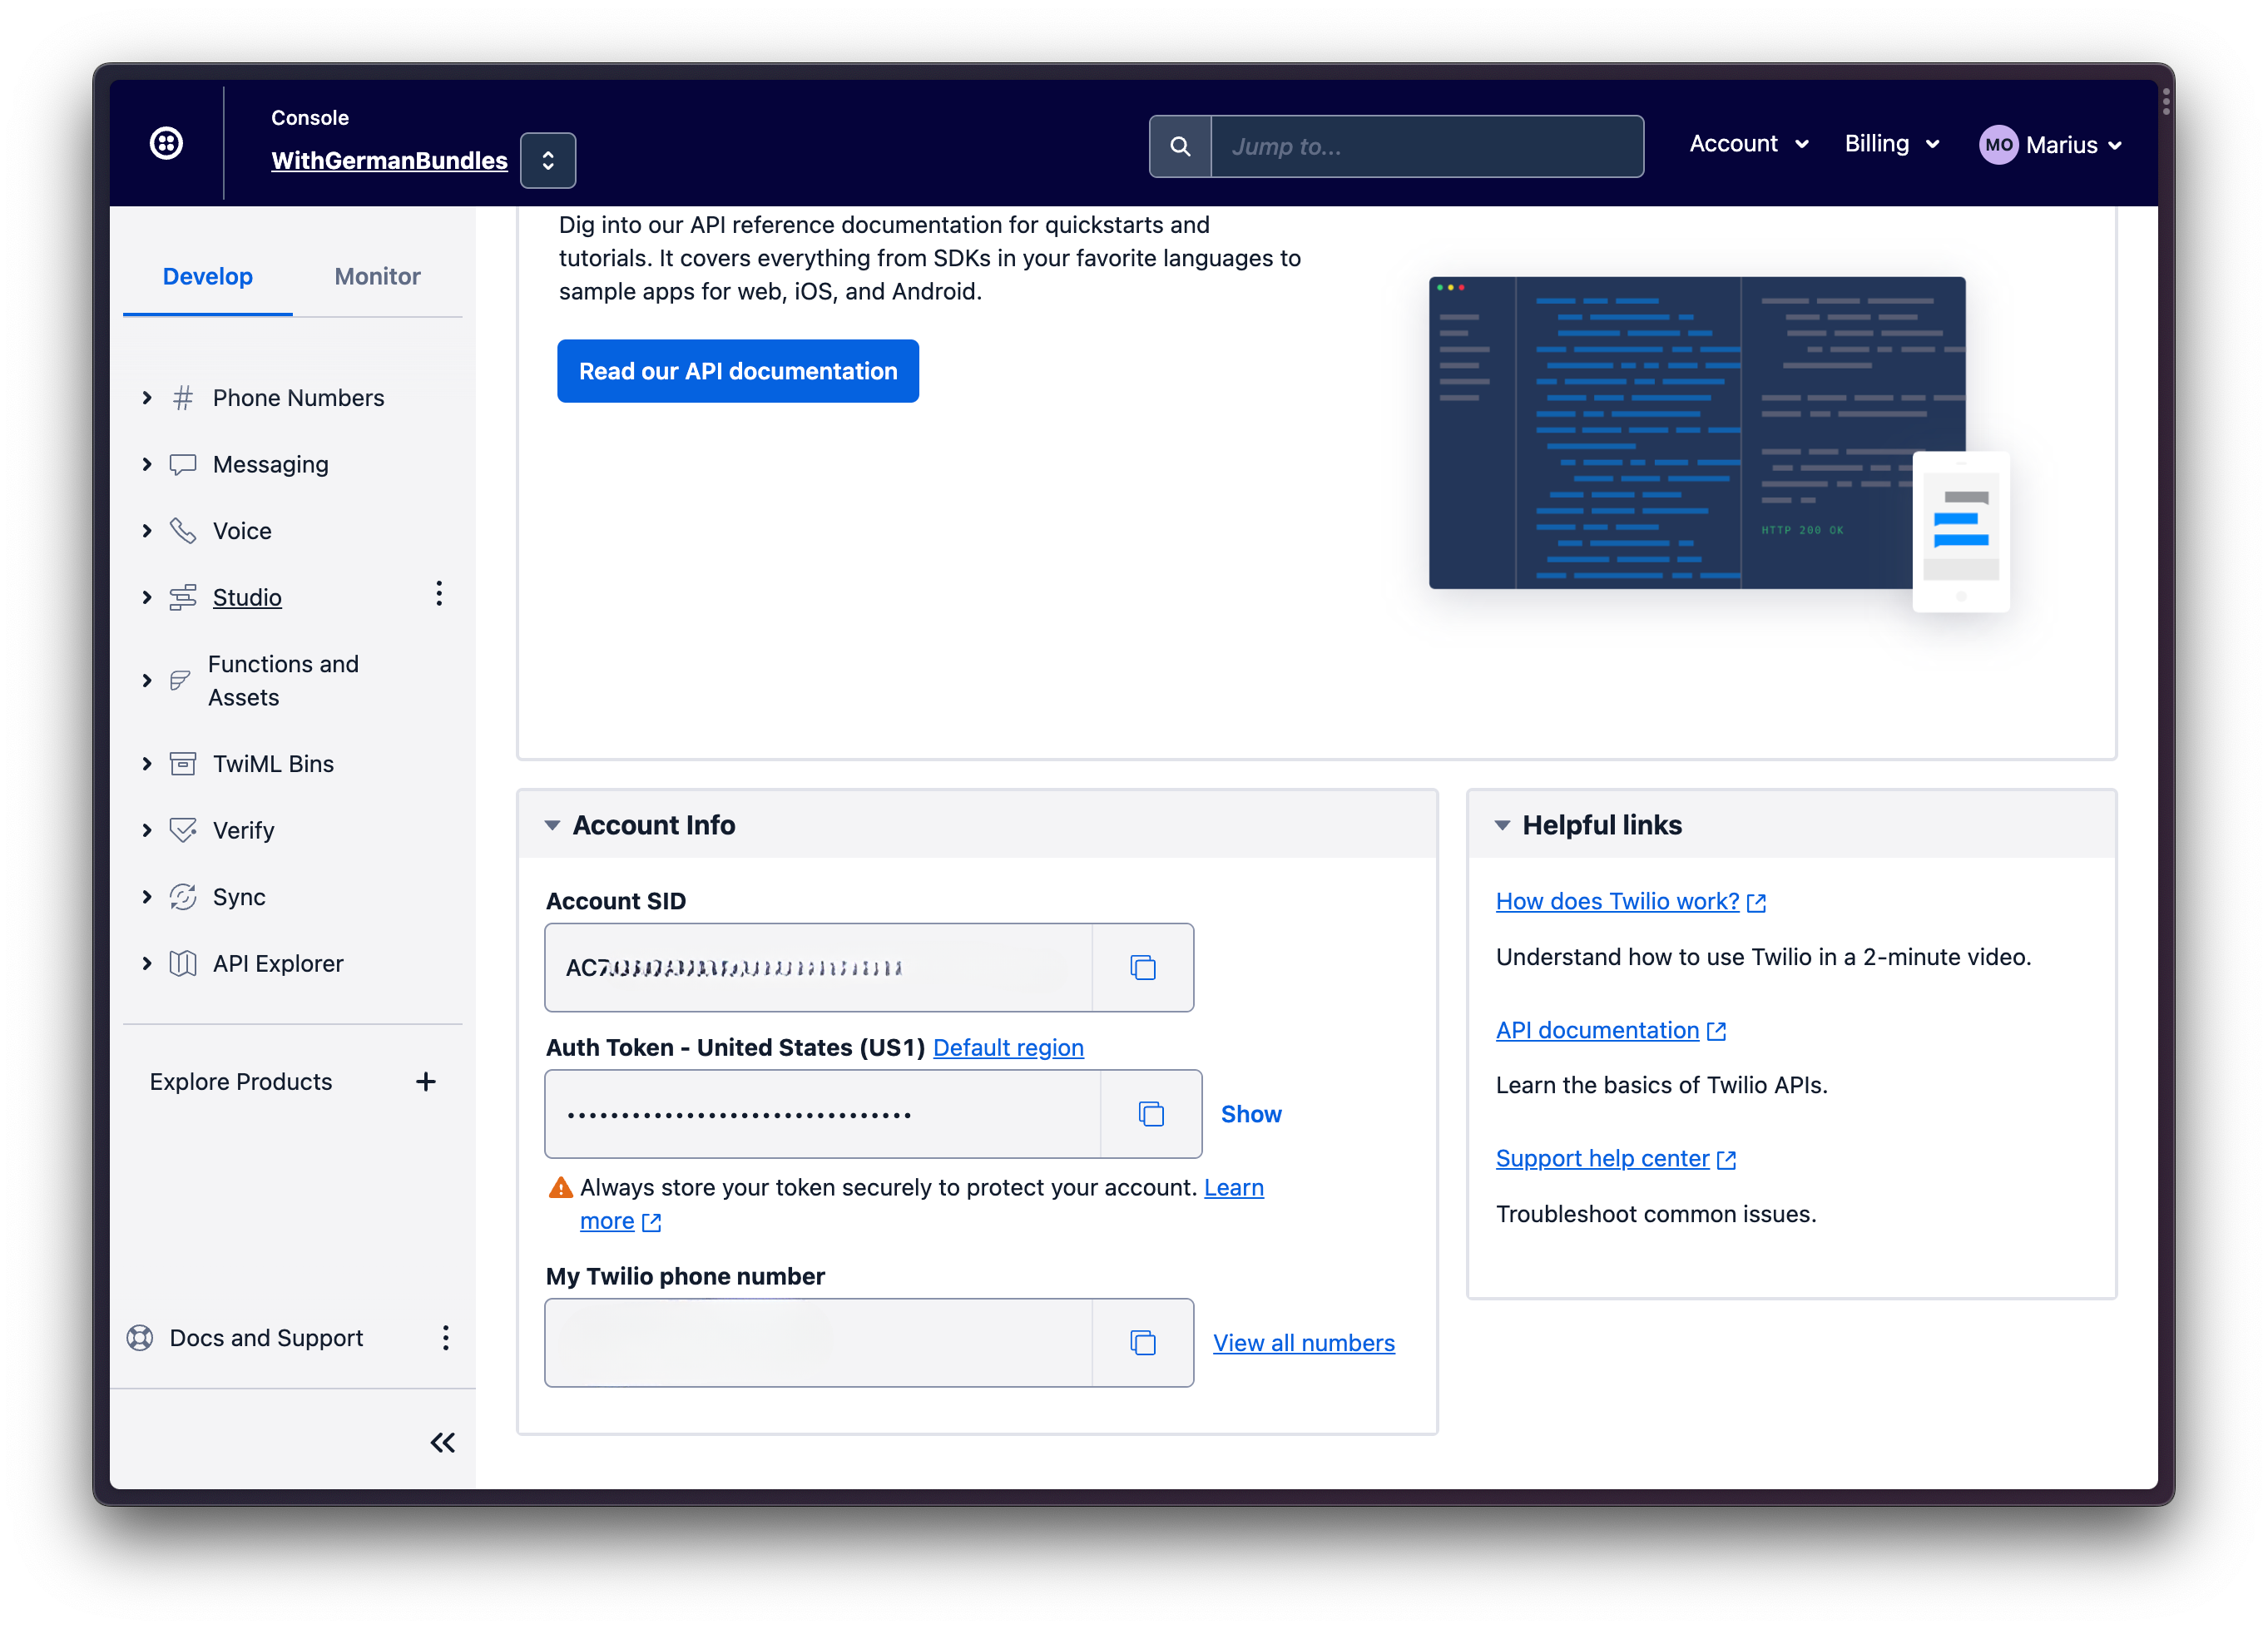
In your terminal, define two environment variables called TWILIO_ACCOUNT_SID and TWILIO_AUTH_TOKEN and set them to your account credentials:
If you are following this tutorial on a Windows computer, use set instead of export to define your environment variables in the command prompt. If you want to learn more about environment variables, check out the How to set Environment Variables tutorial.
Buy a Twilio phone number
To be able to make a phone call you need to have a phone number associated with your Twilio account. Log in to the Twilio Console, select Phone Numbers, and then click on the red plus sign to buy a Twilio number. Note that if you are using a free account you will be using your trial credit for this purchase.
In the Buy a Number screen you can select your country and check Voice in the capabilities field. If you’d like to request a number from your region, you can enter your area code in the Number field.
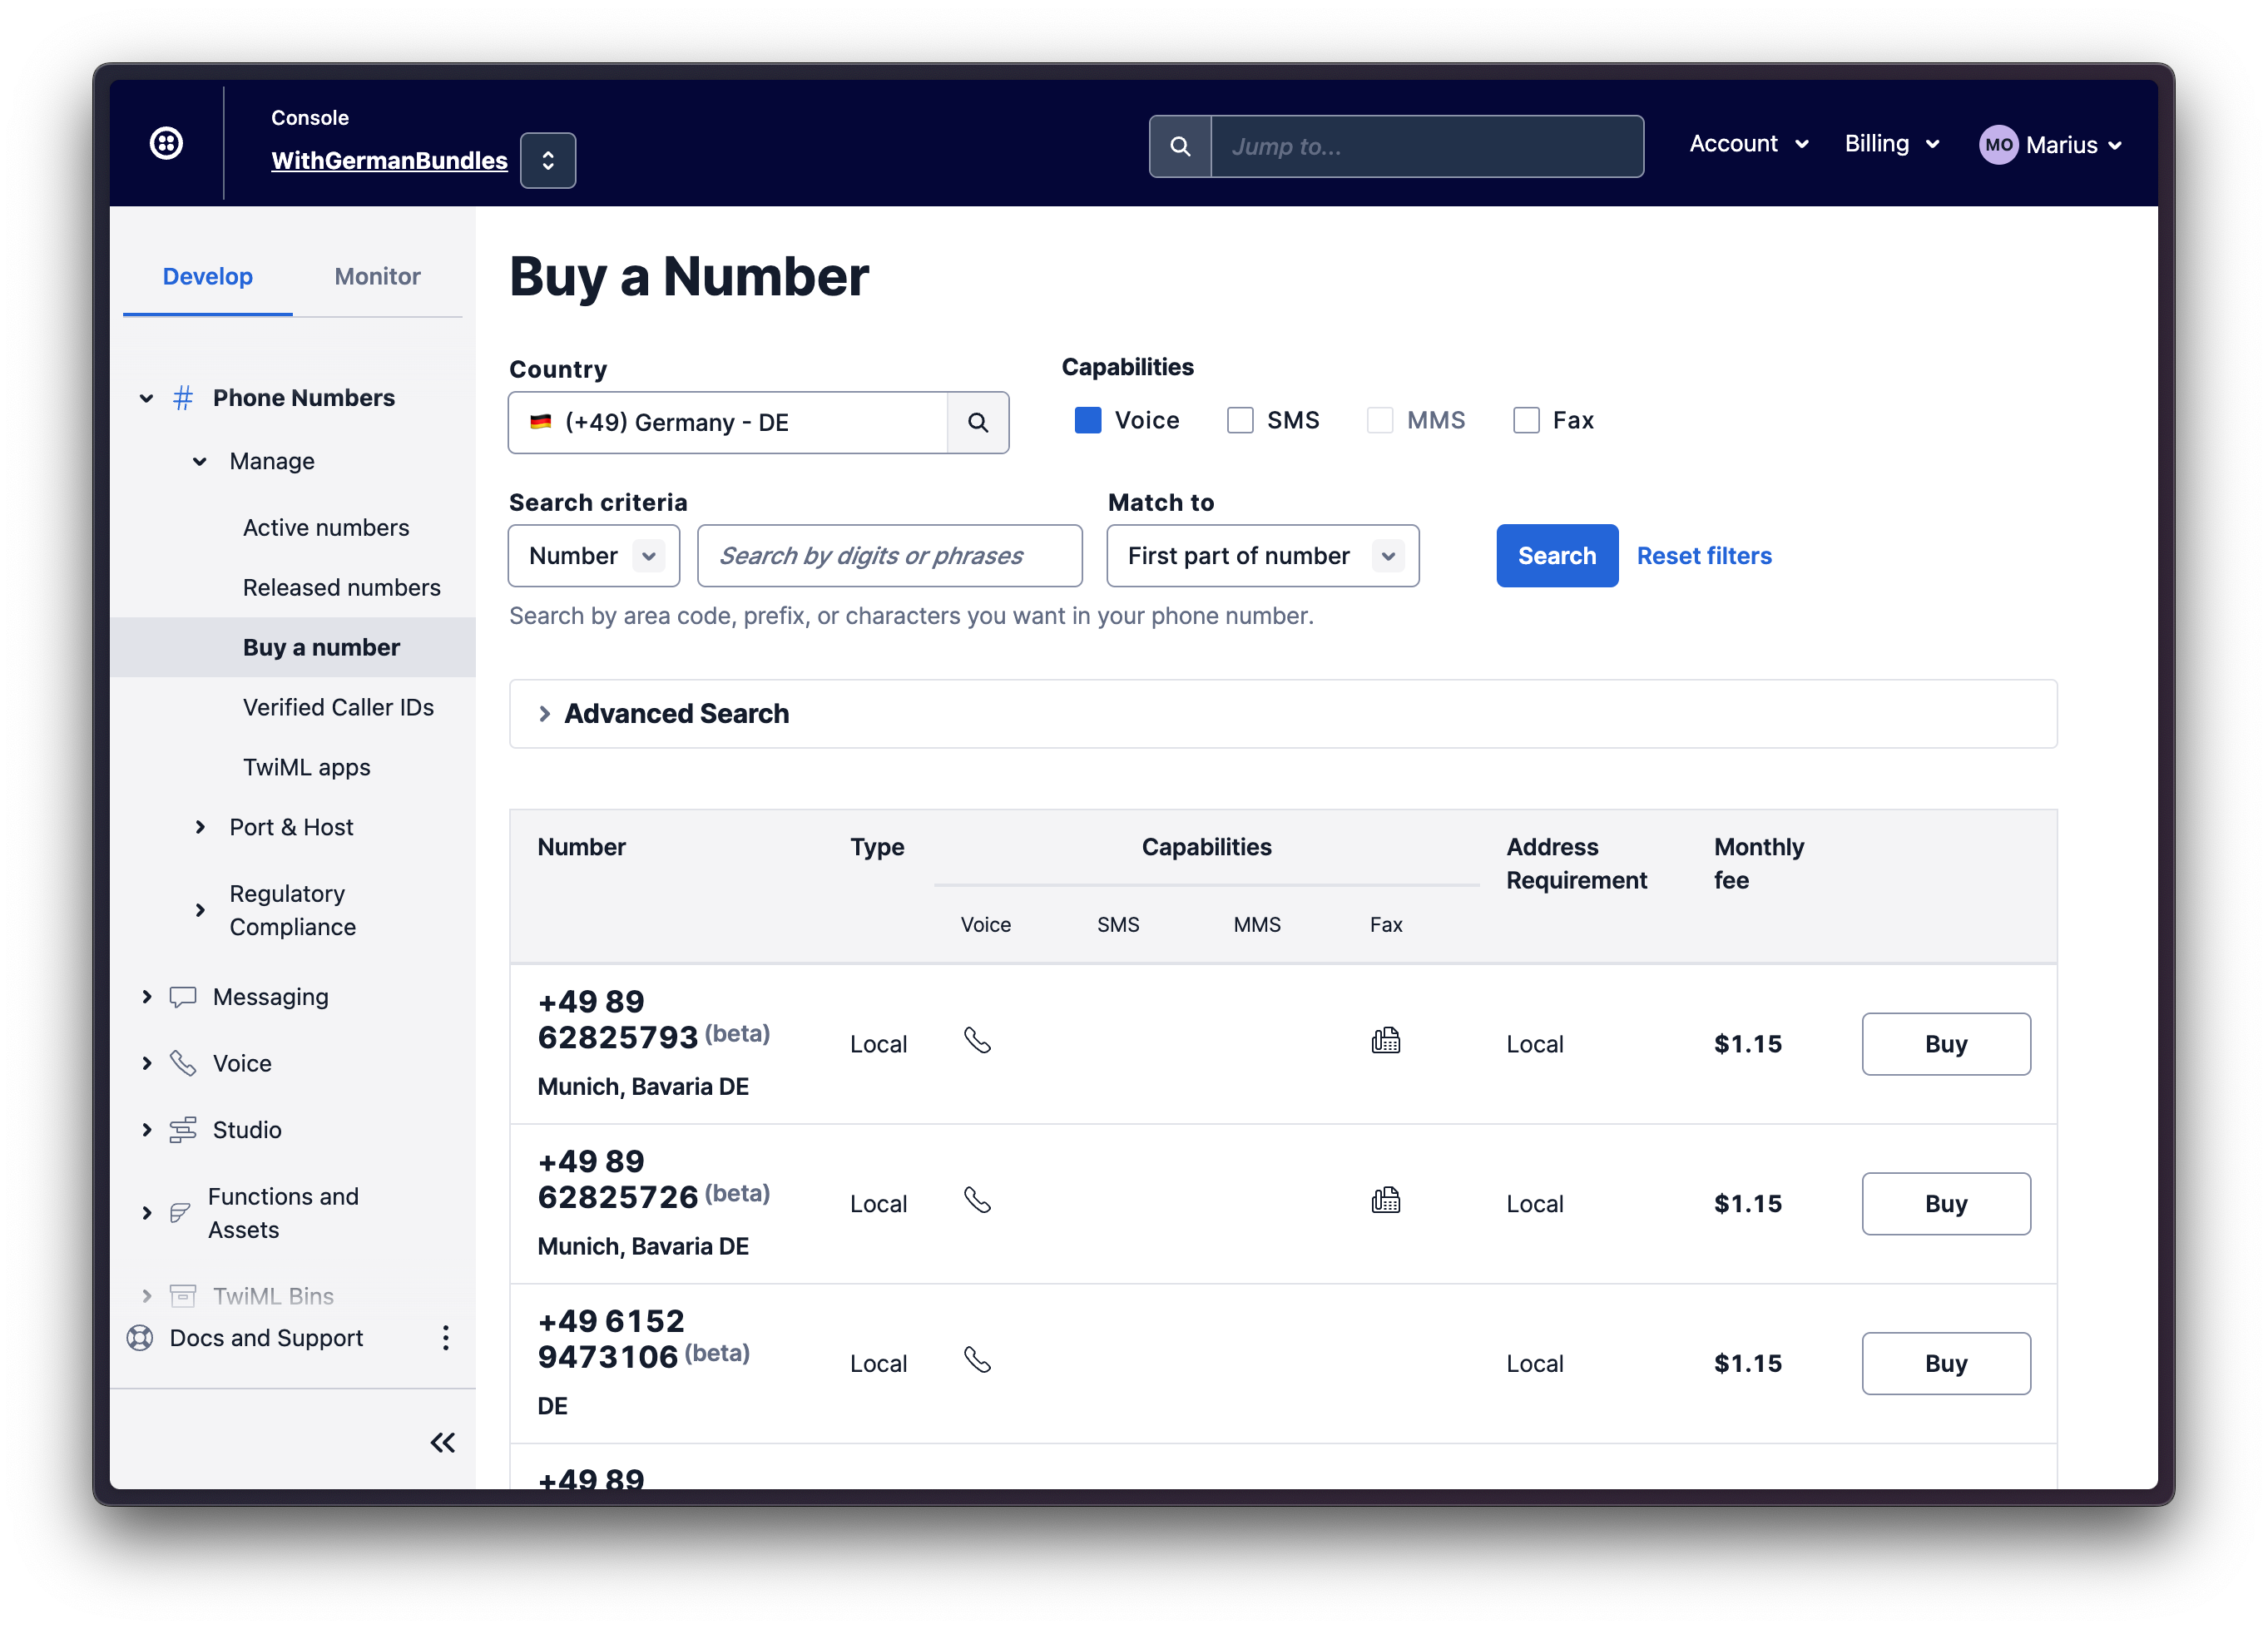
Click the Search button to see what numbers are available, and then click “Buy” for the number that you like from the results. After you confirm your purchase, click the “Close” button.
Create a TwiML Bin
TwiML is Twilio’s markup language, an extension to XML that is used to provide instructions to Twilio on how certain events need to be handled. When a call is made from the Twilio phone number you purchased earlier, Twilio looks up the URL associated with your number and sends a request to that URL. If your URL responds with TwiML, Twilio will follow these instructions to handle the phone call.
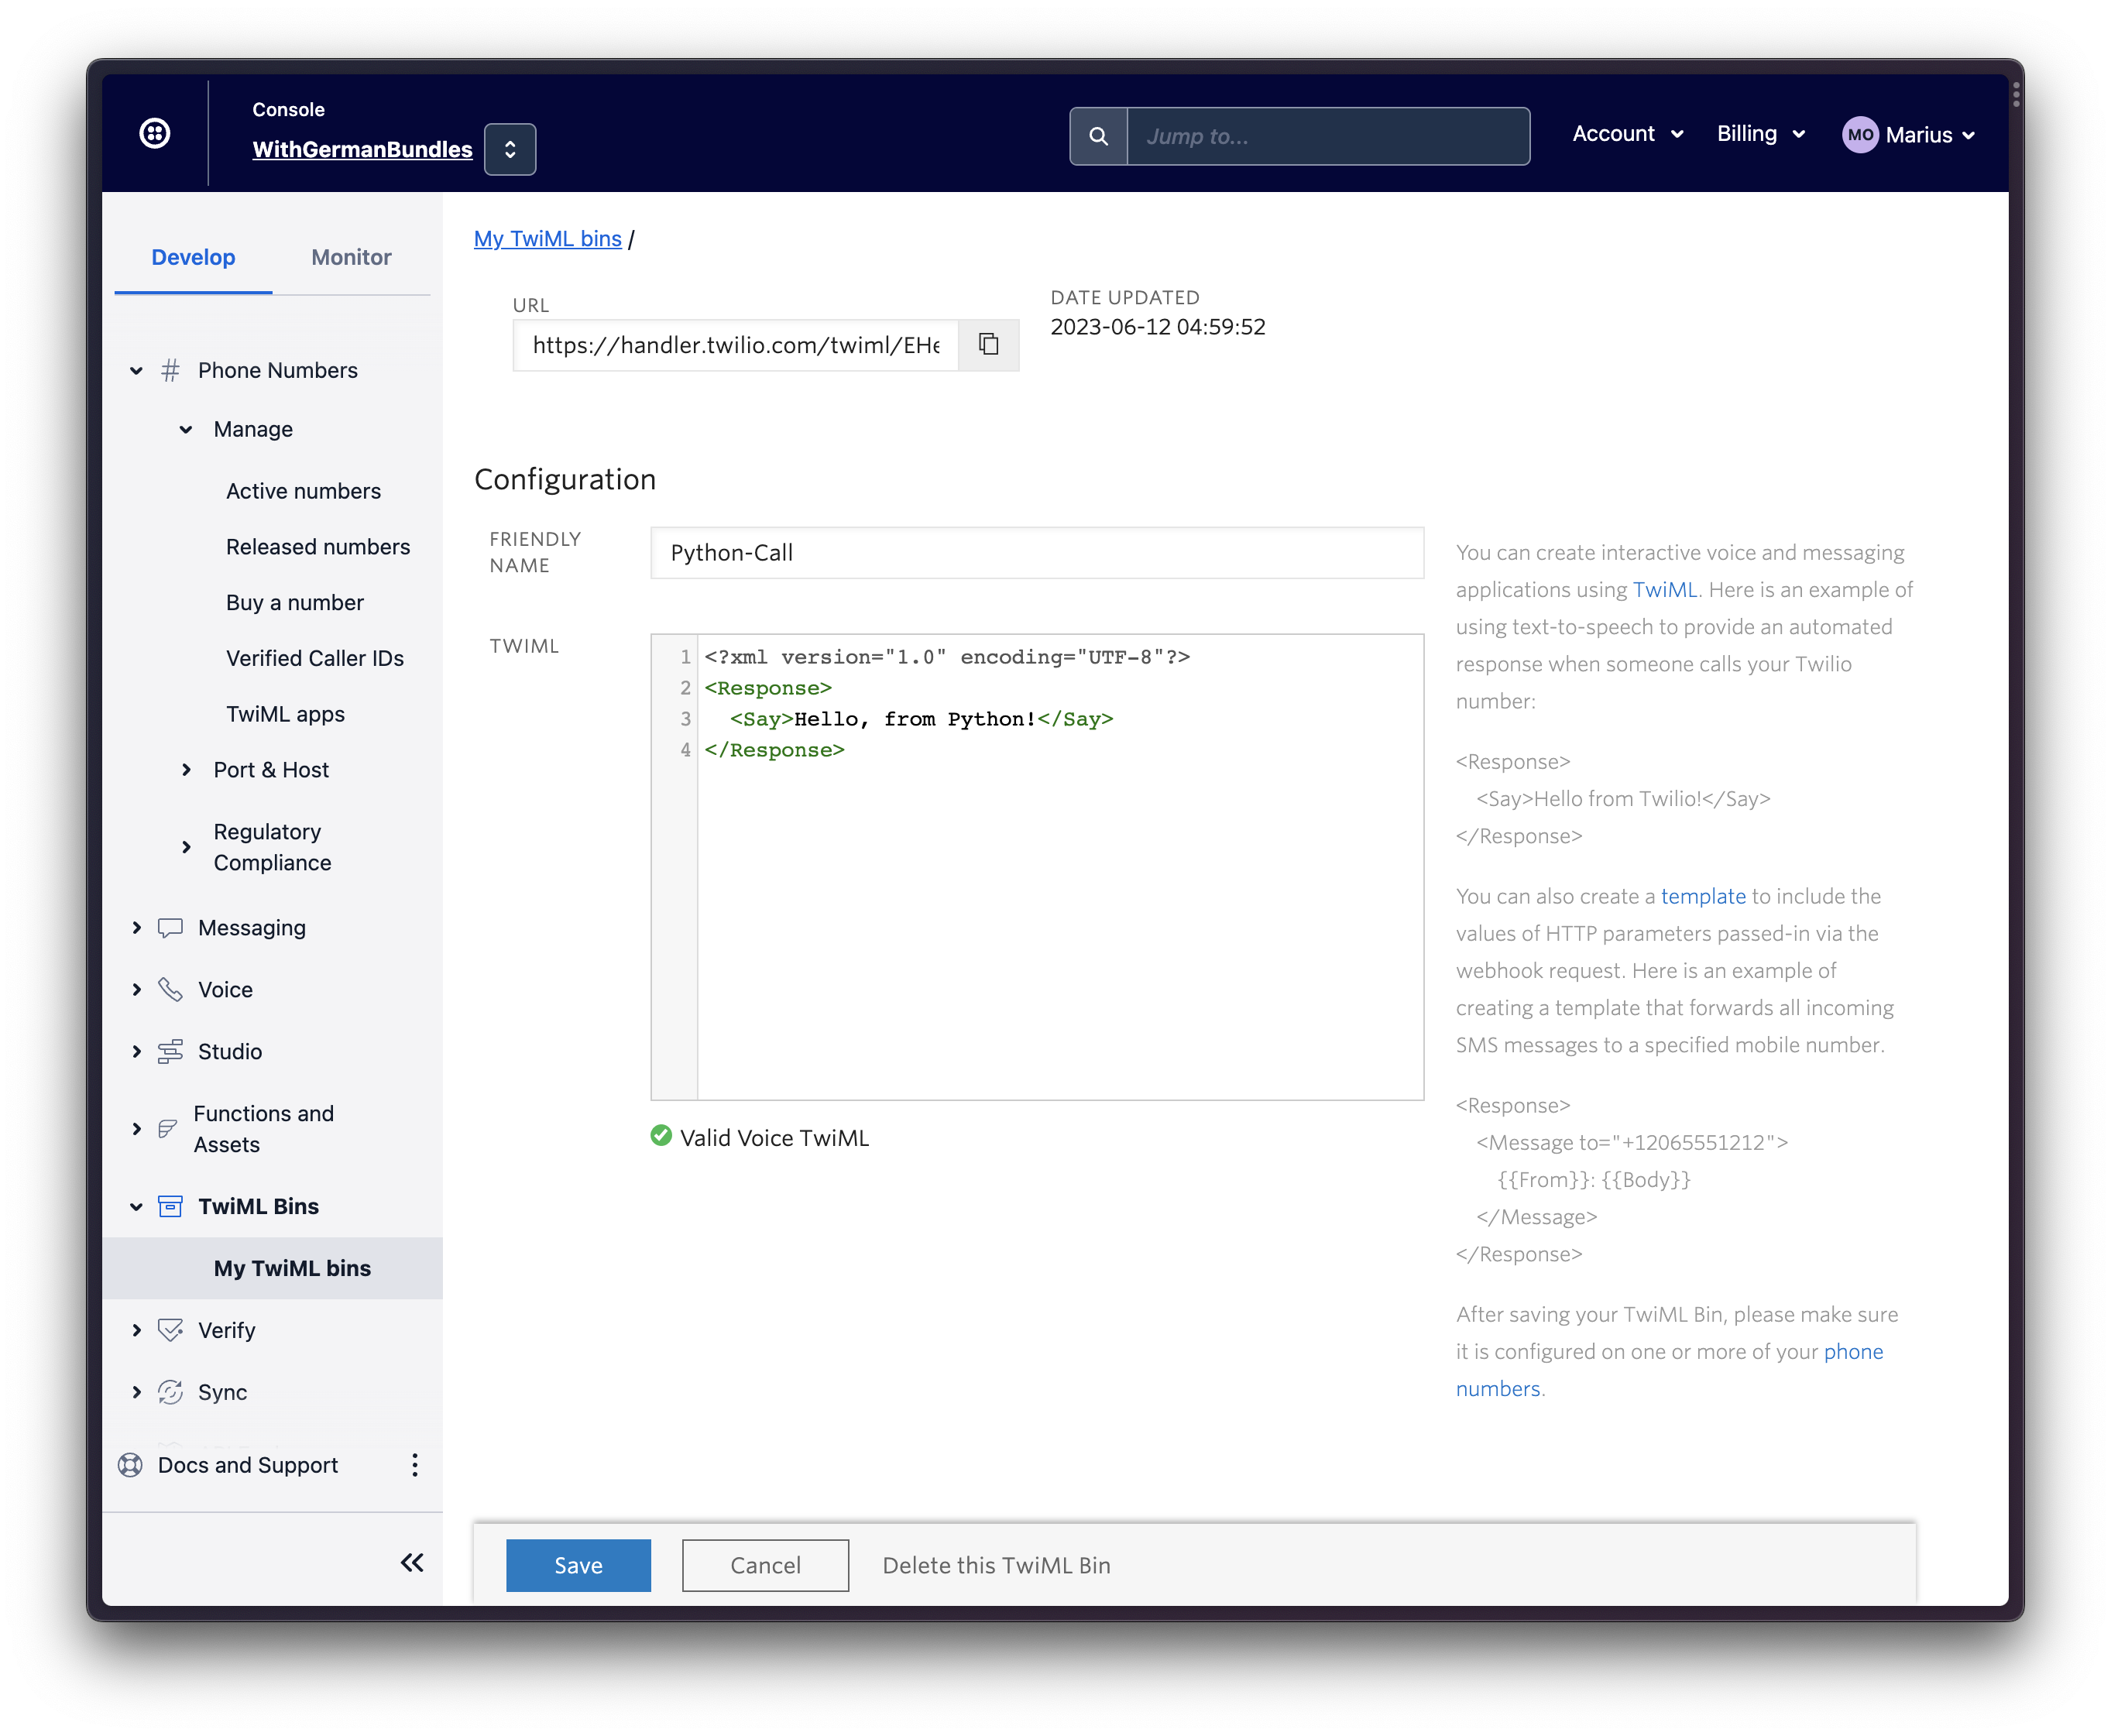
You can host TwiML directly through Twilio, in a TwiML Bin. Navigate to the TwiML Bins section of the Console.
Click the blue plus-button to create a new bin. This will direct you to a new page where you can configure your bin.
Give your bin any friendly name of your choosing, such as Python-Call. Then copy and paste the following TwiML into the TwiML field, replacing anything there already:
Scroll down and click the Create button. The page will refresh and then at the top of the new page, you will see the “SID” and “URL” values assigned to your new TwiML bin. Copy the URL to the clipboard.
Making a phone call in Python
Fire up your text editor or IDE and create a new Python file call.py in the phone-call directory you created at the start of the tutorial.
Enter the following code in this file:
Make sure you update the following parts of the above code snippet:
- Replace the value of the
from_argument with your Twilio phone number - Replace the value of the
toargument with your personal phone number - Replace the value of the
urlargument with the URL you just copied from your TwiML bin
Be sure to use E.164 format for the phone numbers.
Head back to your terminal, make sure you have defined the environment variables with your Twilio credentials as indicated above, and then run the script as follows:
Your personal phone will ring in just a few moments. When you answer the call, you’ll hear “Hello, from Python!”.
Feel free to go back to your TwiML bin in the Console and edit the message you want the caller to hear!
Conclusion
In this tutorial you’ve learned how to make a phone call from a Python application. But this is just the beginning. Be sure to check the TwiML reference to find out how you can do lots of other cool things with your phone calls!
Miguel Grinberg is a Python Developer for Technical Content at Twilio. Reach out to him at mgrinberg@ twilio.com if you have a cool Python project you’d like to share on this blog!

Related Resources
Twilio Docs
From APIs to SDKs to sample apps
API reference documentation, SDKs, helper libraries, quickstarts, and tutorials for your language and platform.
Resource Center
The latest ebooks, industry reports, and webinars
Learn from customer engagement experts to improve your own communication.
Ahoy
Twilio's developer community hub
Best practices, code samples, and inspiration to build communications and digital engagement experiences.