Setting Up a Conference Call Line with Twilio Programmable Voice, Python and Django
Time to read:
April 03, 2020
Written by

The modern workplace requires extensive infrastructure, tools, and support to enable remote work and tele-commuting. Individuals across the globe need to be able to communicate with each other through every medium in order to be productive and stay connected. One of the most common means of communication is a simple conference call with relevant members of your team to get information quickly or share updates.
In this tutorial, you will be setting up a Django project using virtual environments, creating a free Twilio account, provisioning a phone number, and finally, creating a conference line that allows users to call your Twilio number, enter a PIN, and join a conference call.
By the end of this tutorial, you will be able to:
- Set up a free Twilio account
- Set up a conference line that accepts callers that enter a valid PIN
- Control the settings of your conference line and change configurations, such as a maximum number of allowed participants and a welcome message to each caller
Tutorial requirements
To follow this tutorial you need the following components:
- Python 3.6 or newer. If your operating system does not provide a Python interpreter, you can go to python.org to download an installer.
- A text editor. Visual Studio Code is a great cross-platform option with extremely helpful plugins, linters, and extensions.
- ngrok. We will use this handy utility to connect the Django application running on your system to a public URL that Twilio can connect to. This public URL will be used to expose your local web server to the public Internet. If you don’t have ngrok installed, you can download a copy for Windows, MacOS or Linux.
- A smartphone with an active phone number to make calls
- At least one more phone or phone number to make calls to your Twilio phone number
- A Twilio account. If you are new to Twilio create a free account now. If you use this link to register, you will receive a $10 credit when you upgrade to a paid account.
Configure your free Twilio account
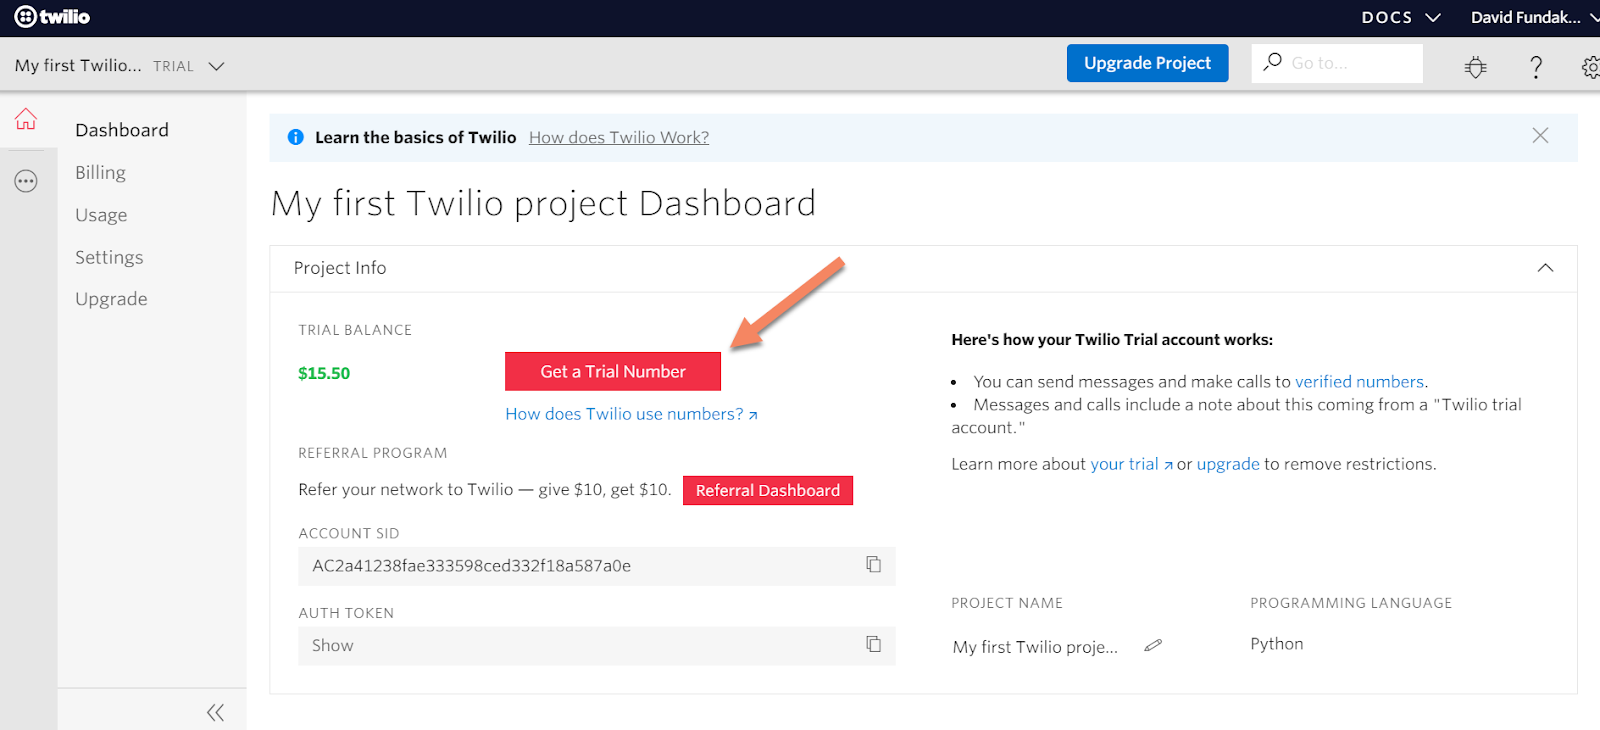
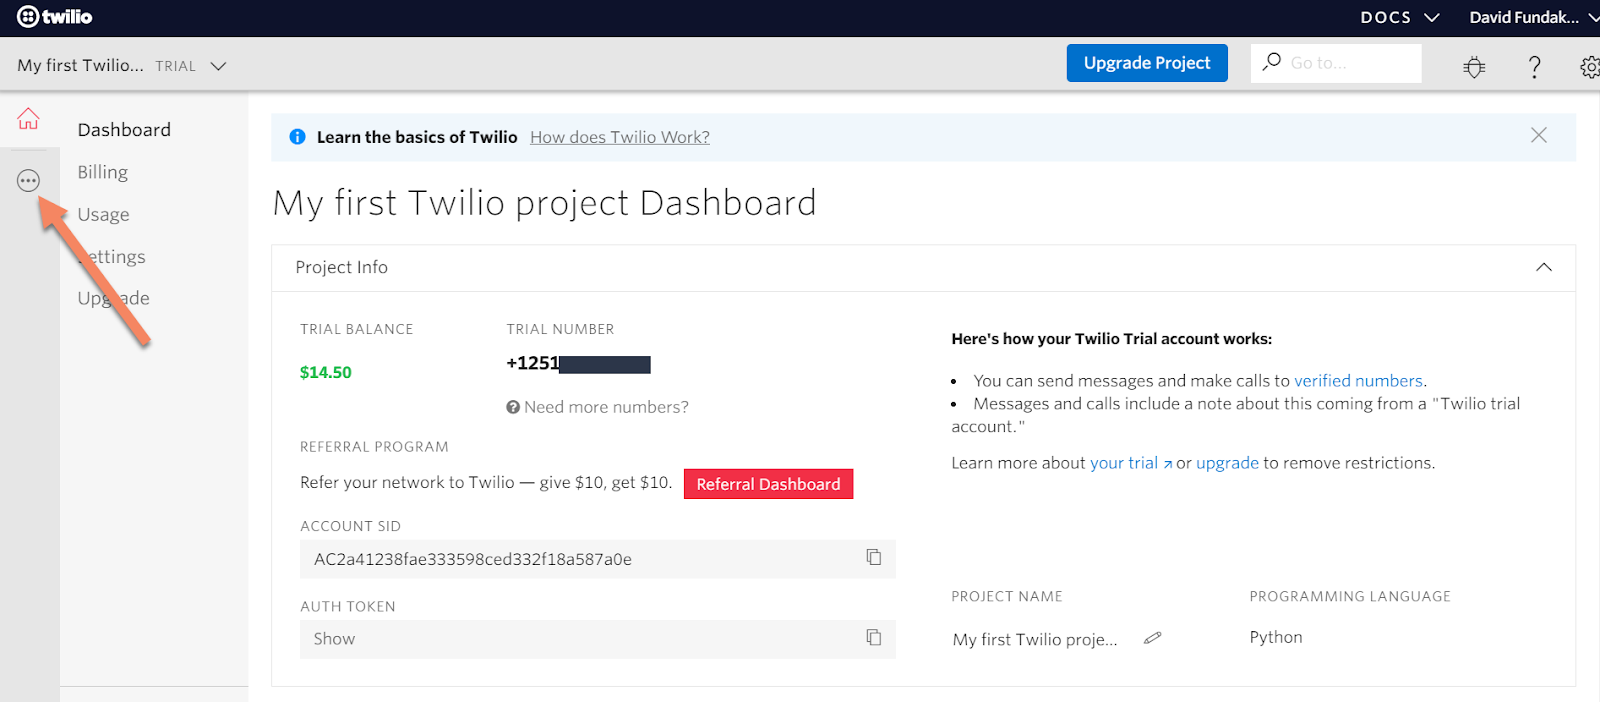
After you set up your free Twilio account using the link in the Tutorial Requirements section, you can access the Twilio Console. The first step if you made a free trial account is to provision a phone number by clicking the “Get a Trial Number button”. Follow the prompts after clicking the link to choose your new number.
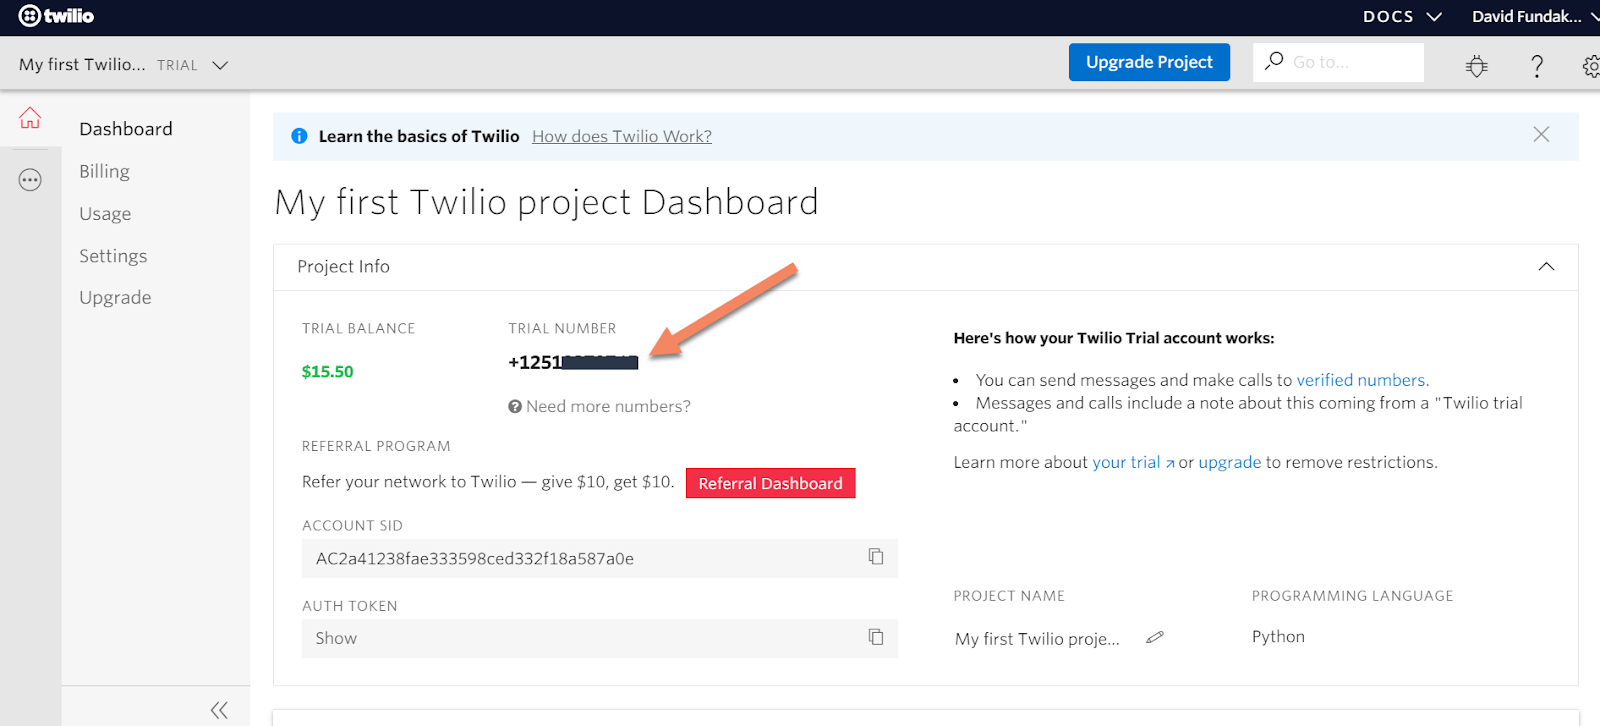
The Twilio dashboard should now have a phone number aligned to your account.
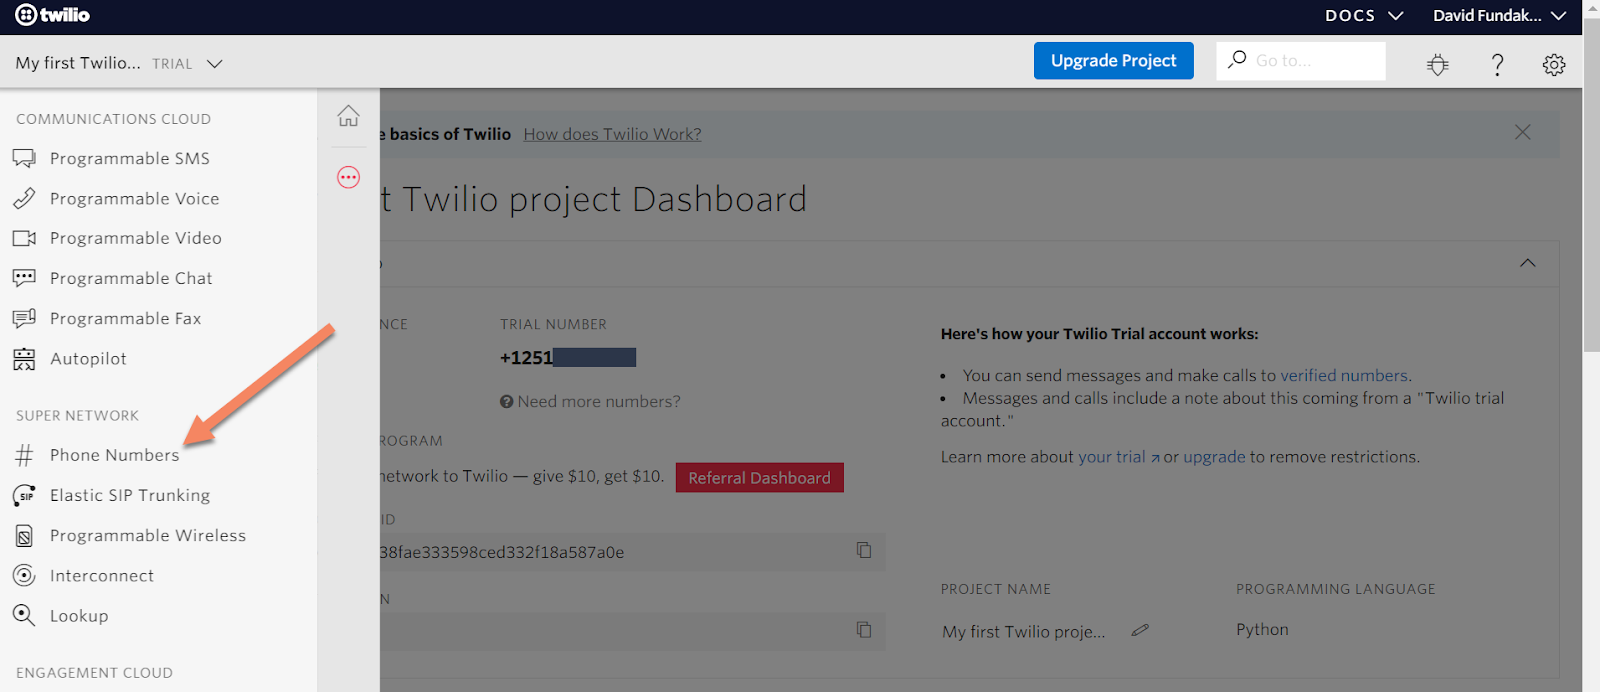
If you already have an account, you can use an existing number or navigate to the Phone Numbers section of the Console and provision a new number. Click the ellipsis on the left side of the screen, click Phone Numbers, and then pick a number of your choosing:

Create a Python virtual environment
The first step is making a virtual environment where you will install both Django and the Twilio Python helper library.
For Linux/MacOS:
For Windows users:
Start your conference line project
You are ready to start developing your conference line application using Django. With your virtual environment still activated, create your Django project, your conference line app, do an initial model migration, and start a local server:
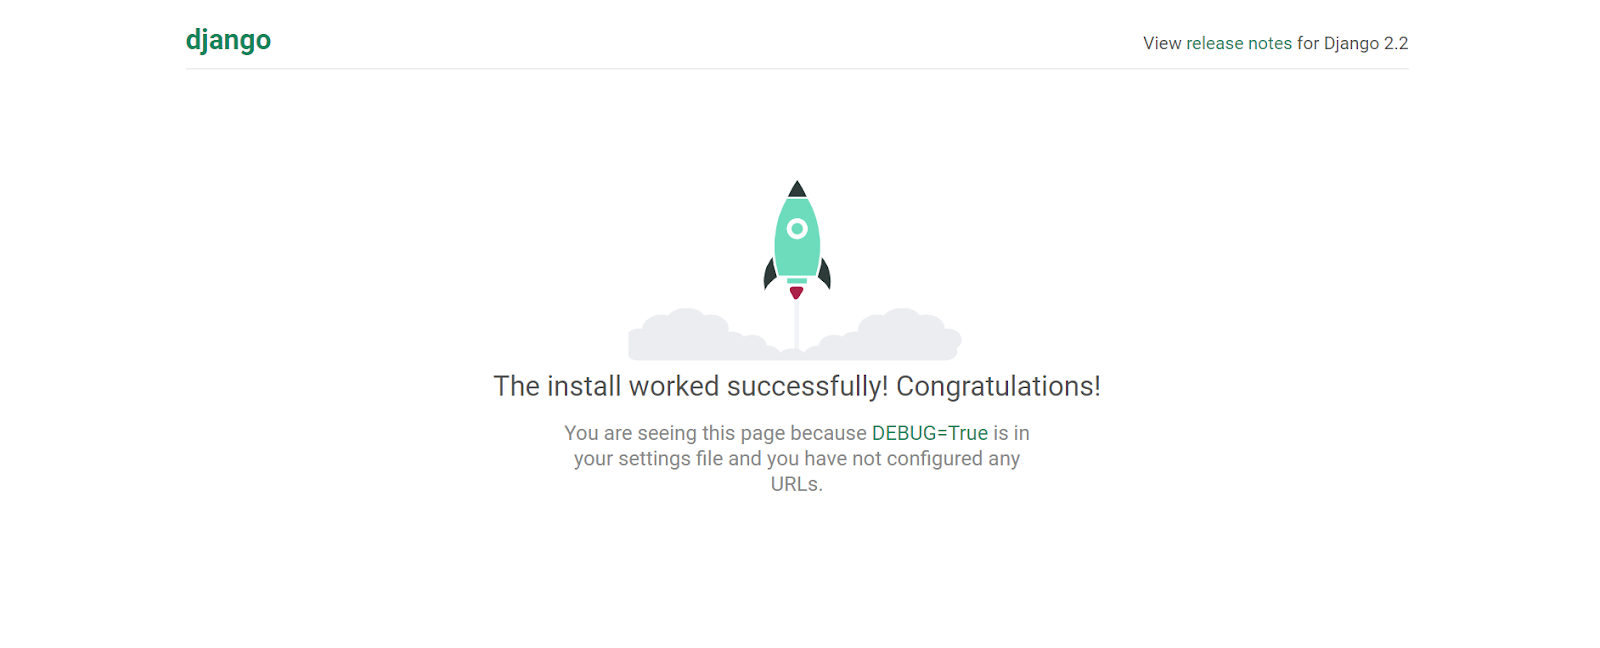
Open a browser, navigate to http://127.0.0.1:8000/, and if you see a web page with a success message, you have successfully started your Django project and app!
Configure your project settings and files
There are a few things that need to be added to the project before you can call your conference line. If you haven’t stopped the local server yet, use Ctrl+C to stop your runserver in your terminal/command prompt.
The first step is to add the confline app to the list of installed apps in the Django project. This list is located in the settings.py file located in the MyConfLine directory:
After updating the installed apps, add ngrok and your localhost to the list of allowed hosts also located in settings.py:
Lastly, add a blank urls.py file to the confline app directory using your code editor. The confline app directory should now look like this
Add URL routes and view for call logic
You are ready to start writing the logic to handle inbound calls to your Twilio conference phone number. You are going to accomplish this by writing a view in the confline app to execute the conference line code, adding the new view to a specific URL path, and then adding the new URL path as a webhook for your Twilio phone number in the Twilio Console.
The first step is to get a basic conference line started when you call your Twilio phone number. Start by writing a basic view in confline/views.py that dials a conference line:
Next up is adding URL pattern routes to generate a path to this view. First, add an entry to the URL patterns in the project-level MyConfLine/urls.py file:
Now add a single entry in the new urls.py file in the confline directory that will call the my_conference_line view:
Add a webhook to the Twilio phone number
You now have a complete path to the my_conference_line view and are just about ready to make your first call to your Twilio number. The next steps are to start a local server and then start ngrok to expose your local server to the public Internet. In a terminal or command prompt with your virtual environment activated, start your server:
Now open another terminal/command prompt and start ngrok:
If ngrok started successfully, the terminal should look like below:
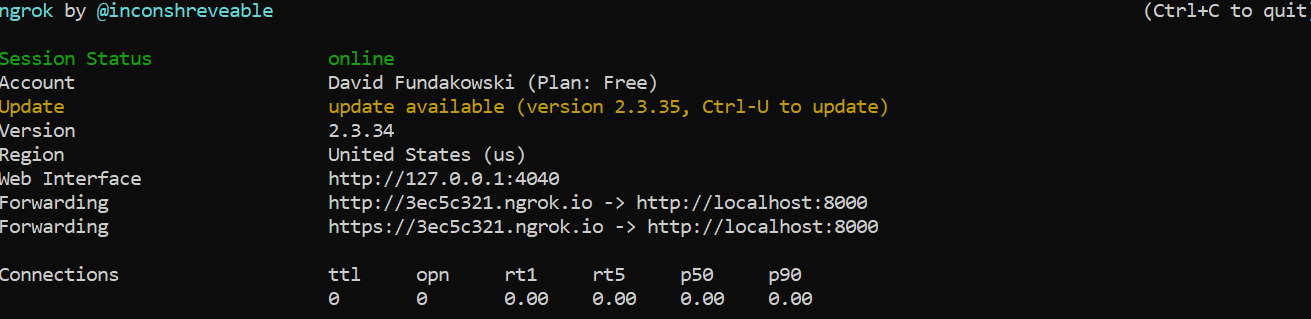
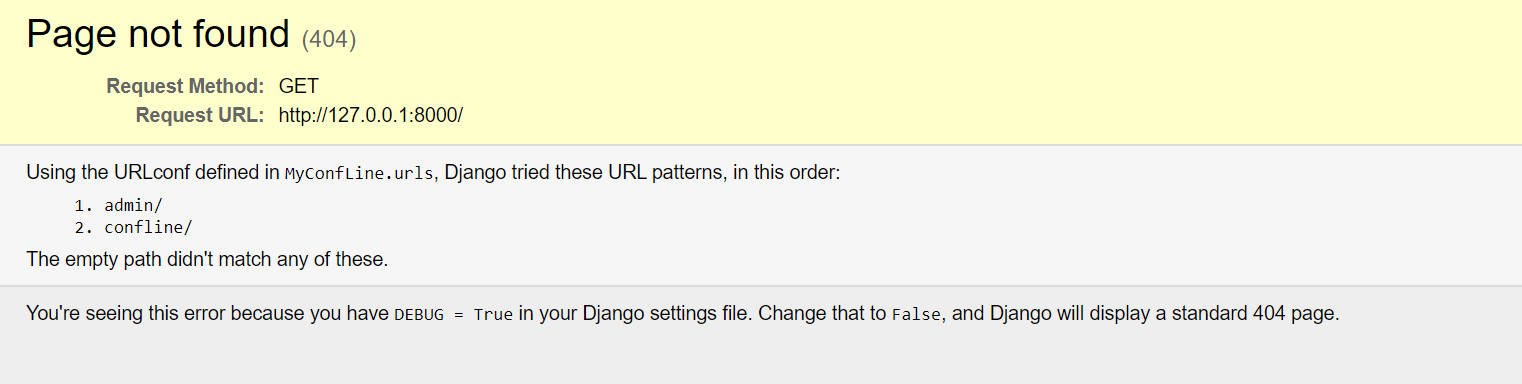
You should now be able to open a browser and navigate to the HTTPS URL listed as Forwarding in the ngrok window, which should give you a “Page not found” error because we are asking for the / URL but the application only implements a view for /confline/.
With ngrok working successfully, you can now add a URL to your Twilio number in the UI. From the Twilio Console, click the ellipsis icon on the left side:
Then navigate to your Phone Numbers and select your conference line phone number:

After clicking on your number, scroll down to the Voice options. In the section labelled “A Call Comes In”, add your ngrok URL and make sure the confline portion of the URL is included. For example, the complete URL would be similar to https://8ff8606c.ngrok.io/confline/, but with a different ngrok subdomain:
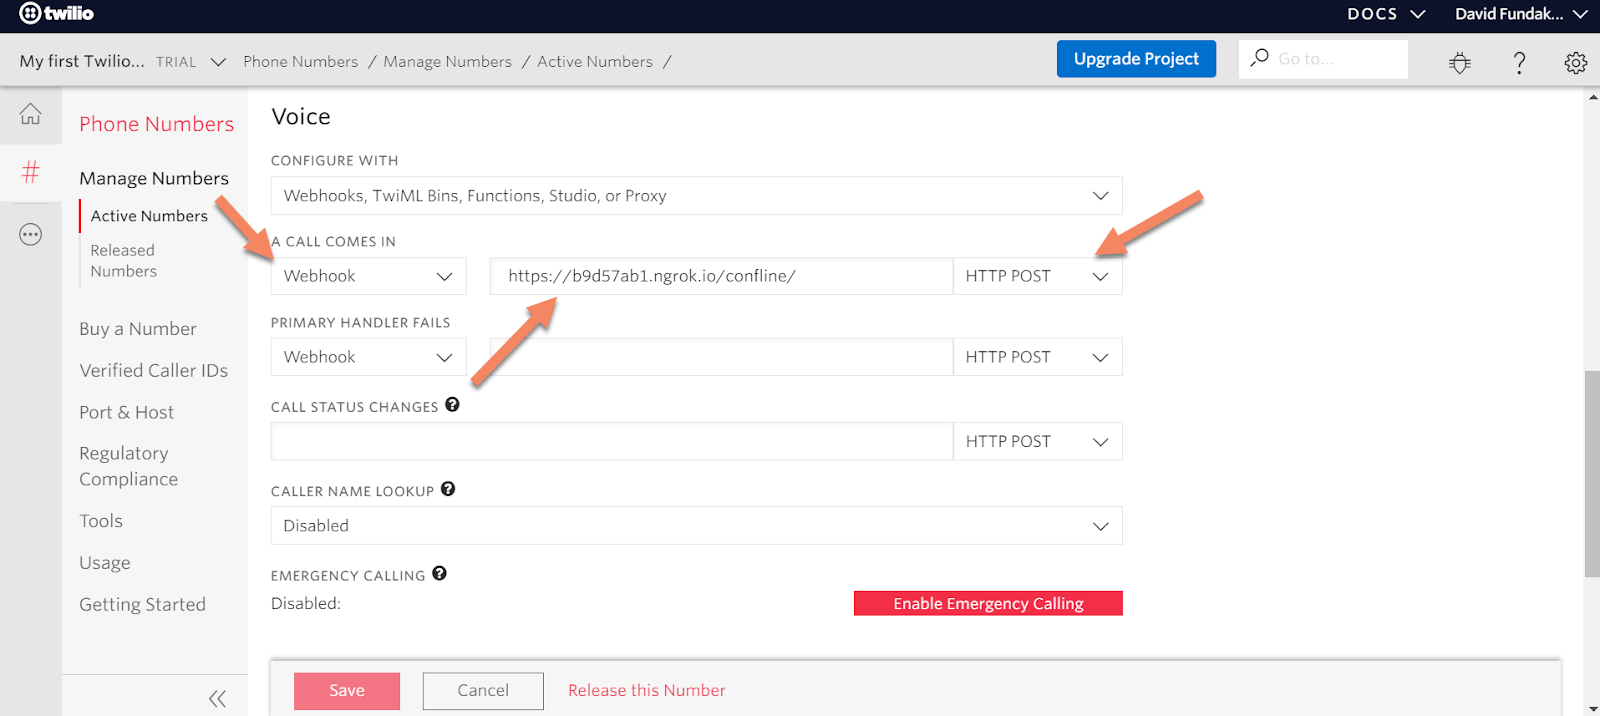
Click “Save” at the bottom of the screen.
Now, pick up your personal phone, and call your Twilio number! If you are using a trial account, there will be a recorded message that gets played at the start of the call. Press any number to continue after this message.
If all of the directions were followed, ngrok is running, your local server is running, and your webhook is properly configured, you should be greeted with some lovely hold music! Your conference line is working, so grab a second phone or have a friend grab theirs and call your Twilio number to have your conference line connect the two calls. Any additional calls into your Twilio number will also be added to the conference call.
Add view logic to secure the conference line and change settings
You have a basic conference line now, but there are some configurations to add to it to make it more robust and secure. In this section, you are going to add a PIN number to protect the conference line from unwanted visitors and also add a cap on the amount of participants.
In the views.py file in the confline app, replace the existing my_conference_line code with the following code:
Let’s walk through what the code here is doing. First, the logic is checking if there is a value called Digits passed in the view request. The Digits value is what is captured from the Gather action further down in the method. The first time this view is executed, there is no Digits so it will proceed to the else where we gather a PIN from the caller. The caller enters a 4-digit PIN, and the view is called again. If the PIN entered is the correct one (9812 in the example above), the caller will be accepted, read a welcome message and put into your conference room. If the PIN entered is incorrect, the caller will hear a “Wrong PIN” announcement and the call will end. The dial.conference() call now adds a cap on the number of participants allowed into the call.
Once you save the updated file, the Django app should automatically recognize the changes and restart the local server. You now have an application that allows you and up to four more friends to call your Twilio number, enter the PIN, and chat with each other!
Wrap up
Twilio’s conference feature goes further than simple conference calling. The functionality enables call center managers to coach their reps or transfer calls, it allows trainers to have attendees join and be totally muted, and allows developers to customize the experience of the callers with an extremely robust API.
For next steps, head over to the Twilio Conference API docs and look at some other things that can be added to your app!
David Fundakowski is a senior data architect and full stack developer in Kansas City. Reach out through LinkedIn or Twitter if you want to connect!

Related Resources
Twilio Docs
From APIs to SDKs to sample apps
API reference documentation, SDKs, helper libraries, quickstarts, and tutorials for your language and platform.
Resource Center
The latest ebooks, industry reports, and webinars
Learn from customer engagement experts to improve your own communication.
Ahoy
Twilio's developer community hub
Best practices, code samples, and inspiration to build communications and digital engagement experiences.