Create a Chat Room App with Twilio Video and Flutter / BLoC
Time to read: 8 minutes
January 04, 2022
Written by
Reviewed by
In this blog post, I’m going to show you how to create a video chat room mobile app with Twilio Video and Flutter. The app will be implemented with the Business Logic Components pattern, known as BLoC. BLoC is a design pattern created by Google to help separate business logic from the presentation layer and enable a developer to reuse code more efficiently. Flutter is Google’s free, open-source UI toolkit for building applications for mobile, web, and desktop from one single codebase.
In this tutorial, you’ll create a Flutter app which will use an unofficial Flutter package for interfacing with Twilio Video, and you will allow users of this app to host a call and be joined by multiple other users. The tutorial will focus more on creating a serverless endpoint to get access tokens for our users to connect and enter the same chat room, which will be represented as a grid of video streams.
In this blog post, we assume that you already have some basic knowledge of Dart.
Set up the local dev environment
Before getting started, you will need to set up the following:
- Flutter SDK 2.2.3
- An iOS mobile device to test with
- Xcode downloaded on your machine
- Visual Studio Code v1.60.1 (or your favorite code editor/IDE)
For the project, you will also need the following tools, but we will walk through them later in the tutorial:
- The package twilio_programmable_video v0.10.0+1
- Note: This package is not officially maintained by Twilio but by the Flutter community.
- The packages bloc and http
- Twilio Functions (to easily generate access tokens for our chat room)
Additionally, a little existing knowledge of Dart and BLoC will be required.
Sign up for a Twilio account
First, you’ll need to sign up for a Twilio account if you don't already have one.
After entering all the required account information, select Twilio Programmable Video as the product you would like to use.
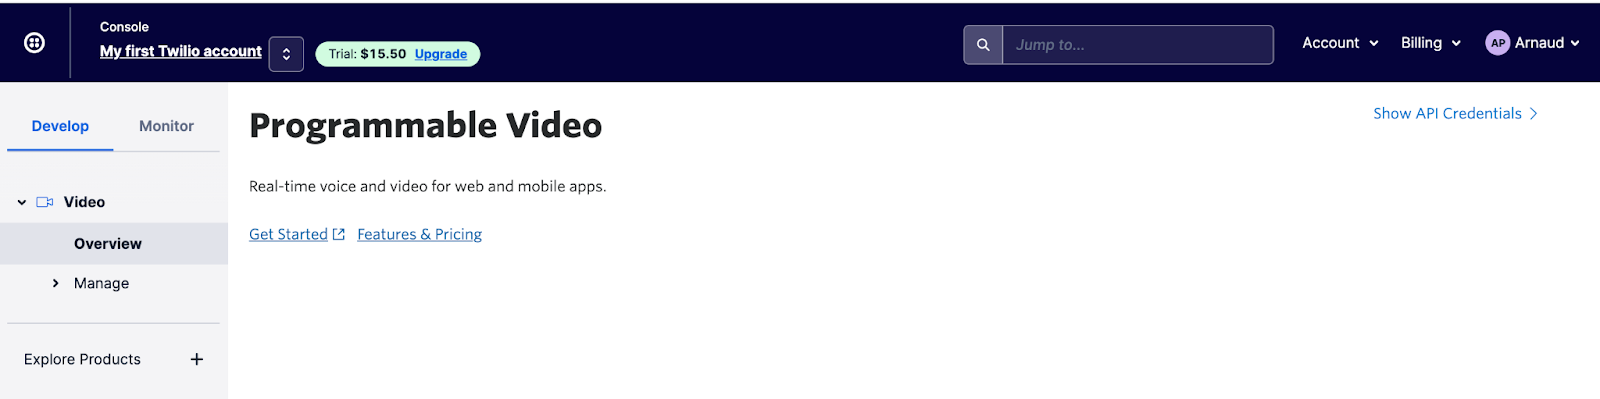
Once you are logged in to the Twilio Console, you will see your Account SID displayed there. Make a note of this value, then navigate to the API Keys page and click the Create API key button. Enter a friendly name for your API key, then create the key and make a note of its SID and secret key — these are the live credentials you will need later in the project.
Create the backend service
For the sake of simplicity, we will create a Twilio Service to generate an access token we can use in our chatroom.
Navigate to the Services page in the Functions section of the Twilio Console.
Click the Create Service button and name the new service TwilioChatRoomAccessToken.
Create a new function by clicking the Add+ button and naming the function accessToken. This function will be used as our serverless service path. By default, it’s set as protected, so make sure to make it public in the dropdown menu next to the function's name.
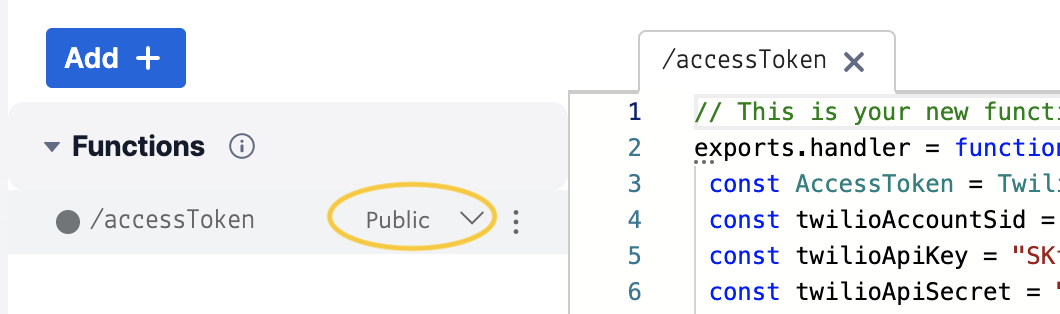
In the function body, copy and paste the following code. Replace <ACCOUNT_SID>, <TWILIO_API_KEY> and <TWILIO_API_SECRET> with the values you made note of earlier.
When you are done, make sure to Save and then Deploy All.
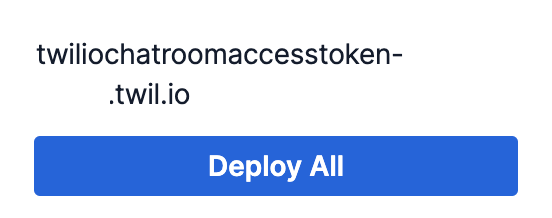
Once you deploy, you will have access to a URL like the following, since it will be public: https://twiliochatroomaccesstoken-XXXX.twil.io/accessToken.
If you make a request to this URL, you will receive a response containing an access token:
Start the client-side app project
I’ve created a sample project with the architecture already set up to save time. You can download the starting project here.
Open the project in your code editor. If you open the file pubspec.yaml, you will see that we are using the following packages:
Simple BLoC architecture with Cubit
We want the mobile application to present a screen for a user to be able to join the call, and another screen representing the video room.
If you look at the lib directory, you can see that we have set up a basic architecture by using BLoC (Business Logic Component) and set up the folders as follows:
The folders represent each feature of the application (a page to join a room, a page for the chat room). Each page will be separated into:
- A Cubit file. This is a class that stores an observable state, powered by streams but exposed in a friendly way. We will call any business logic here such as making API calls or connecting to Twilio.
- A UI file for presenting the widgets.
One of the main issues with Flutter is with dependency injection, and knowing how to pass down the widget hierarchy tree without retaining a pointer of that object for each widget.
In this project, we will use two convenient components:
BlocProvider: It will inject an object available for each widget of the UI tree. We want to inject our Cubit object, as it’s encapsulating the business logic.BlocConsumer: It will read any available object provided by theBlocProvider. We want to get the Cubit object and the state in order to manage our UI.- Important Note: A
BlocConsumerof an object needs to be encapsulated by aBlocProvider.
- Important Note: A
Make sure that you run the command flutter pub get on your command line to get all of the dependencies before you run the app.
Once you have done this, connect your mobile device and run the app with the following command:
Once the app is running, it will open in a browser window, and you should see this first screen:
Write your Twilio API service
I like to start writing the service first when building an application. For this project, we will write a singleton class (accessible from anywhere) to make a GET call and retrieve an access token for our user to join a video room.
Let's write the service in the lib/shared/twilio_service.dart file and review together what it's doing:
Line 6-7: We declare a singleton object.
Line 10: The base URL, pointing to your server. Replace <SERVERLESS_TWILIO_URL> with your own serverless URL endpoint you deployed by using Twilio Serverless Services.
Line 13: The createToken function will generate an access token for a user with a given identity.
Line 19-20: We receive the response and then parse it into a dictionary / map object to be returned.
Create your Cubit object to retrieve the access token from the Join Room page
Let’s write the method for when a user clicks on the submit button from the UI. We will need to retrieve an access token from the service we wrote above, and then load it using different Cubit states (RoomInitial, RoomError, RoomLoaded, and RoomLoading). Open lib/room/join_room_cubit.dart. Update your submit function so it matches the one below:
Line 2: We are about to make an API call, so we will define our state as RoomLoading.
Line 6-21: We retrieve the access token. If it’s not empty then we can set the state to RoomLoaded. Otherwise we emit a RoomError since we didn’t receive any valid tokens.
Now let’s write the UI code for the Join Room page!
Create the listener and join a room
Open lib/room/join_room_page.dart. The only thing we will change is the following behavior:
- We want to listen to different states of the app.
- If we have received any tokens, we should push the user to a new screen.
Between the listener brackets of the BlocConsumer<RoomCubit, RoomState> let’s add the following code:
Line 3-18 : The listener: (context, state) callback is watching the different states of the cubit object. We will need to listen for when the API call is finished to push to a different screen called ConferencePage by passing in a ConferenceCubit.
If you try to run the app now, entering your name and pressing the Enter the room button, it will look like the image below:
Write your Cubit object to handle joining a Twilio room and creating participants
Before going further, let’s define some important terms used in Twilio Video:
- Room: represents the virtual space where end-users communicate.
- Participant: represents a client that is connected to a Room. A participant can only be connected to one room.
- Track: a stream of bytes, containing the data generated by a source such as a microphone or camera. A participant can subscribe to these tracks.
- RemoteParticipant: Represents the rest of the clients excluding yourself (LocalParticipant).
To join the room we will create:
- a function called
connect()to be called automatically when we land on the Conference Page - a function called
disconnect()for when we want to leave the room - callback listeners to handle connection / disconnection of the participants
- a function called
_buildParticipant()to build the participant widget - a function called
_addOrUpdateParticipant()to build the participants widget
Here in lib/conference/conference_cubit.dart, there’s a comment that says /// TODO: Implement connect, listeners and disconnect methods.
Replace the TODO line with the code below, after which I have listed the explanation of some key lines in the code:
Line 1-41: connect() — The function to connect to the Twilio Video room, in which we:
- Set general rules (here, the output audio by default is the phone speaker)
- Allow access to the camera
- Connect to the room
- Set listeners for connection events from remote streams in that room
For sake of simplicity, we won’t handle any case or scenario other than connection from a participant.
Line 43-46: disconnect() — Handling the participant's disconnection.
Line 56-86: _onConnected() — When a participant (ourself) is connected to the room for the first time, the application will listen to different streams from that participant (similar to a room). The application adds the local participant, as well as any remote participants who are already connected to the room, to the list of participants on the video call.
Line 92-105: _onParticipantConnected() and _onParticipantDisconnected() — These are the listeners that listen for participants’ connection and disconnection events.
Line 114-139: _addOrUpdateParticipant() — Adding a remote participant. Read the code carefully; it’s only possible to get the video widget from the remote participant after receiving a RemoteParticipantEvent (event -> video track -> widget). A common misunderstanding is to assume you can get the video widget from the list of remote participants in a room.
We are almost ready to go! We haven’t done anything fancy here — just connecting to our room, listening for new connections, and adding them to our list of participants. There’s just a little left to do.
Connect and disconnect from the Conference Room
The last thing remaining is to connect automatically when we create the cubit object for the conference room.
Go to the file lib/conference/conference_cubit.dart, and change the constructor as follows:
In lib/conference/conference_page.dart, find the call button widget, which looks like the code below:
And then add the two highlighted lines below in the onPressed callback. In this code, we are grabbing the ConferenceCubit so we can disconnect from the Twilio call page, and then we will navigate back to the login screen:
Now that you have all the code you need, you can run the application on your device. If you have an Apple developer account, don’t forget to open XCode and set up automatic signing:
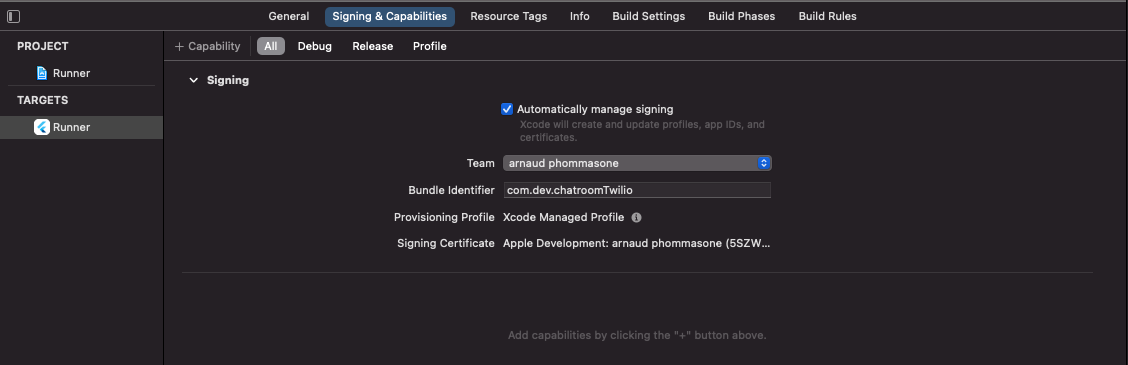
It’s recommended to run the app on a real device, as you will be using the front camera (which is not available on an iOS simulator). Once you have signed in with your name, you will see the application running as shown in the gif below.
Conclusion
There are many other features you can add to this example application, including:
- Showing the names of the participants
- Showing the participants' audio and video statuses (audio muted / unmuted, video off / on) and some buttons to change the local participant's status
- Improved handling of the connection / disconnection of participants
That should be enough to get you started with your first Twilio Video and Flutter project while utilizing a simple and easy BLoC architecture.
Hi, I’m Arnaud Phommasone, a 34 year old French mobile developer specializing in iOS and Flutter, who has been building mobile apps for 11 years now. Feel free to reach me on LinkedIn: https://www.linkedin.com/in/aphommasone.
Related Resources
Twilio Docs
From APIs to SDKs to sample apps
API reference documentation, SDKs, helper libraries, quickstarts, and tutorials for your language and platform.
Resource Center
The latest ebooks, industry reports, and webinars
Learn from customer engagement experts to improve your own communication.
Ahoy
Twilio's developer community hub
Best practices, code samples, and inspiration to build communications and digital engagement experiences.