Detect Hair Color with AutoML, MMS, and JavaScript
Time to read:
February 24, 2021
Written by
Reviewed by

A few weeks ago, I hosted Anna Lytical on my weekly Twilio TV Twitch show to talk making tech more inclusive and accessible, their path to Google and drag, this cool Google Cloud and Twilio hack we made, and more! Anna Lytical is the sickeningly entertaining and educating coding drag queen dedicated to engaging a more diverse audience with code and technology, especially the LGBTQ+ community. During working hours, they are an engineer at Google working on the developer experience for Google Cloud Platform.
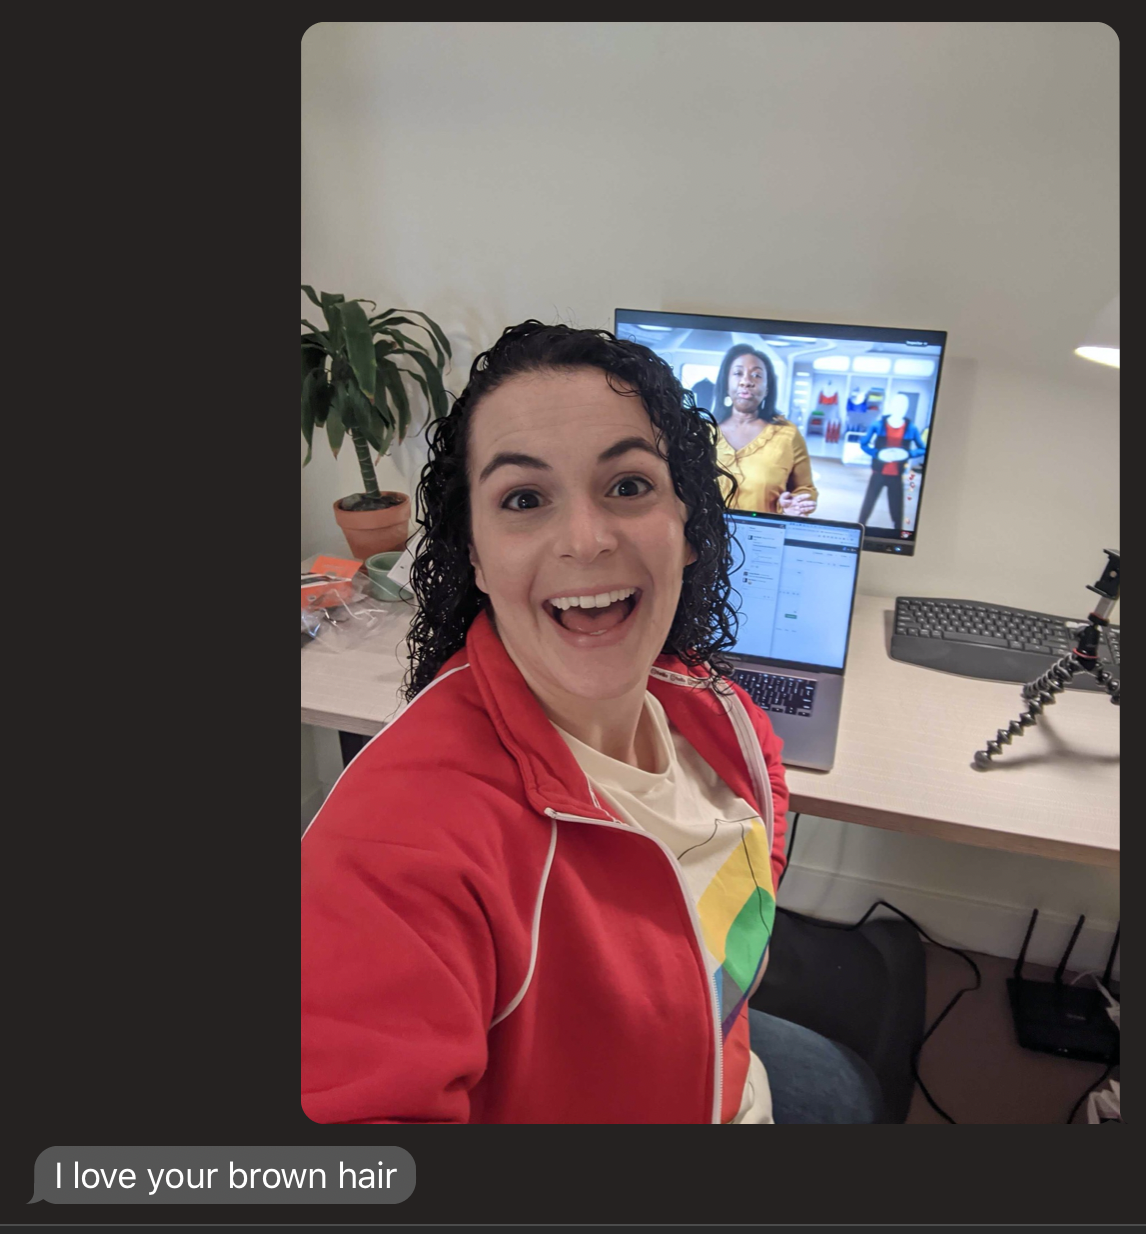
The app we built for the stream was a hair color detector using Google AutoML, Cloud Functions, Twilio MMS, and JavaScript. Read on to learn how to build it yourself and see it in-action by texting a selfie or image with hair to +18182757423!
What you need to get started
To follow along with this post, you will need
- A Google Cloud account
- A Twilio account - sign up for a free one here and receive an extra $10 if you upgrade through this link
- A Twilio phone number with SMS capabilities - configure one here
Prepare image data to train the model on
The next two sections on preparing data and training the model can be summed up by Anna Lytical in their TikTok video.
It can be a pain to get all of the training images needed for a machine learning model. We could scour a search engine for images of hair, but let's get crafty as developers and builders and use this open source Instagram Scraper. You can search for tags like brownhair on Instagram here. Install the scraper with pip running pip install instagram-scraper.
In a project directory called hair make a directory called data where images corresponding to different hair colors will be saved. You could scrape images from a certain account, but we want a lot of images.
To search hashtags corresponding to hair colors, run the following commands to return 100 images tagged "brownhair", "redhair", and "blondehair" each:
You can check that the images were scraped by running ls - sometimes I run the command a second or third time to get images.
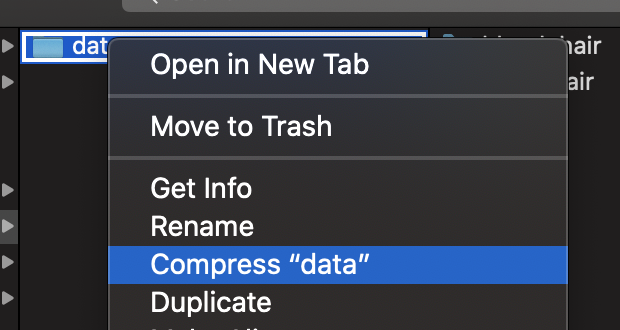
Zip up the data into a folder. If you have a Mac device, you can do this by right-clicking the folder in Finder and selecting "Compress."
With this data, we can now train our model.
Build and train the model with AutoML
In your Google Cloud console, select a project or make a new one. For this post, I called the project "AutoML".
Then, search "vision" in the console search bar as shown below.
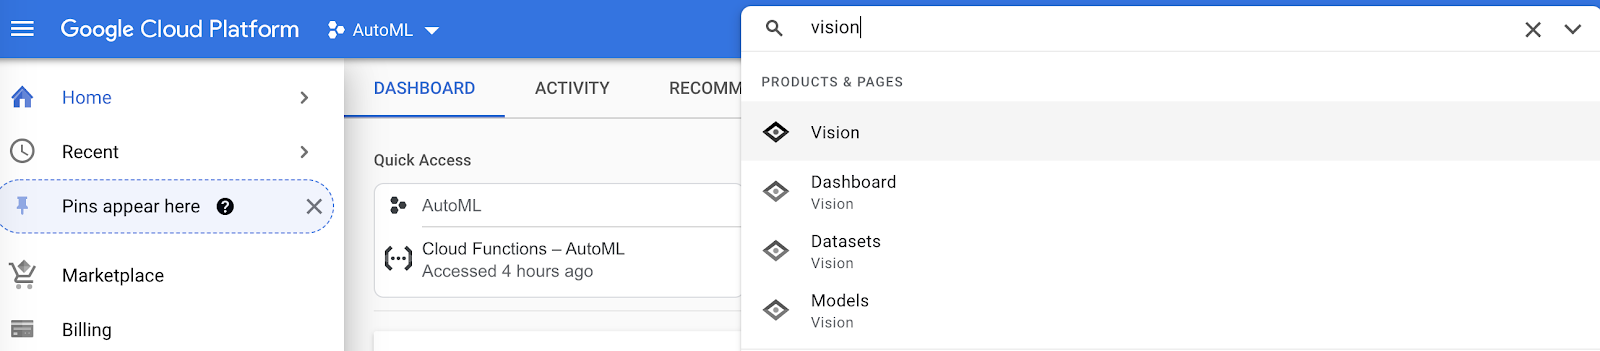
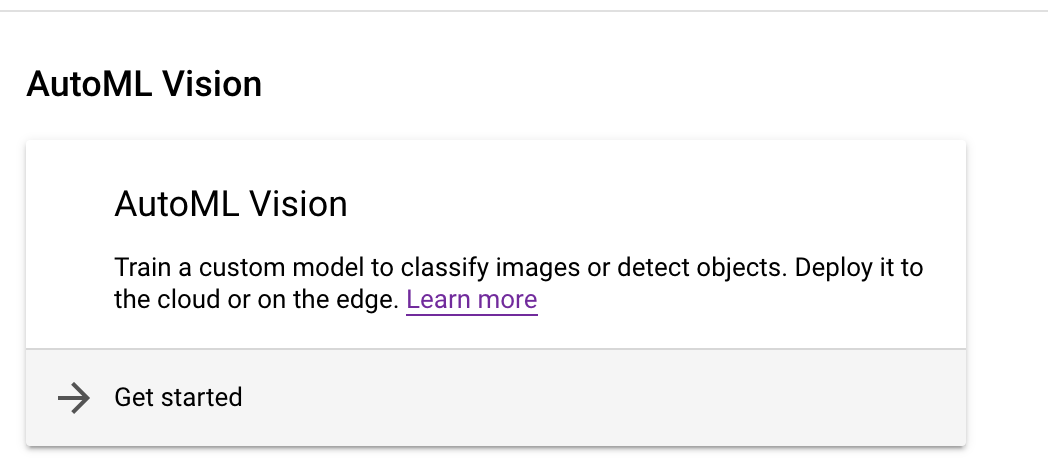
Select Get started under the AutoML Vision API.
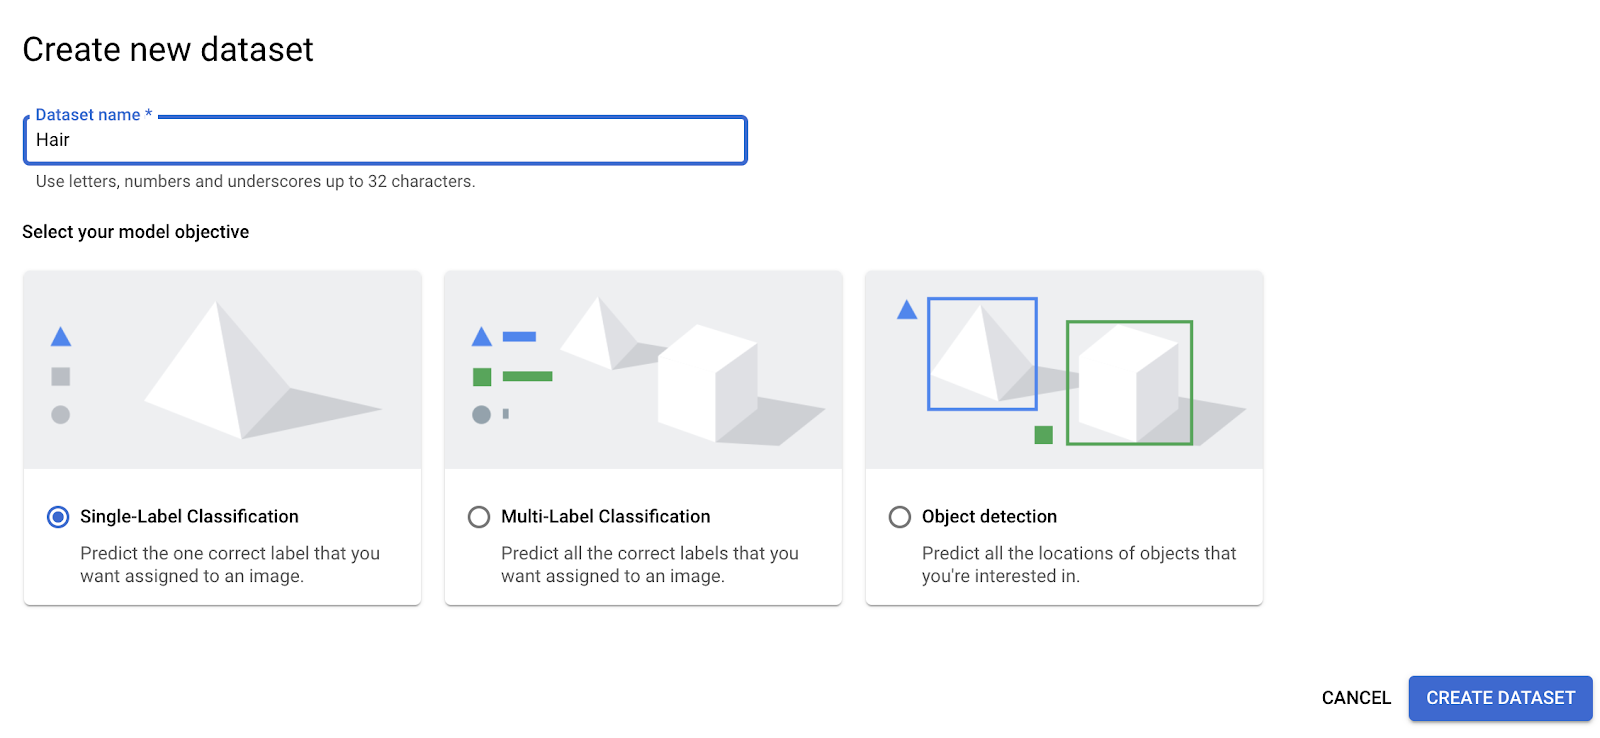
Click New dataset, give it a name like "hair". Make sure the model objective is set to single-label classification, and click Create Dataset.
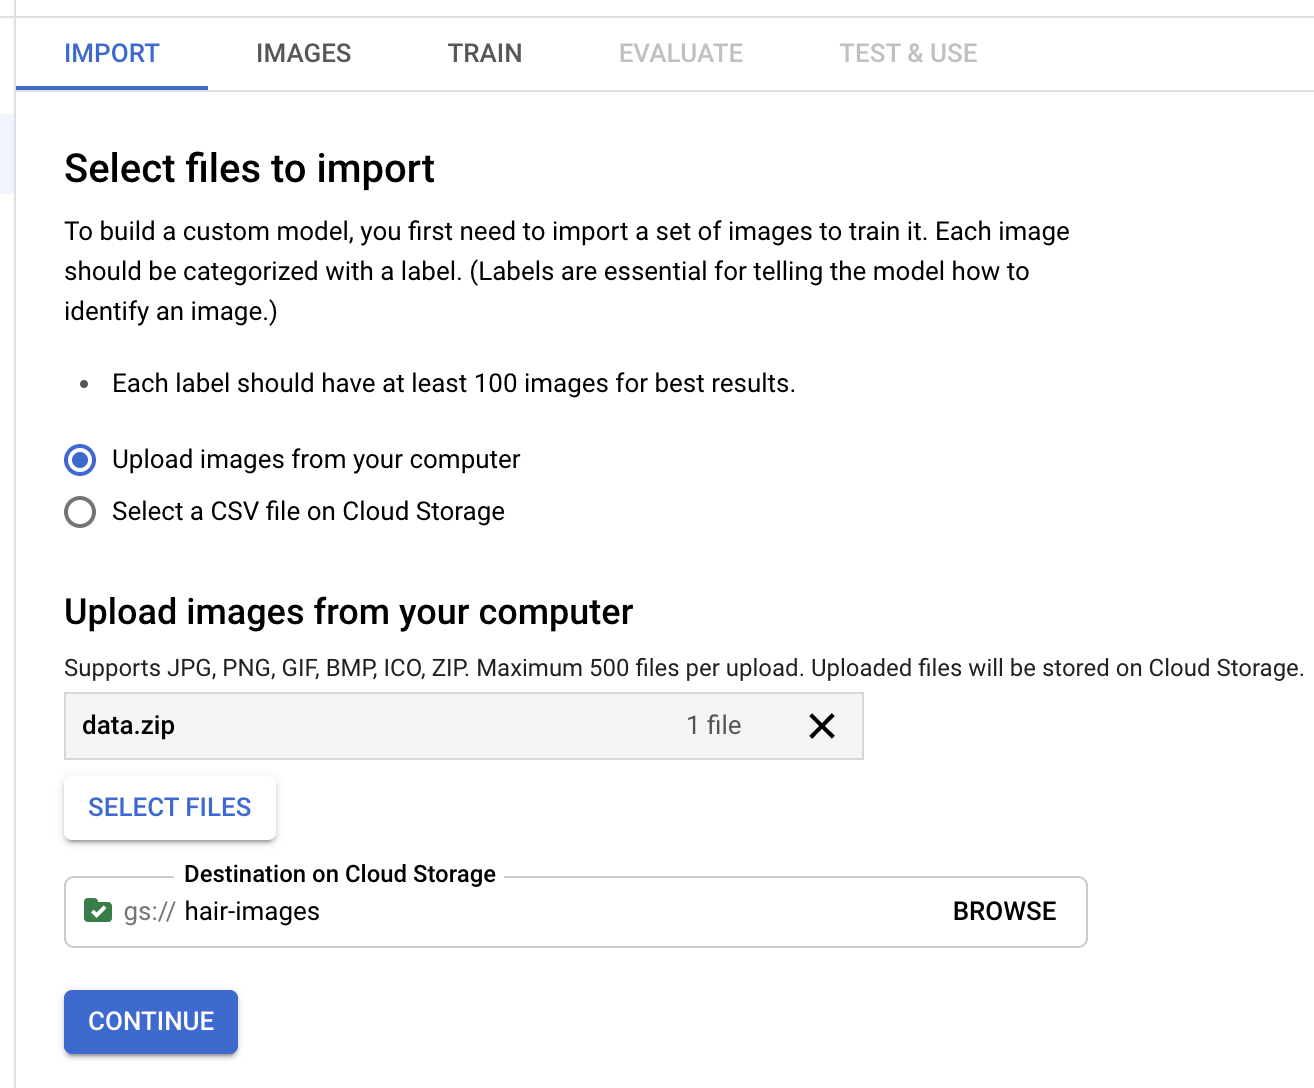
You'll be uploading images from your computer. Click on Select files and upload the zipped file (mine is called data.zip.) To save the data to cloud storage, you must make a folder to save it to. Click "Browse" next to "Destination on Cloud Storage" followed by "Create new bucket".
Call the bucket "hair-images" and choose some data storage options according to cost, performance, and availability. I chose the following:
- multi-region
- standard
- fine-grained
Click Create once you have selected them all.
Wow! That was a lot. Click the Continue button to upload the data to Google Cloud. This could take quite a bit of time. Go for a skip through the park, make some tea, or watch a few music videos.

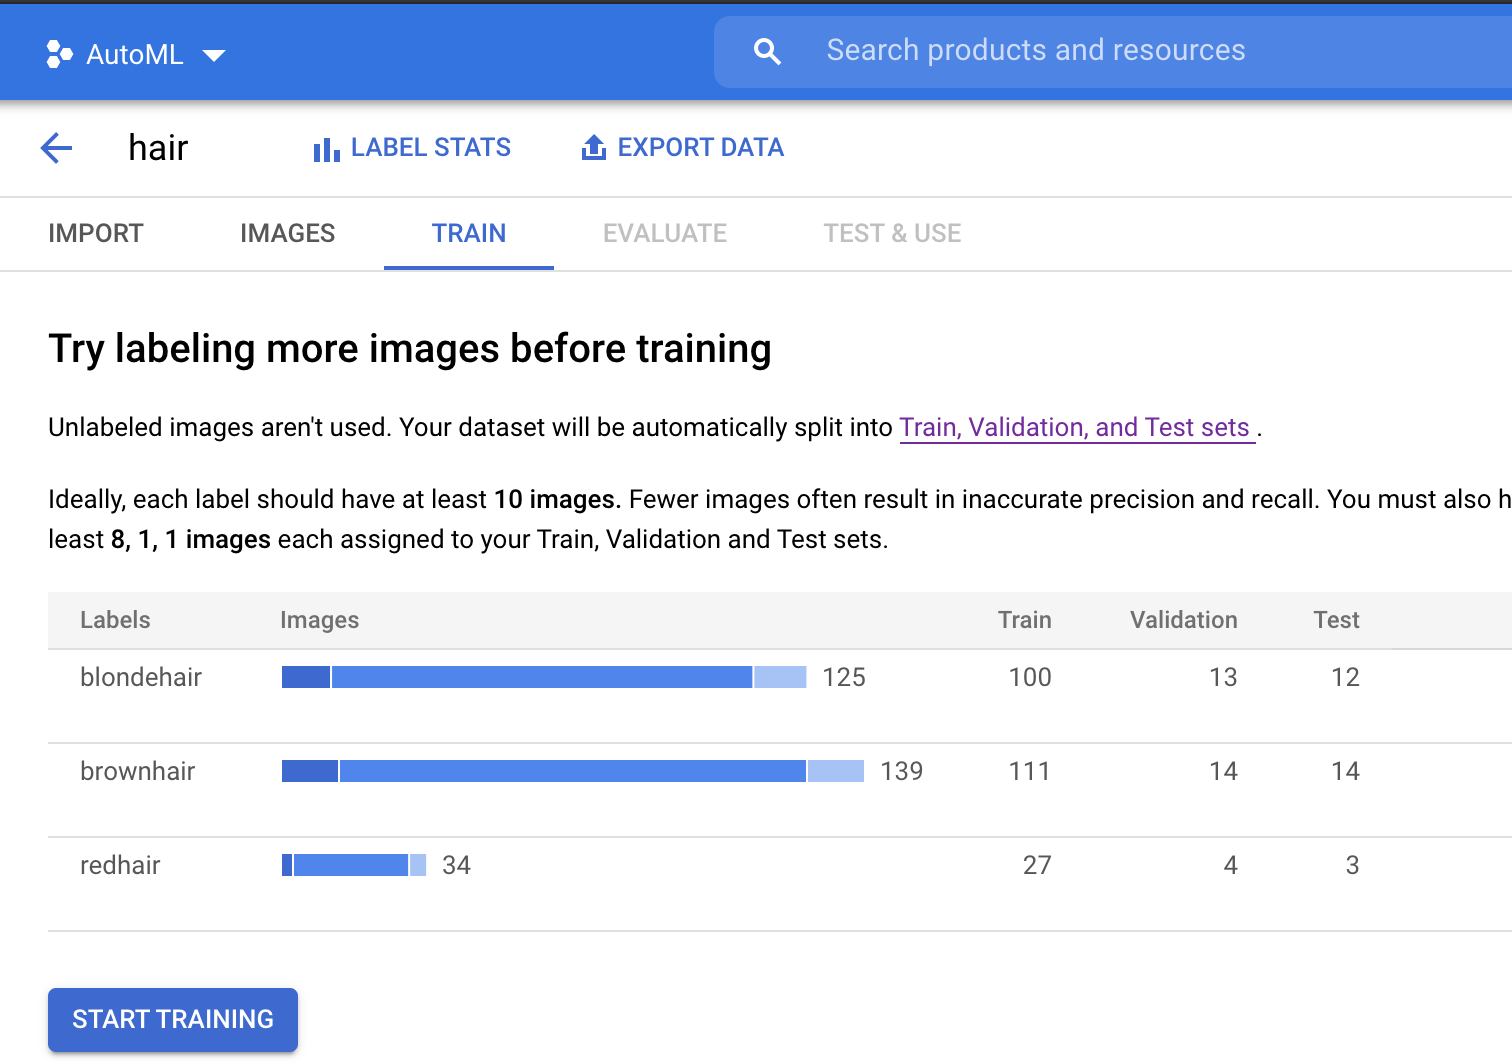
Once all the images are uploaded, you can view them and how they are tagged under the "Images" tab.

Click Train next to Images. Then click the blue Start Training button.
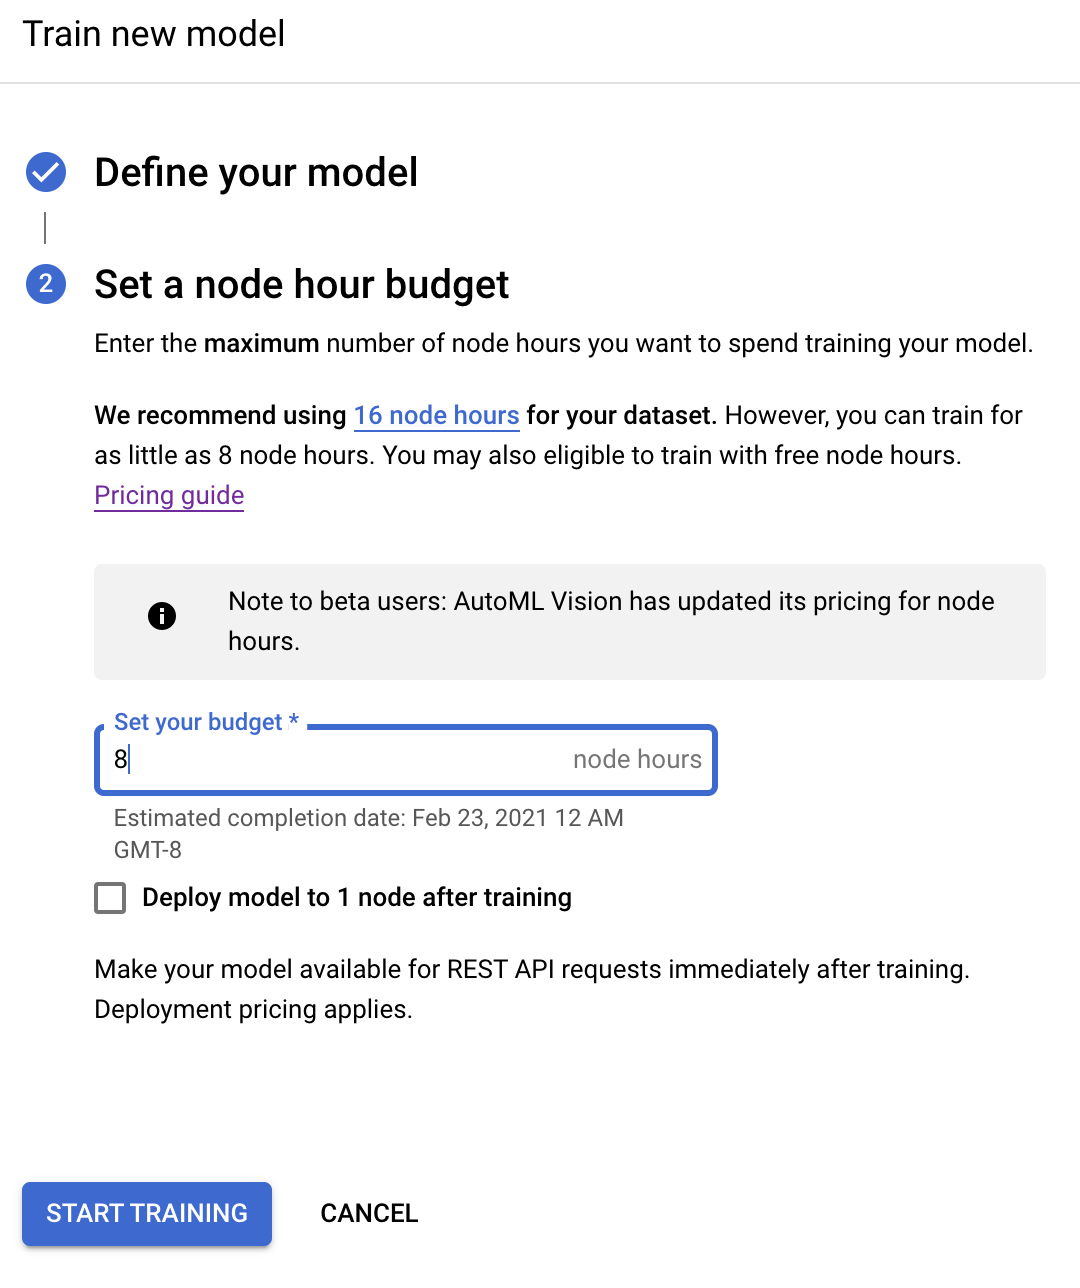
Give your model a name like hair-color-detector and make sure "Cloud hosted" is selected. Click Continue, set your node hour budget to 8, and then select Start training when you're done with all the steps.
Training may take a few hours to complete and you will get an email once your model is done training. Time to go for another walk or read a book!
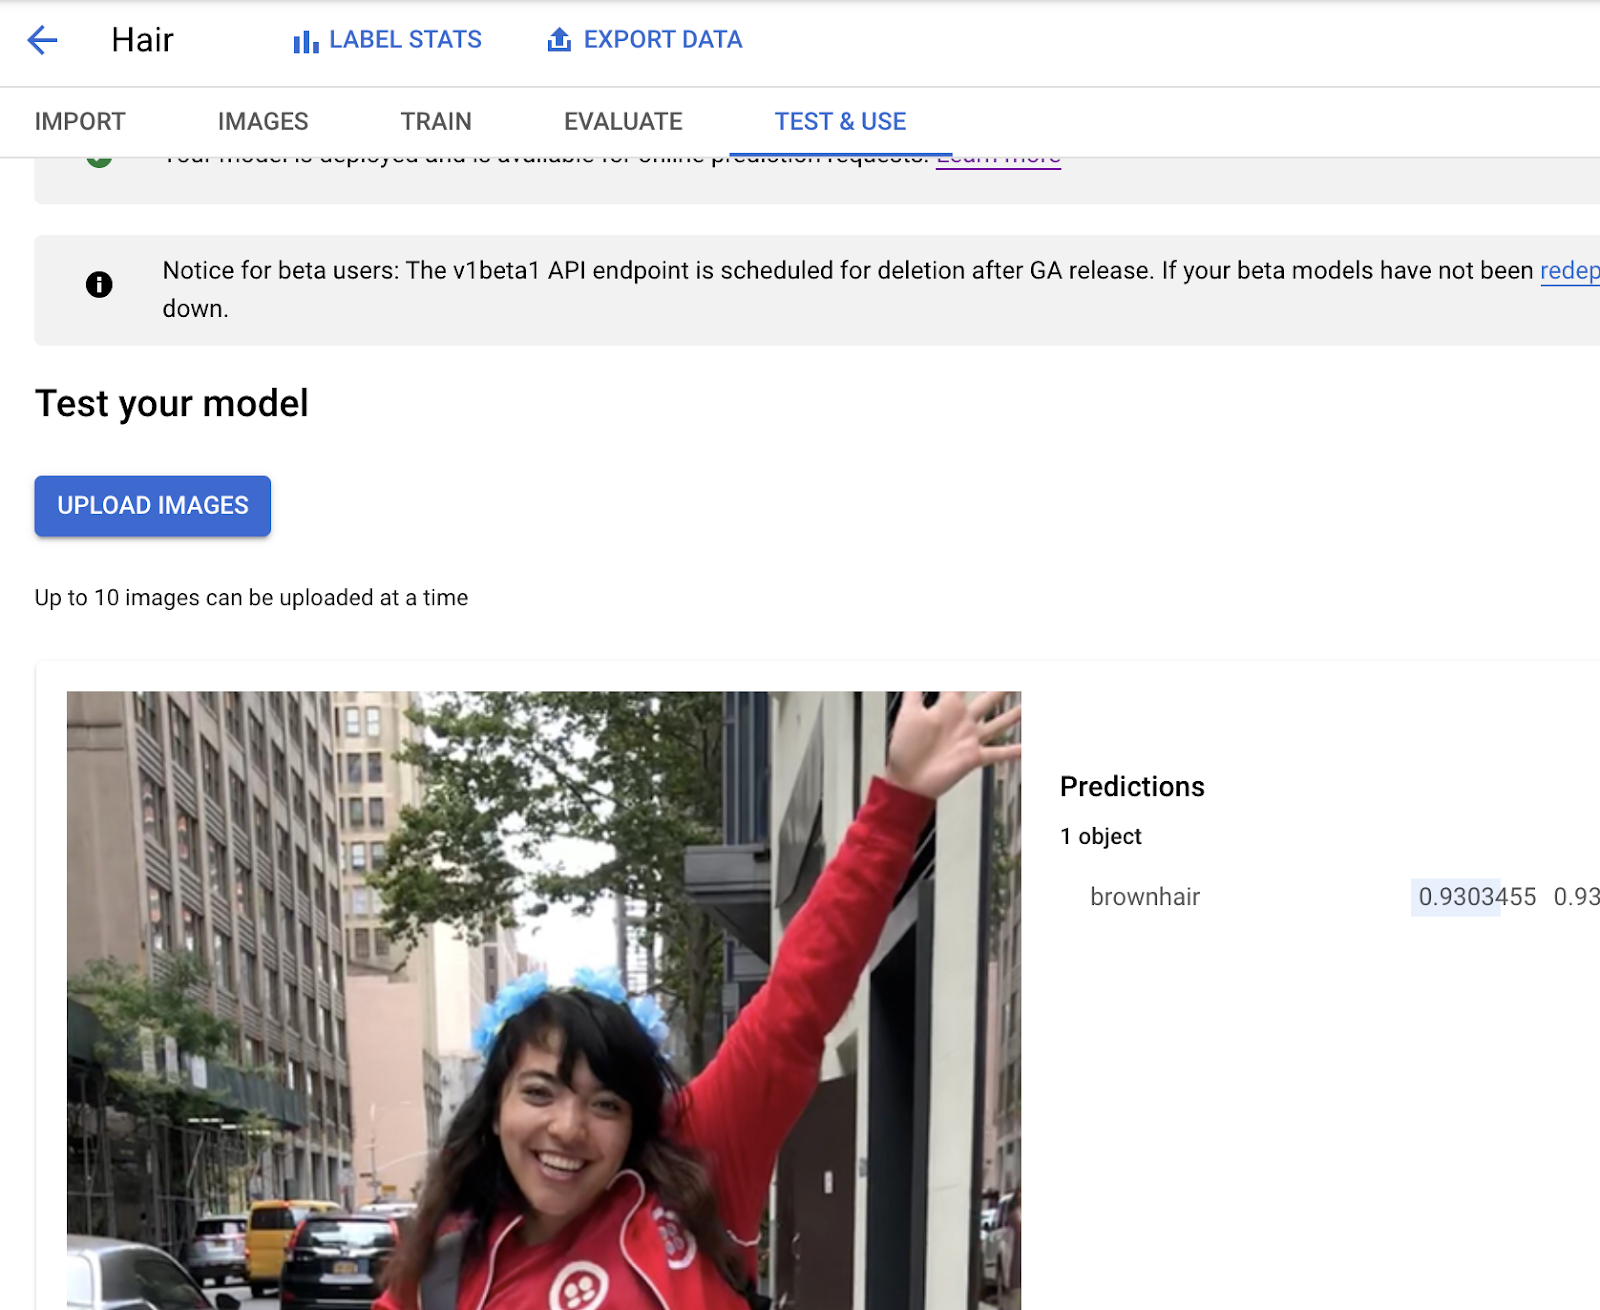
You can test your model in the console by uploading an image under the "Test & Use" tab:
Write your Google Cloud Function
Cloud Functions allow you to make and deploy a function in Node.js, Python, Go, Java, .NET, or Ruby using just your browser with the Google Cloud Console.
The article will be covering Node.js from hereon. Go to your Cloud console and select Cloud Functions on the side. Make sure you are under the same project in which you built your AutoML model.
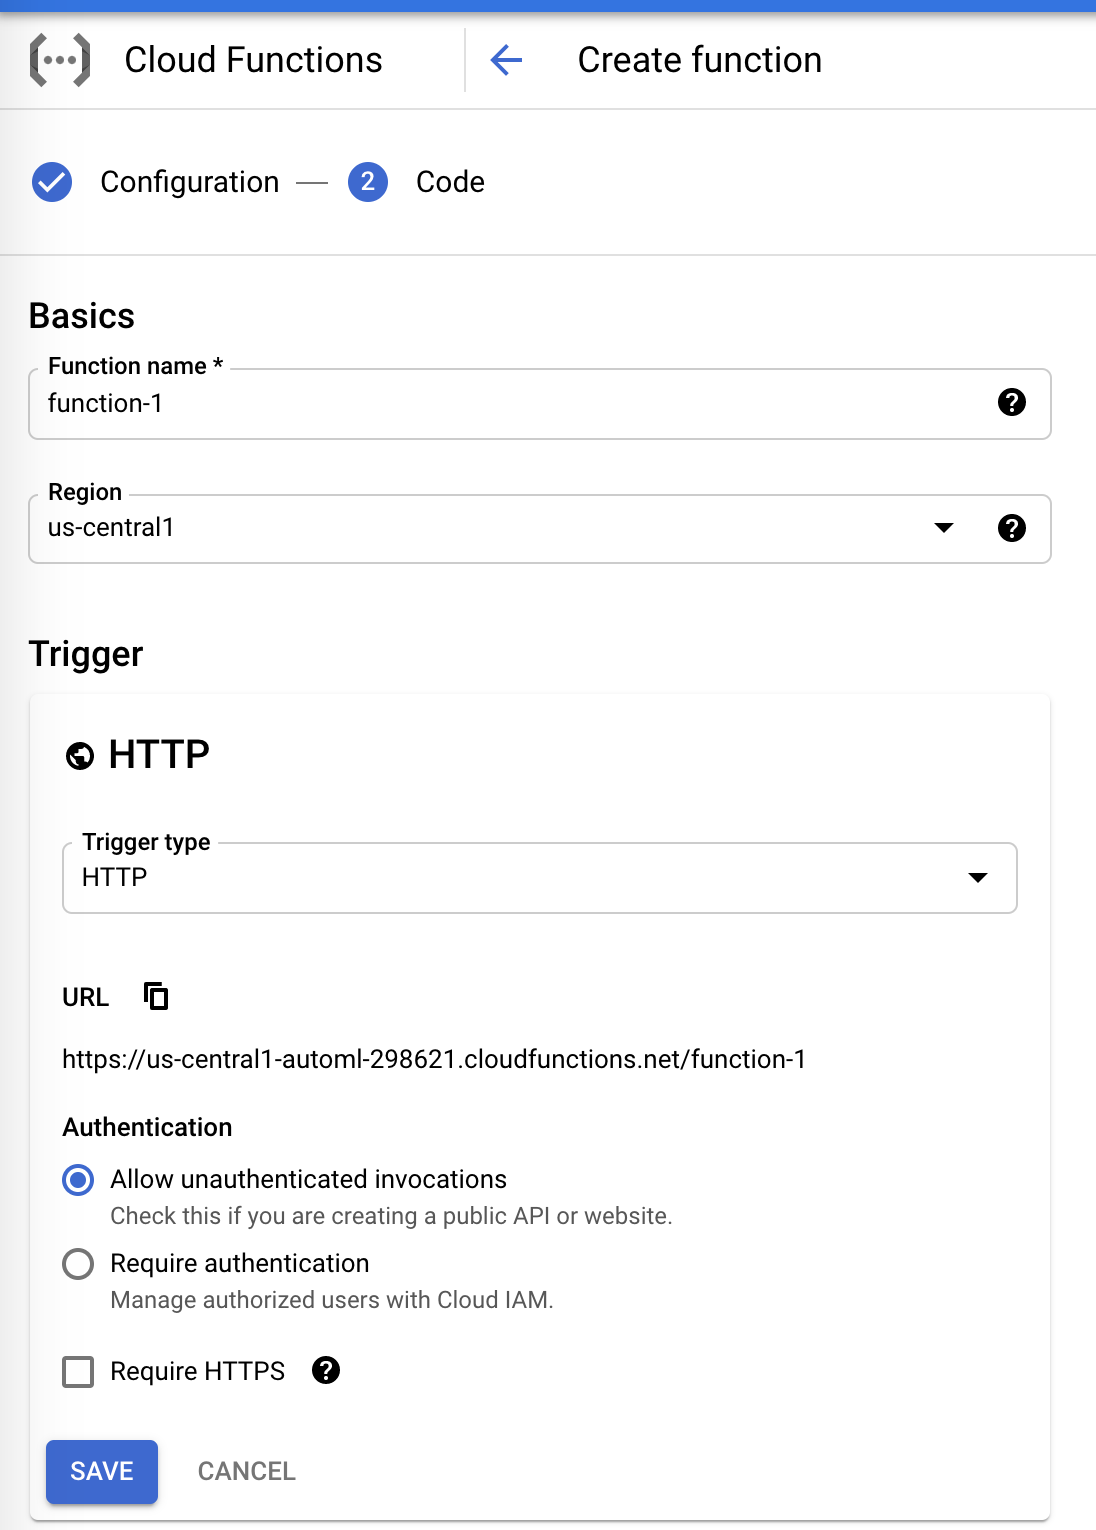
Select Create Function at the top of the page.

Give the function a name like "hair" and make sure the region is set to "US-central1". Select "Allow unauthenticated invocations" and click Save.
After clicking Next, paste the following code in index.js of your function:
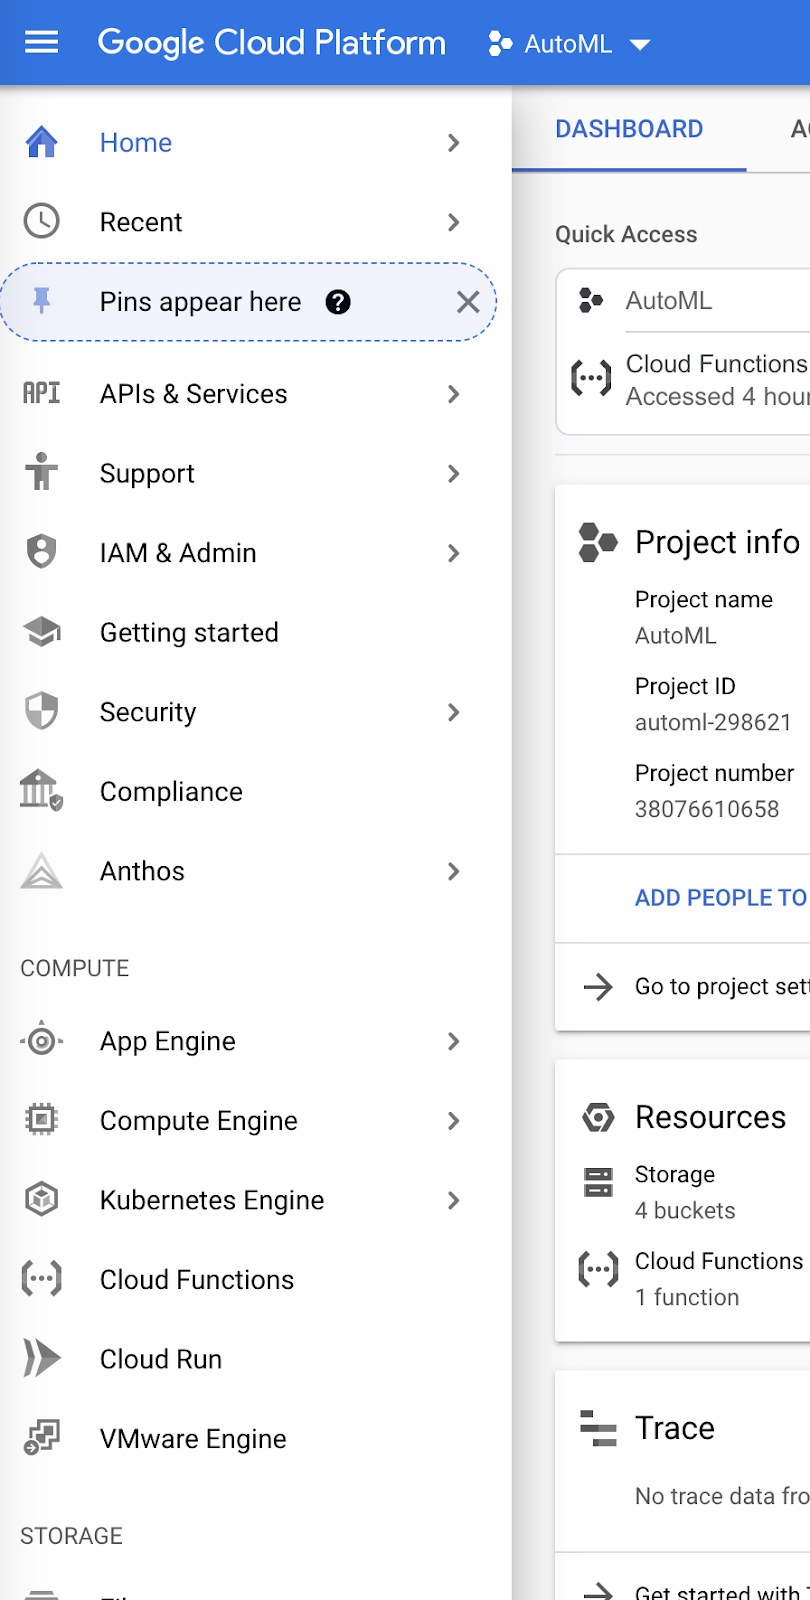
You can find your Project ID by clicking on your project name at the top as shown below:
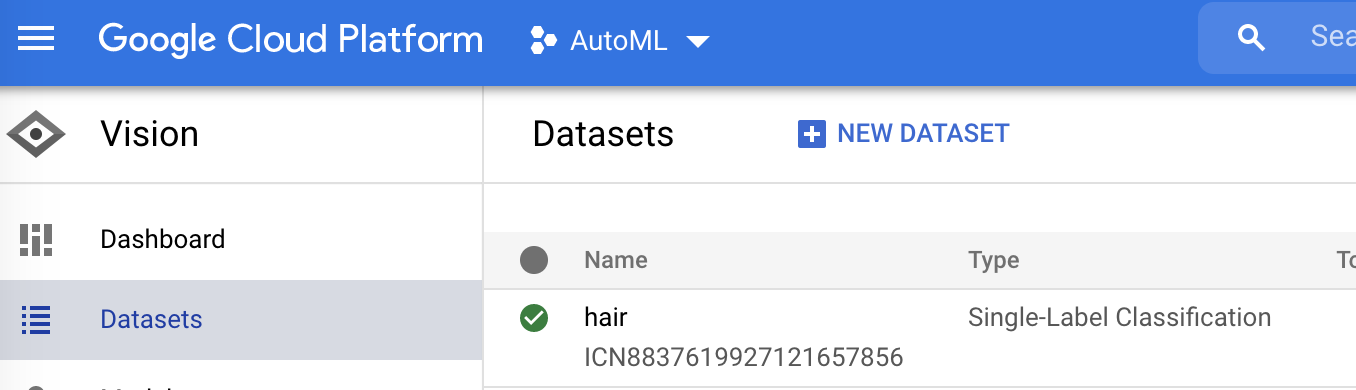
To get your model ID, go back to the Vision API (search "Vision" in the search bar near the top). Navigate to Datasets, and copy the string beneath the dataset that begins with "IC."
The package.json should include the following:
Click Deploy near the bottom of the dashboard.
Hook up your Cloud Function to a Twilio phone number
Grab your Cloud Function URL by clicking on the three dots next to your deployed function and then click Copy the URL.
Select a purchased Twilio phone number in your Twilio phone number console and scroll down to the Messaging section. Paste the link in the text field for A MESSAGE COMES IN webhook. Make sure that this is set to HTTP POST and text your number an image containing hair!
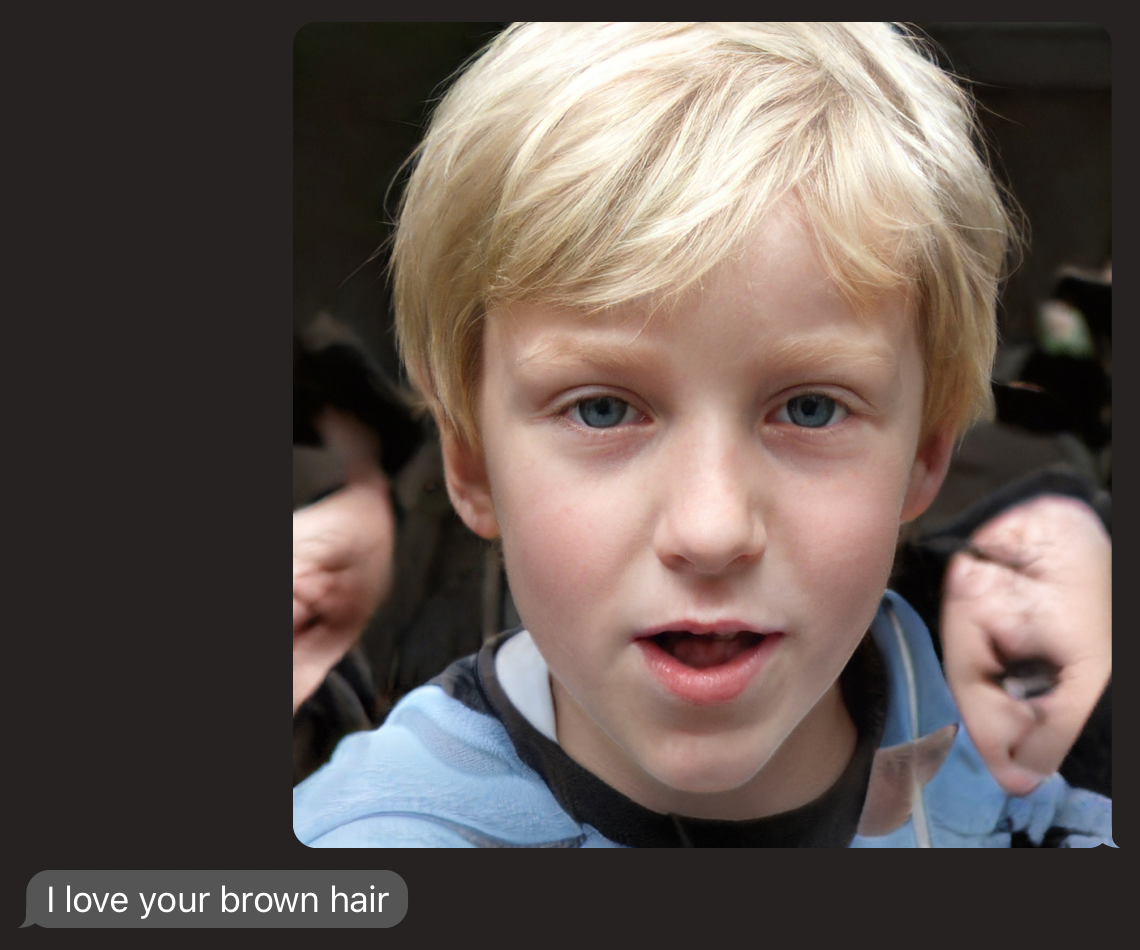
This image above is AI-generated on thispersondoesnotexist.com using a GAN (generative adversarial network). The model sometimes struggles with blond hair because some of the images tagged #blondehair were people who dyed their blonde hair brown or black, so to improve our model, we'd need to add more images of blond hair.
What's next for detecting hair color
AutoML simplifies building, training, and deploying a machine learning model. You can add other color categories to recognize other hair colors, use the Vision API to recognize other types of images as well, classify curly or straight hair on top of color, use AutoML Natural Language to train a model for language, and more.
Let me know online what you're building and check out my weekly Twitch stream where I host guests like Anna Lytical (check out their educational tech content on TikTok, YouTube, and Twitch), build cool hacks, and more.
- Twitter: @lizziepika
- GitHub: elizabethsiegle
- Email: lsiegle@twilio.com
- Twitch: twitch.tv/lizziepikachu


Related Resources
Twilio Docs
From APIs to SDKs to sample apps
API reference documentation, SDKs, helper libraries, quickstarts, and tutorials for your language and platform.
Resource Center
The latest ebooks, industry reports, and webinars
Learn from customer engagement experts to improve your own communication.
Ahoy
Twilio's developer community hub
Best practices, code samples, and inspiration to build communications and digital engagement experiences.