Everything You Need to Know About Using Twilio Subaccounts
Time to read:
February 24, 2021
Written by
Reviewed by
This post will walk you through the benefits of using subaccounts and how to send messages via subaccounts. Subaccounts allow you to separate your usage, numbers, and settings while sharing a balance with your main account. They're a great way to segment your usage of Twilio.
Below are the main items we will work through in this post:
- Technical Requirements
- What are Twilio subaccounts and why should you use them?
- Using subaccounts to send a Message
Technical Requirements
- A free Twilio Account - Sign up for one here through this link, you’ll get an extra $10 in credit when you upgrade.
- A Twilio Phone number.
- A verified mobile number (for receiving SMS messages).
- Familiarity with sending REST API requests. Here are helpful tips on running a cURL from bash or zsh or you can use a tool like Postman.
What are Twilio subaccounts and why should you use them?
Subaccounts are containers that separate resources that belong to a Twilio project (Parent). For example; consider the fictional company Owlie Notifications. Owlie Notifications offers a SaaS platform that allows customers the ability to make calls. Owlie Notifications has about 50 customers.
Owlie Notifications has two options when creating their Twilio account structure:
- Create a Twilio Account, which is tied to an identifier called an Account SID, that is unique to their account, and is always prepended with “AC”. Whenever Owlie Notifications makes an API request they will use the Account SID for that account in their API request. For the sake of example, let’s say their Account SID is AC123.
- Create a Twilio Account (Account SID = AC123, aka the parent account) the same way suggested in option one, however they will also create a subaccount for each of their 50 customers (50 subaccounts). Each of the 50 subaccounts will get its own unique Account SID. So, when Owlie Notifications makes an API request for a customer they will use the appropriate subaccount Account SID instead of the parent account’s Account SID.
Here’s why going with option two is the optimal choice.
Key benefits of subaccounts
You can segment the billing process
If Owlie Notifications chose not to use subaccounts they would need to keep track of all the usage for each customer on their end, which is additional work and leaves room for error. Because subaccounts act as containers, you can utilize the Twilio Usage API to get specific billing data for a subaccount, thus reducing the business logic needed to implement individual customer tracking.
Allows for resource provisioning
Subaccounts allow for resources (such as phone numbers) to be added to the specific subaccount. One consideration is that most resources can belong to only one subaccount at a time. This could be tricky if you are constantly moving numbers between accounts. For example, you will need to handle this logic if you close a subaccount but want to retain the phone number. Luckily, Twilio allows you to move phone numbers between accounts.
Gives you additional control over multiple accounts from the same project: With subaccounts you have the ability to suspend, close and reactivate subaccounts based on your customers’ needs.
Considerations before migrating to subaccounts
For customers using Twilio to send messages, Twilio will help to manage your customer opt-outs, like when an end-user replies STOP to message. Twilio maintains this opt-out list at the account level.
This means if an end-user has replied STOP to a phone number and that phone number is moved from a project to a subaccount, which has a unique Account SID, that opt-out mapping is broken. If you haven’t been tracking opt-outs; start now to ensure you have the most up to date list of subscribers.
Using subaccounts to send a Message
You might be thinking, “What if I am not using subaccounts already? How hard is it to migrate?”
Imagine that Owlie Notifications has been using a single account for all 50 customers. They now have customers that want to send SMS messages. Below are the steps that Owlie Notifications will likely need to follow:
You will use the subaccounts REST API to do this programmatically, however you can choose to use the server-side helper libraries if you prefer.
First, log into your Twilio Console. You will see your Account SID and Auth Token values assigned to your account in the dashboard:
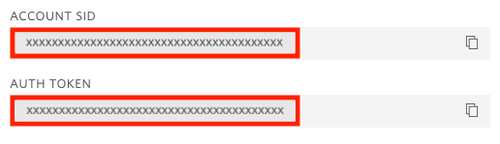
For the following examples, you will use the Account SID and Auth Token for the Twilio account that you just made or copied. Don’t forget to replace them in all the placeholders below.
Create a subaccount
Let's continue with Owlie Notifications customers (Falcon Flights) and create a subaccount for them.
Request
From your terminal or command prompt, run the following command to make the request, taking care to replace the placeholder values with your parent account Account SID and Auth Token.
Response
After running the command, you will receive a response like this:
This response includes a few key pieces of information.
There is a new account named FalconFlights which has its own unique Account SID and Auth Token.
The owner_account_sid should match your project (parent) account SID (Owlie Notifications).
Please keep track of the subaccount Account SID and Auth Token as you will use them later on.
Transfer a phone number
Earlier, I mentioned the case where you may want to transfer a phone number. Here’s how to do that. If you don’t have a Twilio phone number, you can purchase one either via the Twilio Console or REST API.
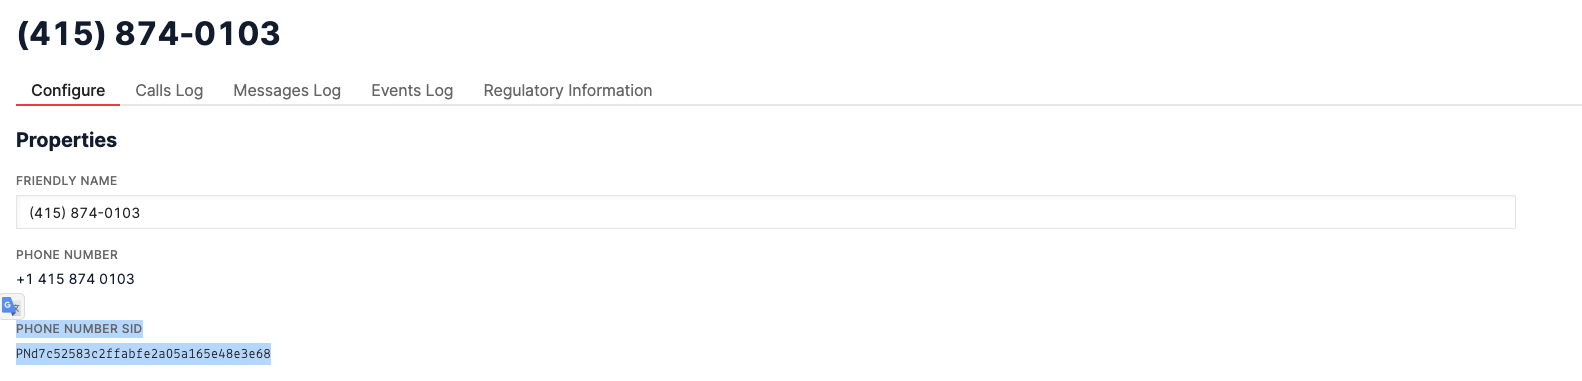
To begin transferring your Twilio phone number between your parent account and a subaccount, navigate to the Active Numbers section of the Console. Click on a number to see a view with configuration options.
There is where you can find your Phone Number SID (PNxxx).
Request
It's important to ensure that you use the parent account SID in your headers, as the parent account owns the phone number.
Run the following command in your terminal:
Note, when moving phone numbers to another account, the Voice and SMS URL will be preserved.
Response
Create a Messaging Service
Create a Messaging Service in your newly created subaccount. A Messaging Service is a resource that can act as a container of your phone numbers and provides software that makes your life easier when sending messages at scale.
For this request, you will use the Account SID and Auth token associated with the subaccount.
Request
Response
The response will provide you with a Messaging Service SID (MGxxxx). You will use this in the next steps, so keep it handy.
You’ll notice quite a few different attributes in your response object. If you want to learn more about all of the features on a Messaging Service, check out the Messaging Service documentation.
Add Phone number to Messaging Service
Now that you have a Messaging Service you can use the Services API to add your phone number to your Messaging Service.
Request
Response
You have now successfully added the phone number to your Messaging Service.
Sending a Message
Now that you have a new subaccount, a Messaging Service with a phone number lets send a message!
To send a message through the Messaging Service, use the Messaging Service SID (MGxxx) in your request.
Make sure the To phone number is verified. If your number isn’t verified you can add a verified phone number via the Twilio Console.
Request
Upon success, you should receive a text like the one below:
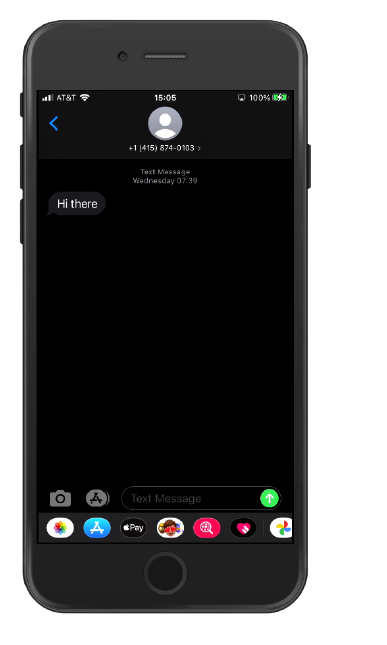
Awesome it worked!
Conclusion: subaccounts are powerful
Lets recap everything you did:
- Created a subaccount
- Transferred a phone number from your parent account to your subaccount
- Created a Messaging Service in your subaccount
- Added your phone number to the Messaging Service
- Sent a message via your Messaging Service in your subaccount
Hopefully you see the power of subaccounts! This article only scratched the surface. If you liked this blog you might be interested in the following:
- Track usage of subaccounts with the Usage API
- Setting up Usage Triggers
- Messaging Archiecture for ISVs
- Voice Architecture for ISVs
Josh is a Senior Solutions Engineer at Twilio, focusing on helping our Independent Software Vendor (ISV) Partners build scalable architectures and business on Twilio. You can reach him at jsiverson [at] twilio.com.


Related Resources
Twilio Docs
From APIs to SDKs to sample apps
API reference documentation, SDKs, helper libraries, quickstarts, and tutorials for your language and platform.
Resource Center
The latest ebooks, industry reports, and webinars
Learn from customer engagement experts to improve your own communication.
Ahoy
Twilio's developer community hub
Best practices, code samples, and inspiration to build communications and digital engagement experiences.