How to Receive and Respond to Text Messages in Python with Django and Twilio
Time to read:
October 10, 2017
Written by
This post is part of Twilio’s archive and may contain outdated information. We’re always building something new, so be sure to check out our latest posts for the most up-to-date insights.

You’re building a Django app and want to be able to respond to SMS messages? Let’s walk through the well written Django tutorial and add Twilio SMS to the canonical basic Django app.
Setting up your environment
Before moving on, make sure to have your environment setup. Getting everything working correctly, especially with respect to virtual environments is important for isolating your dependencies if you have multiple projects running on the same machine.
You can also run through this guide to make sure you’re good to go before moving on.
Installing dependencies
Now that your environment is set up, you’re going to need to install the libraries needed for this app. The code in this post will run on both Python 2 and 3. We’re going to use:
- Django for our web framework
- Twilio’s Python library to interact with the Twilio API for sending and receiving SMS.
Navigate to the directory where you want this code to live and run the following command in your terminal with your virtual environment activated to install these dependencies:
Building a basic Django app
First, generate a barebones Django starter project with the following terminal command in the directory where you want your project to live:
This will generate a new Django project from scratch and create a mysite directory in your current directory. Before moving on, run the following command if you want to make sure everything works (don’t worry if you see an error message about unapplied migrations):
Visit http://localhost:8000 and you should see the following:

Now create a Django app within the project. Instead of the polls web app from the Django tutorial, we will make one that responds to text messages. Run the following command from the same directory as
manage.py:
As in the Django tutorial, let’s create a view for this app. If you’re familiar with the Model-View-Controller pattern, Django views might confuse you at first because they behave more similarly to Controllers in the traditional MVC app. Open sms/views.py and add the following code:
Now add a route to this view by creating the file, sms/urls.py and adding the following code:
As in the Django tutorial, the next step is to point the root url at the sms.urls module. In mysite/urls.py, add an import for django.conf.urls.include and insert an include() in the urlpatterns list, so you have:
Now run the project and visit http://localhost:8000/sms/ to see “Hello, World.” on the screen.
Setting up your Twilio account
Before being able to respond to messages, you’ll need a Twilio phone number. You can buy a phone number here (it’s free if you’re using the number to test your code during development). Your Django app will need to be visible from the Internet in order for Twilio to send requests to it. We will use ngrok for this, which you’ll need to install if you don’t have it. In your terminal run the following command:
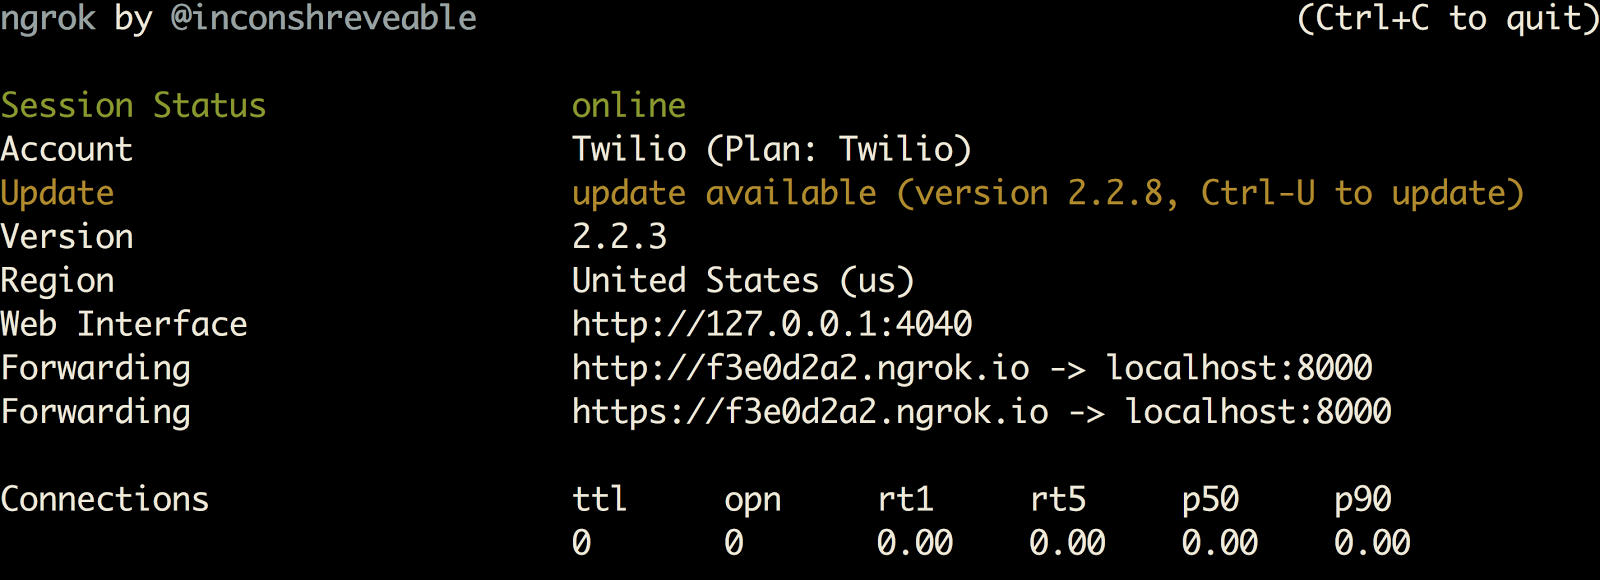
This provides us with a publicly accessible URL to the Flask app. Configure your phone number as seen in this image by adding your ngrok URL with a /sms/ route appended to it to the “Messaging” section (make sure you don’t forget the extra slash at the end):
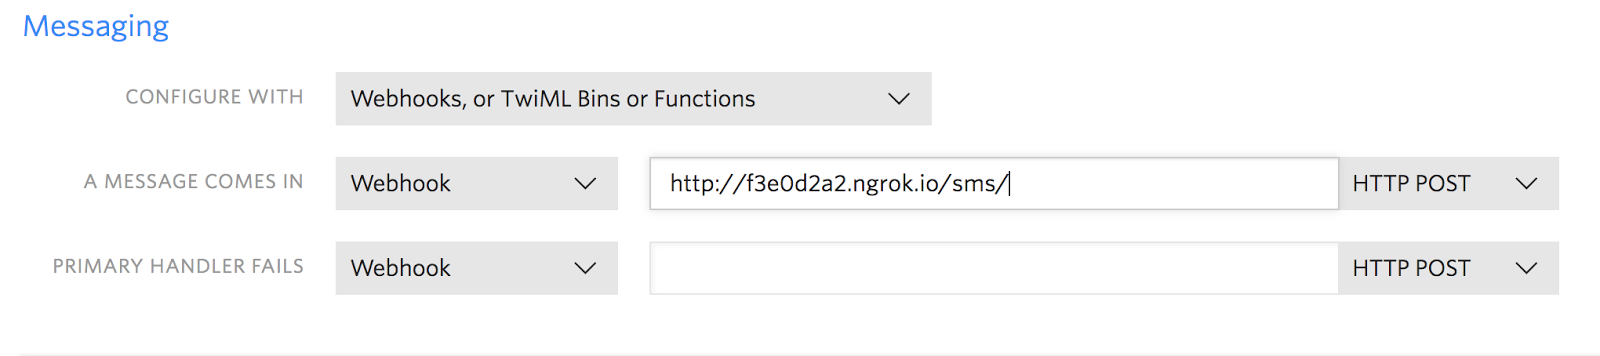
You are now ready to receive a text message to your new Twilio number.
Adding SMS to your Django app
Now that you have a Twilio number you want to allow users to send a text message to it and get a response.
We only need one route on this app: /sms/ to handle incoming text messages. Let’s replace the code in sms/views.py with the following:
If you’re confused by the @csrf_exempt decorator, their documentation explains things pretty well.
Before being able to respond to messages, you’ll have to add ngrok.io to your ALLOWED_HOSTS in your Django site’s settings. Open mysite/settings.py, find the line where the ALLOWED_HOSTS are set and replace it with the following:
Run your code again:
Now text your Twilio number and you should get a response!
What just happened?
With this app running on port 8000, sitting behind a public ngrok URL, Twilio can see your application. Upon receiving a text message:
- Twilio will send a
POSTrequest to/sms. - The
smsview function will be called. - Your
/smsview responds to Twilio’s request with TwiML telling Twilio to send a message back in response (containing this sweet owl pic).
If you want to learn more thoroughly about Django and Twilio SMS check out the Server Notifications tutorial or Appointment Reminders in Django.
Feel free to reach out if you have any questions or comments or just want to show off the cool stuff you’ve built.
- Email: sagnew@twilio.com
- Twitter: @Sagnewshreds
- Github: Sagnew
- Twitch (streaming live code): Sagnewshreds
Related Resources
Twilio Docs
From APIs to SDKs to sample apps
API reference documentation, SDKs, helper libraries, quickstarts, and tutorials for your language and platform.
Resource Center
The latest ebooks, industry reports, and webinars
Learn from customer engagement experts to improve your own communication.
Ahoy
Twilio's developer community hub
Best practices, code samples, and inspiration to build communications and digital engagement experiences.