Analyzing Customer Emotions Using IBM Bluemix, Watson, and Twilio Voice
Time to read:
March 02, 2016
Written by
This post is part of Twilio’s archive and may contain outdated information. We’re always building something new, so be sure to check out our latest posts for the most up-to-date insights.

Not every customer that calls in for support is a happy camper. When an unhappy customer walks through the door there are a multitude of signs and signals as to how they are feeling. However, over the phone it can be more difficult to judge a customer’s emotions when all that’s expressed are words and tone. Wouldn’t it be great to have help identifying how a customer is feeling? In this post we’re going to do just that using a Cloud Foundry Java application and two Watson APIs inside IBM Bluemix along with Twilio Programmable Voice.
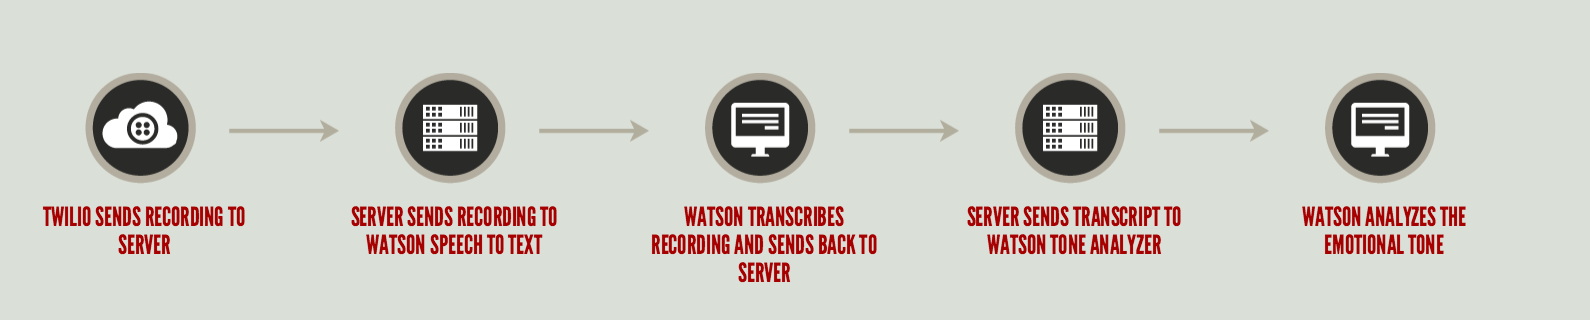
Our application will start with a Twilio phone number. When a customer calls the number Twilio will make an HTTP request to our Java app looking for some TwiML instructions in the app’s response. Our TwiML will ask the user why they are calling and then record their response. Once the recording is complete Twilio will send our server the recording through another HTTP request. With the recording in hand we’ll use the Watson Speech to Text API to get a transcript of what was said. That transcript will then be sent into the Watson Tone Analyzer API which will give us an emotional analysis of what was said.

or check out the GitHub repo.
Tools
To get started we’ll need to gather all the accounts and tools we’ll be using.
If you don’t already have a Twilio account and phone number you can sign up for a free one.
You’ll also need a Bluemix account which you can sign up for free.
I’m normally a big VIM user but when it comes to Java I like to use an IDE. I’ll be using IntelliJ IDEA which you can download for free.
Finally, have a look at the Tone Analyzer demo app and API Explorer to get an idea of the data that will be returned to us.
Analysis organized by tones. The emotion tones are anger, disgust, fear, joy, and sadness. The writing tones are analytical, confident, and tentative. The social tones are openness, conscientiousness, extraversion, agreeableness, and neuroticism.
We’ll only be using the emotion tones for our app but the others contain a wealth of insight as well.
Note: Tone Analyzer is currently in beta at version 3 and at the moment only supports English.
Fire Up The Foundry
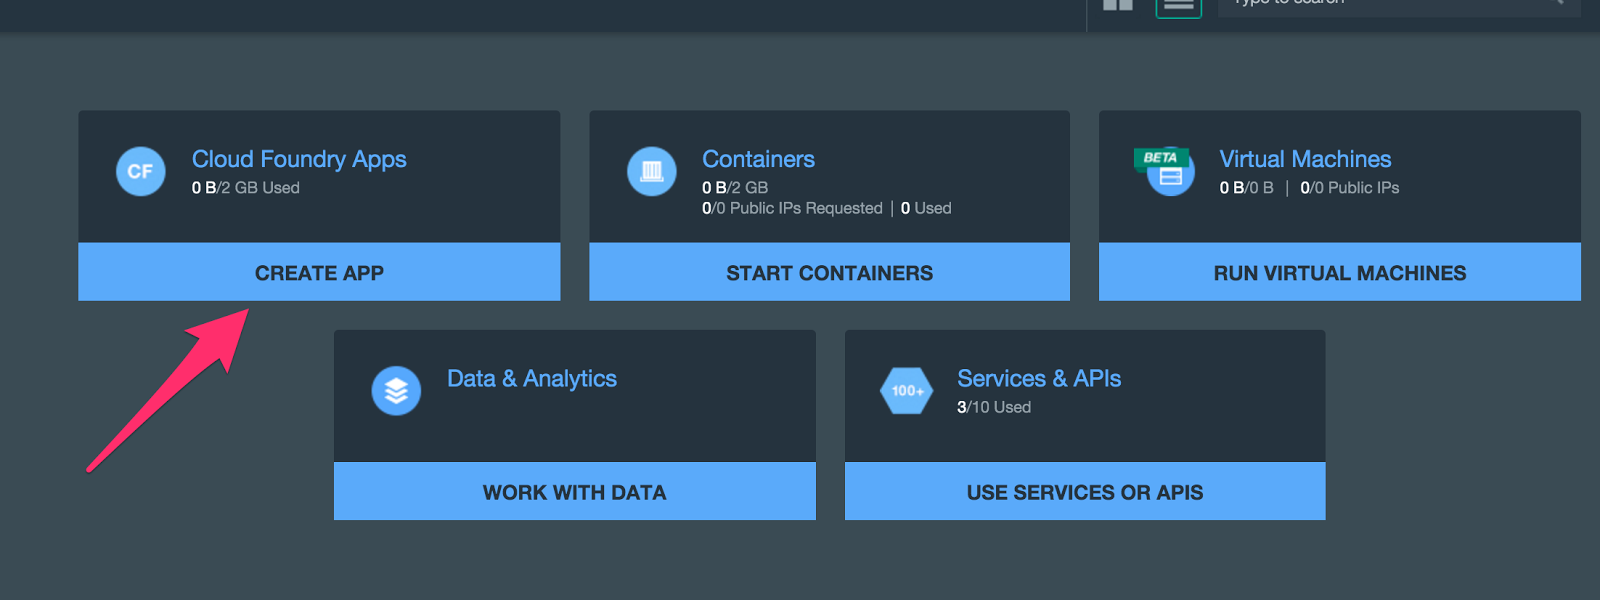
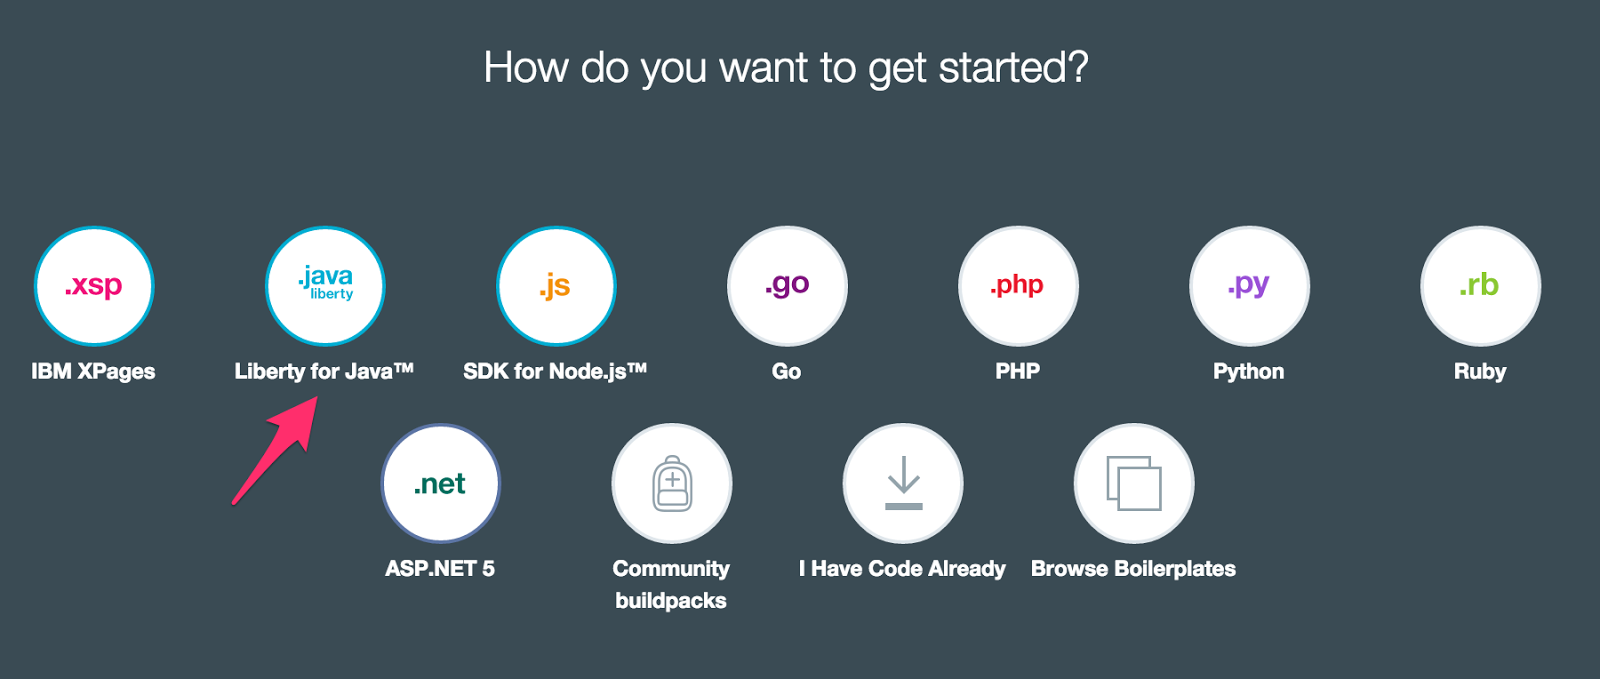
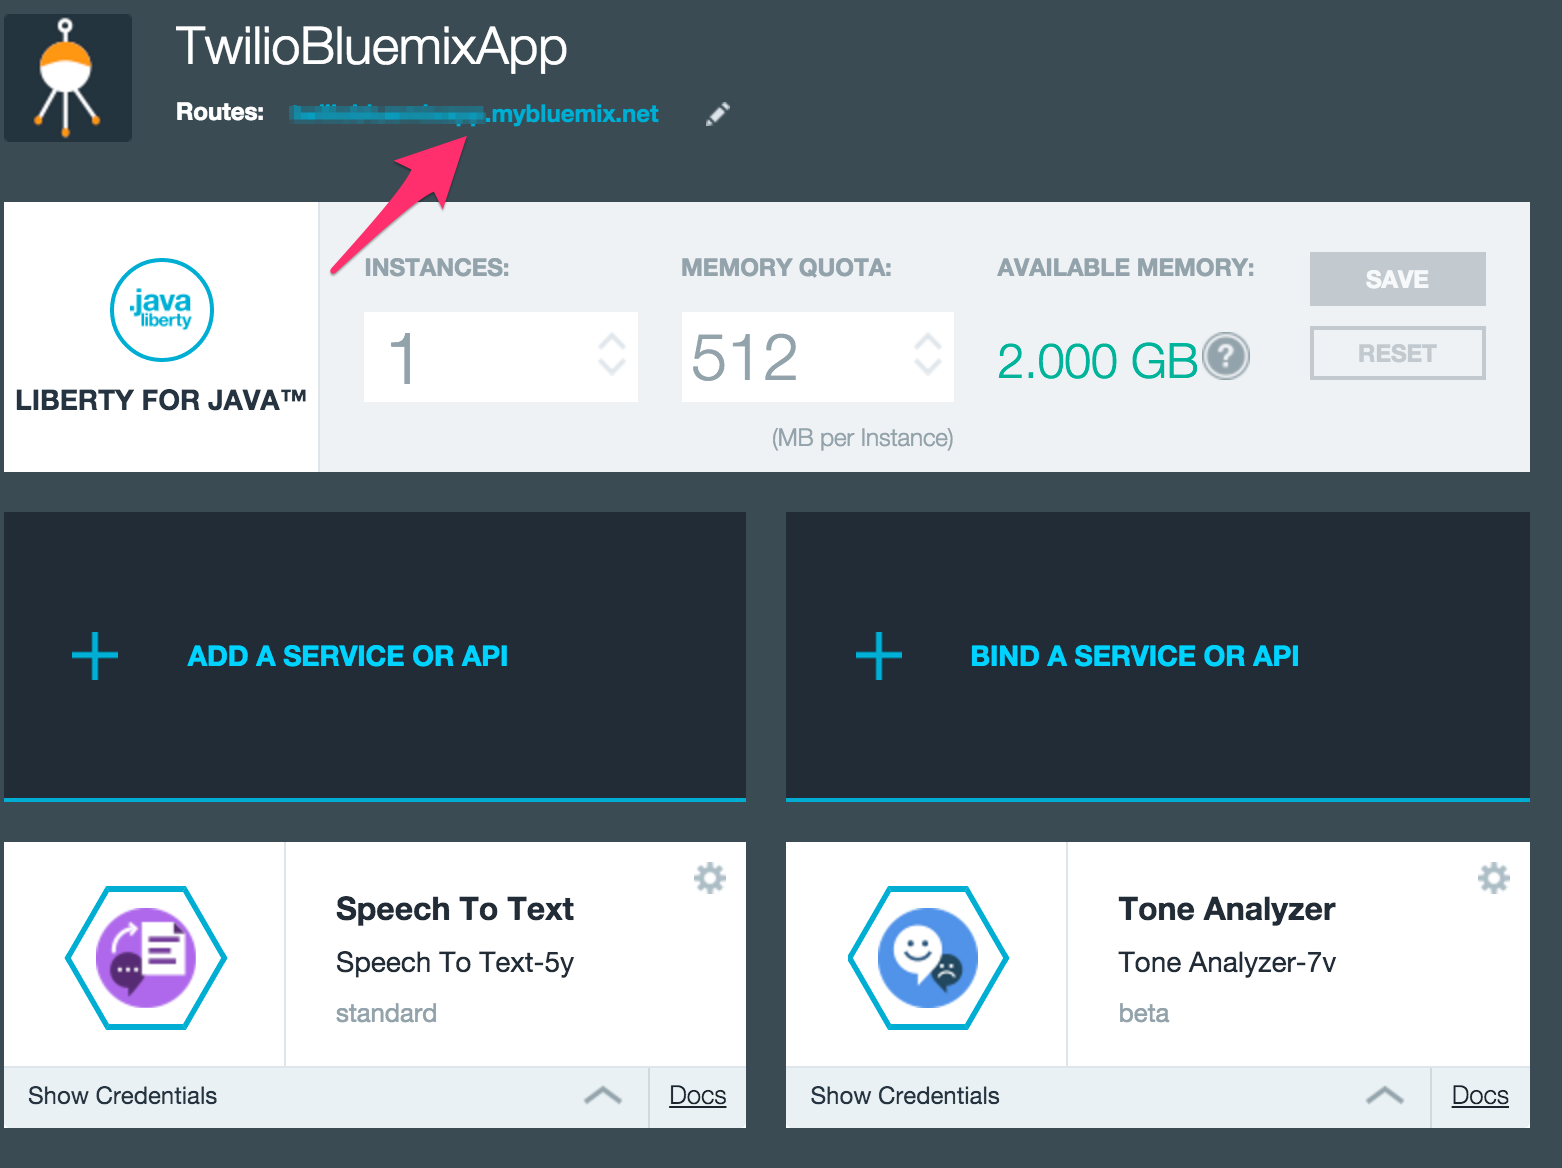
Create a new Cloud Foundry Web app from the Bluemix Dashboard. Select Java for Liberty and give it a unique name.
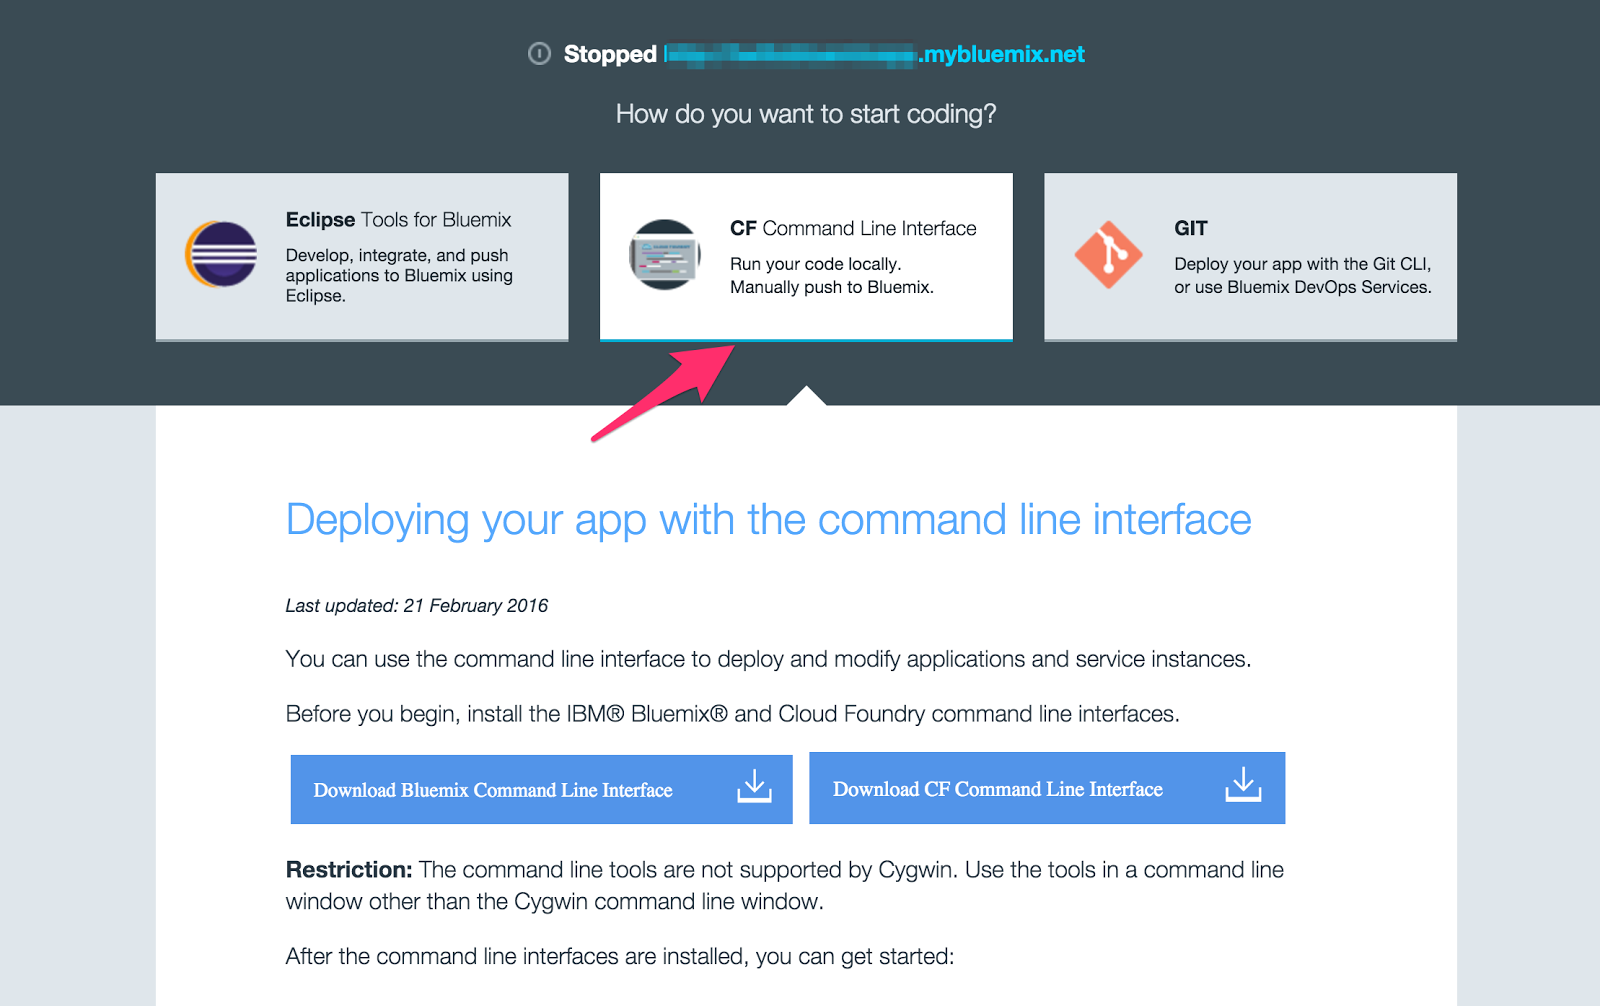
Follow the instructions to set up the CF Command Line Interface and download the starter code. Skip the last step – cf push YourApp – for now because we are not yet ready to deploy our app.
Click through at the bottom to “VIEW APP OVERVIEW”. Here we’ll add those two Watson services. Click the “ADD A SERVICE OR API” button and select “Speech To Text”. Follow the prompts by clicking the “CREATE” button to add the service to your app. Repeat this for “Tone Analyzer”. The credentials for these services will be picked up through environment variables once deployed.
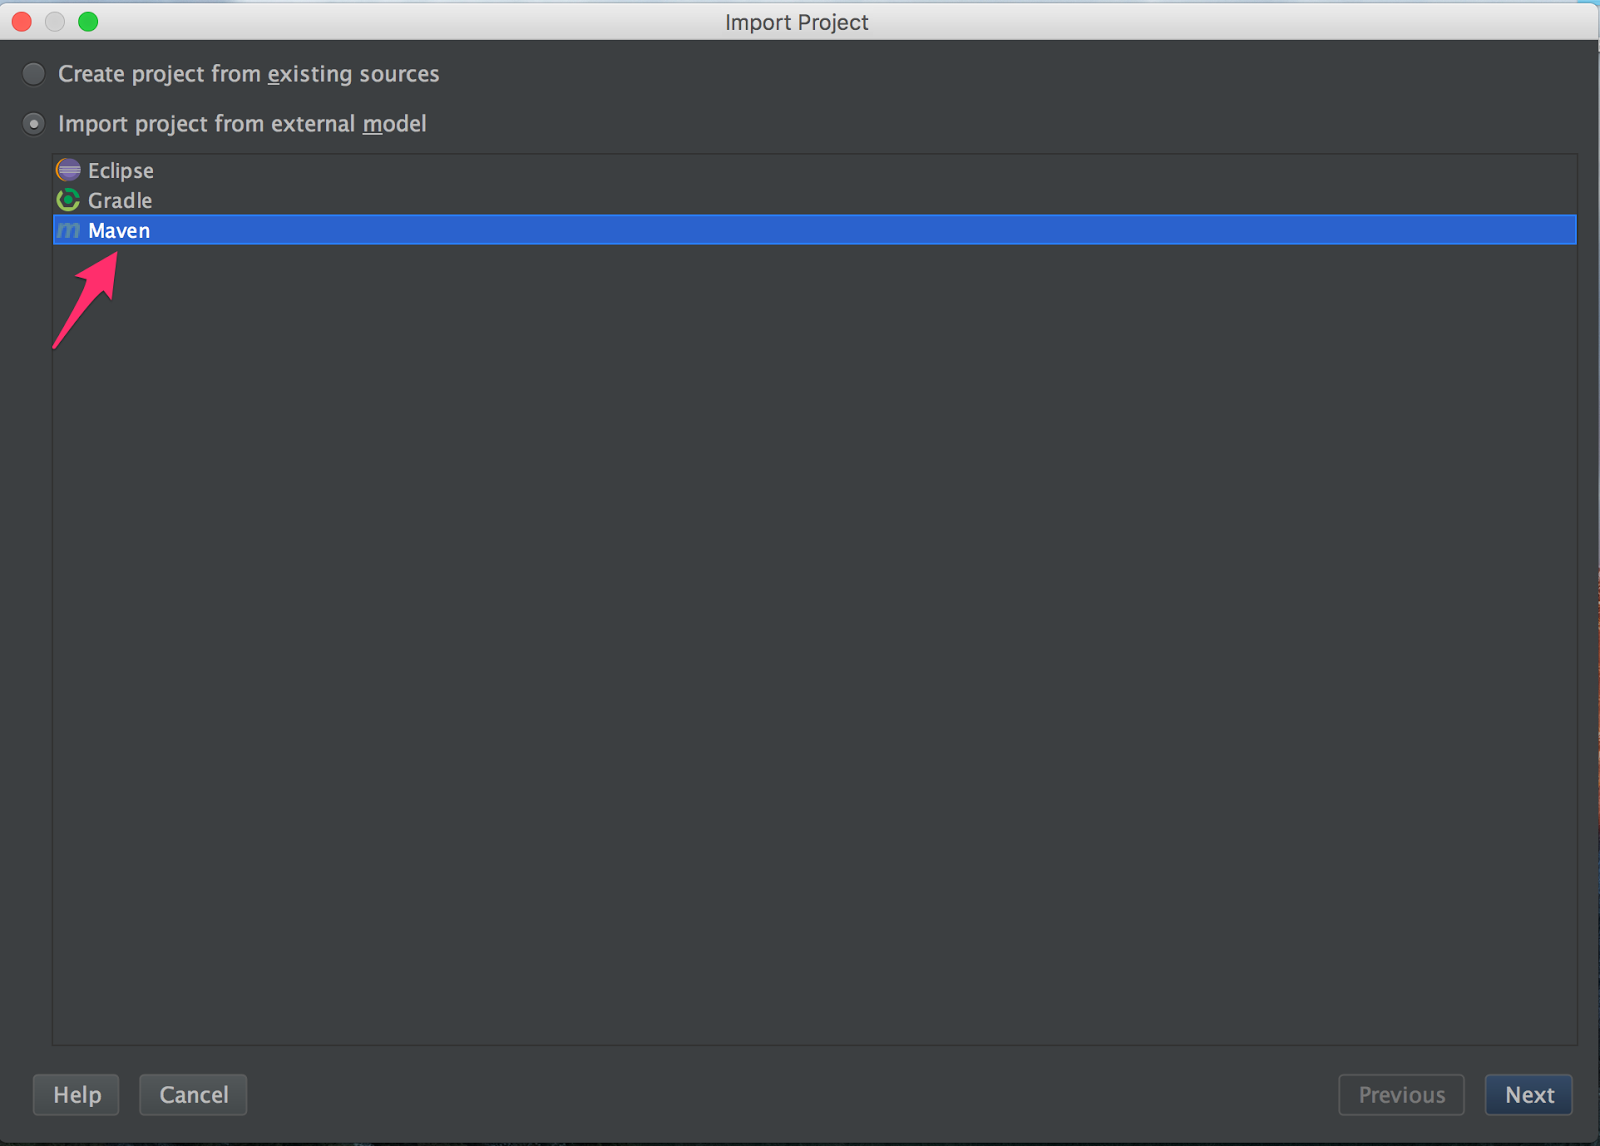
Extract the downloaded starter code and import it into IntelliJ as a Maven project. We only need to touch two files. pom.xml is our Maven config and src/main/java/wasdev/sample/servlet/SimpleServlet.java contains our Java code.
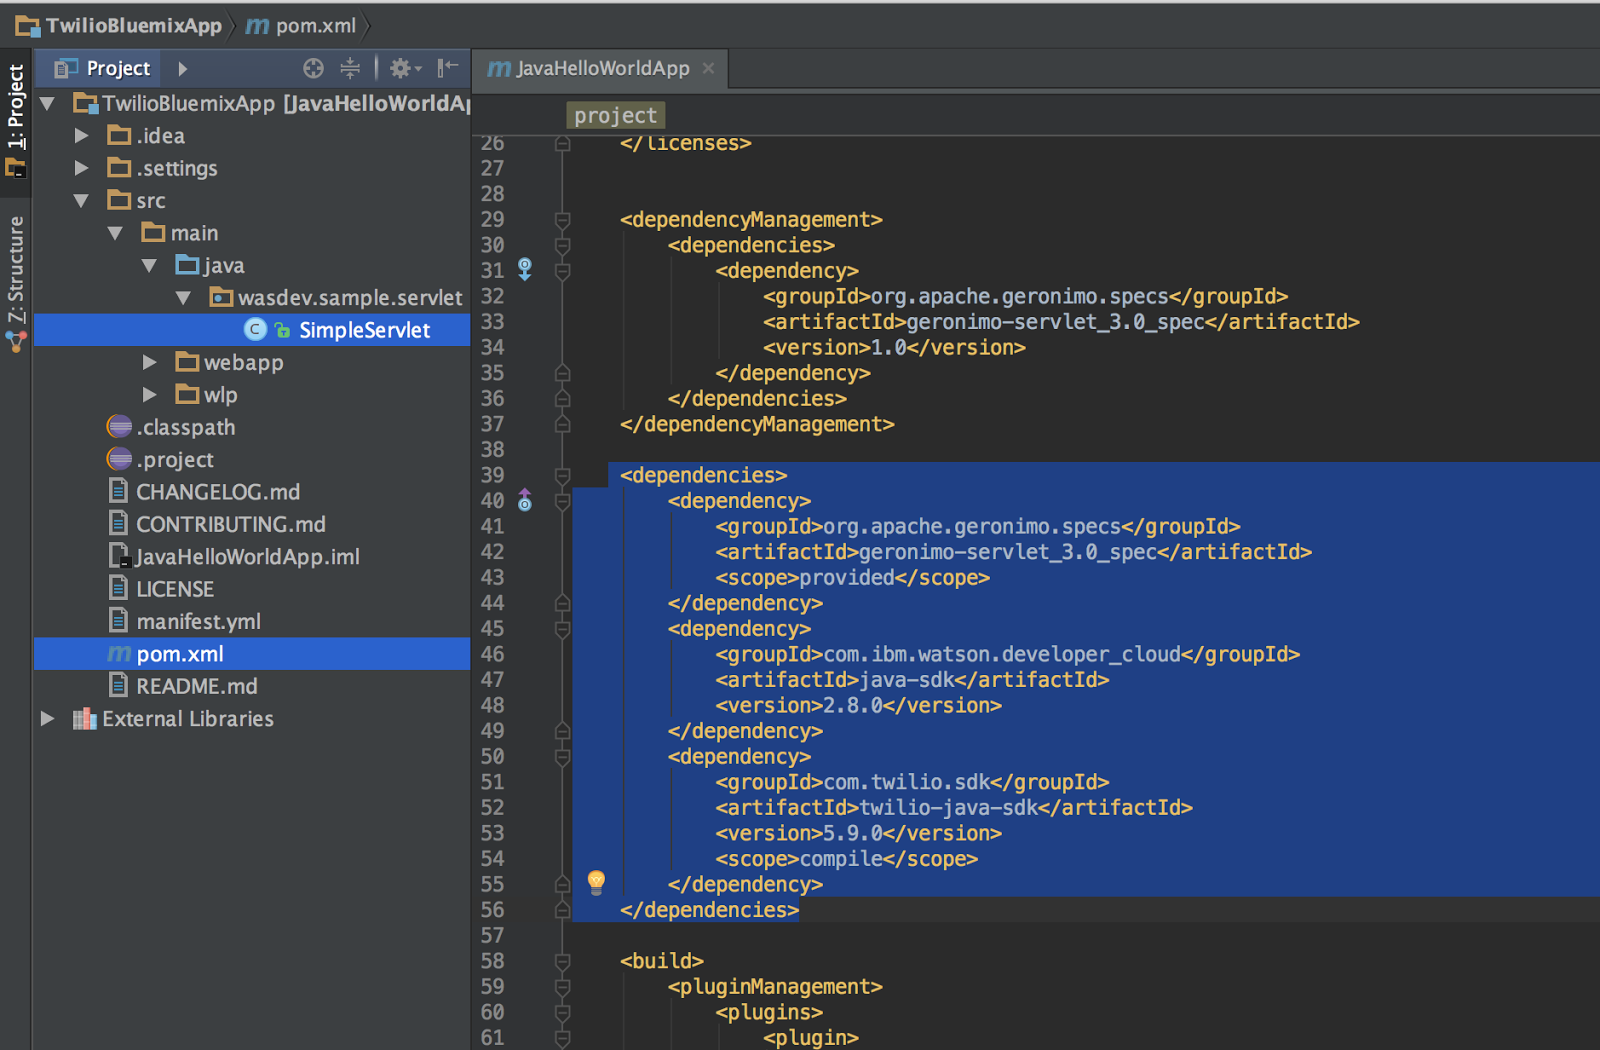
Add the Watson Java SDK and Twilio Java SDK as dependencies by opening pom.xml and adding the following highlighted lines to the <dependencies> block.
This is a great place to run the sample project and verify that everything is working.
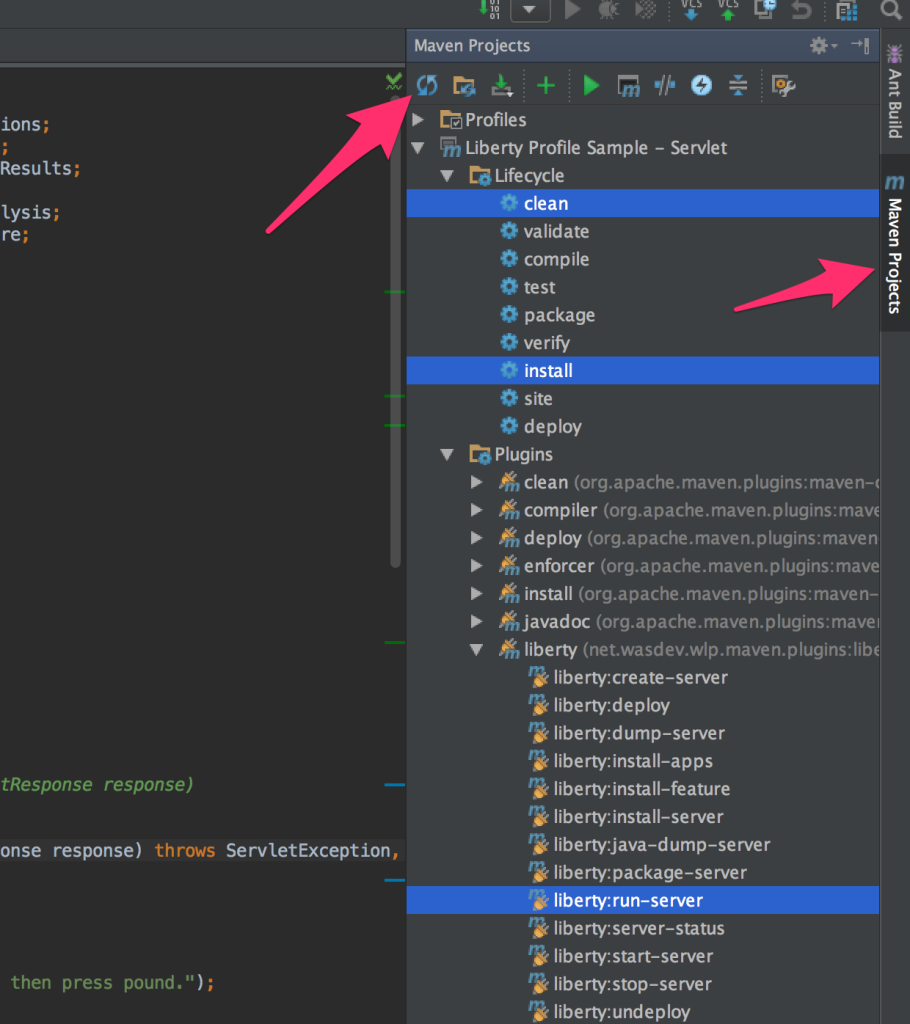
Run the clean and install Maven tasks highlighted in the above picture to compile the project into a .war file. A .war file is a shippable package with all the dependencies necessary to run the project.
Next run the liberty:run-server task which is also highlighted in the picture above to download and start up a dev server with our .war. Open up http://localhost:9080/JavaHelloWorldApp/ in your browser and you should be greeted with a Hello World web page.
Click the red stop button to shutdown the server.

Spit Hot Code
Now that we have our new Maven dependencies added and the sample project up and running, we can start to build the part of our application that will tell Twilio what experience to give to someone who calls our Twilio phone number.
Open up src/main/java/wasdev/sample/servlet/SimpleServlet.java and have a look at the code. This is a very basic example of Servlets – an easy way to define HTTP routes in Java. This class and the doGet method will be called when an HTTP GET request comes into http://your-web-app.mybluemix.net/SimpleServlet.
You can view the completed file on GitHub and follow along below as we create it.
We’ll get to the Twilio config in a bit but this doGet method is what’s going to respond to Twilio’s inbound request when someone calls our Twilio phone number. We want to first present the caller with a spoken prompt and then begin to record the call. To do that we’ll use the and TwiML verbs. Change the contents of the method to the following.
The Record method is set to a POST request to reuse the same /SimpleServlet route and tells Twilio to stop recording when the ‘#’ phone key is pressed. The TwiMLResponse is then turned into an XML string and sent back with the correct content type.
When the recording completes, Twilio will make an HTTP request to our application with a parameter named RecordingUrl which contains a URL that points to the actual audio recording. We need to implement a doPost method to handle the request right below doGet.
Look for the RecordingUrl parameter in the request and return if it’s missing.
The Watson SpeechToText class expects an instance of Java’s File class passed to it and Twilio sends us a URL that links to a .wav recording. We need to download the file and create a new temporary file to give to Watson.
Instantiate a new URL, open an HTTP connection and grab the input stream.
Create a new temporary file using the new-ish java.nio classes which expect a prefix and extension. Copy the InputStream into the new file. Specify that it’s ok to replace the existing file.
Now that we have a temporary file we can create a new SpeechToText instance.
Audio from the PSTN isn’t the greatest quality so we need to tell Watson to use a different analysis model to get the best transcription results. Create a new RecognizeOptions instance and set the model to en-US_NarrowbandModel.
Make the request with the file and options then grab the results.
Create a new ToneAnalyzer instance with a required version date.
Hand the transcription text to the ToneAnalyzer, create a new StringBuilder for our response, and iterate through the Emotion tone category which is at index 0.
For this blog post we are going to send the ToneAnalysis results to our phone as an SMS. To do this we’ll use the TwiML verb. Create a new instance of TwiMLResponse and append a new Sms instance with the toneString converted to a string. Set the Content-Type of the response and write the TwiMLReponse into the response as a string.
Unleash The Flame
Open up the Maven pane and run the clean and install tasks again. Run the last step from the CF setup to deploy your app to Bluemix.
While that’s deploying let’s configure our Twilio phone number to send incoming calls to our app. Click on the phone number you want to use or purchase a new one from the Manage Numbers page.
Grab the generated URL to your Bluemix app from the dashboard. It will most likely be http://Your-App-Name.mybluemix.net/SimpleServlet.
Paste the URL you copied into the Voice Request URL box with /SimpleServlet appended. Set the request type to HTTP GET to match our doGet route handler.

Once the app is deployed call your number and leave a voicemail. Make sure to press
# instead of hanging up. The call will end automatically and you’ll receive a text message with the Tone Analysis data.
Open your window and cheer out to the world “WOOOO”.

Cool Down
In this post we’ve built an app to help gauge customers emotions via phone calls using IBM Watson and Twilio Programmable Voice despite not being able to see their full range of expression.
We took an audio recording and transcribed that using TwiML and Watson’s SpeechToText. We then piped that transcription into Watson’s ToneAnalysis. The whole thing was quickly deployed using CloudFoundry on Bluemix.
There is a ton more that we can do from here and I’d suggest looking at Twilio TaskRouter to intelligently route or escalate customers for optimal customer service. Check out the docs for an excellent quickstart.
Be sure to let me know what you do from here in the comments or on Twitter at @eddiezane!
Related Posts
Related Resources
Twilio Docs
From APIs to SDKs to sample apps
API reference documentation, SDKs, helper libraries, quickstarts, and tutorials for your language and platform.
Resource Center
The latest ebooks, industry reports, and webinars
Learn from customer engagement experts to improve your own communication.
Ahoy
Twilio's developer community hub
Best practices, code samples, and inspiration to build communications and digital engagement experiences.