Integrate Twilio Studio, Twilio Flex, and ServiceNow for Agent Interactions
Time to read: 12 minutes
August 17, 2021
Written by
Reviewed by

Twilio is a trusted provider in the telecommunications industry, helping customers navigate the complexities of the ever-changing communications ecosystem. We've heard a lot of feedback about the value of integrating ServiceNow and Twilio to manage incident notifications and escalations.
In other tutorials, we've shown steps you can take towards integrating ServiceNow with Twilio to add communications and incident updates. In this post, I'll go a step further and show you a full ServiceNow and Twilio integration which adds Twilio's Flex Contact Center and lets end-users transition to a live channel.
Follow along to learn to integrate Twilio Studio and Flex with ServiceNow for omnichannel, bi-directional messaging, real-time incident updates, and live agent escalation.
ServiceNow and Twilio integrations
This post is Twilio's recommended Run integration with ServiceNow. You can learn more about the ServiceNow use case on the Twilio website.
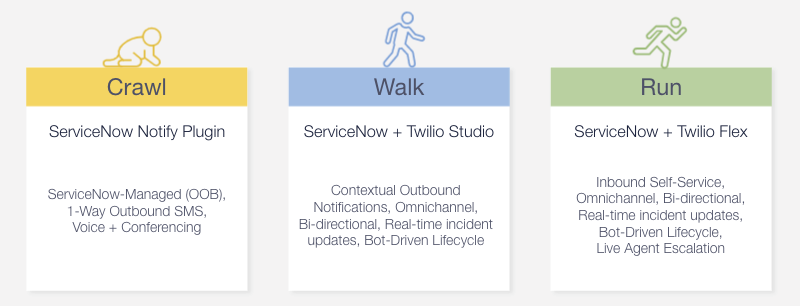
If you only need ServiceNow-Managed 1-Way SMS, Voice, and Conferencing, you can follow our tutorial on how to create a notification system from ServiceNow using their Notify plugin – Crawl.
If you'd like to do contextual outbound notifications and update ServiceNow in real-time via SMS or Voice, but don’t need to integrate Twilio Flex, see our bi-directional incident management framework to integrate Twilio with ServiceNow – Walk.
Prerequisites
Ensure you have the following accounts and tools set up, and that you’re logged into them, before you continue:
- GitHub
- Git installed locally on your computer
- ServiceNow instance
- Twilio Account
- Twilio Flex Instance
- Twilio CLI
- Twilio CLI Serverless Plugin
- Twilio CLI Flex Plugin
What's included?
- 4 Functions - Mechanisms used to connect Twilio Studio and Twilio Flex plugins to ServiceNow: Get User, Add Comment, Create Ticket, Task Event
- 2 Studio Flows - Sample studio flows for Voice and SMS.
- 1 Flex Plugin - A sample plugin that presents customer information to the agent in Flex and raises events about the records being worked.
- ServiceNow Code & Configuration -ServiceNow Studio offers scripted REST APIs, ServicePortal Pages, Navigation Modules, System Properties, and other useful features that you can use to quickly and easily package applications and deploy them straight from GitHub.
Configure the ServiceNow instance
First, we’re going to work through how to set up your ServiceNow instance so we can start integrating with Twilio. These steps will clone the ServiceNow Package, which contains the Flex iFrame and a number of Scripted REST API functions.
Create a new GitHub repository
Note: ServiceNow Studio Import used to allow for anonymous GitHub imports, but that is no longer an option.
We need a way to import and update our source code in a repository where we can authenticate ourselves.
- Login to your GitHub account.
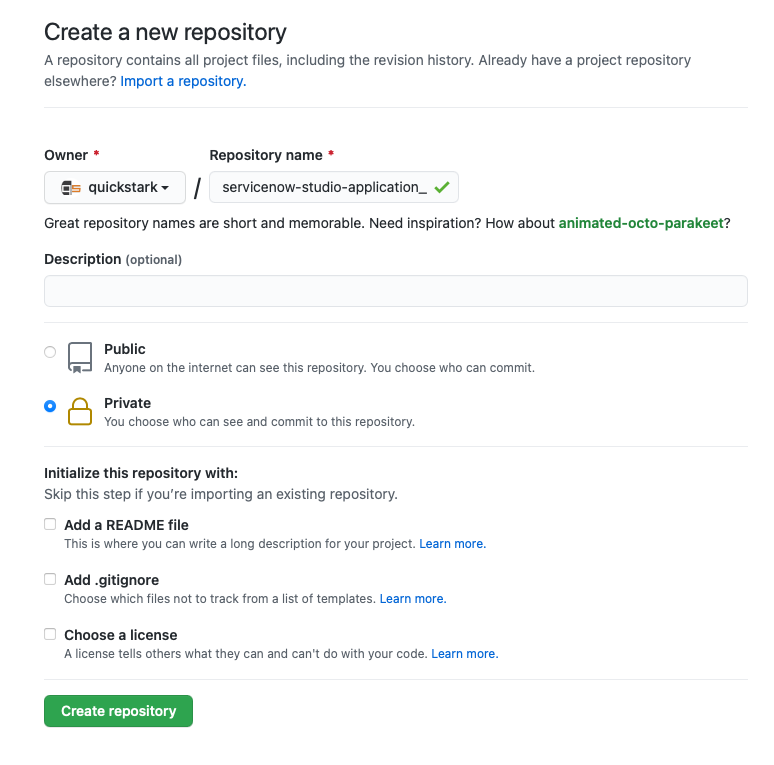
- Navigate to your Repositories and click the New button.
- Call the new repository servicenow-studio-application (or really anything you like ... you just need the URL in the next step).
- Make it private (unless you want others to have access).
- Skip the Initialization check boxes.
Once the repository has been created, copy the URL from your Internet browser's address bar. You'll use it to clone the repository locally, as shown in the next section.
Set up Git version control locally
Now that we've created an empty GitHub repository, let's use Git's mirror flag to clone an existing repository with the ServiceNow application we want to install.
Ensure that Git has been set up on your local machine and that you’ve successfully connected Git to GitHub. Copy the URL associated with your new GitHub repository from the GitHub Step above.
- Open a new terminal window.
- Execute the following commands in the terminal.
Note: It is best to do this without a VPN running to avoid conflicts with corporate git repositories. Additionally, attempting to cd into the git file may throw an error that says "fatal: this operation must be run in a work tree". This is expected behavior and can be safely ignored, but the step cannot be skipped.
You can now delete the cloned repository after pushing to your GitHub account by running the following command in your terminal window:
Connect ServiceNow and GitHub
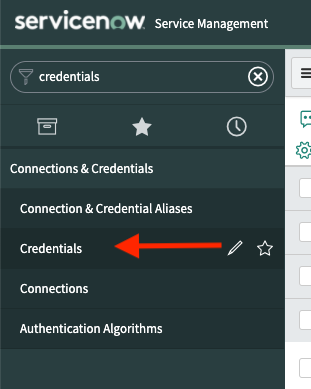
Login to your ServiceNow Instance. In the ServiceNow Navigator, search for Credentials and click the New button.
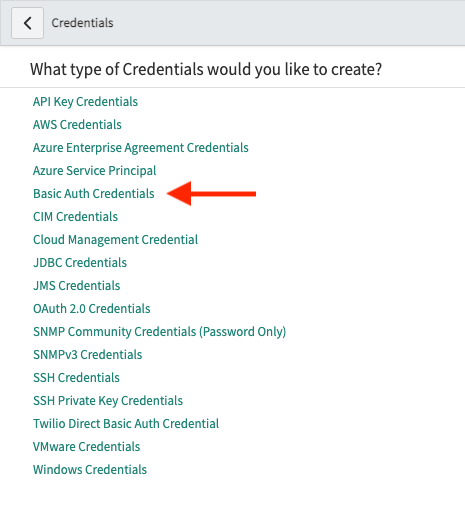
On the next screen, select "Basic Auth Credentials".
On the next screen, enter your GitHub credentials. (Note: Depending on your GitHub security settings such as 2FA, you may need to generate a single-use password.)
Import the code into ServiceNow Studio
Login to your ServiceNow Instance. Navigate to System Applications > Studio in the Application Navigator.
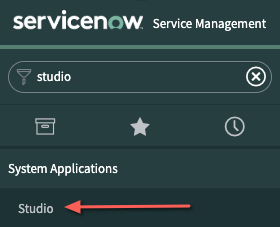
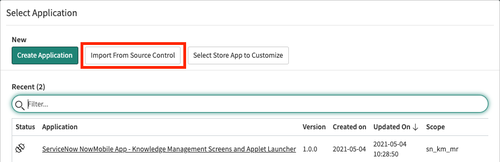
Clicking Studio should automatically pop up the following Select Application screen. On this screen, click Import From Source Control.

- In the URL field, use the URL from the GitHub repository you created earlier. It should be something like
https://github.com/<your GitHub handle>/servicenow-studio-application. (The URL shown in the screenshot above is only for illustrative purposes.) - Enter "main" in the Branch field.
- Select the GitHub credentials you created in the prior step.
- Click the Import button. This should connect to your GitHub Repository and set up the ServiceNow side of the integration.
- You should now be able to Select Application.
- Close ServiceNow Studio, and refresh the ServiceNow home page to pull this code into the Application Navigator!
Because you imported the application code using GitHub, any changes you make to the Scripted APIs can be kept in sync with GitHub. This is very useful if you forget to refresh your ServiceNow instance and need to rebuild this integration or want to enhance it in the future.
Setup the ServiceNow Service Account
We need to create a Service Account to allow access to the Scripted REST APIs we imported into ServiceNow from Twilio Functions in the previous tutorials of this series. (We’ll set these Functions up later on.) If you already created a Service Account during Part 2 of this series, you may elect to use that instead. Just remember to adjust the username and other important metadata in the subsequent steps where this Service Account is used.
Create a Service Account
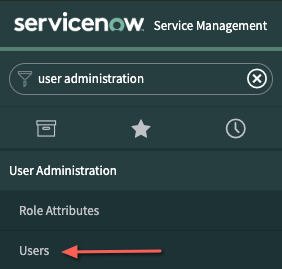
Navigate to User Administration > Users in the Application Navigator.
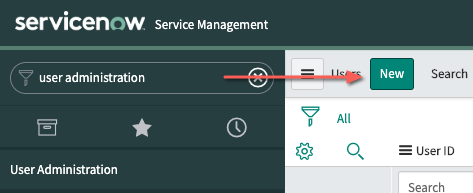
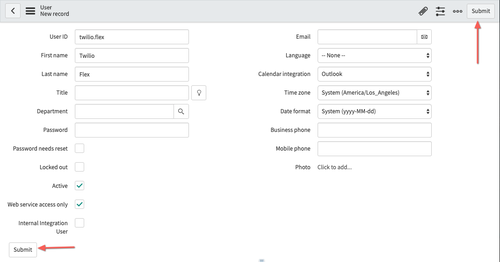
Click the New button.
Update the following fields with the values below:
- User ID = twilio.flex
- First Name = Twilio
- Last Name = Flex
- Password = <Any> (Remember this password! You will need to add it to your .env file in a later step.)
- Web Service Access Only = Checked
Click Submit.
Setup the ServiceNow Users
In addition to a Service Account, we also need to modify a couple of ServiceNow user accounts to successfully test our application end-to-end. For example, we need to modify the user accounts of the person logging the incidents and the agent who is responding.
The End User Account
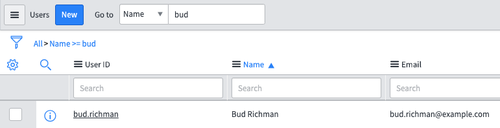
- Navigate back to User Administration > Users in the ServiceNowApplication Navigator.
- Enter “bud” in the Go to Name search box and press Enter. (“Bud” is the first name of a pre-loaded example user.)
- Select bud.richman to edit, then enter the following data, which will be passed to the agent:
- Title = <Something Important Sounding>
- Mobile Phone = Your cell number in E.164 format, such as +12145552222
- Click the Update button and close the user record.
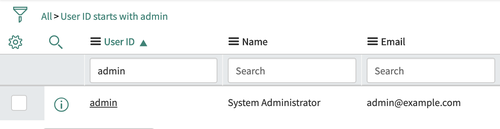
The Agent User
- Enter admin in the User ID Search box and press Enter.
-
Click into the admin record and update the following fields:
- First Name = <Your First Name>
- Last Name = <Your Last Name>
- Email = <Your Email Address>
- Click Update.
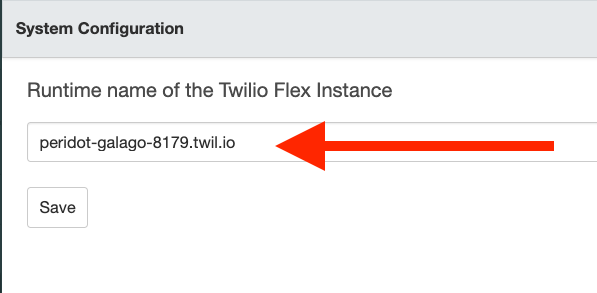
Add the Twilio Flex Runtime environment name in the ServiceNow dashboard
Navigate to System Properties > Twilio Flex.
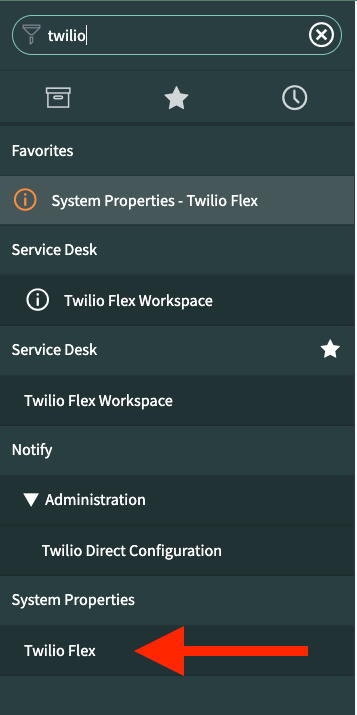
Enter your Twilio Flex Runtime Environment name and click Save. Make sure you DO NOT include .twil.io.
Configure the Twilio settings
Great work! You should now have the Twilio Flex package deployed in ServiceNow. In this section, we’ll walk through our setup on the Twilio side. By the end, you’ll have the ability to retrieve a ticket’s status, add ticket comments, create new tickets, and contact an agent — all via SMS and Voice.
Download the Code
- Navigate to https://github.com/quickstark/servicenow-twilio-functions.
- Download the ZIP file (green button labeled “Code”).
- This will download a zip file of everything you’ll need for the remaining steps.
- If the zip file doesn’t unzip automatically, unzip it into a logical place such as a designated git folder). Going forward, we will refer to this as your “deployment folder”.
The zip file you just downloaded contains a Twilio Serverless Package consisting of:
- A Twilio Flex Plugin containing the hooks for Task Dispatch within Flex
- The Twilio Functions needed to fetch, create, and update ServiceNow Tickets
- The Twilio Studio Flows in JSON format (for importing later)
We are combining the Twilio Flex Plugin and Serverless Functions into one package. If you want more details about how to do this for other projects, check out the Streamline Your Flex Plugin & Functions Development Using VS Code tutorial on the Twilio blog.
Enable Flex CORS
Starting June 29th, 2021, all Flex applications created before March 3rd, 2021 are required to register their valid URLs under Twilio Flex's Allowed URLs list in order to embed Flex as an iframe. Read more in our documentation, Securely embed Flex as an iframe.
- Navigate to Flex Settings.
- Scroll to the bottom of the page.
- In the section titled Embed Flex as an iframe, add your ServiceNow Instance URL (it will be in the form https://devXXXXX.service-now.com).
- Click the Save button.
Create the Twilio Serverless .env File
In a conventional Twilio Serverless Project Initialization, the Twilio CLI would create a .env file for us, but because we normally exempt .env from GitHub (via a .gitignore file) we’ll need to create one.
- Navigate to the default folder inside the deployment folder.
- Duplicate the .env.example file using VSCode or your IDE/Text editor of choice.
- Rename the duplicated .env.example file to .env.
- Inside that .env file, add the Twilio and ServiceNow attributes shown below. You can find your Twilio Account SID and Auth Token in the Twilio Console.
- ACCOUNT_SID=<Twilio Flex Project Account SID>
- AUTH_TOKEN=<Twilio Flex Project Auth Token>
- SERVICE_NOW_API_ROOT=https://devXXXXX.service-now.com/api/x_8725_servicenow/twilio_flex/ (Replace XXXXX in the SERVICE_NOW_API_ROOT with the 5-6 digit id from your own ServiceNow instance. You should see this in the URL bar.)
- SERVICE_NOW_USERNAME=twilio.flex
- SERVICE_NOW_PASSWORD=<ServiceNow Service Account Password>
Note: Twilio will inject the Account SID and Auth Token into the Function’s Context during runtime, but for local testing and consistency with the twilio serverless:init command, we’ll add the Account SID and Auth Token to the file.
Deploy the Twilio Serverless Functions
Navigate into the default folder within the deployment folder. Run the following command to deploy the Twilio Serverless Functions:
The combination of the --service-name=default flag and the --override-existing-project flag allows you to deploy your functions to the existing service container. A new Environment will be created consistent with the process outlined here, and your functions and assets will be deployed in association with that Environment.
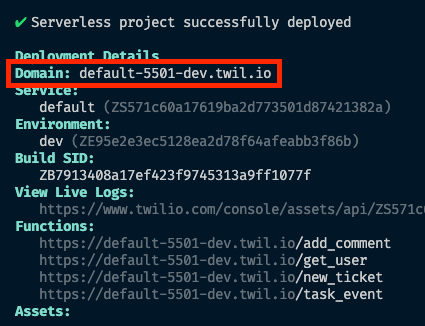
The output of running the deploy command should provide details about the service. Copy the value for the domain as we’ll need this in the next step.
Modify the Flex Plugin env.dev File
We also need to modify an .env file for the Flex Plugin to host the BASE URL for our Serverless Functions.
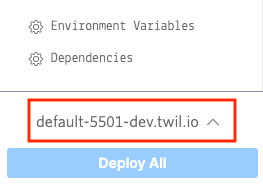
If you forgot to copy the domain from the prior step, you can find the path of the Serverless Functions you deployed by visiting Functions in the Twilio Console, clicking “default”, and looking for the Serverless Path (in this example, “default-5501-dev.twil.io”)
To modify or create the Flex .env file:
- Navigate to the root of your deployment directory. (If you are still within the default folder, go up one level using the command
cd ..) - You should see a .env.dev file there already. If you don't have one, create one.
- Open .env.dev and modify the value of the
SERVERLESS_BASEvariable to your Serverless Package URL. If you created an empty .env.dev file, addSERVERLESS_BASE=<Your Serverless URL>. - For this example, the file would have a single line reading:
SERVERLESS_BASE=https://default-5501-dev.twil.io.
Deploy the Flex Plugin
Deploying the Flex plugin requires a different set of commands than deploying Twilio Serverless Functions, as you’ll see below. We’ll release our plugin via the CLI, but you can also manage releases in the Plugins section within Flex if you prefer.
Navigate to the root of the deployment folder. Ensure you are using the correct Twilio environment. You can check by running the following CLI commands:
Ensure the dependencies are installed. To do this, run:
Run the following command:
Or, if the CLI isn’t acknowledging your profile, you can explicitly specify it by running the following command:
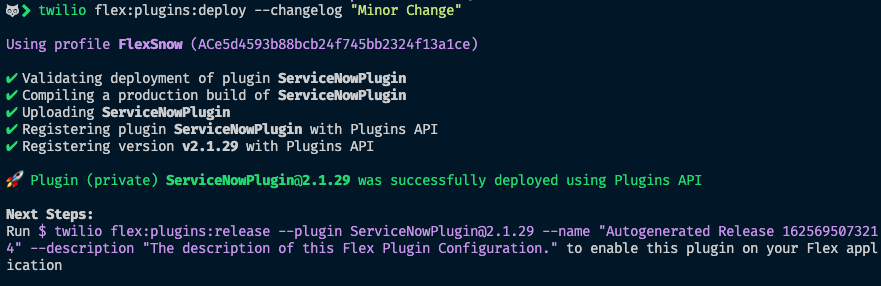
The deploy step should result in an output command for releasing the plugin. It will automatically track your release version with every subsequent deployment. Copy the output of the command and modify the description.
Deploy Studio Flows
In this section, you will import, update, and publish 2 Studio flows. The updates involve pointing the Flow’s Function Widgets to the Twilio Serverless Functions we deployed above.
Import the Voice Flow
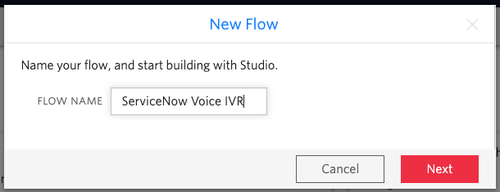
Navigate to the Twilio Studio Dashboard. Click + to create a new Studio Flow, then name the flow ServiceNow Voice (or whatever name you prefer), and click Next.
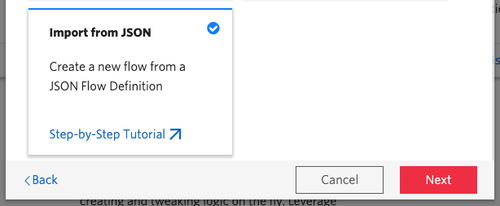
Scroll to the bottom of the next pop-up and select the Import from JSON template, then click Next.
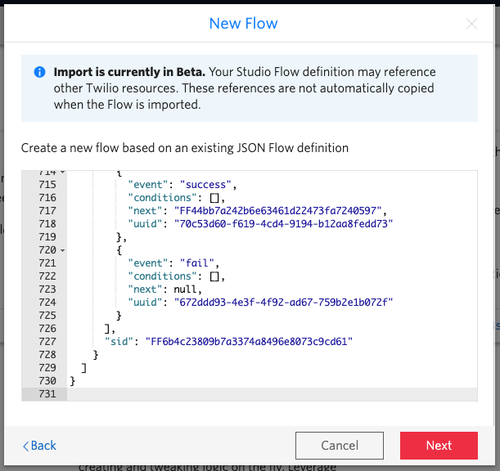
Open <deployment_folder>/studio_flows, and open the voiceflow.json file in your favorite code editor. Copy the contents of the file, and replace the contents of the textarea.
Once imported, we will need to make a few modifications to connect certain widgets to the unique resources in your environment. Locate the 4 Functions Widgets in the imported Studio Flow. (See the example images below for the GetUserFromPhone Function Widget.)
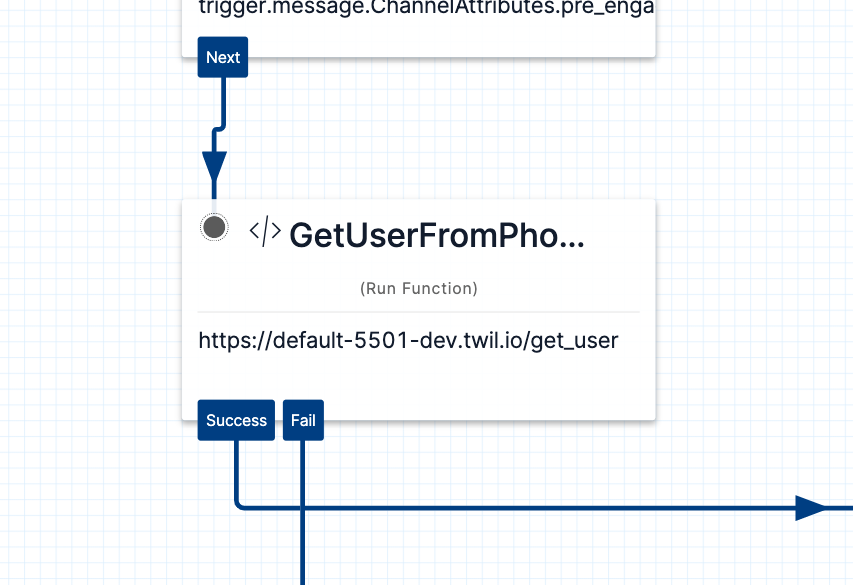
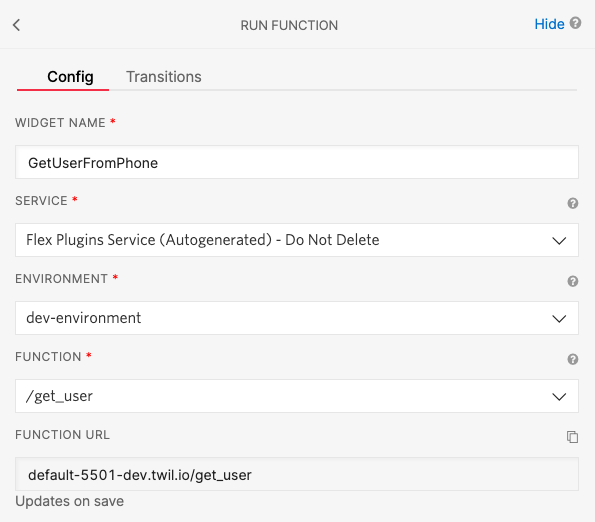
Update the widgets with the following information:
- The GetUserFromPhone widget needs to point to the /get_user function
- The AddCommentToTicket widget needs to point to the /add_comment function
- The NewTicketCreate widget needs to point to the /new_ticket function
- The SendCallToAgent widget should have:
- Workflow = Assign to Anyone
- Channel = Voice
Click Save after making all changes to the 4 widgets listed above, then click Publish at the top of the screen.
Import the Messaging Flow
- Navigate to the Studio Dashboard.
- Click + to create a new Studio Flow, then name the flow ServiceNow Messaging (or whatever name you prefer) and click Next.
- Repeat the steps from the “Import the Voice Flow” section above, except this time select the <deployment_folder>/studio_flows, and open the messagingflow.json file.
The same functions need to be updated as in the Voice Flow:
- The GetUserFromPhone widget needs to point to the /get_user function
- The AddCommentToTicket widget needs to point to the /add_comment function
- The NewTicketCreate widget needs to point to the /new_ticket function
- The SendMessageToAgent widget should have:
- Workflow = Assign to Anyone
- Channel = SMS
Click Save after making all changes to the 4 widgets listed above, then click Publish at the top of the screen.
Update pointers to Studio
Finally, we need to make a few updates to ensure your Twilio Phone number is pointing to these new Flows.
Point to Voice Flow
- Navigate to the Active Numbers page in the Twilio Console.
- Click the phone number that came with your Flex Project. It should be labeled Flex Phone Number.
- Update the A Call Comes In option to point to your new ServiceNow Voice Flow.
Point to Messaging Flow
- Navigate to the Messaging page in the Twilio Console.
- In the Incoming Message Handlers section, update the line with Channel = sms to point to the ServiceNow Messaging Flow you created in the prior step. This page will automatically save when you change the value.
Testing
Great work! You now have Twilio and ServiceNow integrated, and you’re ready to check that everything is working well together.
Once logged into ServiceNow, navigate to Service Desk > Twilio Flex Workspace in the Application Navigator. This will load Flex embedded in the Service Portal.
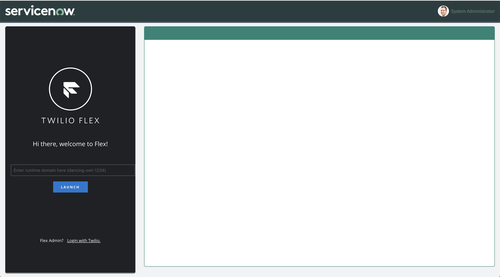
Click the Login with Twilio link, and you should be logged in automatically.
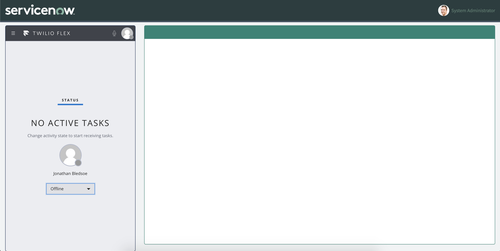
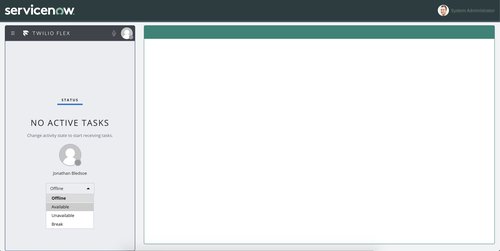
Change your status to Available.
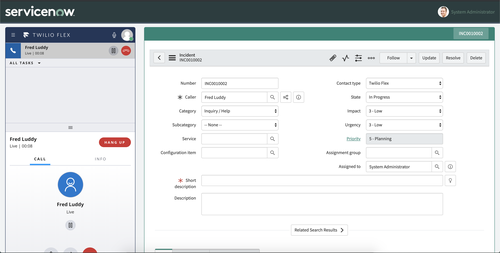
Call or text the number you got with your Twilio account (you can find that here) and once you reach a path which speaks to an agent, you should see the call or message pop up in Flex.
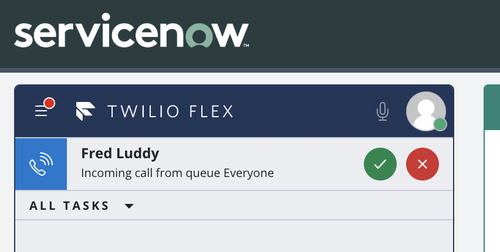
Once you accept the task by clicking the green check mark (✅) the appropriate ticket record should pop open on the right!
Troubleshooting
- If you have issues with the Integration returning 500 errors from ServiceNow, this is often an indication that your ServiceNow Development instance is hibernating. Please login to the ServiceNow Developer Console and wake up your instance. An example error message would be:
Unexpected token < in JSON at position 0 in "https://dev85449.service-now.com/api/x_8725_servicenow/twilio_flex/find_user_phone" - If your mobile number isn’t found or if you have it provisioned more than once, the error control logic should notify you of either scenario. If you still aren’t receiving an initial “menu” this may be an indicator you have a stuck Task. Please go to Flex in the Twilio console and run a System Check.
- ServiceNow seems to have a knack for triggering password managers. When editing users, it may inadvertently fill your ServiceNow Developer credentials into user fields which can cause the integration to break. If this happens you’ll usually be unable to save the user record.
That’s It!
You now have an MVP agent-enabled ServiceNow integration and you even learned about a few useful tools to aid in your future integration pursuits. As Chris Feehan, Principal Solutions Engineer at Twilio, mentioned in Streamline Your Flex Plugin & Functions Development Using VS Code, now the work begins to improve on this integration so that it works for you and your business.
Hopefully, this tutorial has demystified the ways you can approach integrating Twilio and ServiceNow. I can't wait to see what you build!
Dirk Nielsen is a Solutions Architect at Twilio who spends time working in Javascript/React, Python and entirely too much time Photoshopping cats. You can find Dirk at dnielsen [at] twilio.com.
Related Resources
Twilio Docs
From APIs to SDKs to sample apps
API reference documentation, SDKs, helper libraries, quickstarts, and tutorials for your language and platform.
Resource Center
The latest ebooks, industry reports, and webinars
Learn from customer engagement experts to improve your own communication.
Ahoy
Twilio's developer community hub
Best practices, code samples, and inspiration to build communications and digital engagement experiences.