Integrating ServiceNow with Flex
Time to read:
August 07, 2019
Written by

The Backstory
Southwest is known for the LUV they show their customers. They have been #1 on the Department of Transportation's Consumer Satisfaction Ranking for 24 of the last 28 years, were ranked #8 on Fortune's World's Most Admired Companies list in 2018, and also achieved profitability for 46 of the 52 years they've been around. Southwest's mission is "to become the world's most loved, most flown, and most profitable airline" and they seem to be on the right track to accomplish it.
Southwest was crushing this goal. But Jonathan, a senior developer at Southwest, attended SIGNAL last year and saw the potential of Flex to improve their Service Desk.
The previous system was many generations out of date due to the difficulty to update such a large system serving several call centers. In addition, the Service Desk is by far the smallest of those call centers (50 vs. 3000+) and consistently was not prioritized with enhancements.
He went back to headquarters after SIGNAL and got to work. 3/4 of a trip around the sun later, he's sharing the LUV and showing others how to integrate ServiceNow and Twilio Flex.
What's Included?
3 Functions
Mechanism used to connect Studio and Flex plugins to ServiceNow.
2 Studio Flows
Sample studio flows for Voice and SMS.
1 Flex Plugin
A sample plugin that presents customer information to the agent in Flex and raises events about the records being worked.
ServiceNow Code & Configuration
ServiceNow Studio offers scripted REST APIs, ServicePortal Pages, Navigation Modules, System Properties, and other useful features that you can use to quickly and easily package applications and deploy them straight from Github.
How it works

Prerequisites
- A ServiceNow account. If you don’t have one, go here and sign up.
- A ServiceNow developer instance. If you don’t have one, go here and request one.
- A Twilio account. If you don’t have one, go here and sign up.
- A Twilio Flex Instance. If you don’t have one, go here and create a new Flex project.
ServiceNow Installation
Studio Import
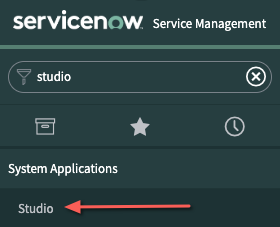
After logging into your dev instance, navigate to System Applications > Studio in the Application Navigator.
In the Load Application screen, click Import from Source Control.
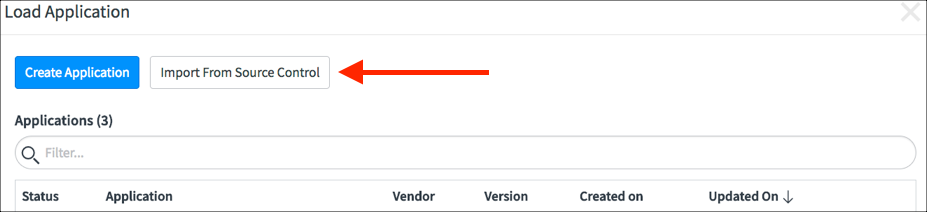
Enter the following information into the screen:
| *URL | https://github.com/SWA-JB/ServiceNow-Twilio-Flex-Integration.git |
| Username | Not Required |
| Password | Not Required |
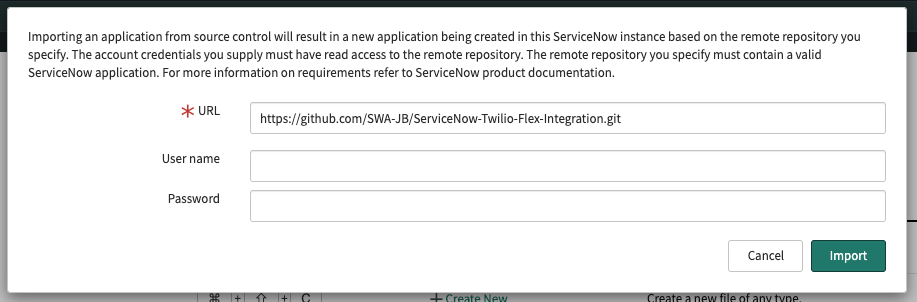
Click Import. Once complete, click Select Application.

Create a Service Account
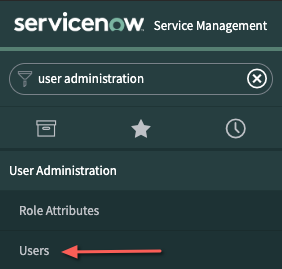
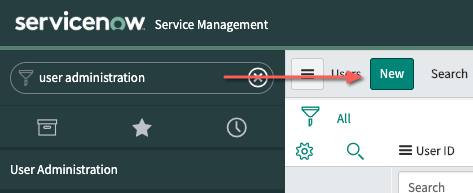
Navigate to User Administration > Users in the Application Navigator.
Select New.
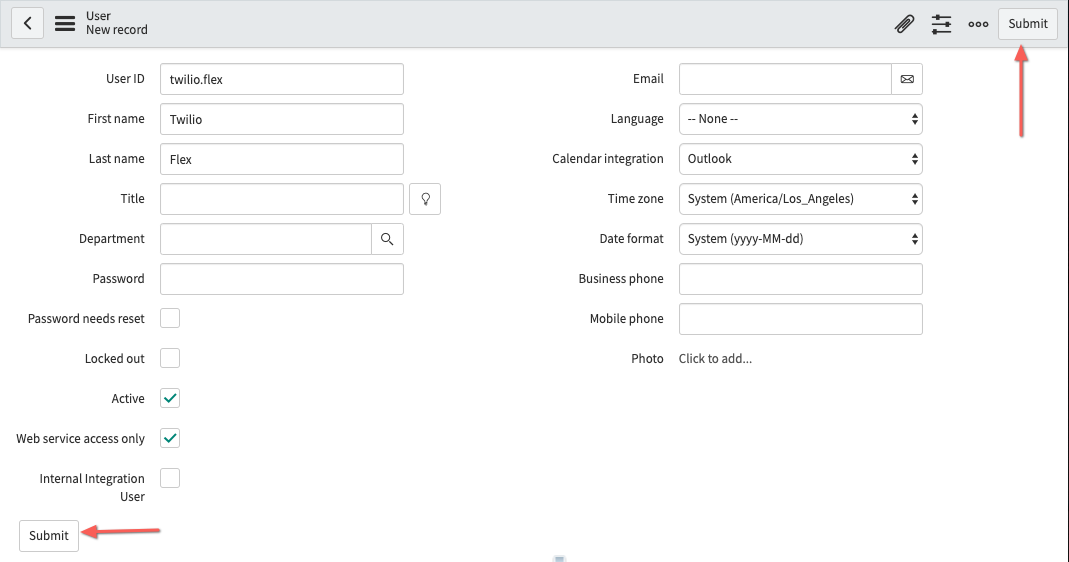
Set the following values:
| User ID | twilio.flex |
| First Name | Twilio |
| Last Name | Flex |
| Password | <Any Password> ** write this down, you’ll use this later |
| Web Service Access Only | Checked |
Click Submit.
Update Users to Use for Testing
Navigate back to User Administration > Users in the Application Navigator. We need two accounts to successfully test our application end to end.
A "Customer" User
Enter bud in the Go to Name search box and press Enter

Select bud.richman to edit, and enter the following data which will be passed to the agent.
| Field | Value |
| Title | <A really important title> |
| Department | <Pick one from the list> |
| Mobile Phone | Your cell number in E.164 format such as +12145552222 |
An "Agent" User
Enter admin in the User ID Search box.
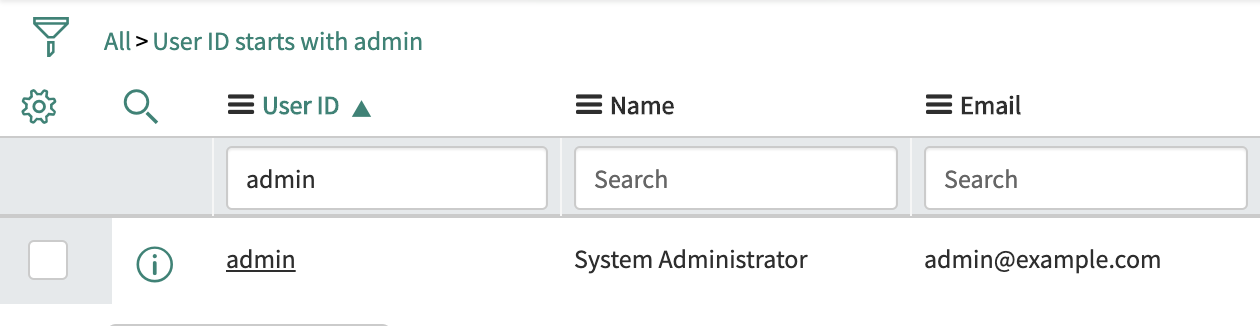
Update the following fields:
| Field Name | Value |
| First Name | <Your First Name> |
| Last Name | <Your Last Name> |
| <Your twilio.com Email Address> ** has to match!!! |
Click Update.
Set the Flex Runtime Domain in ServiceNow
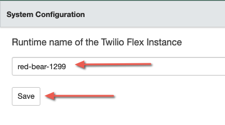
Navigate to System Properties > Twilio Flex.
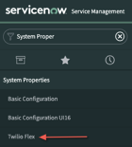
Enter your Twilio Flex Runtime Environment name (found here) and click Save.
Twilio Steps
Download the Code
Navigate to https://github.com/twilio-jyoung/plugin-servicenow-signal/archive/master.zip. This will download a zip file of everything you’ll need for the remaining steps. All futher references to files in this zip will be prefixed with <deployment_folder>
Configure Functions
Navigate to https://www.twilio.com/console/functions/configure
Ensure Enable ACCOUNT_SID and AUTH_TOKEN is CHECKED.

Add the following Environment Variables
| KEY | VALUE |
| ServiceNowUsername | twilio.flex |
| ServiceNowPassword | <ServiceNow Service Account Password> |
| ServiceNowScriptedAPIRootURL | <Instance URL> + <Base API Path> |
Add the following Dependencies
| NAME | VERSION |
| got | 6.7.1 |
Deploy Functions
Navigate to https://www.twilio.com/console/functions/manage
Deploy all of the functions from <deployment_folder>/runtime. Click the Create a Function button, then select the + Blank template, then click the Create button. Once the Function screen loads, copy/paste the content of each Function.
Deploy Studio Flows
In this section, you will need to import 2 Studio flows, and then update them to point to resources on your account.
Import the Voice Flow
Navigate to https://www.twilio.com/console/studio/dashboard
Click + to create a new Studio Flow, name the flow ServiceNow Voice IVR, and click Next.
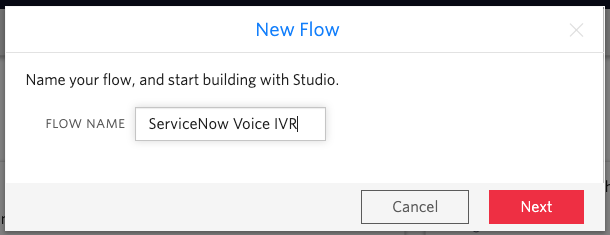
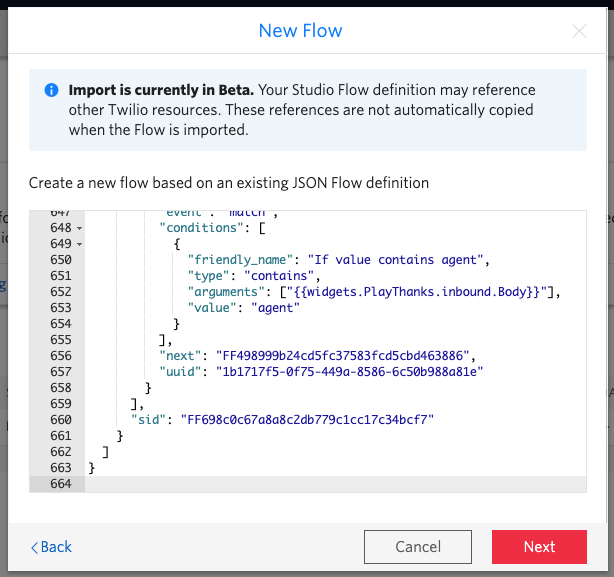
Select the Import from JSON template, and click Next.

Next, open <deployment_folder>/studio, and open the ServiceNow Voice IVR.json file in your favorite code editor, or Chrome. Copy the contents of the file, and replace the contents of the textarea.
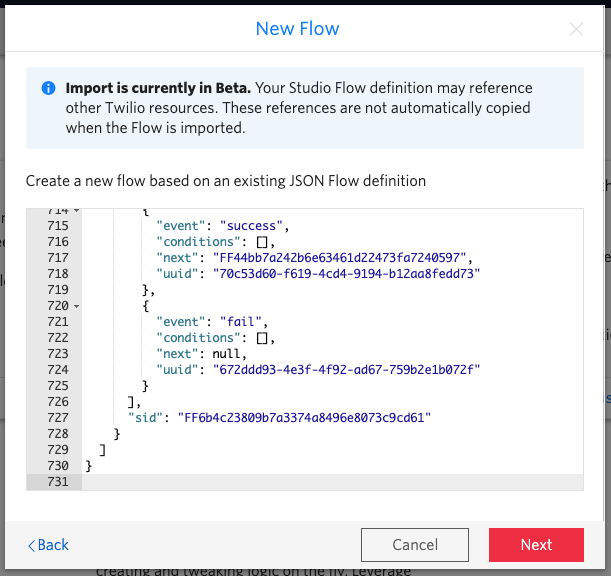
Once imported, you will need to make a few quick modifications to connect certain widgets to the unique resources in your environment.
The GetUserFromPhone widget should have a Function URL = Get User
The AddCommentToTicket widget should have a Function URL = Add Comment
The SendCallToAgent widget should have:
- Workflow = Assign to Anyone
- Channel = Voice
Import the Messaging Flow
Navigate to https://www.twilio.com/console/studio/dashboard
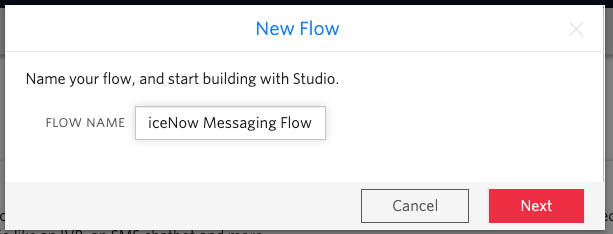
Click + to create a new Studio Flow, name the flow ServiceNow Messaging Flow, and click Next.
Select the Import from JSON template, and click Next.
Next, open <deployment_folder>/studio, and open the ServiceNow Messaging Flow.json file in your favorite code editor, or Chrome. Copy the contents of the file, and replace the contents of the text area.
Once imported, you will need to make a few quick modifications to connect certain widgets to the unique resources in your environment.
The GetUserFromPhone widget should have a Function URL = Get User
The AddCommentToTicket widget should have a Function URL = Add Comment
The SendMessageToAgent widget should have:
- Workflow = Assign to Anyone
- Channel = SMS
Deploy the Flex Plugin
Navigate to https://www.twilio.com/console/assets/public
Upload <deployment_folder>/plugin-servicenow-signal.js as a public asset. Source code is also provided for your reference. This plugin does the following:
- Removes Panel2
- Updates the TaskInfoPanelContent with info from ServiceNow
- Calls a Twilio Function when agents accept a new task, or complete a task
Point to your new IVR
Navigate to https://www.twilio.com/console/phone-numbers/incoming
Click the phone number that came with your Flex Project. It should be labeled Flex Phone Number
Update the A Call Comes In option to point to your new ServiceNow Voice IVR
Point to your new Messaging Flow
Navigate to https://www.twilio.com/console/flex/messaging
In the Incoming Message Handlers section, update the line with Channel = sms to point to the ServiceNow Messaging Flow. This page will automatically save when you change the value.
Testing
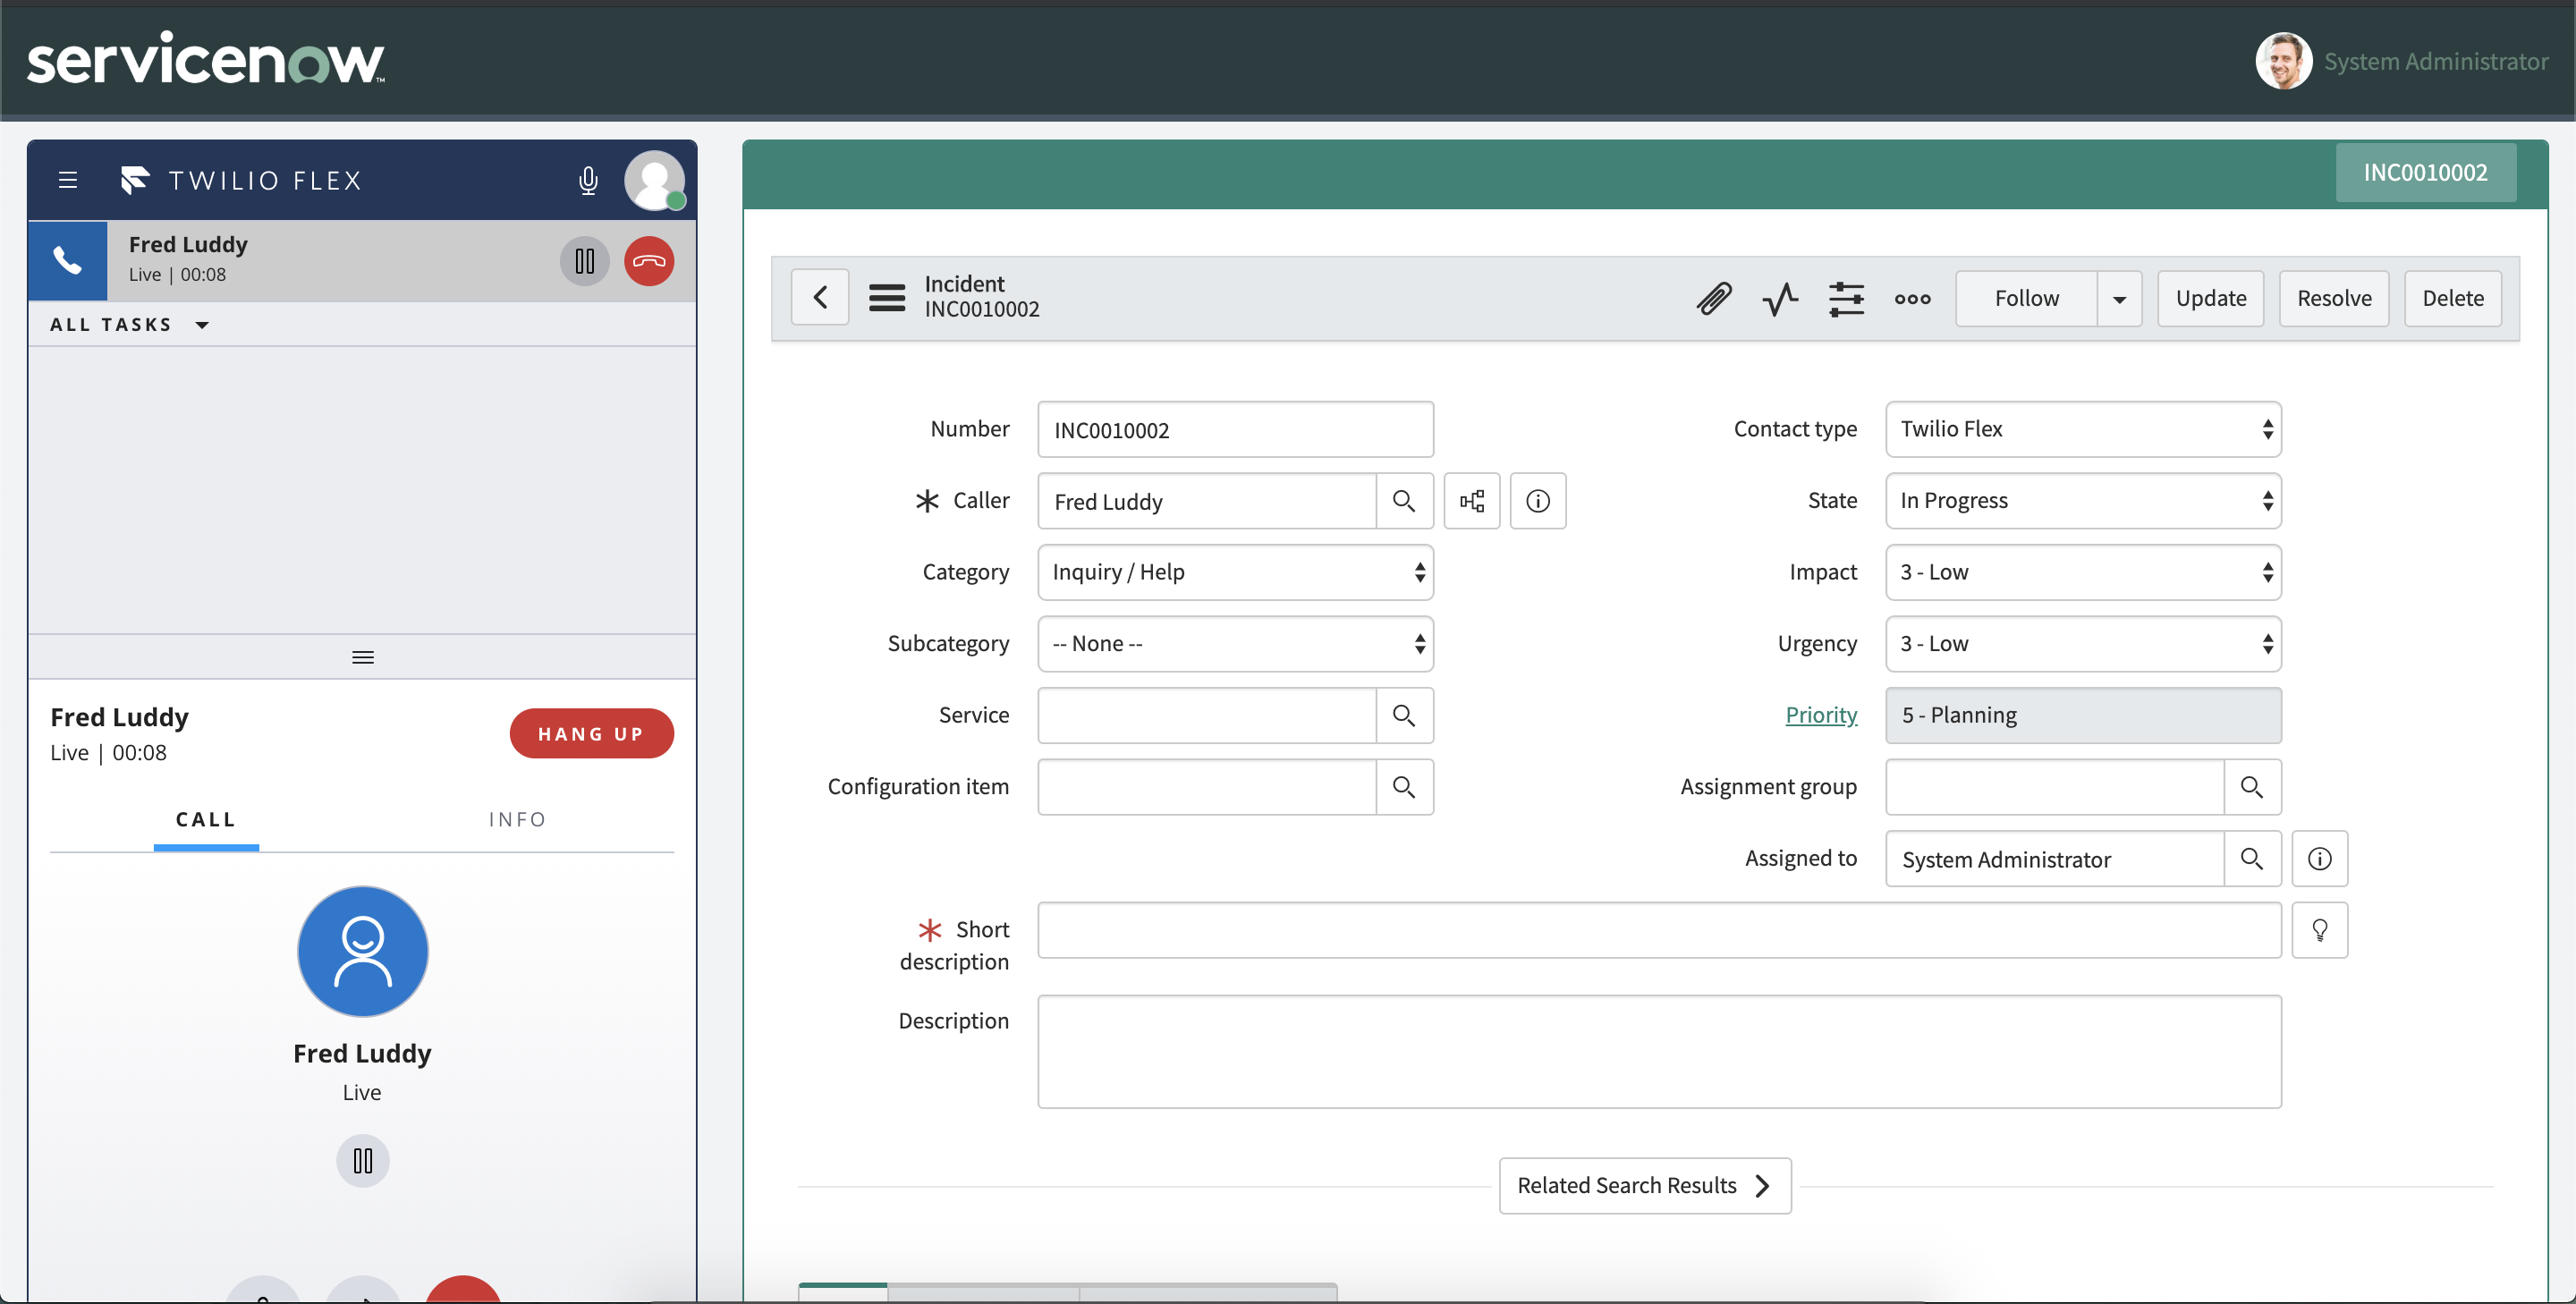
Once logged into ServiceNow, navigate to Service Desk > Twilio Flex Workspace in the Application Navigator. This will load Flex embedded in Service Portal.
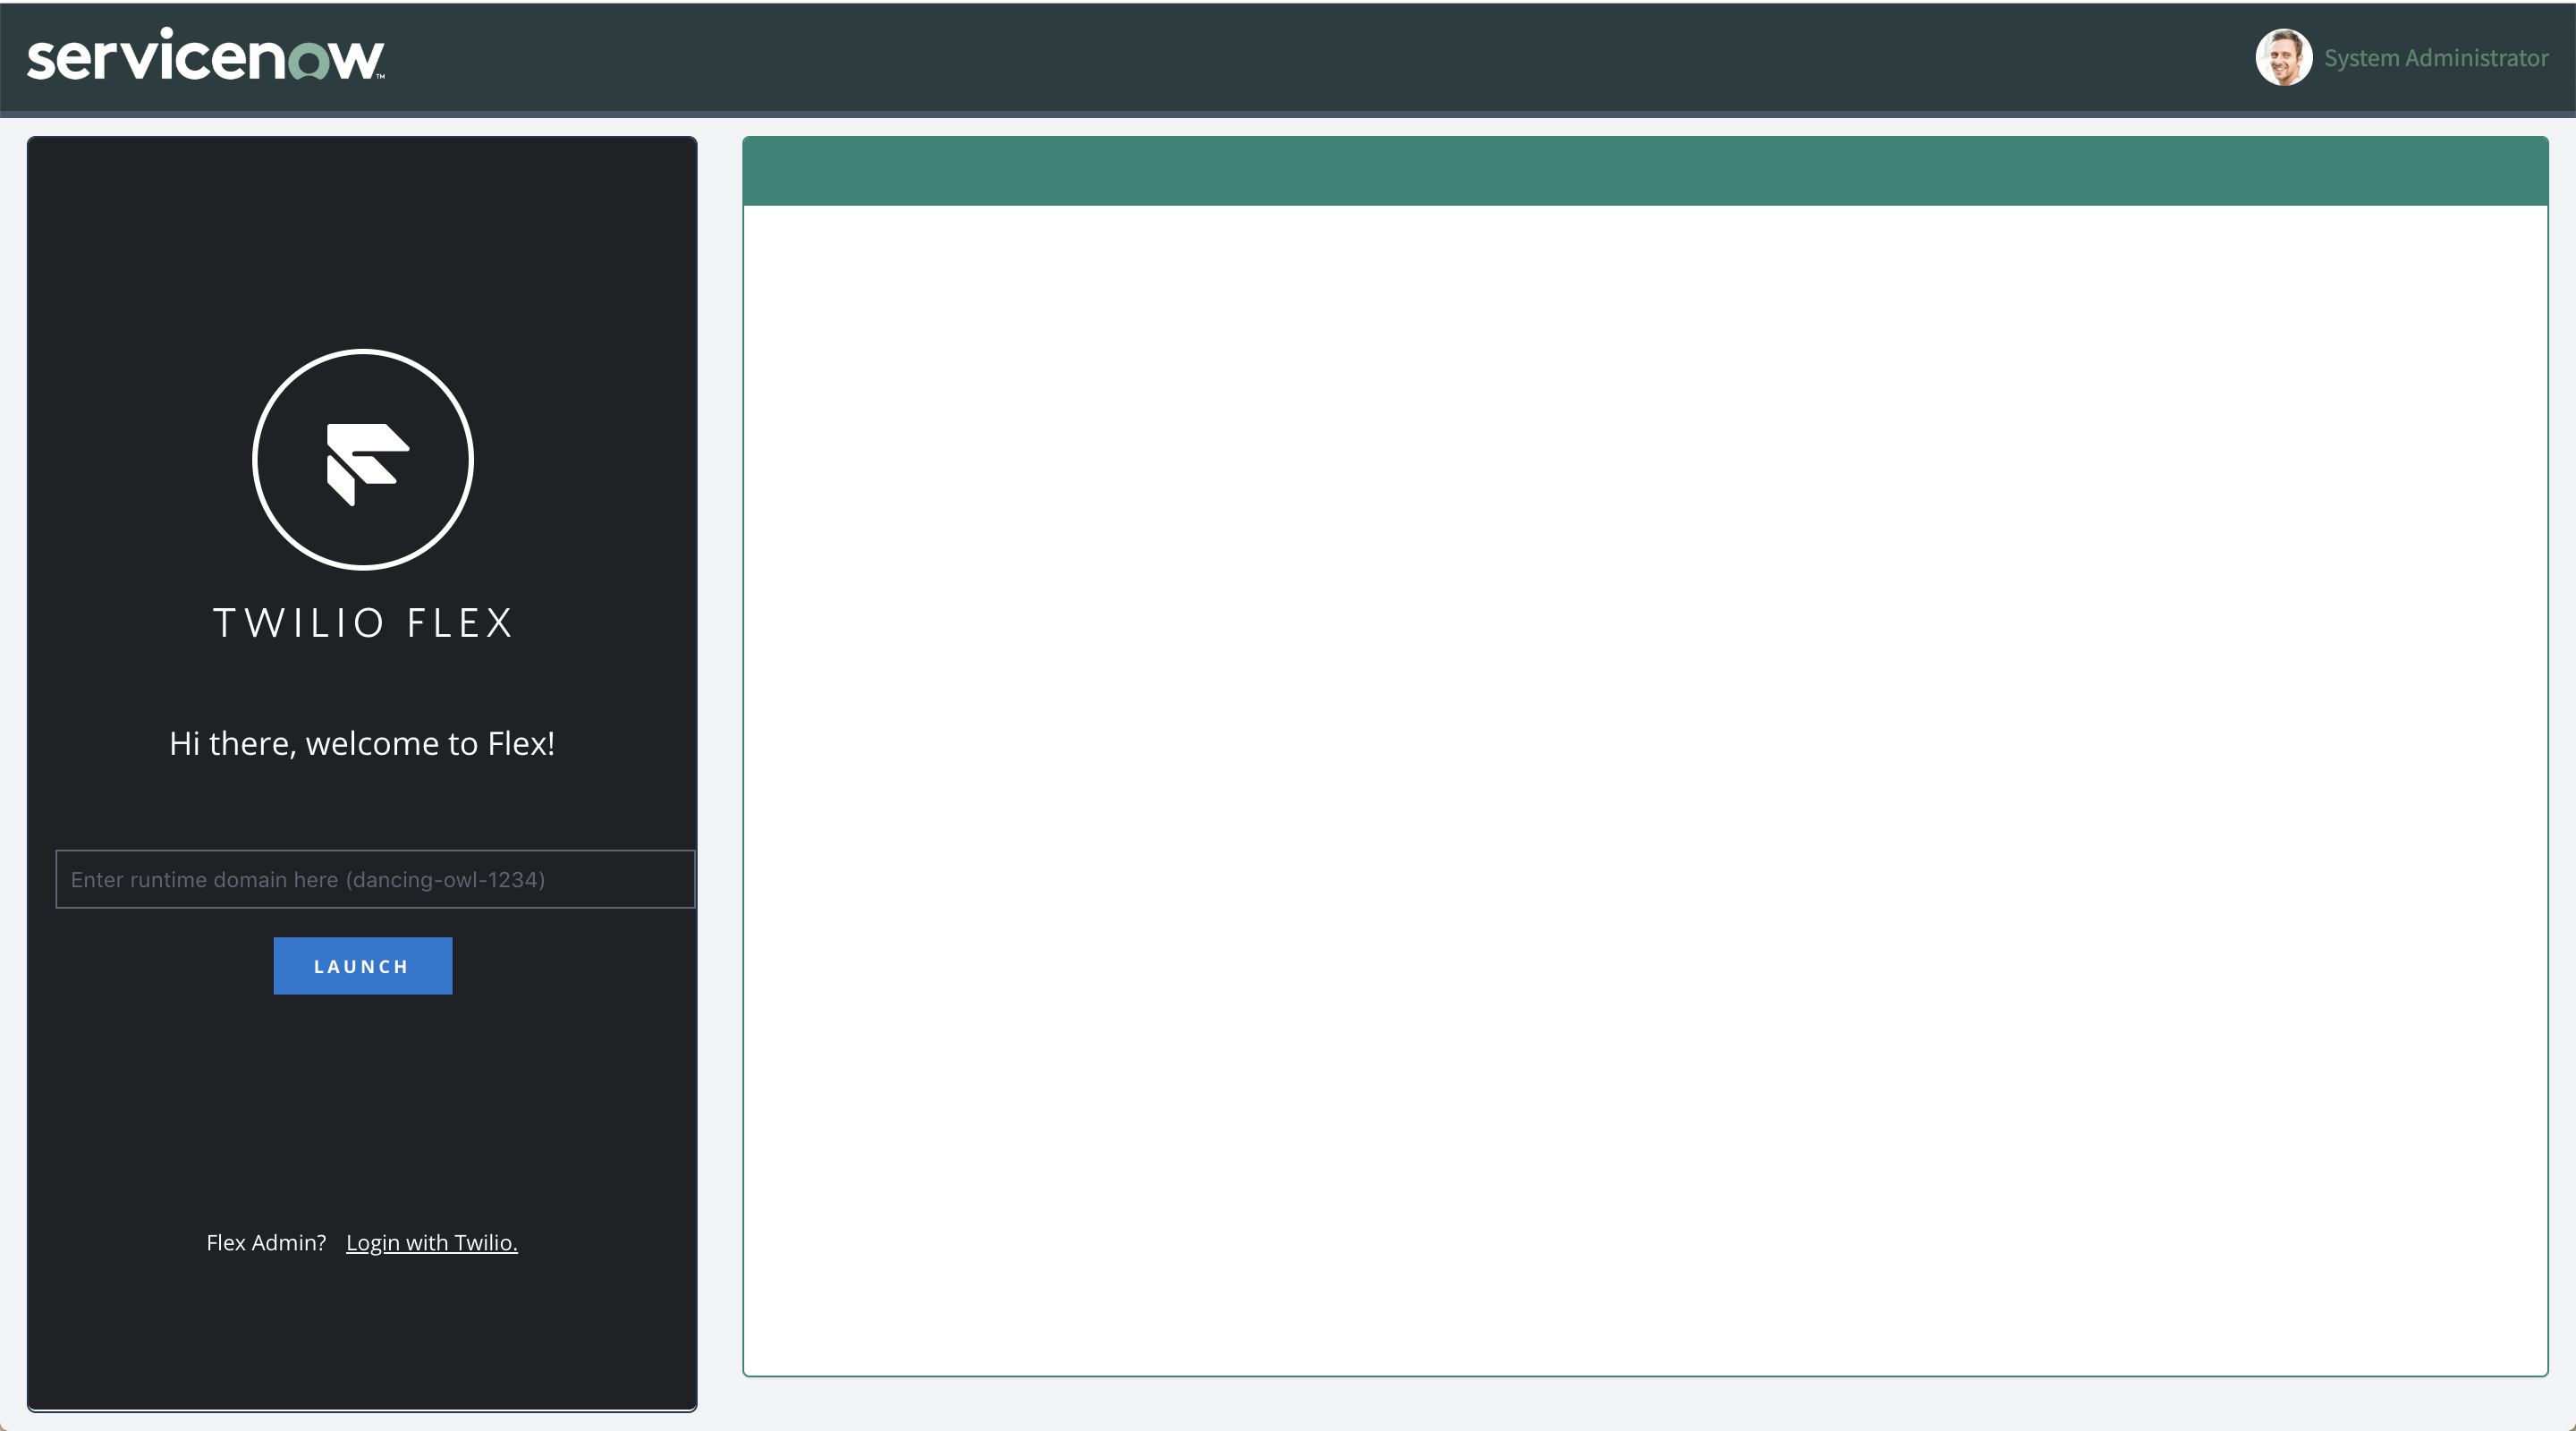
Click the Login with Twilio link, and you should login automatically.
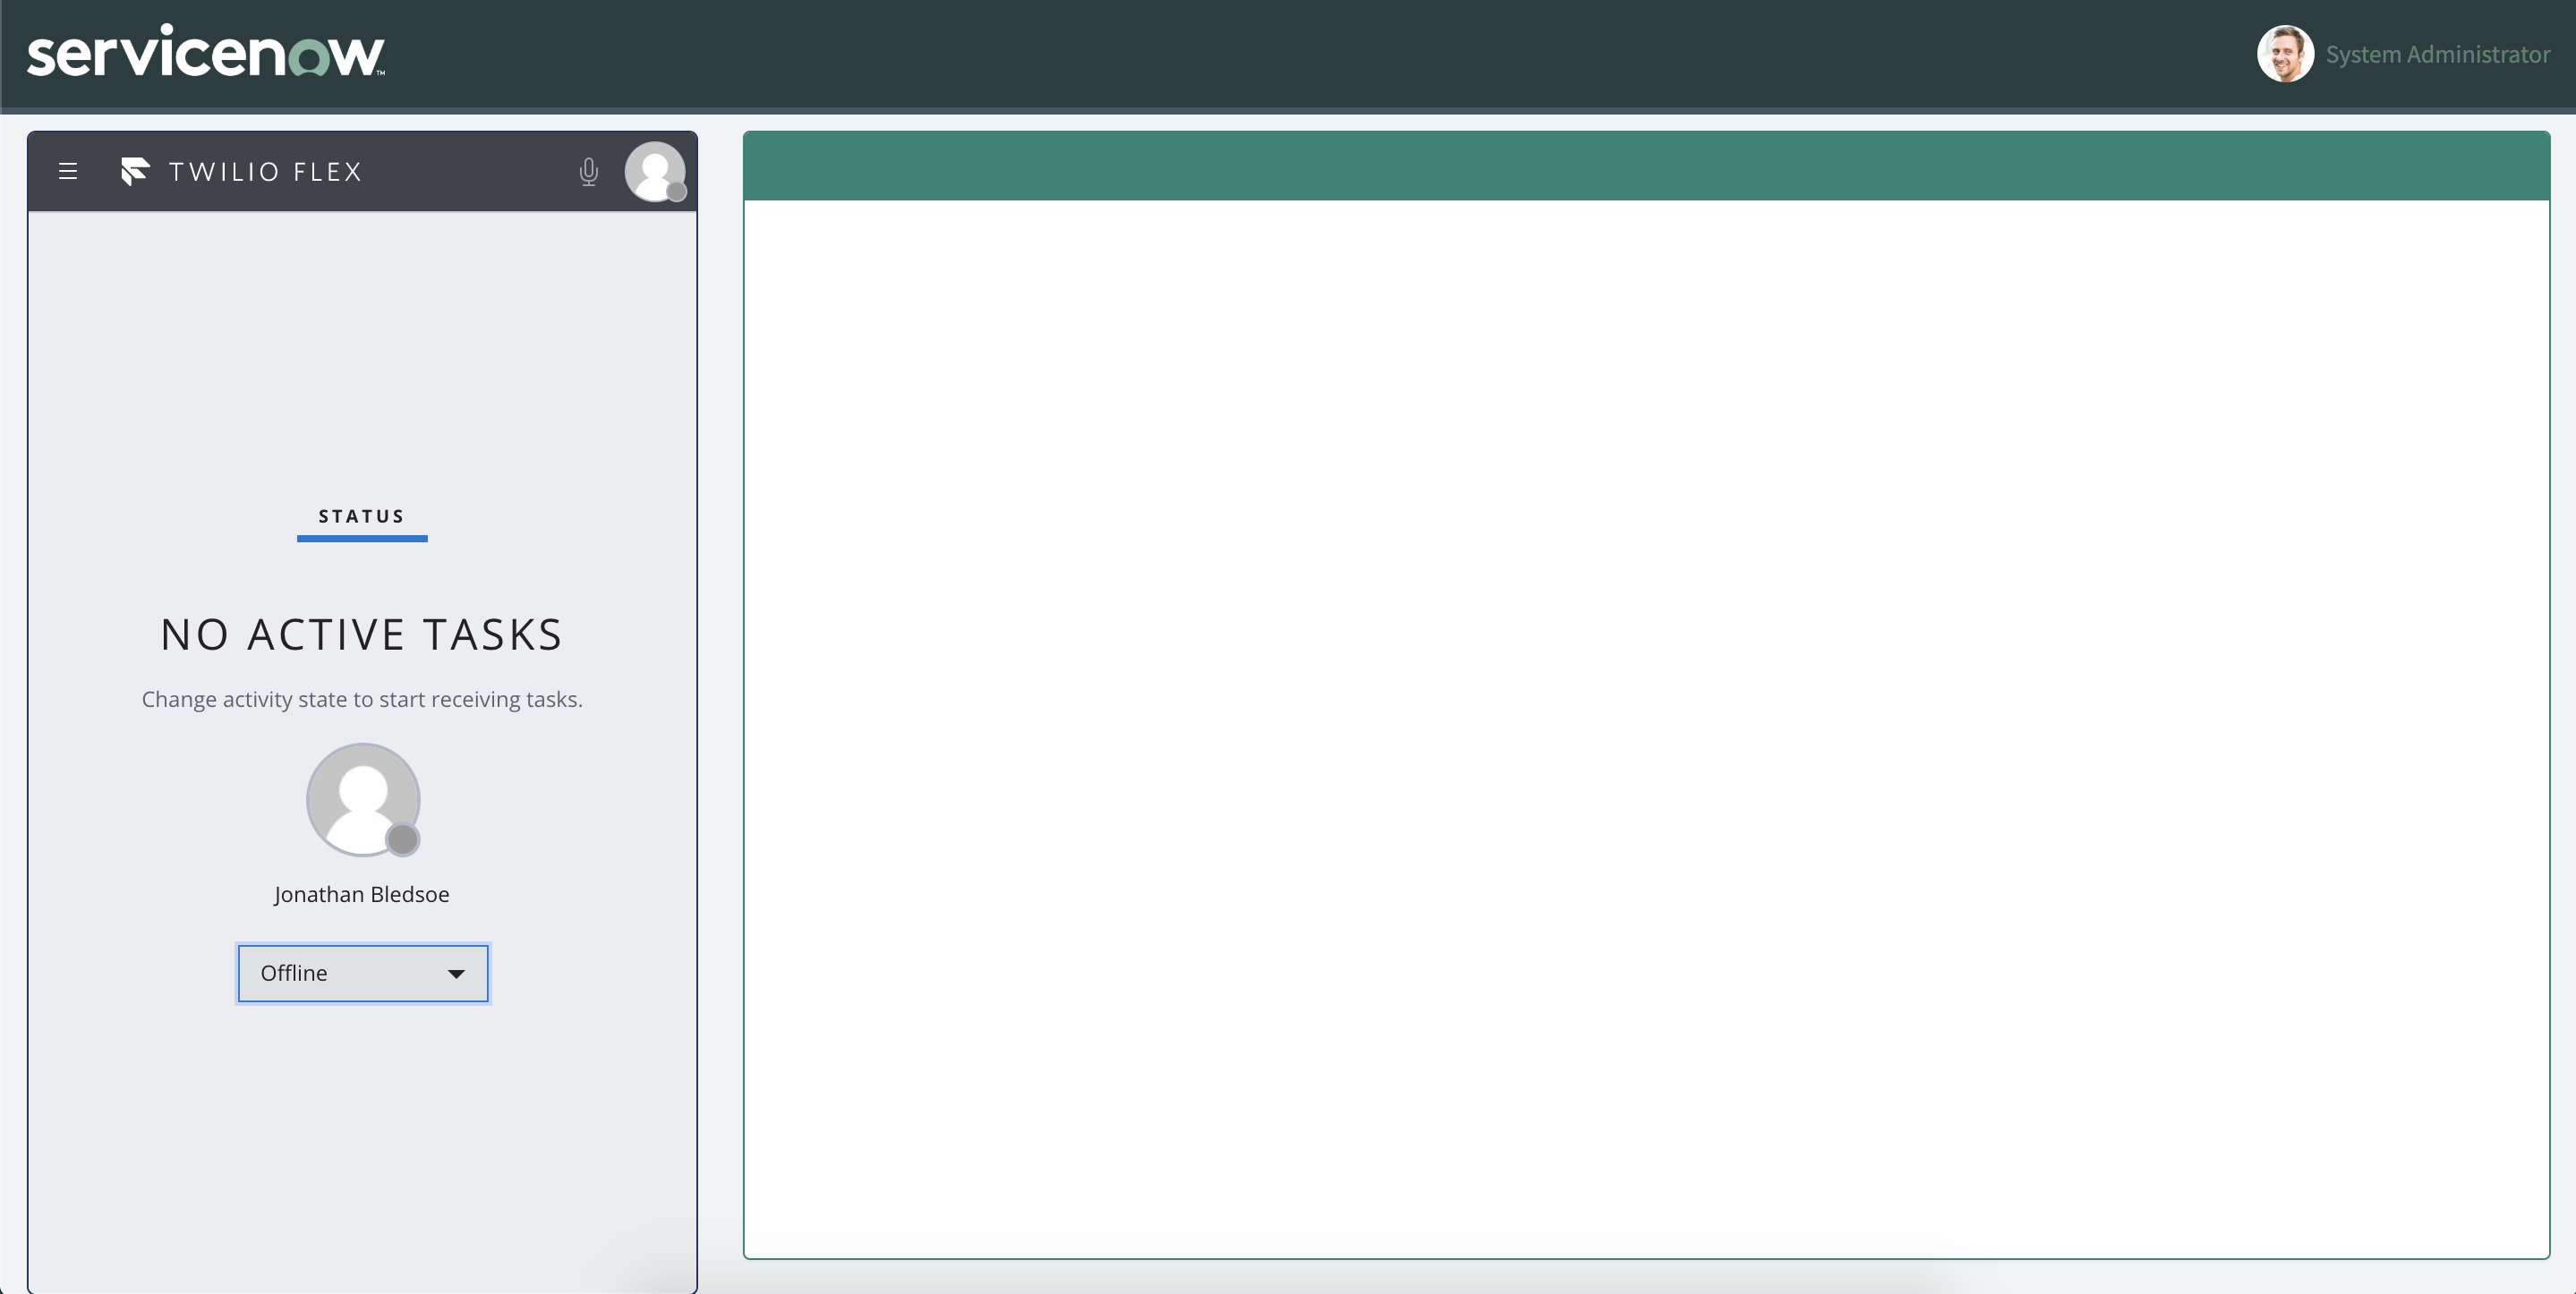
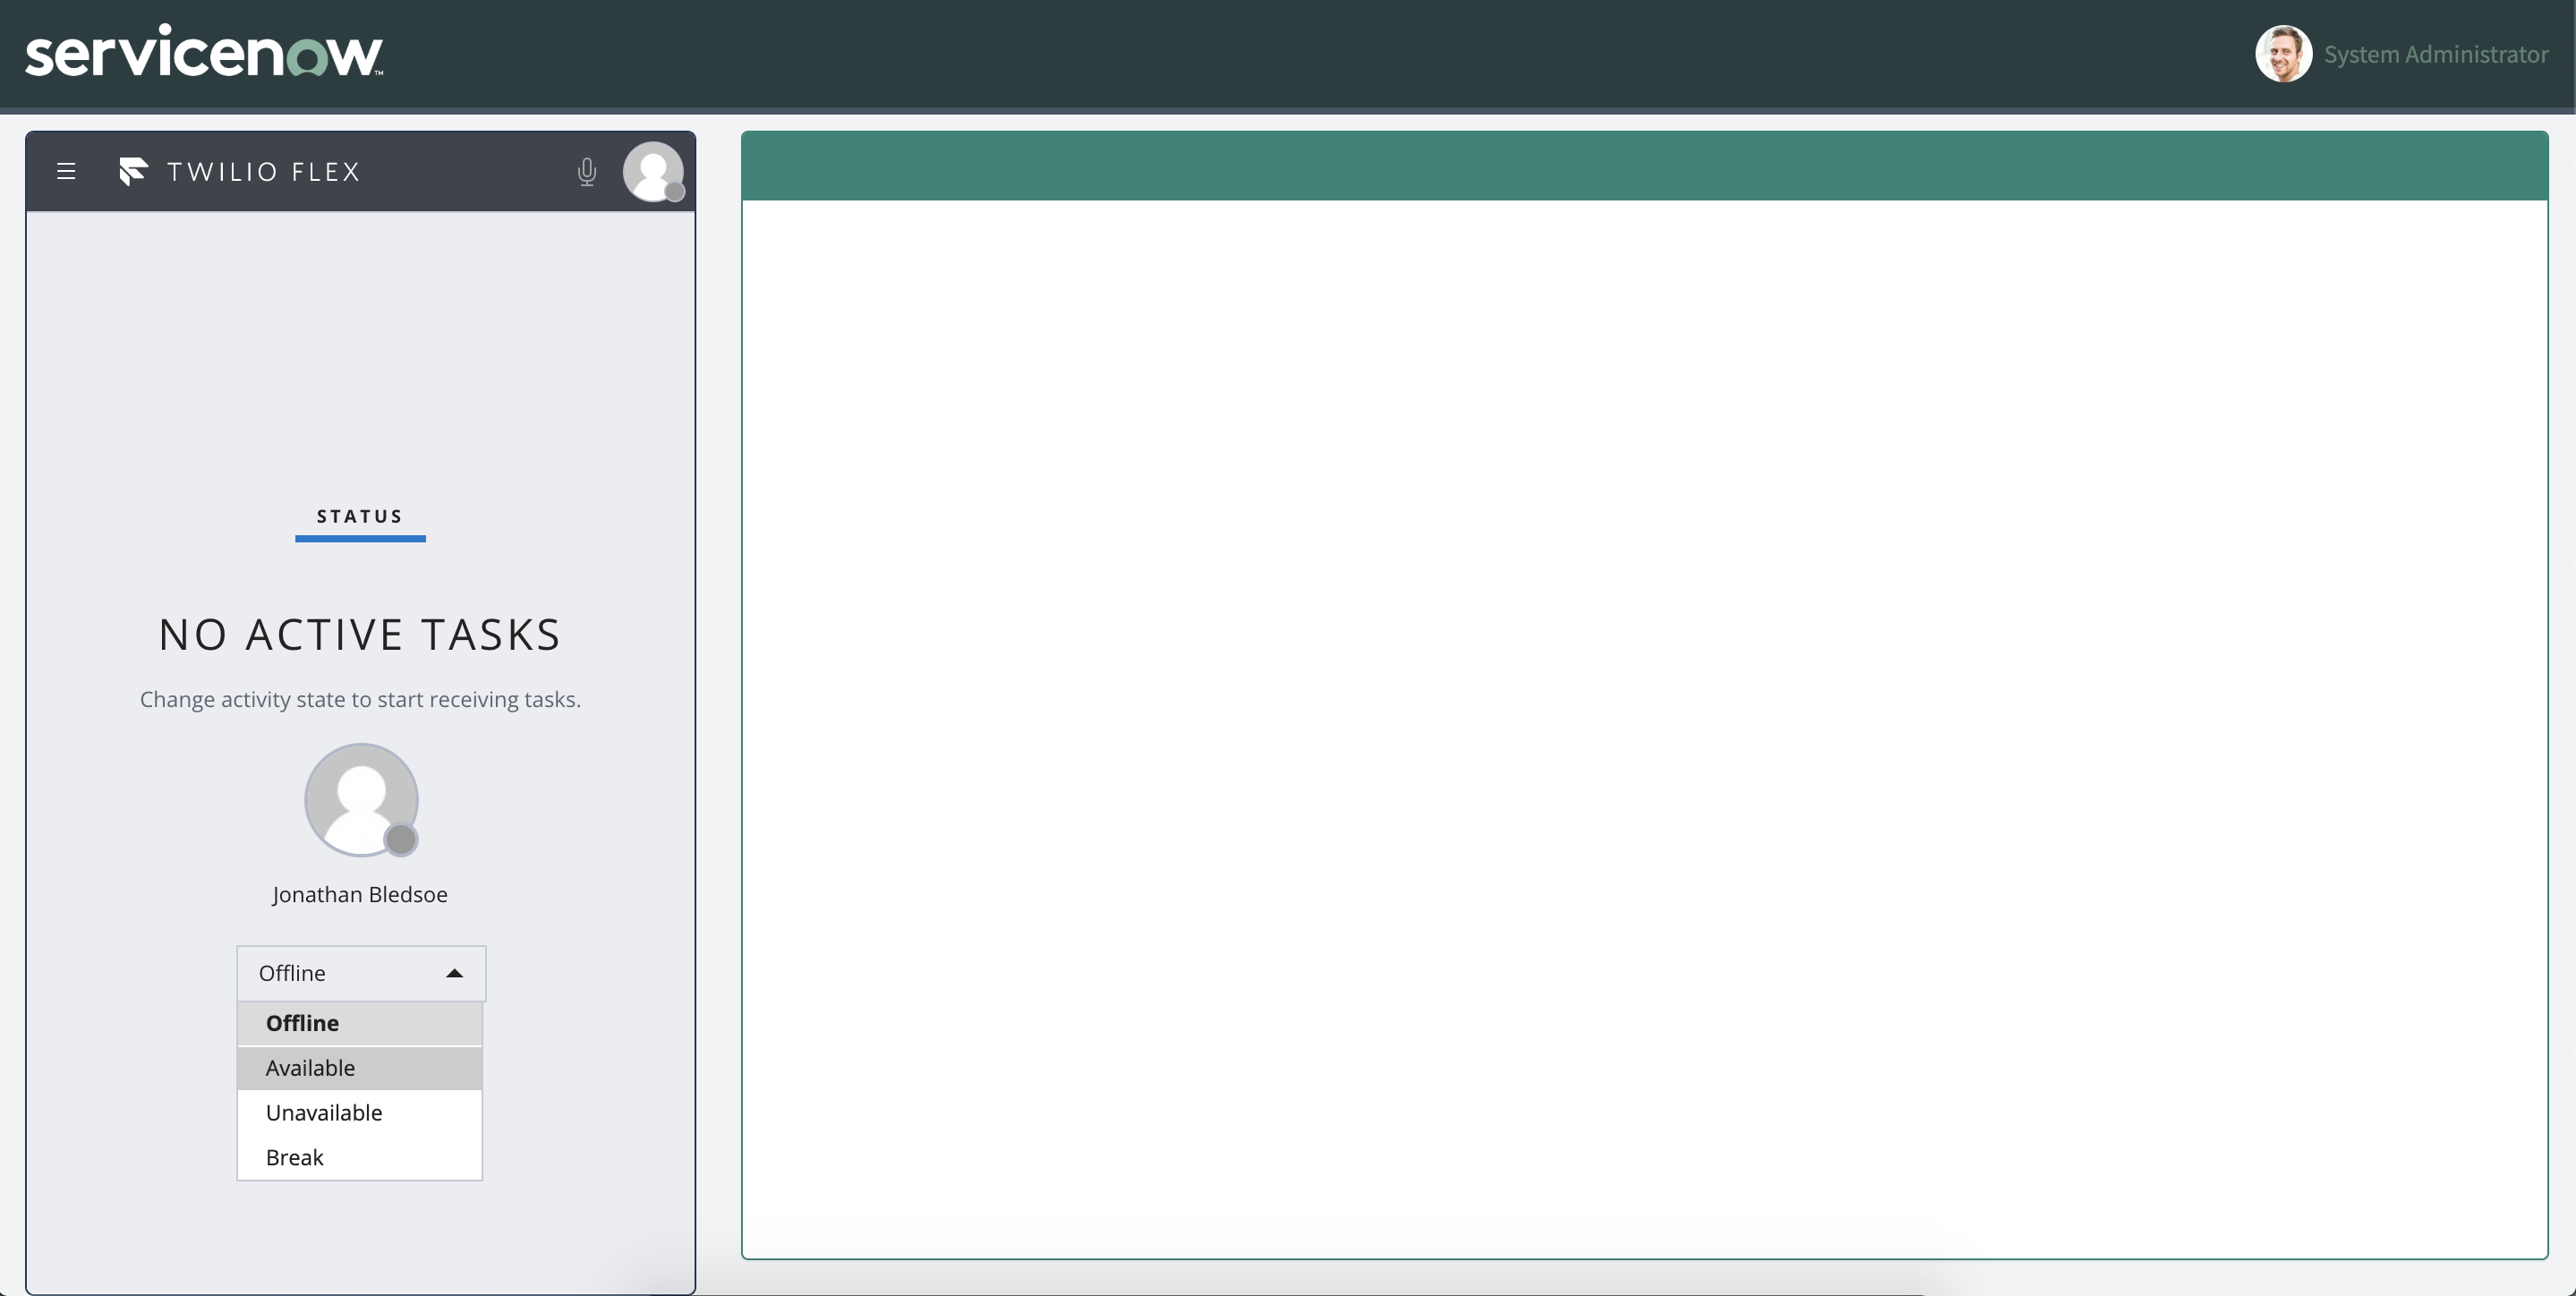
Move yourself to Available
Now simply call or text the number you got with your Twilio account (you can find that here) and once you reach a path which speaks to an agent, you should see the call / message pop up in Flex.
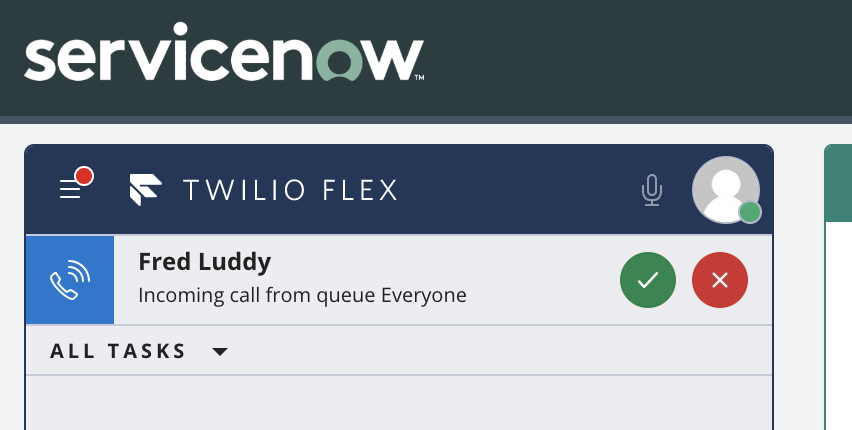
Once you accept, the appropriate ticket record should pop open on the right!
CELEBRATE!
You earned it! Take this MVP to your boss and knock their socks off! And next time you see a Southwest plane, think of Jonathan and smile!
But wait! Now What?!?!?!
There is still plenty to do. Here’s a list of some things you may want to add!
- Enable web chat - We provided only Voice and SMS flows, but you can use what we have given you as a blueprint!
- Add automated password resets. Add functions that implement verify and call them from your Studio IVR flow. Once the user verifies their account, reset their password and send it to them via SMS!
- Ticket deflection with Autopilot. Use autopilot to understand intent, and walk the user through basic troubleshooting steps before passing to an agent. All context is forwarded to the agent automatically, so they can start at step 10 instead of 1!
- Single Sign-On - https://www.twilio.com/docs/flex/configuring-single-sign-and-identity-provider-integration
- Advance routing rules in TaskRouter - https://www.twilio.com/learn/contact-center/taskrouter
- Hours of Operation - https://www.twilio.com/blog/custom-javascript-twilio-functions-code-studio-flows>
- Function Security for your plugins - https://www.twilio.com/docs/flex/call-functions-from-plugins


Related Resources
Twilio Docs
From APIs to SDKs to sample apps
API reference documentation, SDKs, helper libraries, quickstarts, and tutorials for your language and platform.
Resource Center
The latest ebooks, industry reports, and webinars
Learn from customer engagement experts to improve your own communication.
Ahoy
Twilio's developer community hub
Best practices, code samples, and inspiration to build communications and digital engagement experiences.