Introducing the flex-project-template developed by Twilio Professional Services
Time to read:
November 13, 2023
Written by
Reviewed by
Twilio Flex is a digital engagement center platform offering powerful configurability. Your team will be able to build a customized solution that aligns with your specific business needs, likely leveraging Twilio Flex plugins. These plugins are a product of the extensive implementation experience of Twilio Professional Services and allow your team to build the exact bundle of features that address your use cases.
But you may be wondering how to manage increasing complexity with multiple plugins, a common scenario for Flex customers. Having learned this lesson a few times over, Twilio Professional Services has created the flex-project-template. Essentially, this is one supported plugin with customizable parts that ensure that your Flex solution is configured correctly, and that each feature is threaded together with other products and features for optimal performance and scalability.
In this post, learn how to leverage the flex-project-template to accelerate your time to value with a customized Flex solution. In this guide you will see how a solution can be packaged and cloned to any Twilio Flex account, starting with the example features made available in the template.
This flex-project-template distills down all the development best practices the Professional Services team have learned working with customers into a single reusable package. This allows your team to go from 0 to 100 in creating their own bespoke Flex behaviors in a reliable, testable, and reproducible way.
What you’ll learn:
- A strategy for deploying all the dependencies of a typical flex project
- An introduction to the flex-project-template which can be used as a platform to build out any flex customizations, big or small.
- An introduction to features bundled with the flex-project-template that will help you understand best practices as well as how to tackle many of the typical features our customers want to build.
- How GitHub actions can be used to deploy a Flex Solution using just an API Key and an Account SID.
Prerequisites
- A phone number to create a Twilio Account
- Google Chrome to use Twilio Flex
- A GitHub account to create a new repository from the flex-project-template
Build ( ~ 10-15 minutes)
Setup a fresh Twilio Flex Account
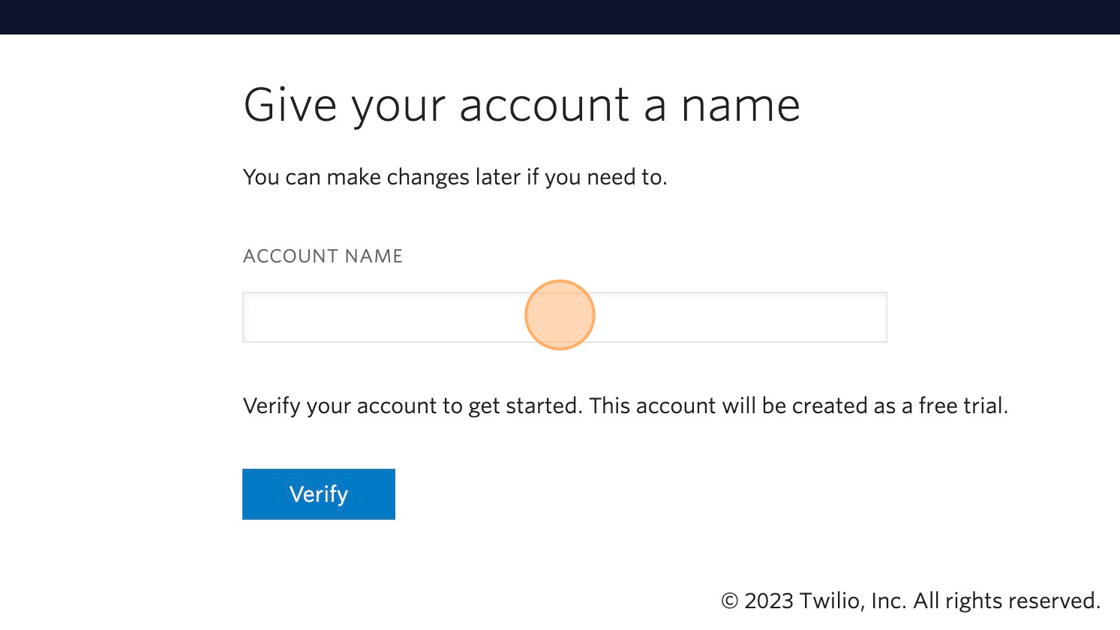
Create a new Flex Account at this link; it will ask you to provide a name.
It's typically a good idea to start with an account name mapping to your environment of the format <project-name_environment_name> (e.g. acme_solutions_dev). In this instance, we will go with blog_example.
Then, click Verify.
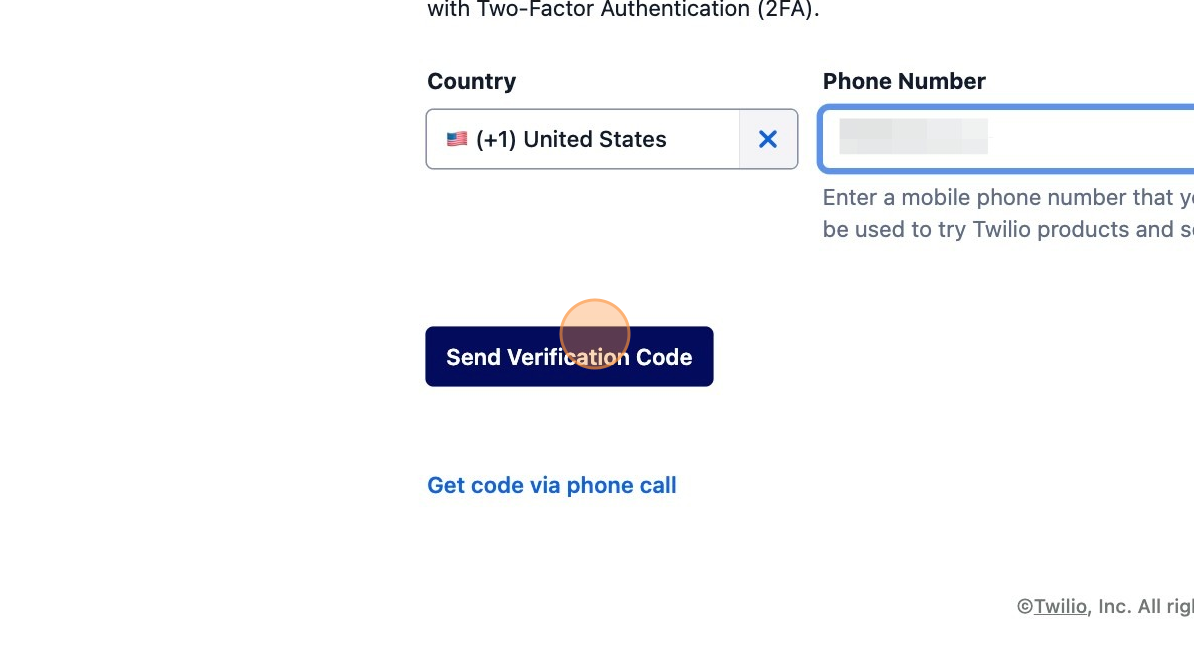
Click the Phone Number field, enter your phone number and click Send Verification Code.
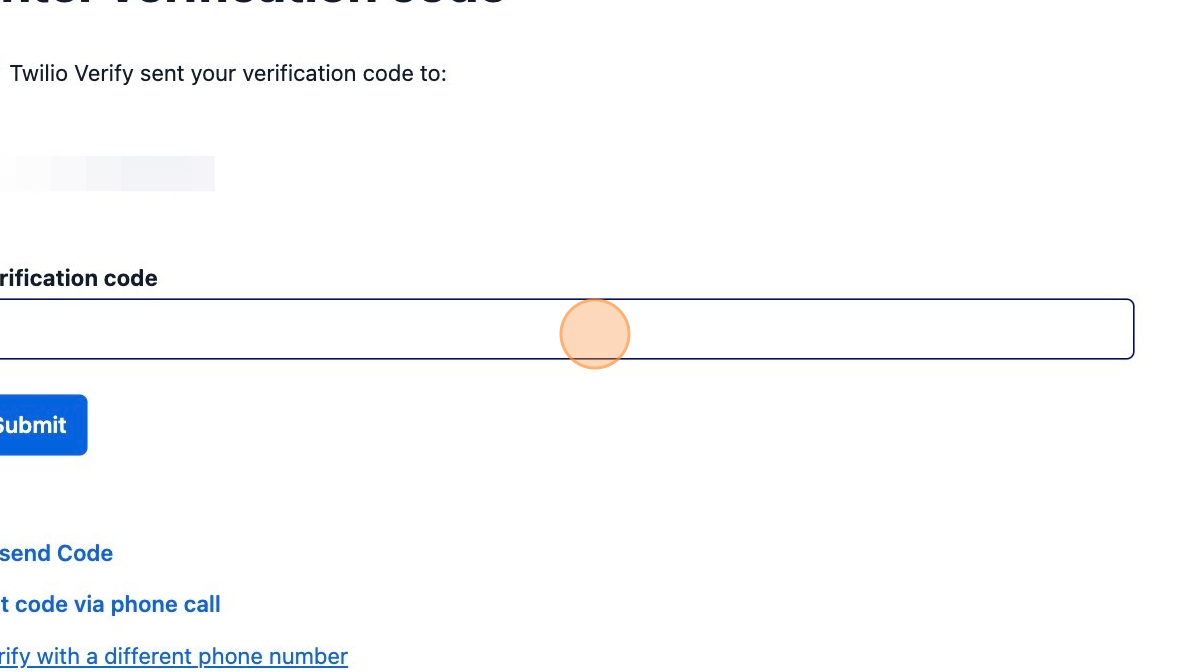
Enter the Verification code you received to your device and hit Submit.
Clone the Template
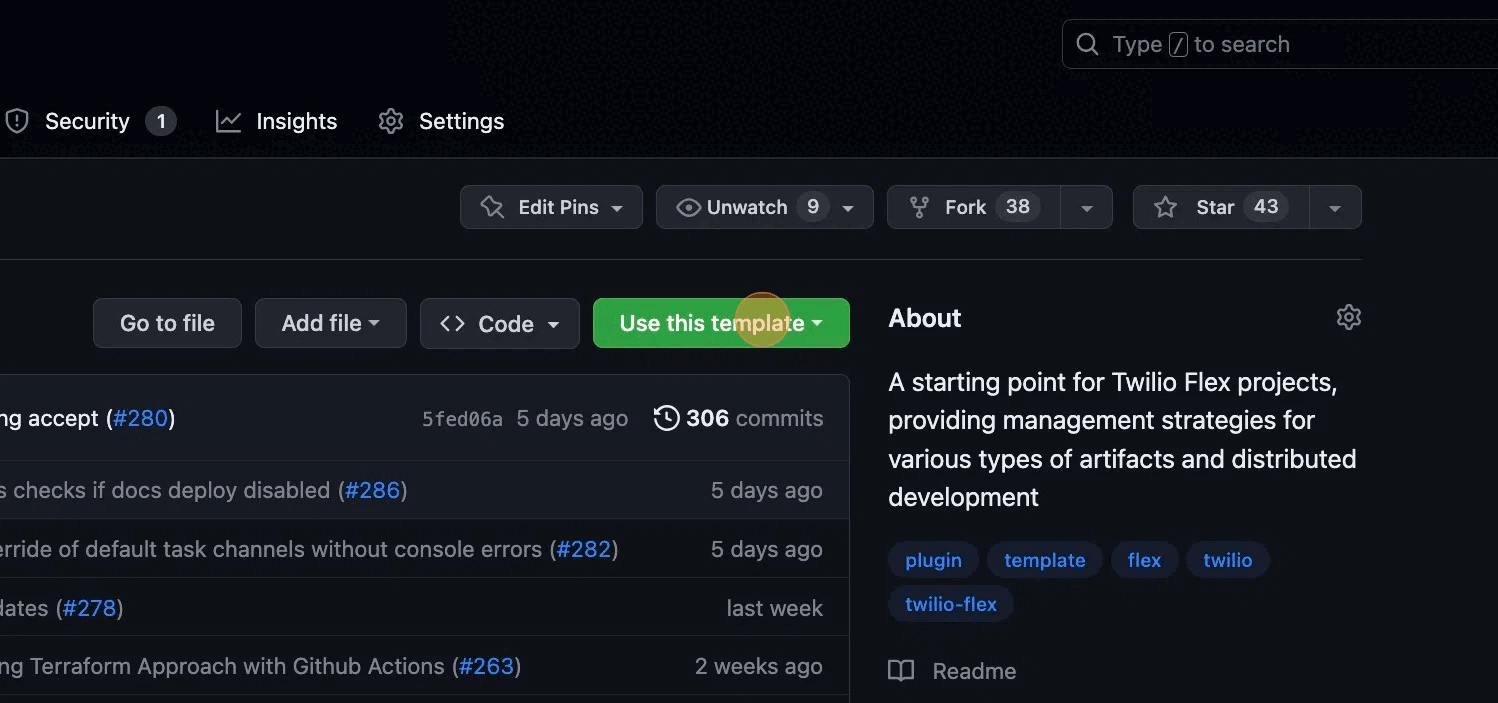
Go to the Twilio Professional Services - Flex Project Template repository on Github. Click Use this template, then Create a new repository.
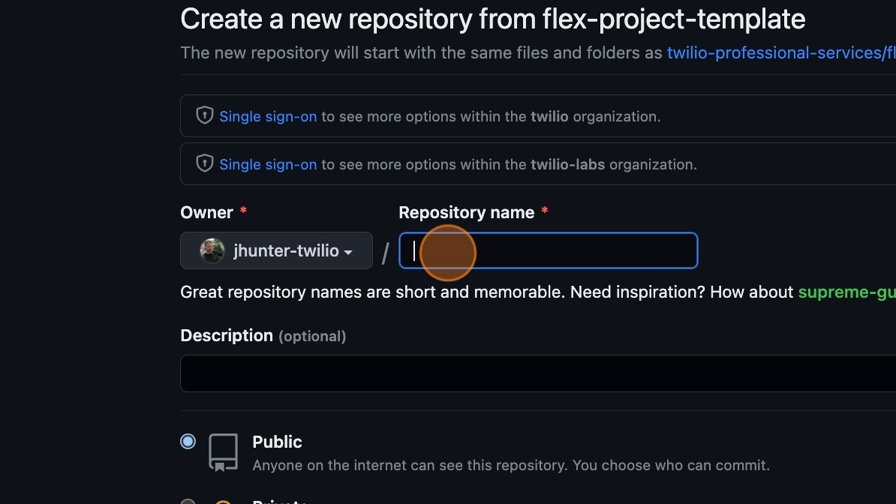
Click Select an owner and provide your owner base. In this case, I'll select my personal owner account.
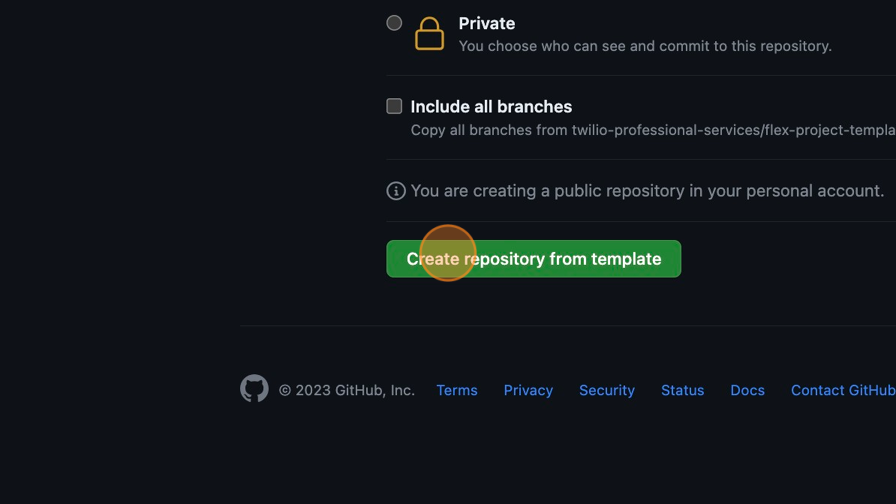
Select public repository if you are on the free Github tier so you can take advantage of the environments feature later.
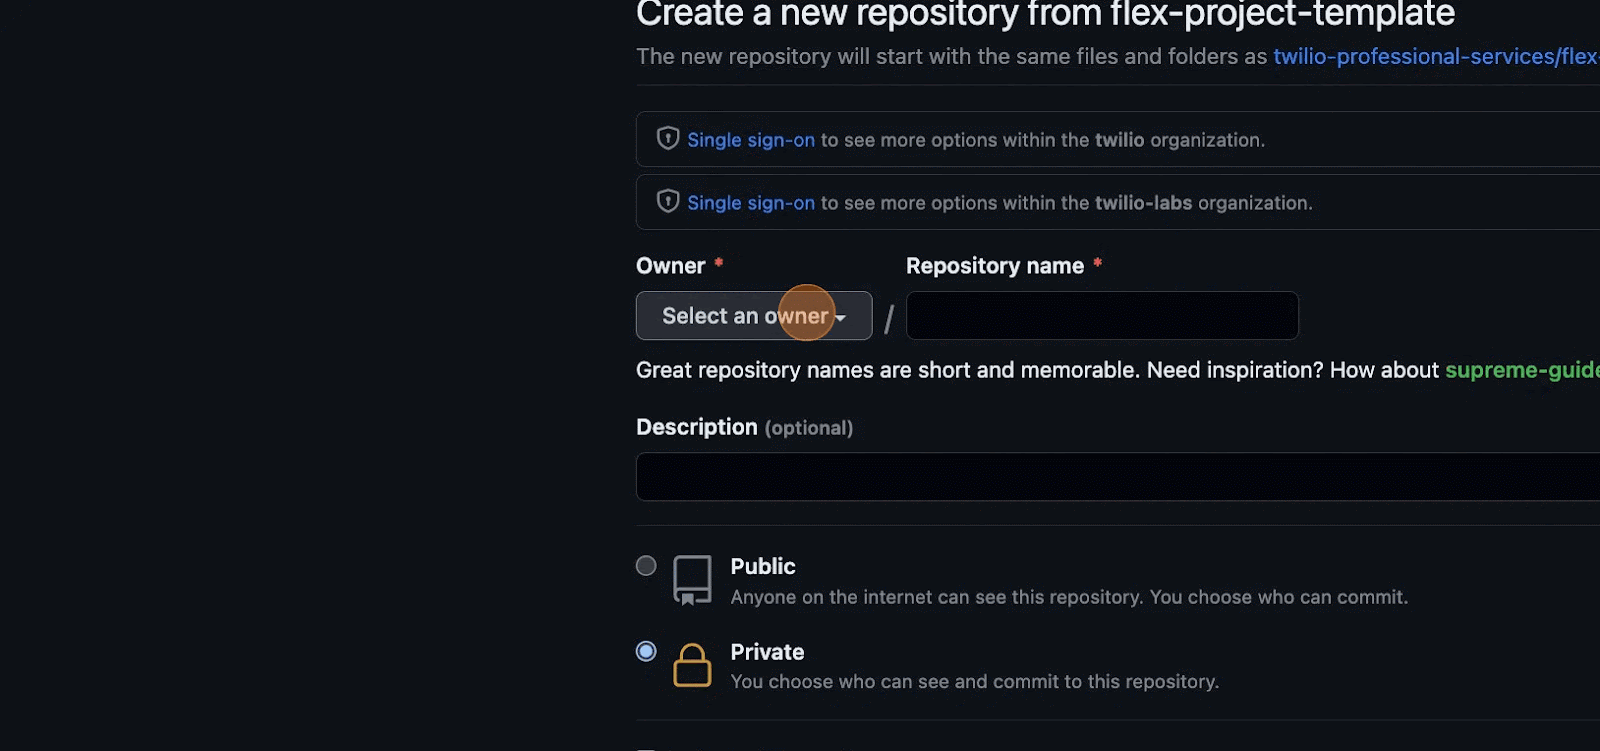
Click the Repository name field and give your repository a name; "acme_flex_customizations" might be one example. I'll use blog_example again.
Click Create repository from template.
Generate Twilio API keys
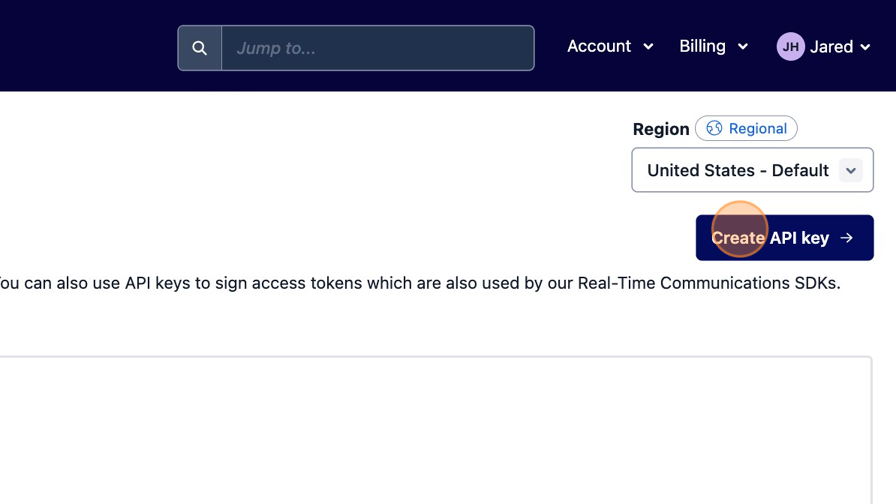
Switch back to your Twilio Console for the new Flex account you created and click the Account dropdown. Then, click API keys & tokens.
Click Create API key.
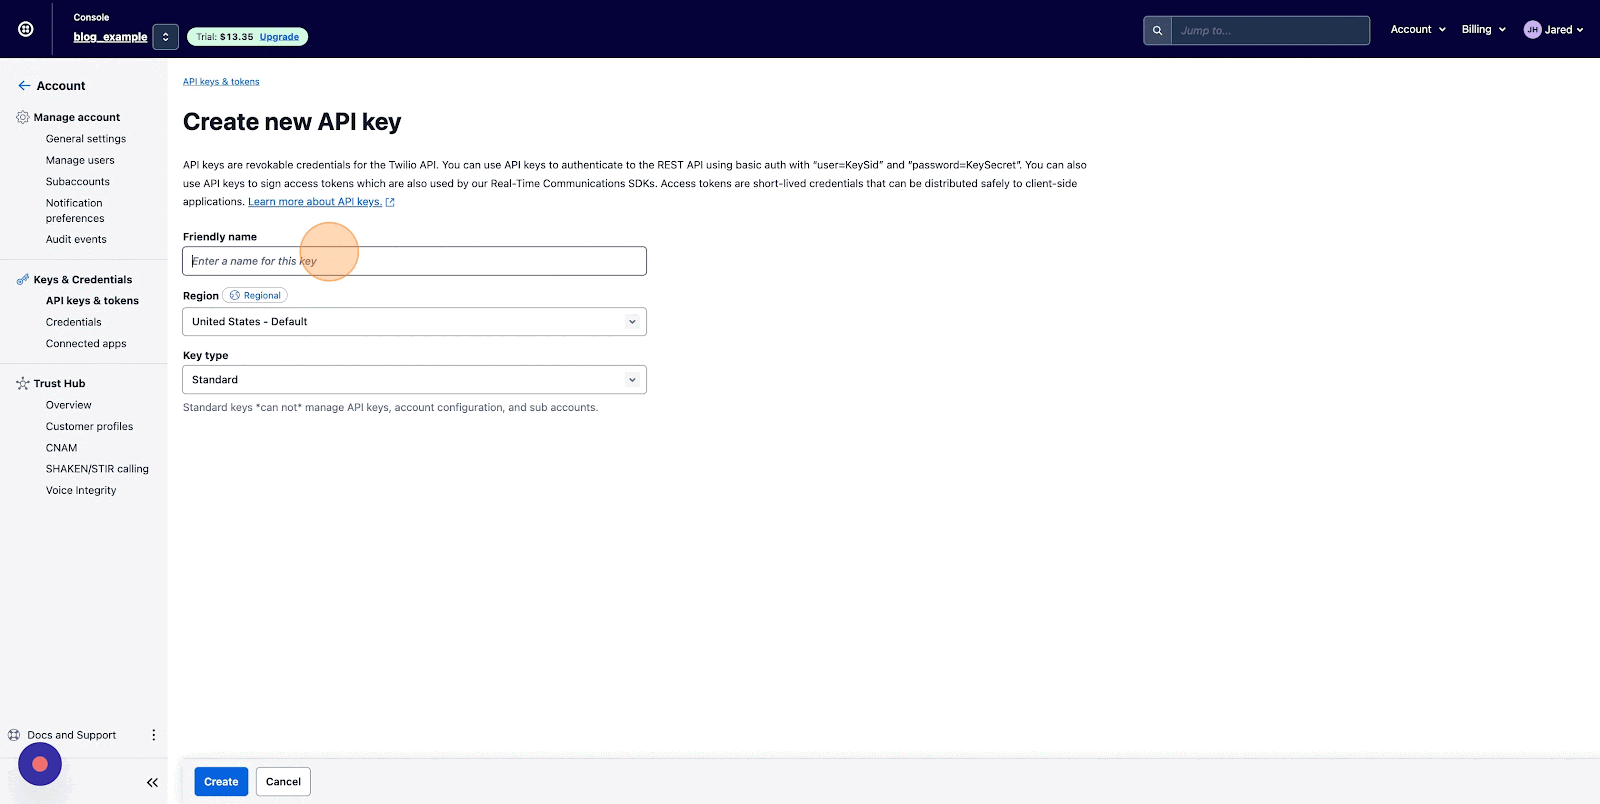
Click the Friendly name field and give the key a name. I will go with "Github Actions Key.” Then, click Create.
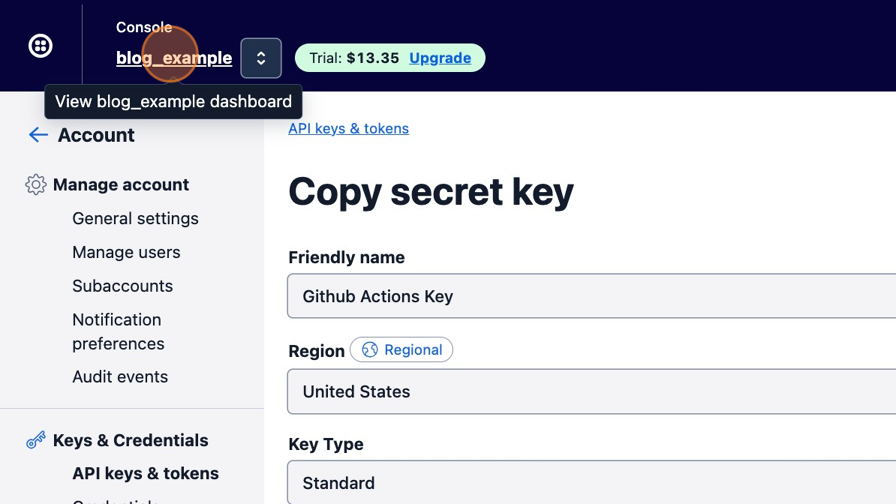
Copy the API key SID and Secret and temporarily store them in a safe place.
Navigate over to the account landing page by clicking on the account name on the top left of the Twilio Console page, then copy the Account SID and temporarily store it in a safe place as well, to be used in the following steps.
Configure Github Actions with Twilio API key and Account SID
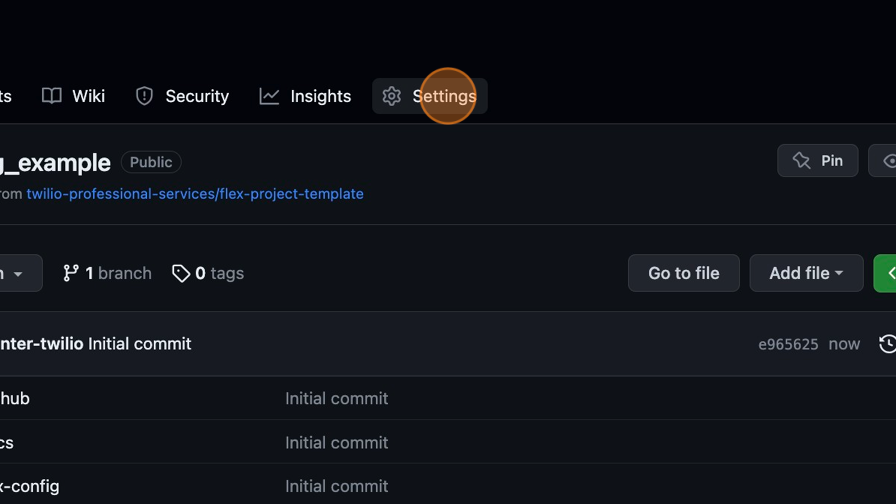
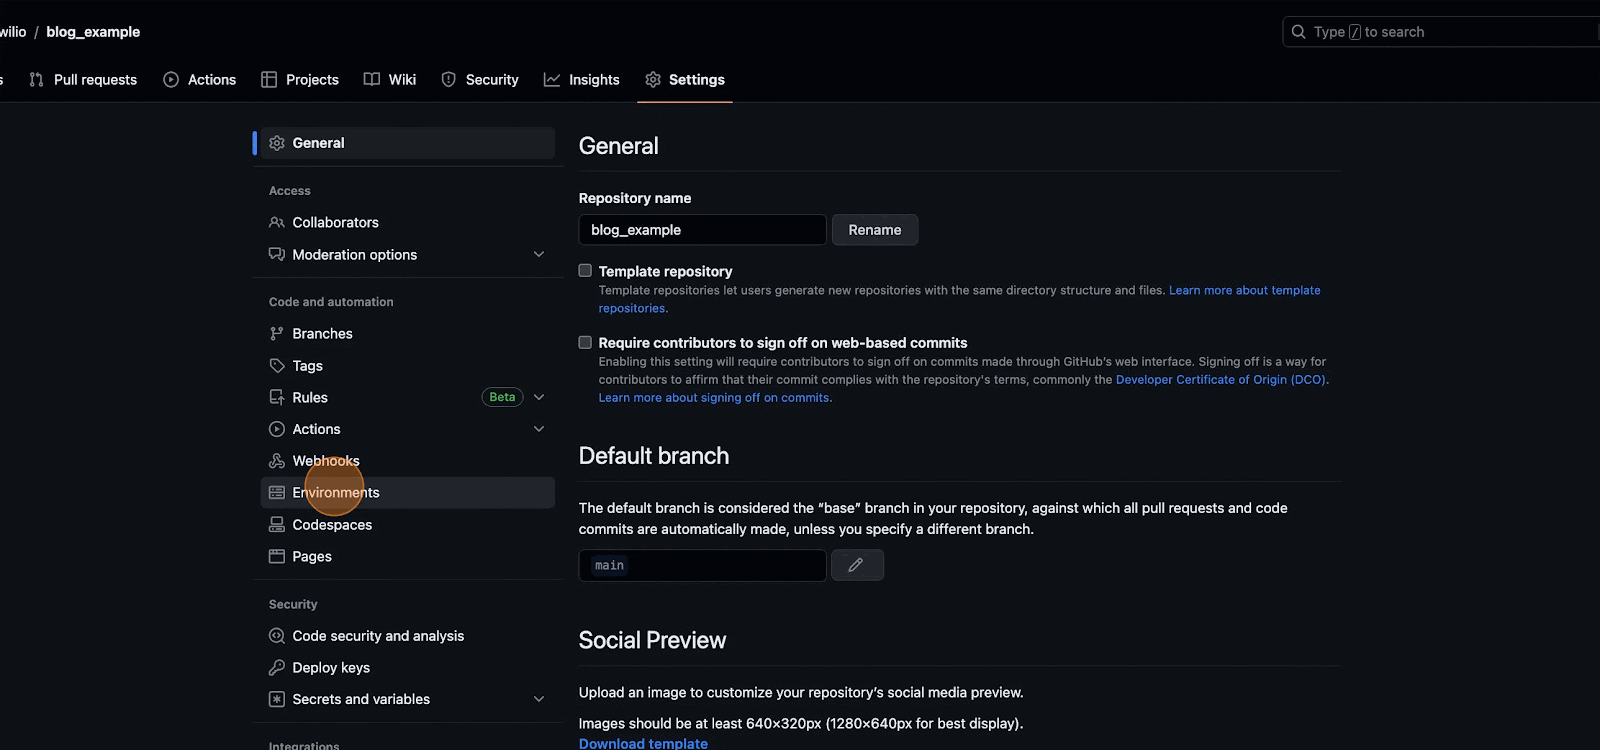
Go back to your freshly minted GitHub repository and click Settings.
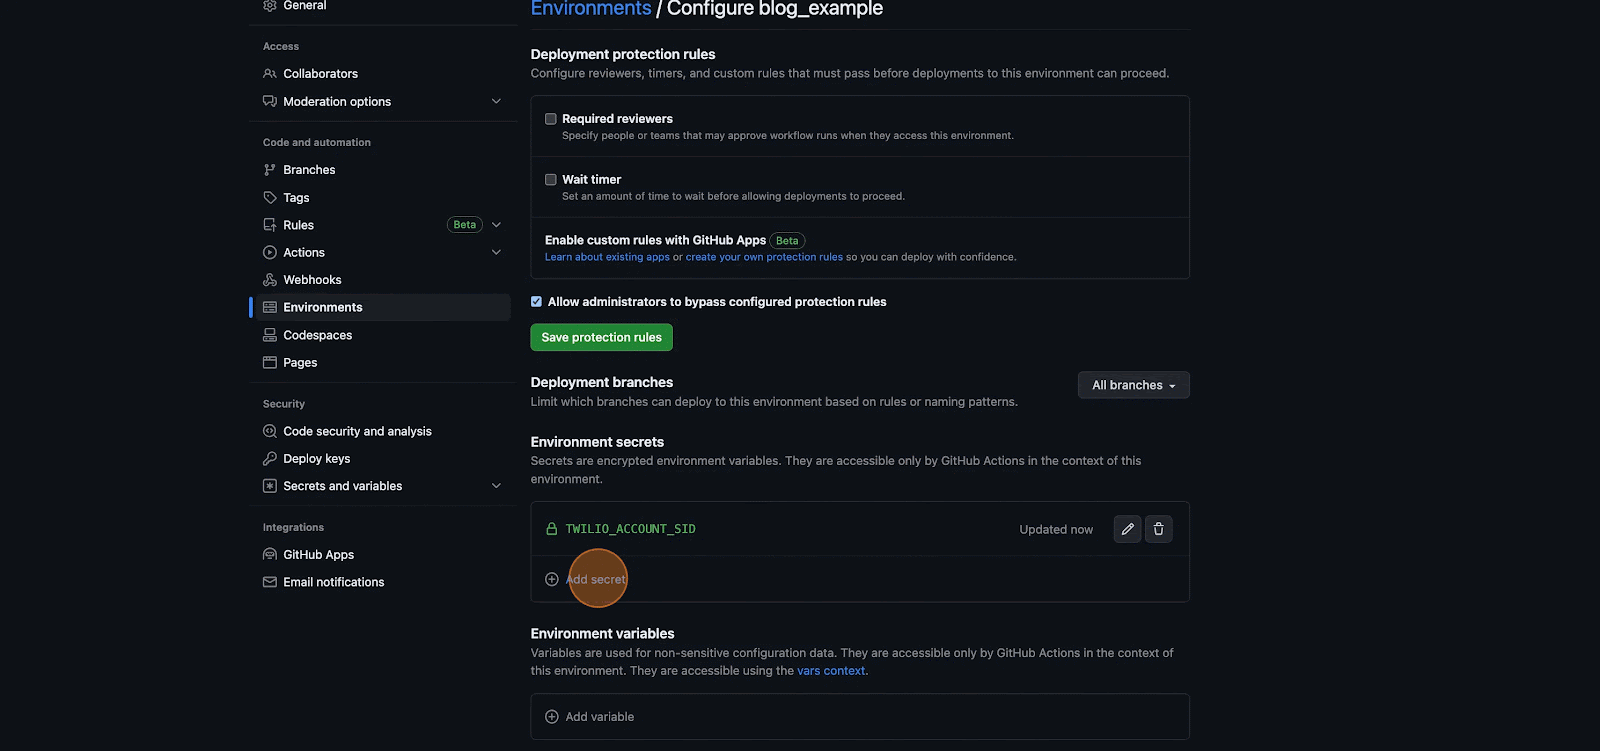
Now, go to environments. Click New environment, and then the Name* field. Give your environment a name. I am going to match the name I gave my Twilio account, "blog_example." Click Configure environment.
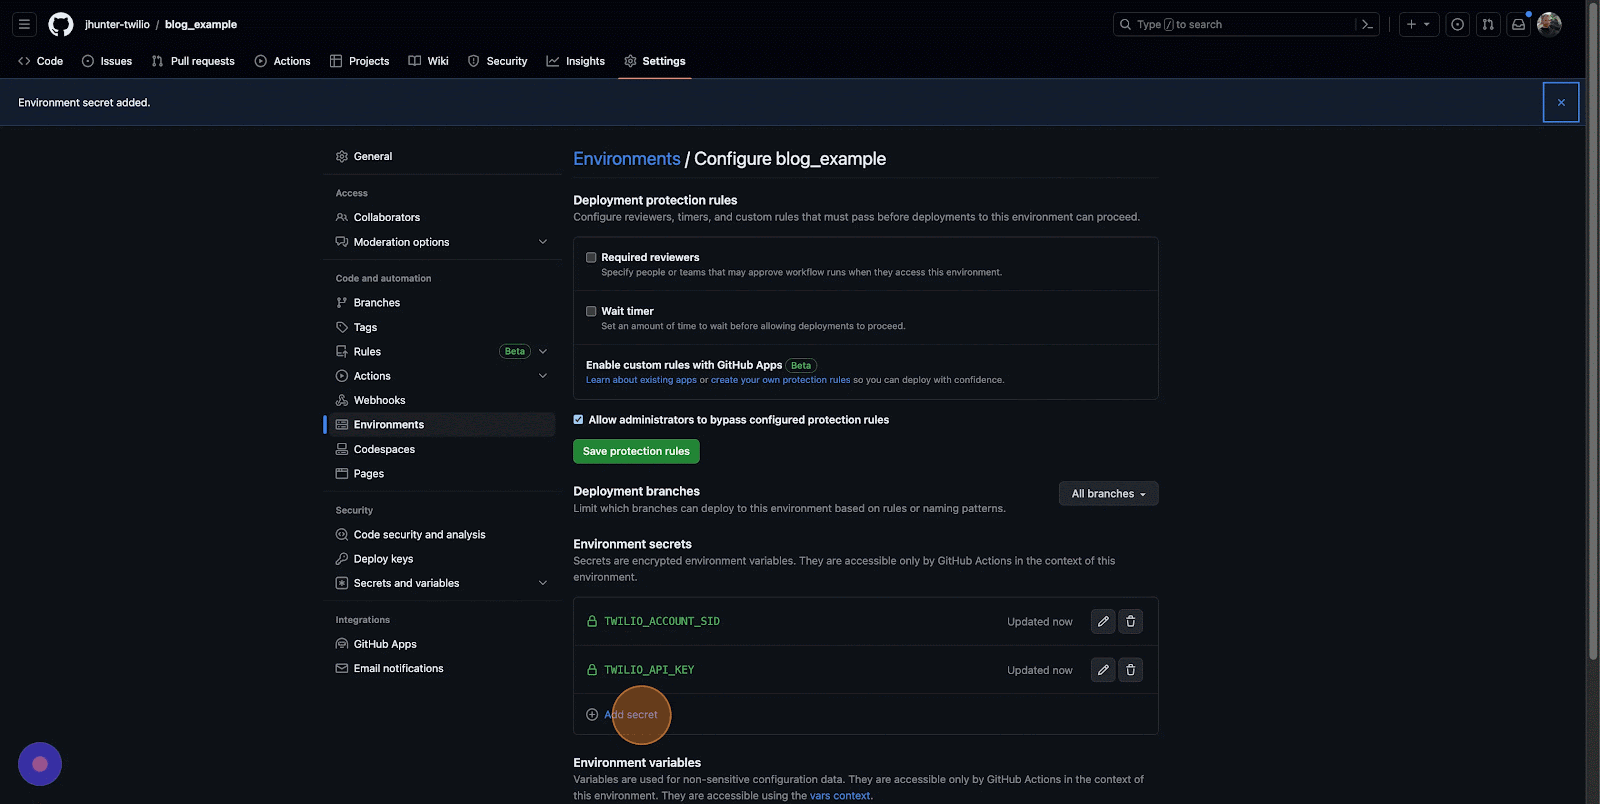
Now, click Add secret and then the Name field. Enter TWILIO_ACCOUNT_SID. Click the Value field and paste in the Twilio Account SID you previously saved to a safe location.
Click the green Add secret button to complete adding your secret.

You will now repeat the same steps with the API key. Click Add secret again. Click the Name field and enter TWILIO_API_KEY. Next, click the Value field and paste in the Twilio Key SID you previously saved to a safe location (note it should start with an "SK).
Finally, click the green Add secret button to complete adding your secret.
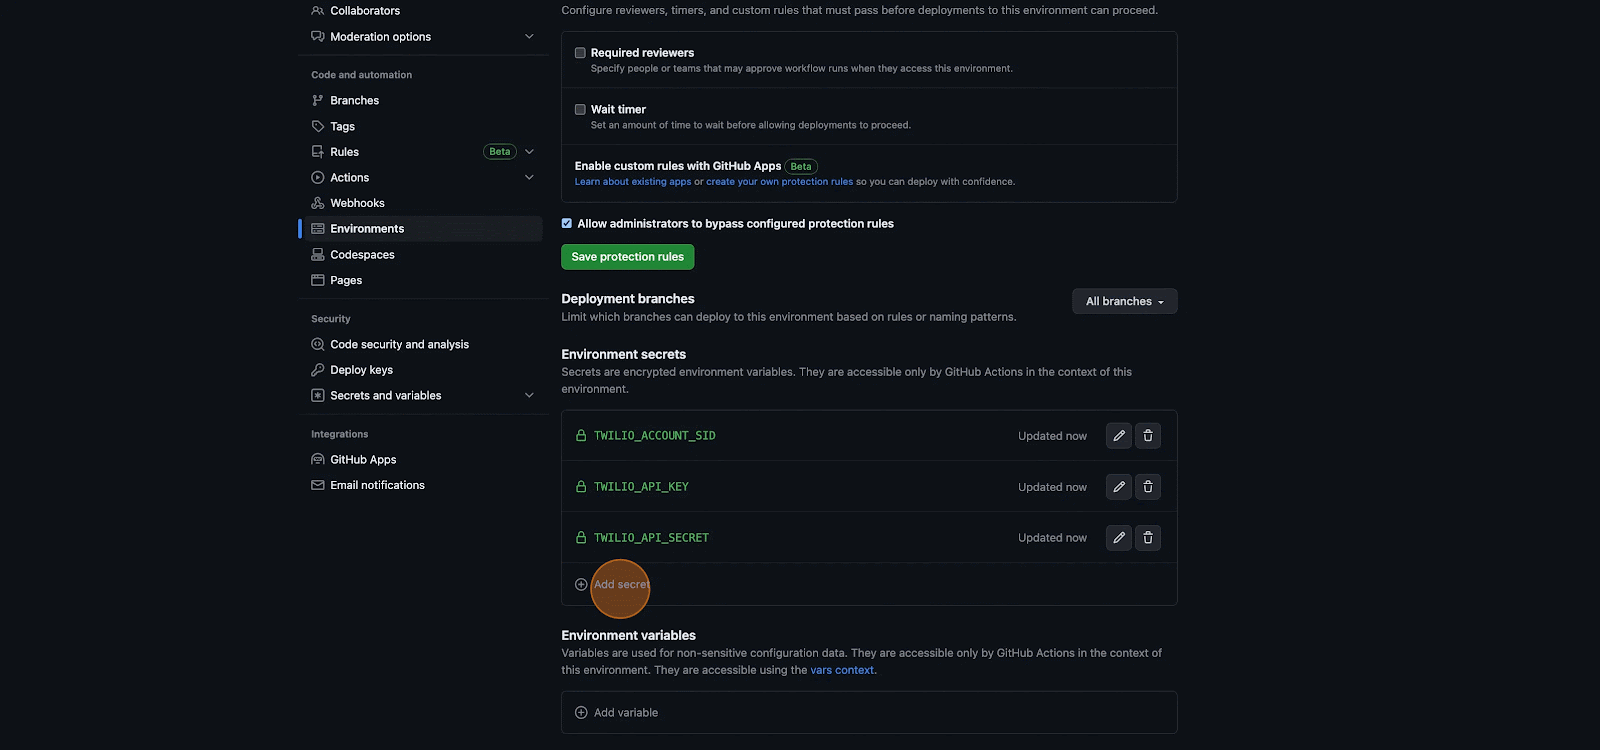
You will repeat the same steps again for the API secret. Click Add secret. Click the Name field and enter TWILIO_API_SECRET. Click the Value field and paste in the Twilio Key Secret you previously saved to a safe location. Click the green Add secret button to complete adding your secret.
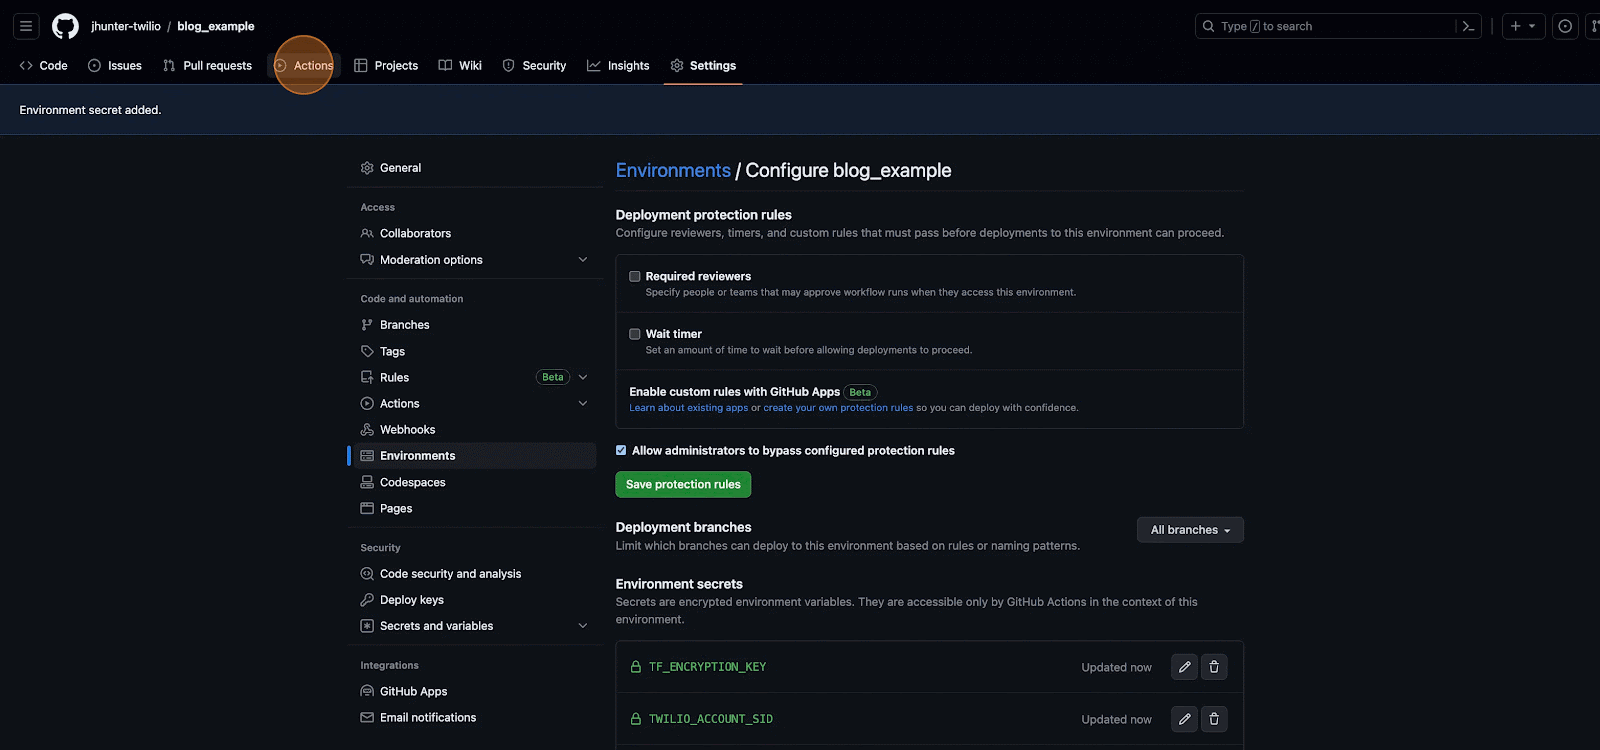
For the last time, you will repeat the same steps for your encryption key. Click Add secret, and then click the Name field and enter TF_ENCRYPTION_KEY. Click the Value field and enter any passphrase you want to, which will be used as the encryption key for the terraform state file stored as a GitHub artifact. Finally, click the green Add secret button to complete adding your secret.
Deploy the Flex solution
Follow the steps below to deploy your solution.
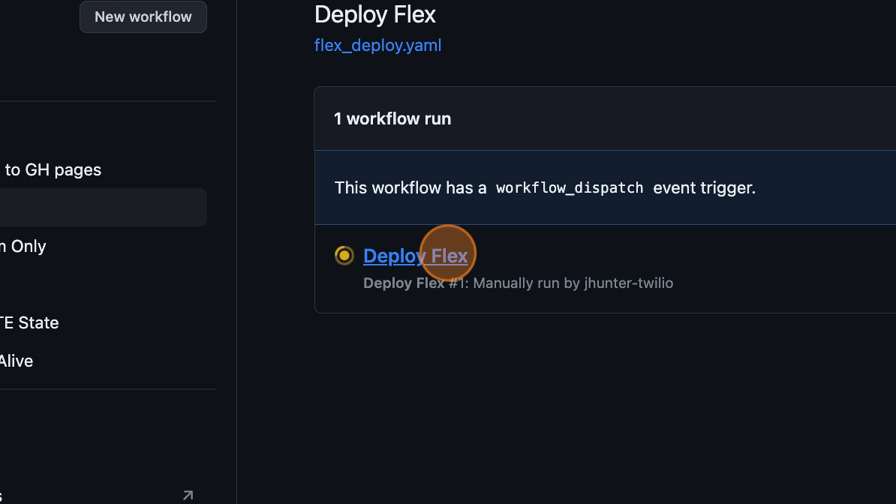
- Click Actions
- Click Deploy Flex
- Click Run workflow
- Select your branch, in this case "main"
- Select the environment you just created, in this case, "blog_example"
- Check the Deploy Terraform? field
- Check the Is this the first release to the environment? field
- Click the Run workflow button
After your GitHub action has launched, the instance of the execution will appear. Click on it to observe the deployment steps.

Enable the dial pad for Flex
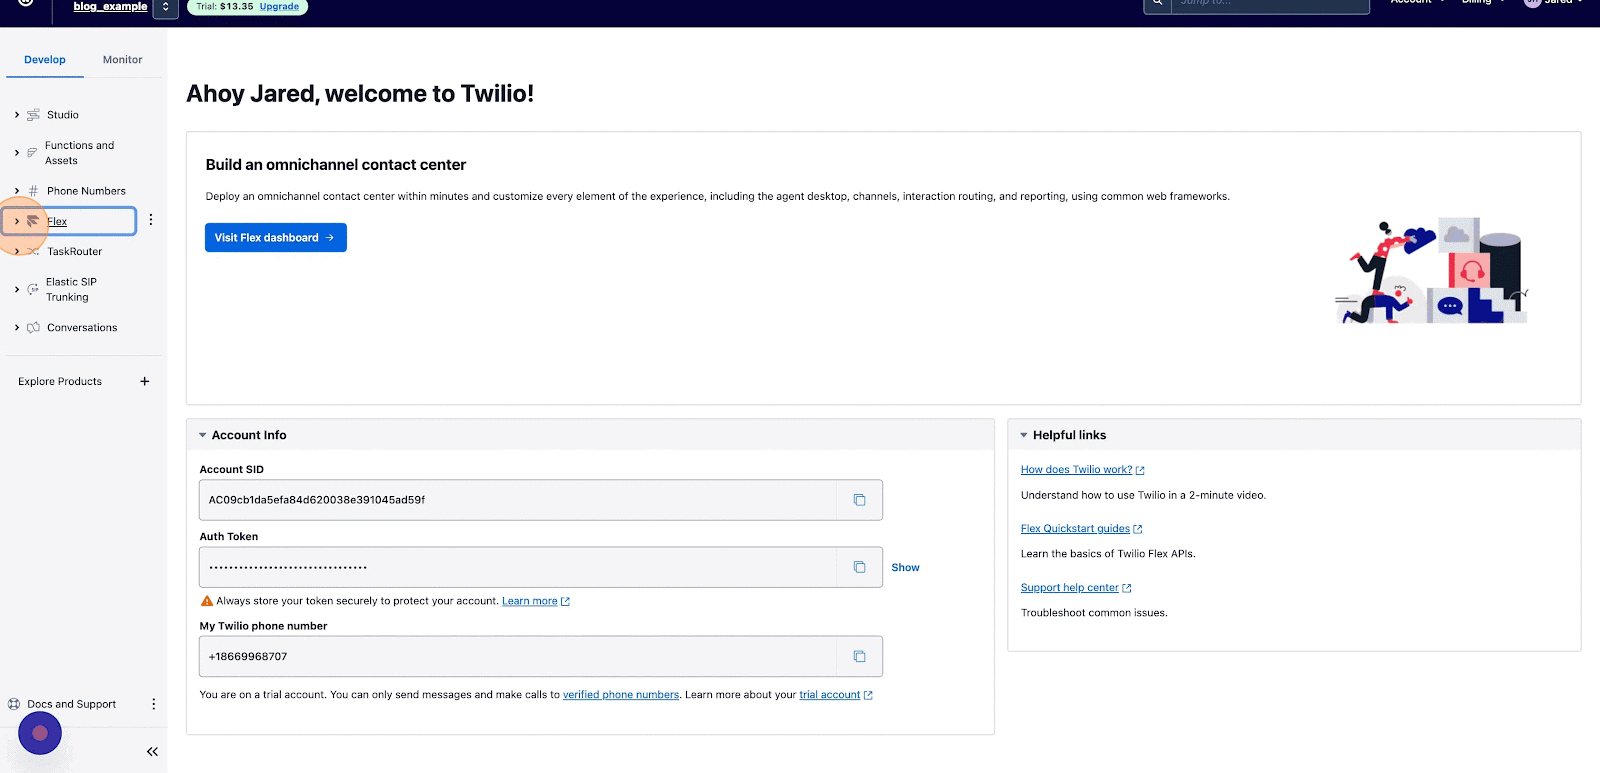
While you wait for GitHub actions to deploy our Flex solution, navigate over to the Twilio Console to configure Outbound Calls for Flex. These are the steps to follow:
- Start by selecting Flex from the left hand panel. Click Manage
- Click Voice
- Check Enabled
- Click the Caller ID dropdown field. Then, select your desired Caller ID.
- Click the Task Queue field, and thenEveryone.
- Click the TaskRouter Workflow field and then Assign to Anyone.
- Click the CountryCountry info field and then "United States of America"
- Then enable call recordings by checking Enabled under call recordings
Confirm Deployment Complete
Go back to your Deploy Flex GitHub Action Script and make sure it has successfully completed. Once it has, you can begin using your cloned solution.
Configure Template Features
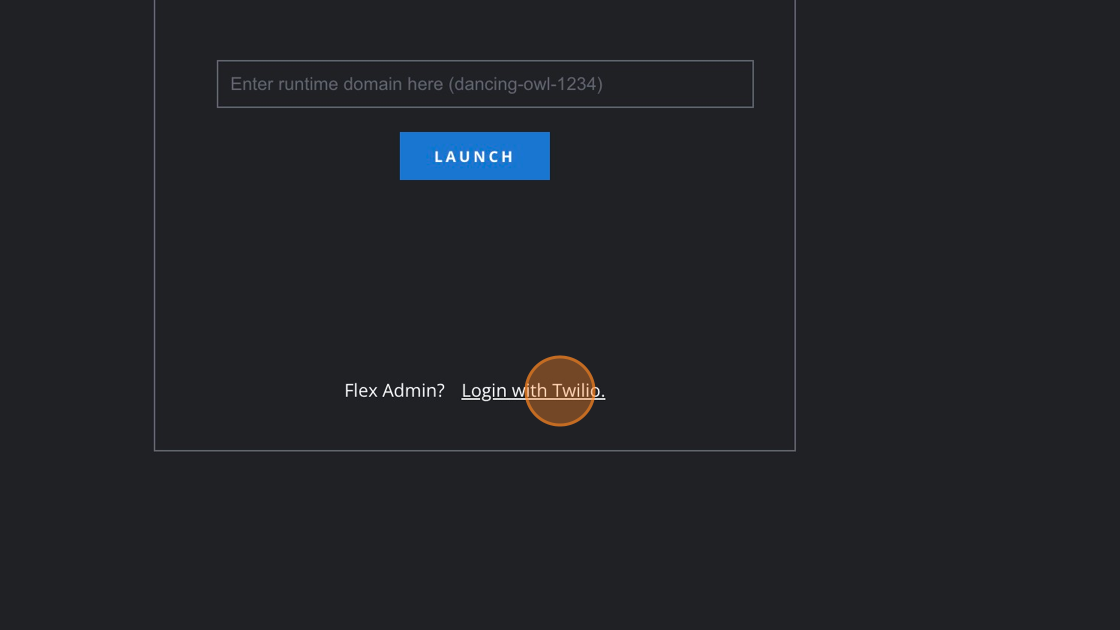
You should now be logged into Flex with the template features and dependencies deployed. From here you can go to the admin panel for the template features down at the bottom left corner.

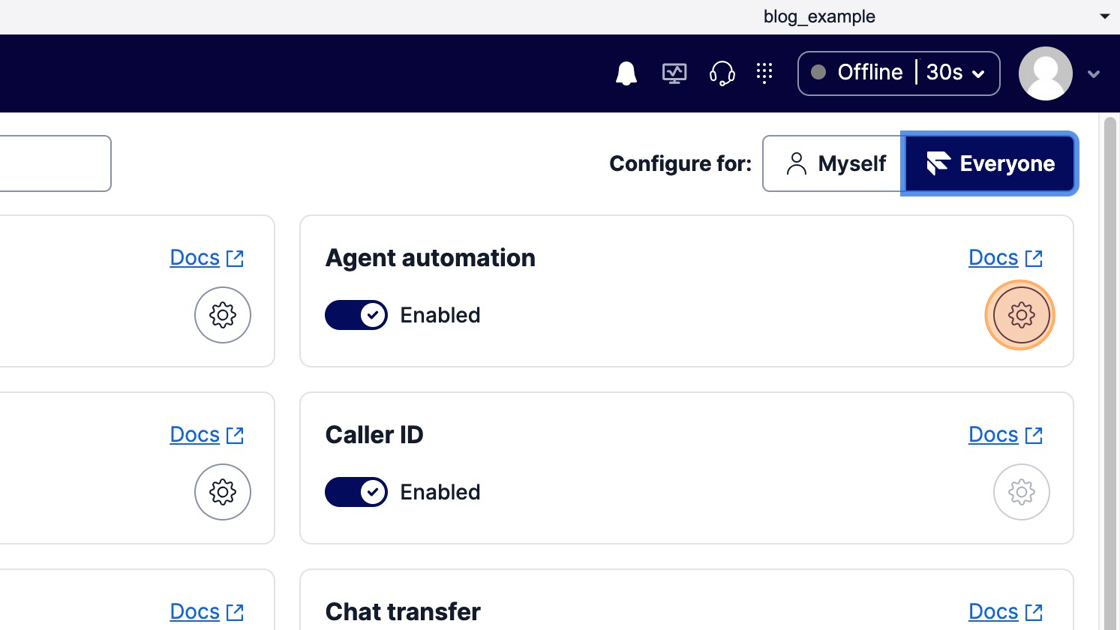
Click Everyone to manage the features globally for all users. From here you can enable or disable many of the features that come with the template.
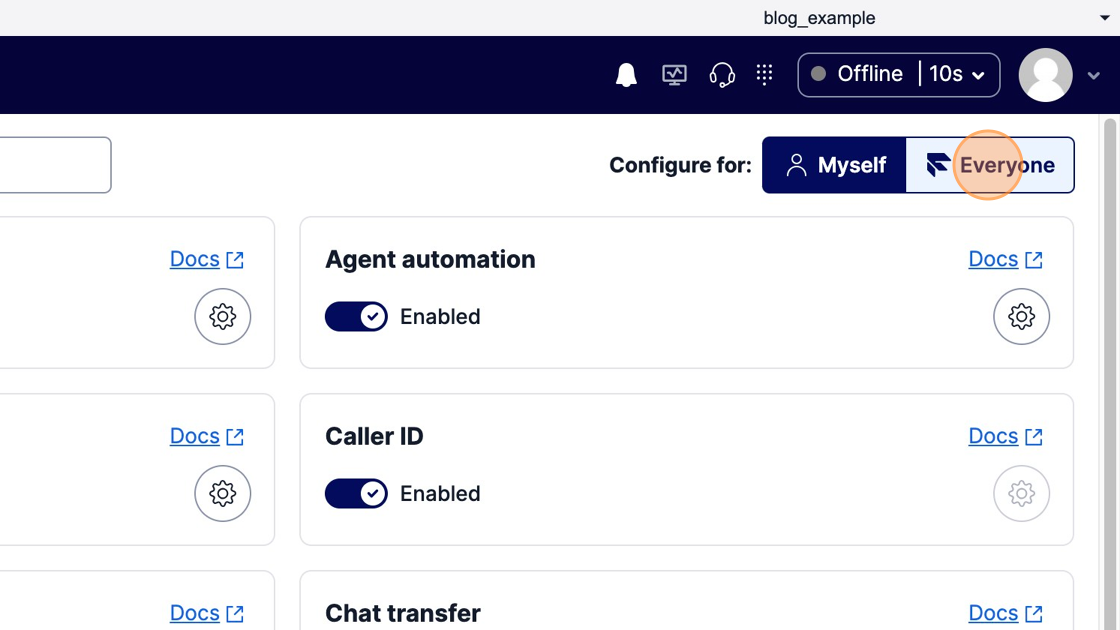
Click on the gear icon for any feature to tweak configuration. Each feature has its own set of configuration details. You can also just enable or disable each feature you want.
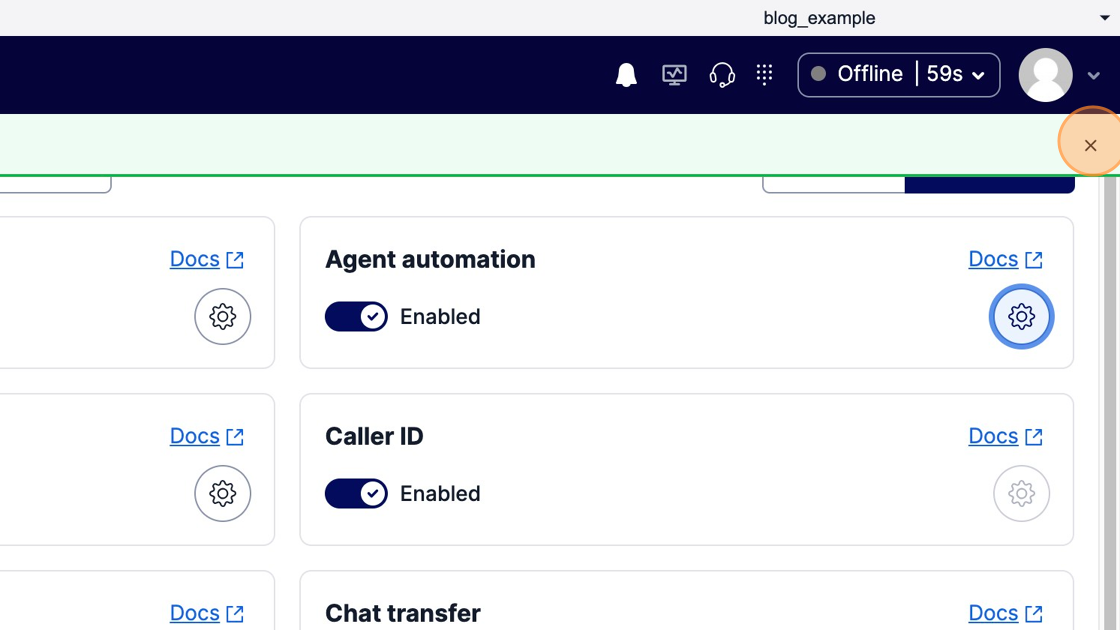
After saving your changes, you will see a green banner appear informing you to refresh your browser to see the applied changes. You can now refresh the browser to see the changes.
Test features by handling a voicemail or callback
Once you have done that, let's take a sample call.
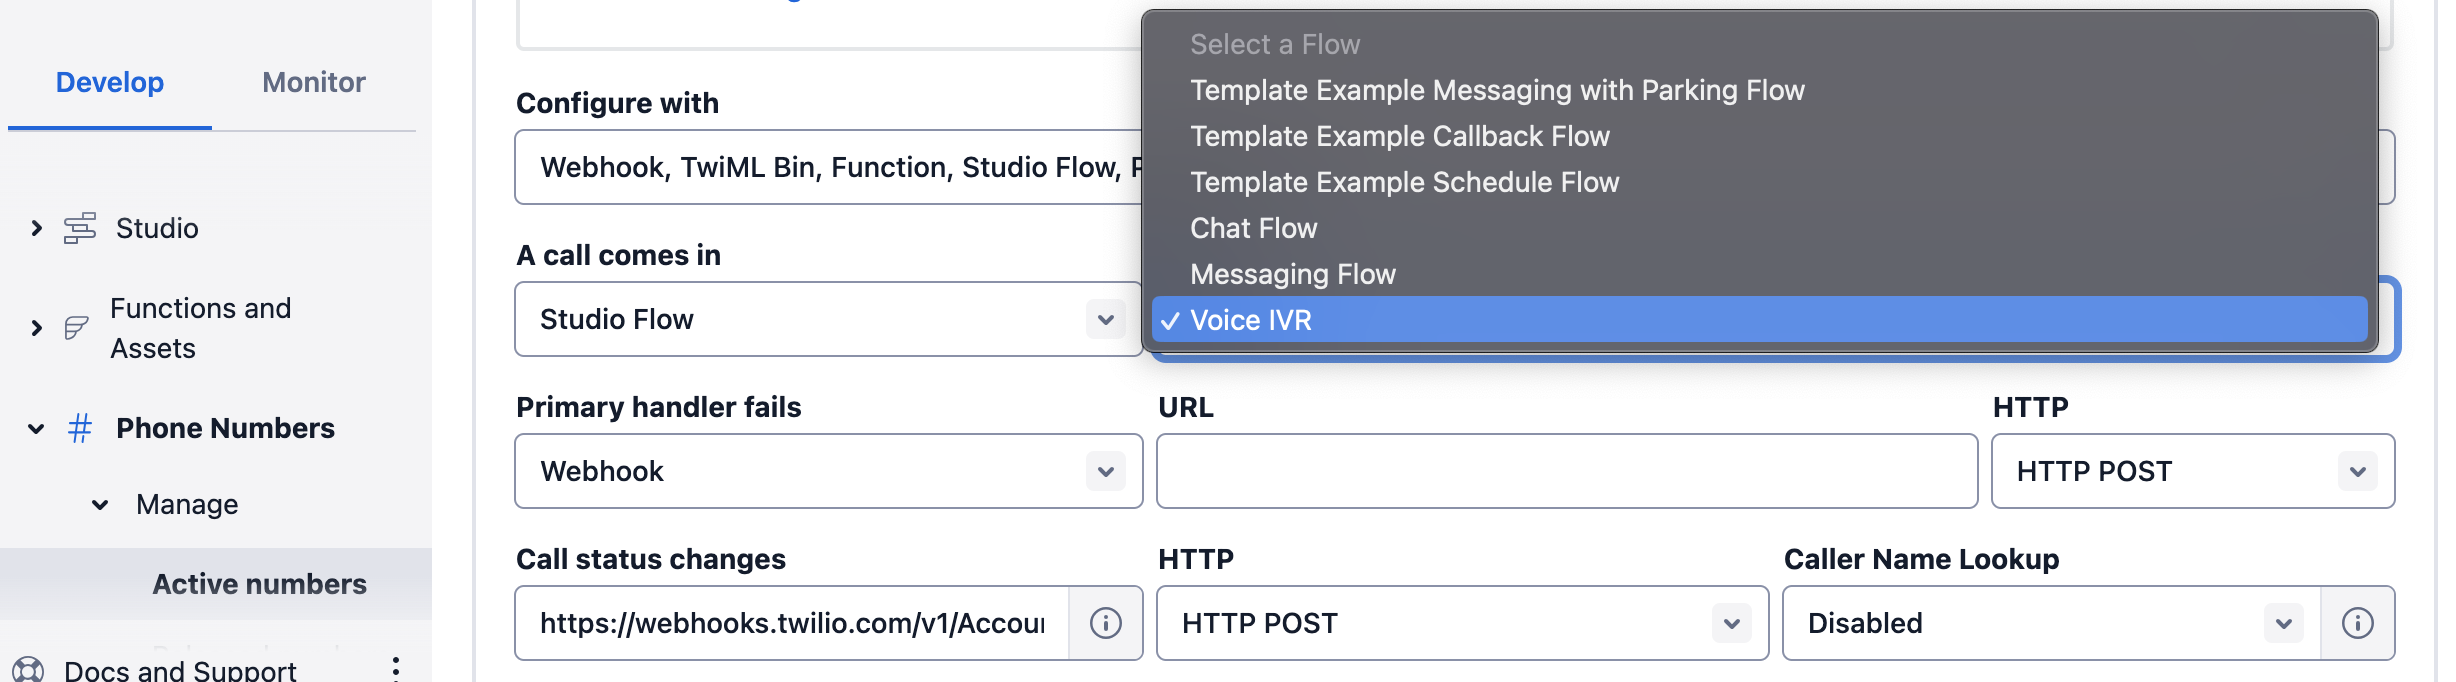
To do that, you first need to connect your phone number to the new studio flow that has the callback behavior plugged in. Navigate to the twilio console and then from the panel on the left hand side, select Phone Numbers (if it does not appear here, you will need to hit the Explore Products option and pin it to the side bar).
Under Phone Numbers you can now click Manage > Active Numbers where you should now see the phone number provisioned with your account (if you don’t see one you will need to buy one). Select the number to manage the webhook for when a call comes in and select the Template Example Callback Flow.
Now you can click Save Configuration on the bottom left of the screen.
You can now call the number shown and follow the prompts on the call to leave a callback or voicemail.
Next, move your status to "Available" in the top right corner. This should pop-up and auto accept a callback or voicemail task (if its not auto accepted you can manually accept it by hitting the green tick on the task). Once you receive your callback or voicemail task, you can review the associated call data and call the number back.
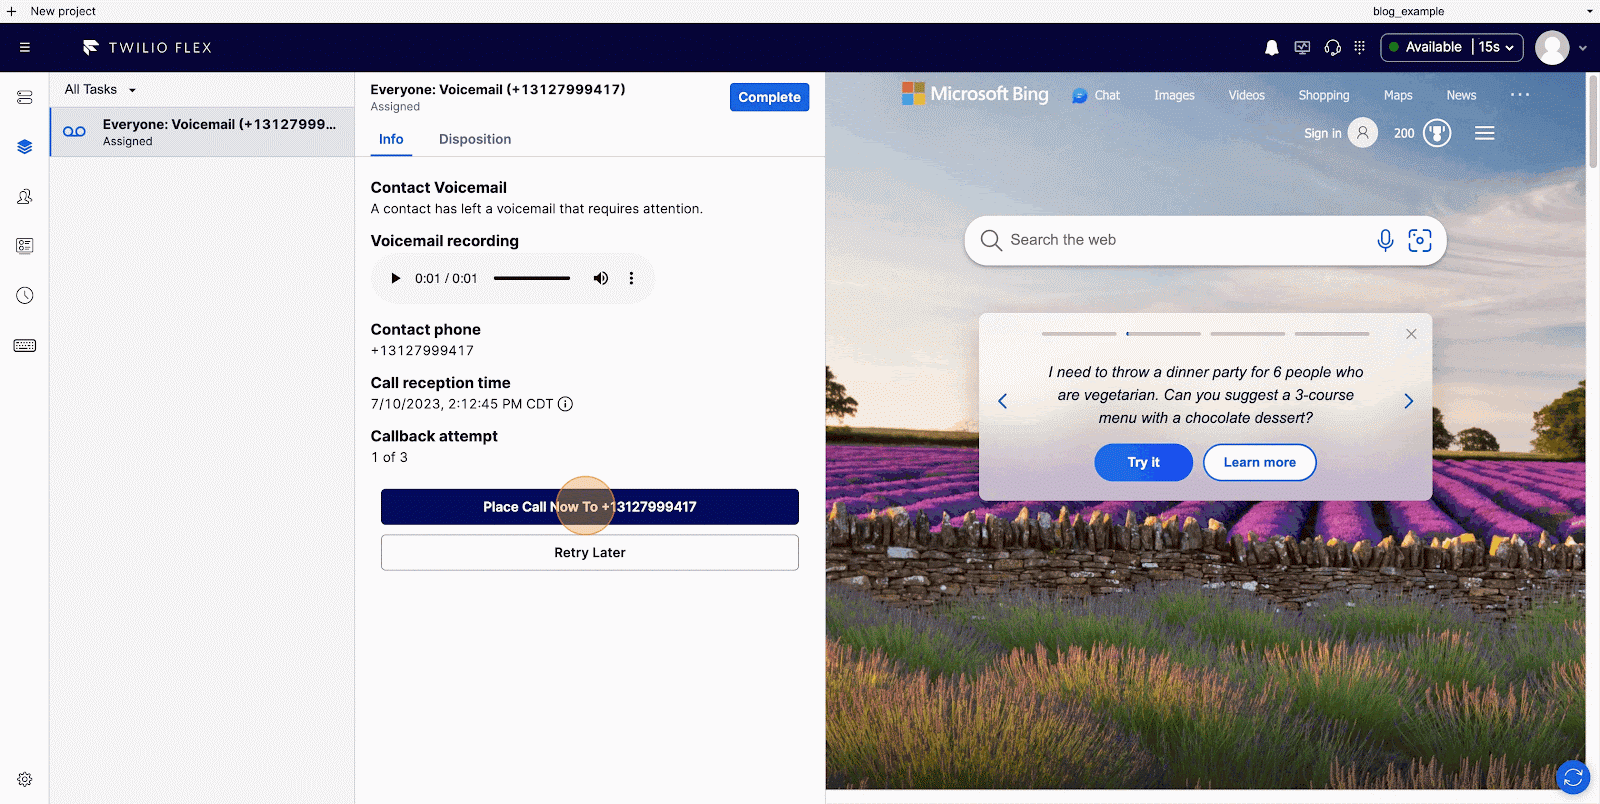
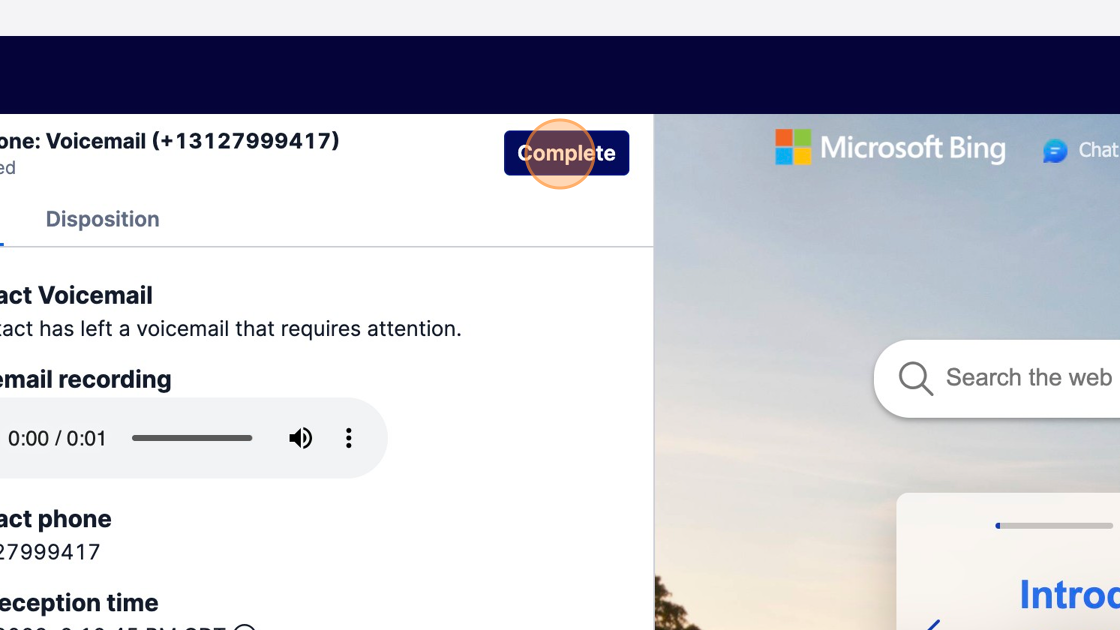
Click Complete on the call task to complete the call.
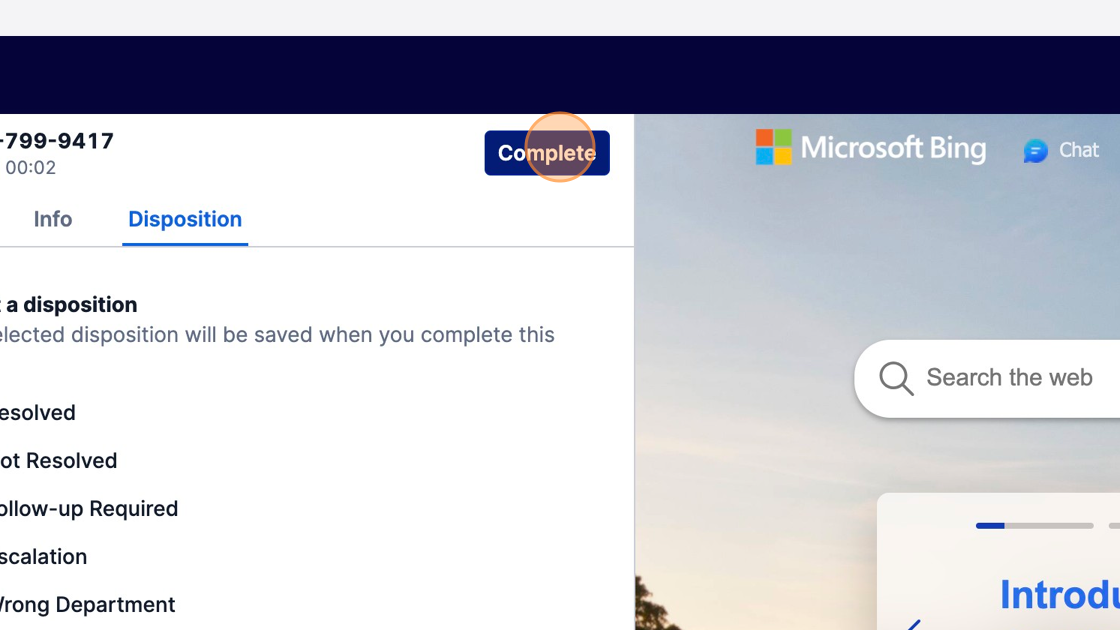
Also, click Complete on the callback or voicemail task to complete that task.
You should now be back at the landing page and have successfully experienced one of the features from your cloned solution deployed to your account.
From here you can add or remove features to your newly minted repository created from the template, managing all the dependencies in one place. When you are ready to clone the solution to a new environment, you can just add the environment config to your GitHub environments and deploy.
Conclusion
Congratulations, you now have the tools to clone a solution on Flex using the template as a starting point and may have successfully cloned a solution already.
For more information regarding the template, you can find the repository here with documentation here. If you would like to learn more about Twilio Professional Services, you can reach out to our engagement team here.
Jared Hunter is a regional lead for the Twilio Professional Services Solution Architect group in North America. He is enthusiastic about enabling customers to reach peak development velocity and understand how to optimally build on Twilio Flex. He can be reached at jhunter [at] twilio.com
Related Posts
-
 Integrating Twilio Agent Connect with Twilio Flex for Human HandoffSimran Aishwarya
 -
Script Adherence Using Real-time Conversation Intelligence with Twilio FlexCurtis Swartzentruber Ruma Nair
-
Orchestrate an AI-to-Human Agent Handoff with Twilio Agent Connect, Conversations Orchestrator, Studio, and FlexKinshuk Kar Sarang Shah
Related Resources
Twilio Docs
From APIs to SDKs to sample apps
API reference documentation, SDKs, helper libraries, quickstarts, and tutorials for your language and platform.
Resource Center
The latest ebooks, industry reports, and webinars
Learn from customer engagement experts to improve your own communication.
Ahoy
Twilio's developer community hub
Best practices, code samples, and inspiration to build communications and digital engagement experiences.