How to Send Bulk SMS Using Spring Boot and Kotlin
Time to read:
April 11, 2023
Written by
Reviewed by

We live in a world where we spend hours and hours of ours with our phones in our hands. This is why sending personalized SMS represents one of the most effective techniques for communicating with a large audience and engaging it.
In this tutorial, you will see two approaches to sending bulk SMS with Twilio’s Programmable SMS. Learn how to use Spring Boot in Kotlin to build programmatically notify several users via API.
Prerequisites
To follow this tutorial, you first need to meet the prerequisites below:
- Java Development Kit (JDK) ≥ 11: any LTS version of Java greater than or equal to 11 is okay. This guide refers to Java 17, the latest LTS version of Java at the time of writing.
- Maven ≥ 3 or Gradle ≥ 7: choose one of the two Java building automation tools. This tutorial is based on Gradle. Keep in mind that Gradle is very sensitive to Java versions. For this reason, you need to install the right version of Gradle according to your version of Java.
- IntelliJ IDEA: the free Community Edition version of the IDE is enough to follow this article.
- A Twilio account and a Twilio number that can send SMS messages.
- A Spring Boot project in Kotlin: this tutorial refers to Spring Boot 3, which is the latest version of Spring Boot currently available.
Use the links above and follow the instructions to set up, download, and install everything you need.
If you do not have a Spring Boot project or prefer to start from scratch, initialize one in Spring Initializr as follows:
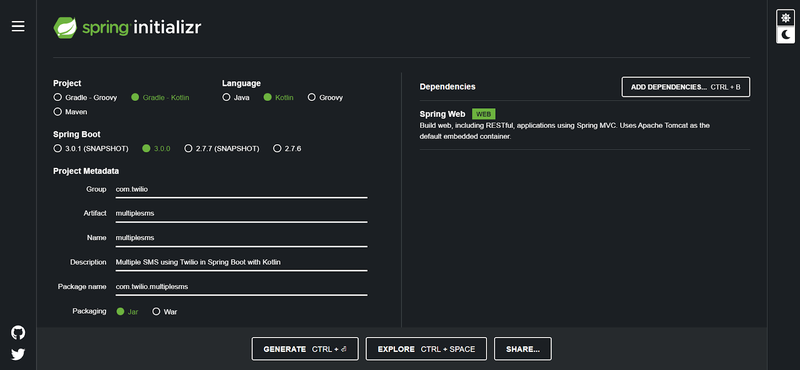
Compile the form as below:
- Group: com.twilio
- Artifact: multiplesms
- Name: multiplesms
- Description: Multiple SMS using Twilio in Spring Boot with Kotlin
- Package name: com.twilio.multiplesms
- Packaging: Jar
Note the selection of “Gradle - Kotlin” as the building automation tool and “Kotlin” as the programming language. Click on ADD DEPENDENCIES... and select the “Spring Web” dependency to set up a Spring Boot Web project.
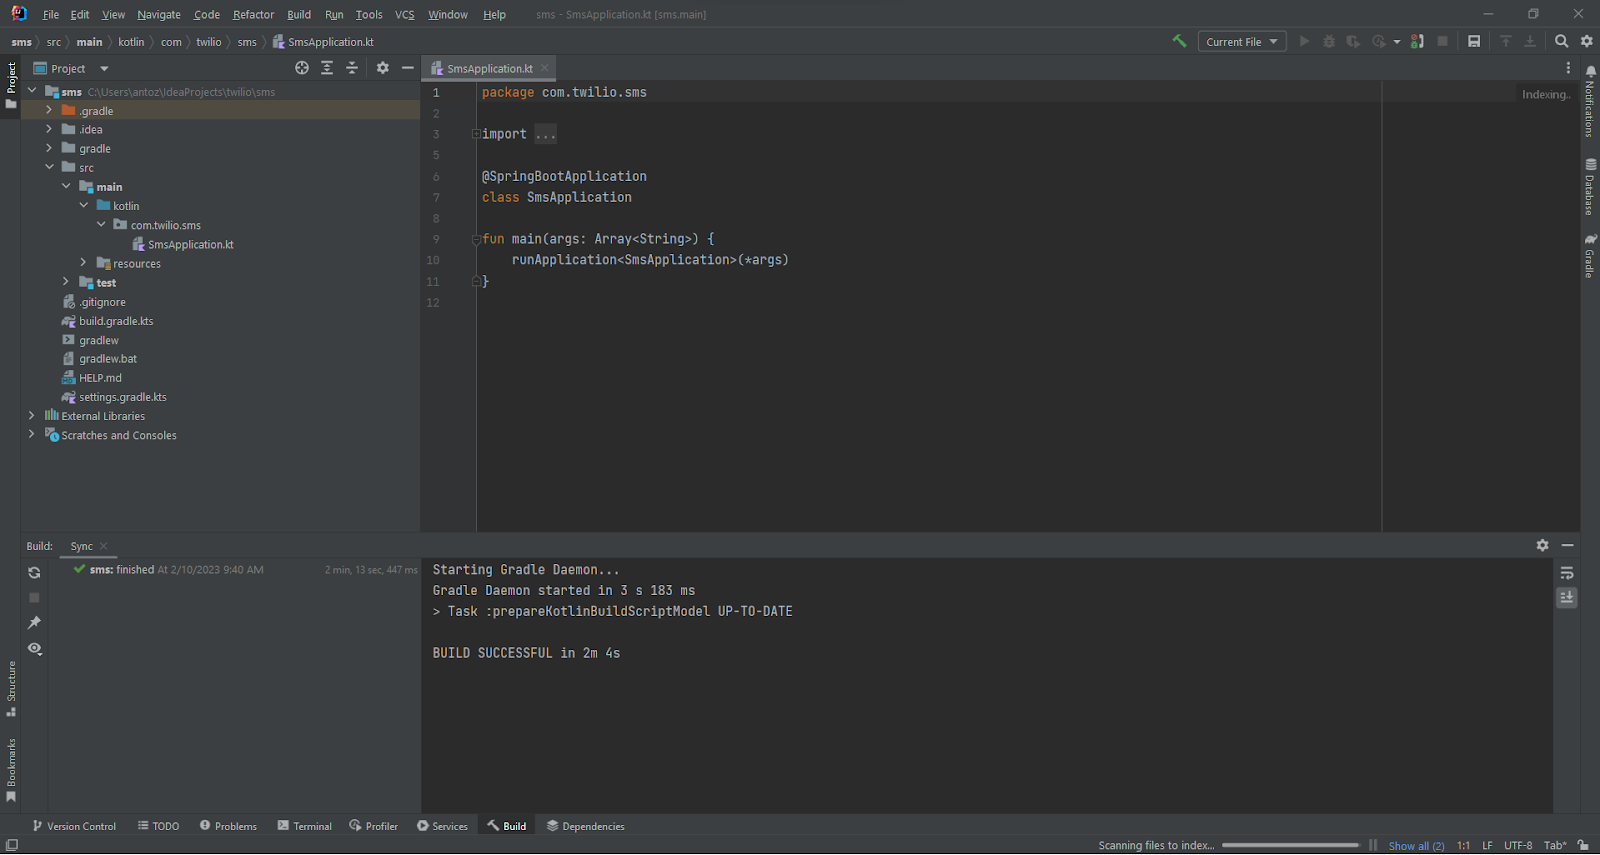
When you are done, click the GENERATE button to download a .zip archive containing your new Kotlin Spring Boot project. Extract the .zip file and open the project folder in IntelliJ IDEA. Wait for the IDE to perform the first Gradle build, and you are now ready to write some code.
Initialize Twilio in Spring Boot
Time to add Twilio as a project dependency and prepare your project to start sending SMS!
First, you need to integrate the Twilio Java Helper Library into your project. This library gives you access to the Twilio SMS API feature, providing everything you need to send single and bulk SMS in Spring Boot.
If you are a Gradle user, navigate to the build.gradle.kts file in the root folder of your project. Open it and add the following line in your dependencies object:
Otherwise, if you are a Maven user, open the pom.xml file in the root folder of your project. Add the following lines to the dependencies section:
You just added Twilio Java Helper Library to your project’s dependencies.
When you change your project's dependency file, IntelliJ IDEA shows the Gradle/Maven reload button in the upper right corner:

Click that button to install the Twilio Java Helper Library.
Next, initialize the application.properties file under the /resources folder as below, replacing the placeholder strings with your account credentials and Twilio phone number:
You can now use these values to initialize Twilio in Spring Boot.
In IntelliJ, right-click on the com.twilio.multiplesms package. Select New > Create Kotlin Class/File and create a new class config.TwilioConfig.kt. You will now have a TwilioConfig.kt file under the config package.
Define TwilioConfig.kt as follows:
Since TwilioConfig.kt is a @Configuration file, Spring Boot will automatically load it at initialization time by calling its constructor. This uses the @Value annotation to read the configs defined previously in the application.properties and initialize the TwilioConfig class members.
After executing the constructor, Spring Boot will run the twilioInit() method annotated with @PostConstruct. That method uses the Twilio.init() function to initialize Twilio, as explained in the Twilio official documentation.
Twilio is now working. It is time to structure your Spring Boot project to send SMS.
Prepare your project to send SMS
Add a service layer to your project. If you are not familiar with this concept, a Spring Boot service layer should contain all your @Service files. These define the business logic of your application.
In IntelliJ IDEA, right-click the com.twilio.mulitplesms package, select New > Package type "service" and press the Enter key. The service package represents the service layer of your Spring Boot application.
In the service package, create a new Kotlin file called SMSService.kt and initialize it as follows:
This file will contain the business logic functions to send single and bulk SMS with Twilio in Kotlin.
Next, create a controller package. This represents the controller layer of your application and will contain all your @RestController files. In Spring Boot, a controller is where you define the API endpoints exposed by your backend app.
In the controller package, initialize a SMSController.kt file as below:
This class will contain all API endpoints to programmatically send bulk SMS in different approaches. Each of these APIs will rely on the underlying business logic method in SMSService.
Send Bulk SMS in Spring Boot with Kotlin via the Twilio SMS API
Suppose you want to notify a large audience with SMS messages. Twilio provides you with many ways to achieve that. Let's explore two different approaches you can follow to send bulk SMS in Spring Boot using Kotlin.
If you are eager to take a look at the full codebase rather than building the Spring Boot app as you read, clone the GitHub repository supporting the article with the following command:
Now, follow this step-by-step tutorial to achieve the same result.
Send single SMS many times
The idea here is to send an SMS once for each of the users you want to notify. Let’s learn how to implement this function in Spring Boot with Kotlin.
Add the sendSingleSMS() method below to the SMSService.kt file:
sendSingleSMS() uses the Twilio Message class to create an SMS containing message and send it to the phone number declared in to.
To avoid sending text messages to someone you do not know, replace the receiver number with your phone number:
PhoneNumber and Message come from the Twilio Java Helper Library. Import them by adding the following lines on top of your SMSService.kt file:
Now, create an API endpoint that calls sendSingleSMS(). In SMSController.kt, add the following method:
This defines a /api/v1/sms/sendSingleSMS POST API endpoint to programmatically send an SMS in Spring Boot. Note that the API calls the sendSingleSMS() business logic method from the SMSService class. Time to test this API endpoint!
In IntelliJ IDEA, click the Run button to launch your Kotlin Spring Boot app. Wait for Spring Boot to start. Then, open your terminal.
If you are a Linux or macOS user, test the API with the command below:
Or if you are a Windows user, launch the following command:
This command will perform a POST request to call /sendSingleSMS API. You should receive an SMS message containing the “Hello, World!” text.
You can now customize the API to accept a message and receiver number. That way, you could call the API several times to notify as many users as you want. However, that is not a good approach for at least two reasons:
- Network overhead: Each API call requires a network trip, which involves sending packages and waiting for a response.
- Complex error handling: If you want to notify all users consistently, you must implement retry logic to protect against network and API failure.
In other terms, this approach is fine if your audience is very small and it is not too important if someone does not get the message via SMS. Let’s move on to the next approach.
Send bulk SMS with a messaging service
Instead of sending a single SMS many times, another approach for implementing bulk SMS is to send several SMS in parallel. This is what we showed in our guide on how to send many SMS in Spring Boot using Kotlin.
Yet, even that approach has two big limitations:
- A regular Twilio number can only send 1 SMS message per second: If you have 60 users to notify, this is going to take a whole minute.
- Carriers may filter your messages: In some countries, carriers implement SMS filtering. This means that if you send too many messages from a single number, carriers may start filtering messages sent from that number.
You can overcome those obstacles with a Twilio messaging service. Messaging services can pool up to 400 phone numbers and use them to send SMS messages. As the number of users to notify increases, you only have to increment the set of phone numbers in the pool. Also, by adding more numbers to the pool, you can avoid having your messages filtered.
You can create a Messaging Service directly in the Twilio console. In the menu on the left, open the "Messaging" drop-down menu and click on "Services.” Otherwise, click here.
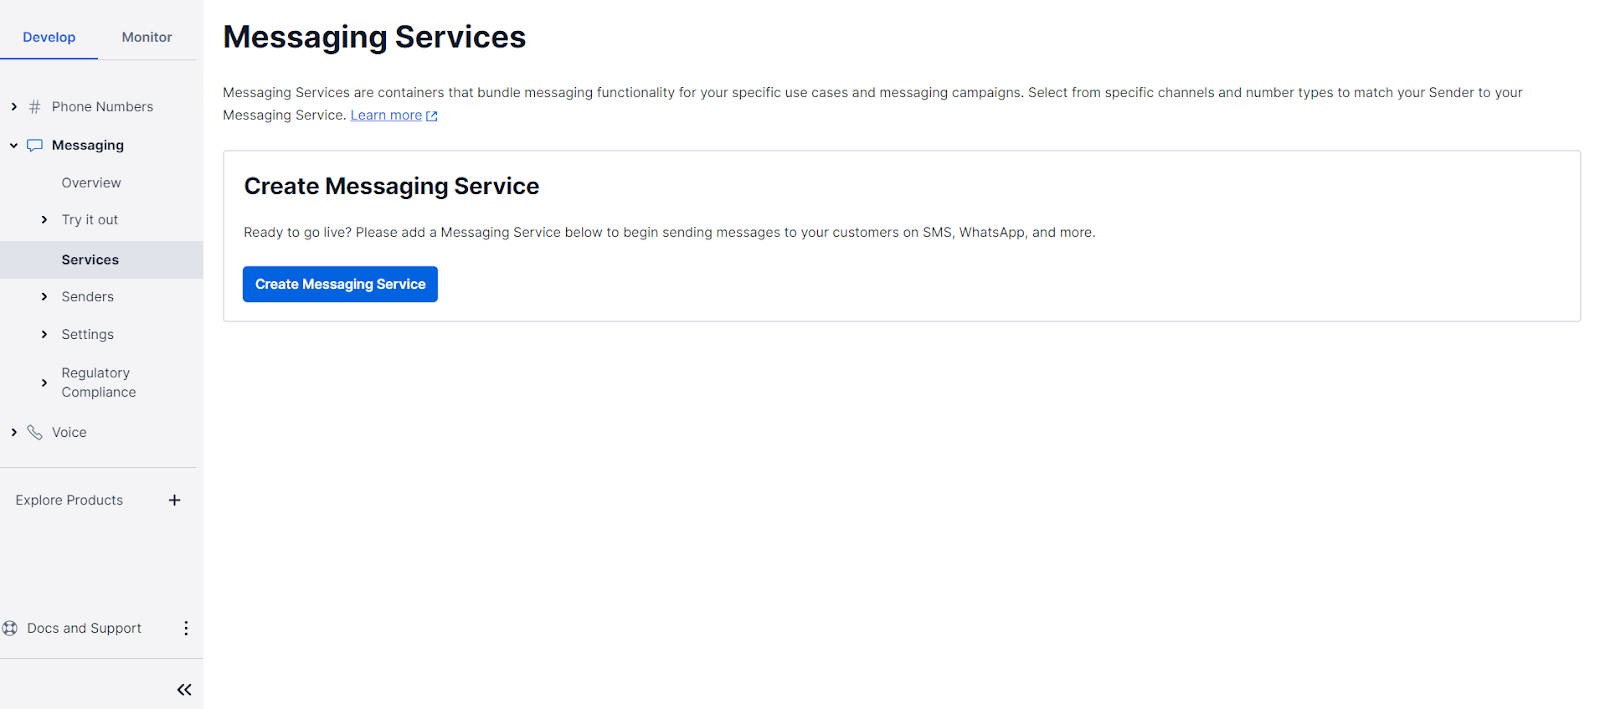
Click on Create Messaging Service and follow the setup wizard.
In Step 1, give your messaging service a friendly name like “SMS notifications,” select Notify my users and click Create Messaging Service.
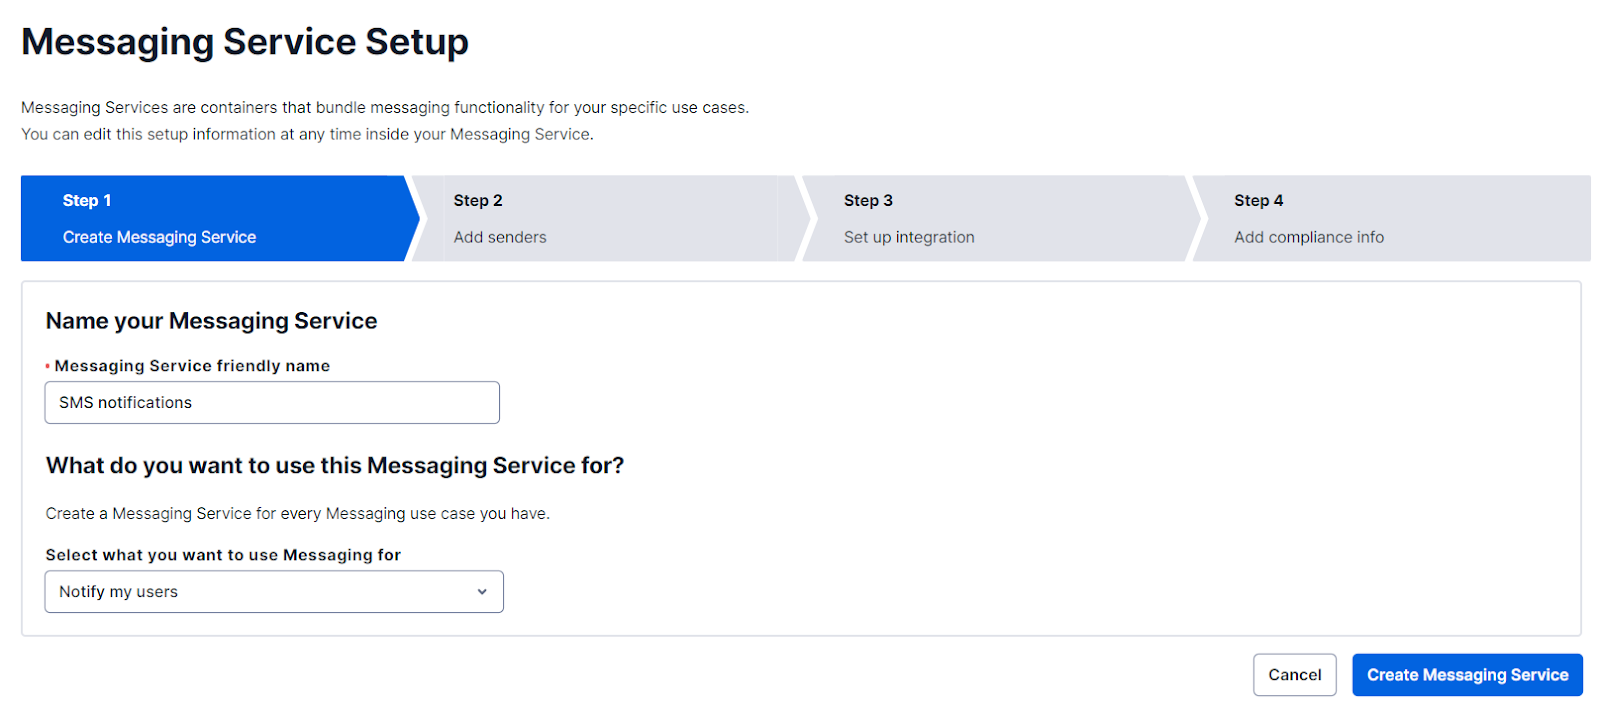
In Step 2, add your Twilio phone numbers to the pool. Then, complete the remaining steps until the messaging service is set up and ready to use.
Head back to the Services page and select the messaging service you created above.
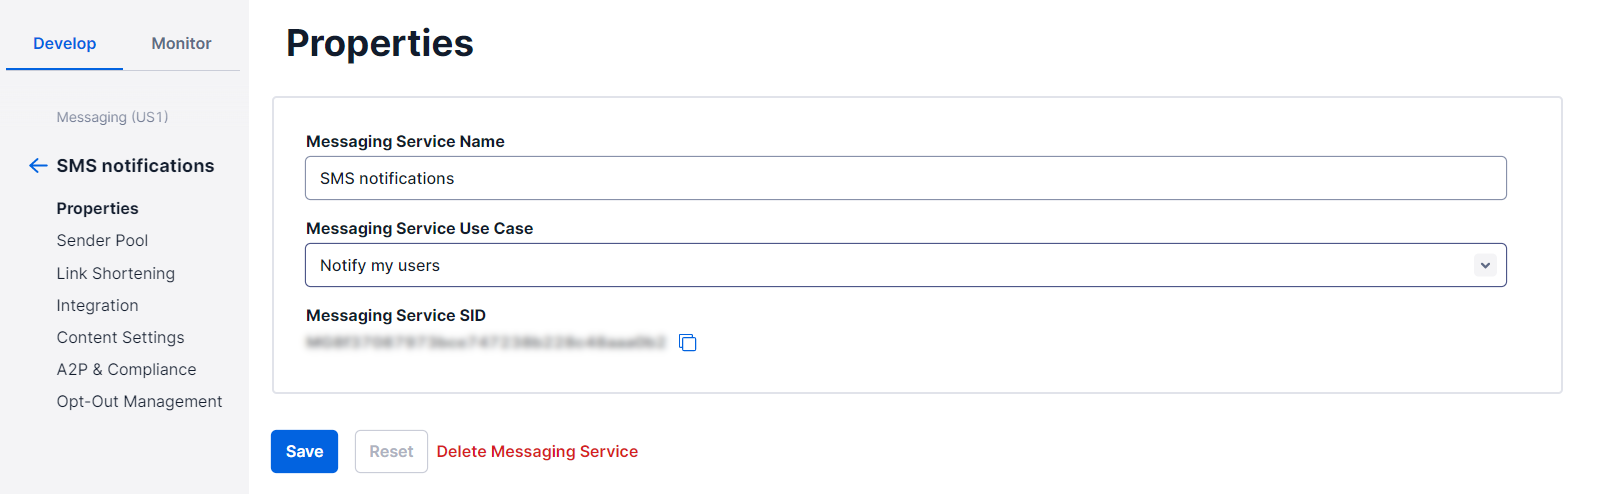
Here, you will get access to the Messaging Service SID. Copy it and add it to the application.properties file as below:
Update the TwilioConfig file with the following code:
Notice messagingServiceSid in the constructor. This class member contains the messaging service SID read from application.properties.
In SMSService.kt, add the method below:
This method uses parallelStream() to iterate over contactList in parallel and sends an SMS containing message to each number. Note that the Message’s from parameter is the messaging service SID.
The messaging service will spread the requests received over the pool of phone numbers, using them to send SMS messages to the end user.
All that remains is to define an API endpoint and test it. Add the method below to SMSController:
Run the Spring Boot Kotlin app in IntelliJ and open the terminal.
On Linux or macOS, test the API with:
On Windows, use:
This command will call the /api/v1/sms/sendBulkSMS POST API and send bulk SMS through your new messaging service.
Keep in mind that due to Twilio’s rate limits, you may still run into some errors. In that case, buy a new phone number and add it to the pool. Since each regular Twilio phone number can handle a queue of up to 14,400 messages, your bandwidth capacity will increase significantly.
Congrats! You just learned how to implement an API to send bulk SMS messages in Spring Boot and Kotlin!
What's next for using the Twilio SMS API with Kotlin?
In this step-by-step tutorial, you saw different approaches to sending bulk SMS with Twilio. In detail, you understood how to use the Twilio Java Helper Library in Spring Boot and Kotlin to build APIs to notify several contacts via SMS. This took only a handful of lines of code. This is thanks to the Twilio SMS API, which enables you to send bulk SMS messages with no effort.
All that remains is to make the application more complex and robust. For example, you could retrieve the contact list from an API or with a database query. Or, you could integrate retry logic to avoid 429 errors.
Antonello Zanini is a CEO, technical writer, and software engineer but prefers to call himself a Technology Bishop. Spreading knowledge through writing is his mission. He can be reached on LinkedIn or at antonello [at] writech.run.


Related Resources
Twilio Docs
From APIs to SDKs to sample apps
API reference documentation, SDKs, helper libraries, quickstarts, and tutorials for your language and platform.
Resource Center
The latest ebooks, industry reports, and webinars
Learn from customer engagement experts to improve your own communication.
Ahoy
Twilio's developer community hub
Best practices, code samples, and inspiration to build communications and digital engagement experiences.