Save Voicemails to Dropbox with Twilio Voice API, PHP, and Laravel
Time to read:
April 17, 2019
Written by

There are a number of ways to record calls with Twilio. Whichever method you decide to use, it is very important to keep the storage space used below the chargeable limit to prevent added cost. To achieve this, you need to backup up and delete your voice recording occasionally. Storage over 10,000 minutes per project is billed by the minute, once a month.
In this tutorial, we are going to discuss how to automate recordings management with recording status callback, download recordings programmatically via the REST API, save the recordings in Dropbox and finally delete the recordings programmatically via the REST API.
Prerequisites
You will need the following technologies and tools:
To follow along, you should have a basic understanding of PHP. Knowledge of the Laravel framework is not required. You can choose to use any other PHP framework of choice or even “Vanilla PHP”.
If you choose to use Laravel, a guide on how to install and use Laravel can be found in the official Laravel documentation.
Install Twilio SDK For PHP
To get started, we first need to install the Twilio SDK for PHP in our project.
In your terminal, navigate to the project directory and run the command below:
Purchase A Twilio Phone Number
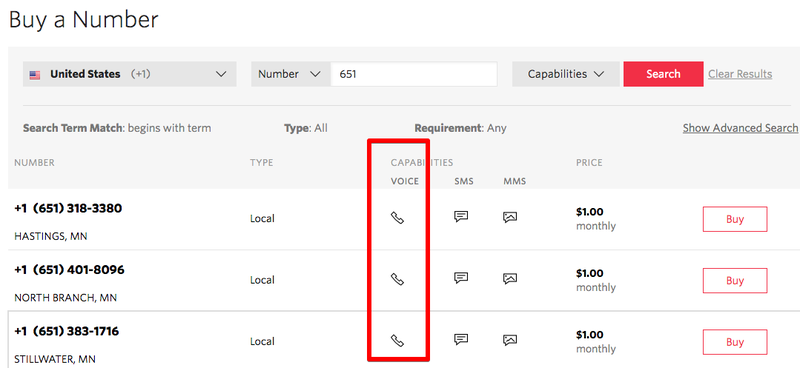
Next, we need to purchase a voice-enabled Twilio phone number. Follow the steps below:
- Login into your Twilio account and go to the console numbers page.
- Click the plus button to purchase a phone number if you don't have one already.
Set Environment Variables
Retrieve your Account SID and Auth Token from your console dashboard.
Go to the console numbers page and retrieve the phone number we created above and update the values in the .env file:
Record An Outbound And Inbound Call
The first step is to create a route to generate TwiML for the outbound and inbound calls.
Run the following command to create the controller:
Open the file app/Http/Controllers/HomeController.php and add the code below:
NOTE: Remember to update 'recordingStatusCallback' attribute with the route in your application that will receive the request recording details once it is available for access.
Now, let's create the route we’ll hit to trigger the outbound call.
Open app/Http/Controllers/HomeController.php and add the function:
Next, create the route to receive the recording details when on call completion. Add the code to the controller:
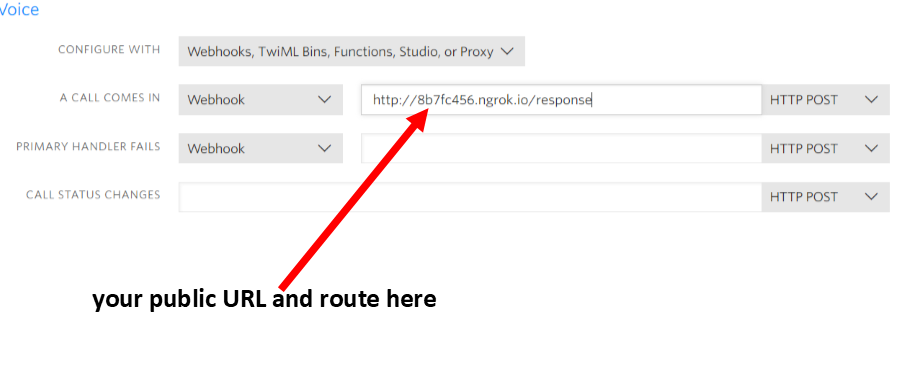
To enable your Twilio phone number to receive inbound calls, you should configure it to send a request to your webhook. This can be done in the number's configuration page. If you’re unsure about how to generate a publicly accessible URL for your localhost, set up and run ngrok via the documentation.
In the Number settings, update the value for when “A call comes in” to BASE_URL/response.
Next, register the web routes to be used.
Inside routes/web.php, add these lines of code:
To ensure that the TwiML route can accept posted request from an external source without verification, inside app/Http/Middleware/VerifyCsrfToken.php, add the following code:
Save The Recording In Dropbox
The next step is to save the recording in your Dropbox.
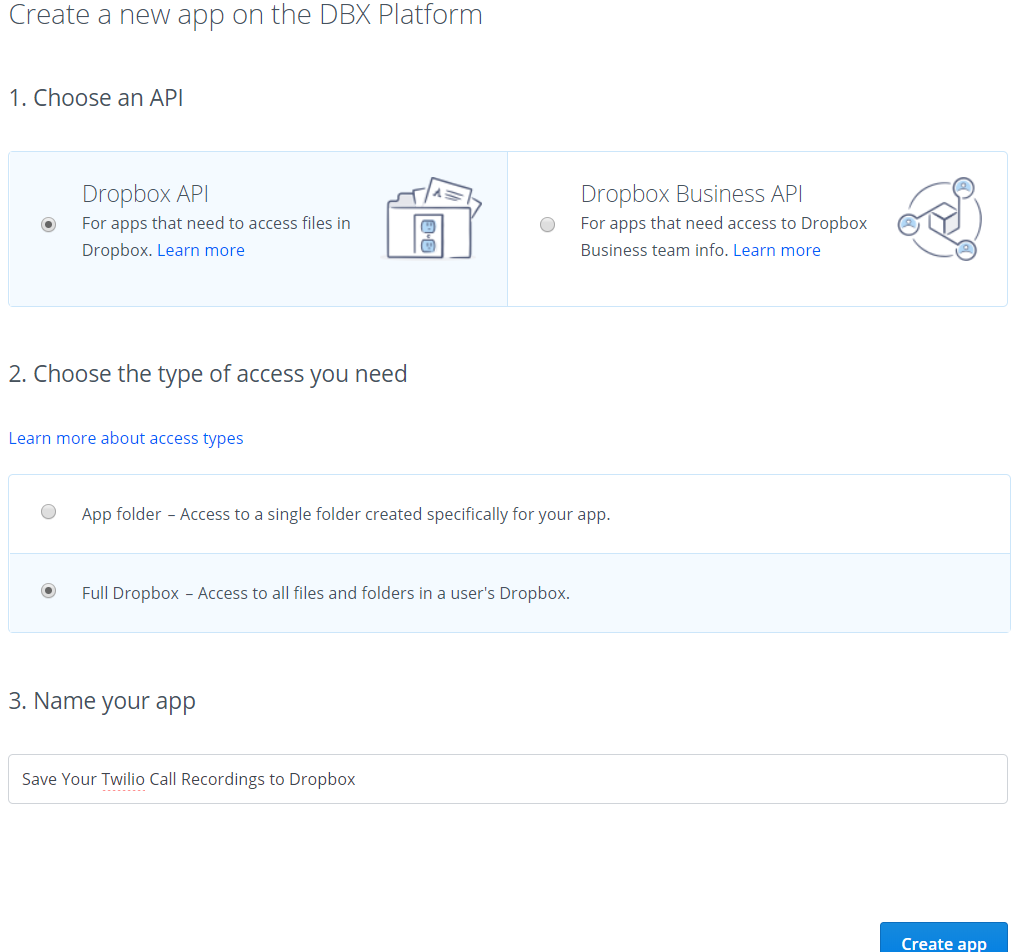
To use the Dropbox API, you’ll need an app. Follow the steps below to create the app:
- Go to the Dropbox developers' page.
- Choose “Dropbox API” as the API you intend to use.
- Then choose the type of access you need and finally assign your app a name.
Install Dropbox Third Party API For PHP
Install the Dropbox Third Party API for PHP in our project.
In your terminal, navigate to the project directory and run the command below:
Update The Environment Variables
Retrieve your App key, App secret, and Access Token from your Dropbox Developer App Dashboard, by creating an application and update the values in the .env file:
Create Save To Dropbox Script
Let’s create a function that will receive the recording and upload it to Dropbox through the Dropbox API.
Open app/Http/Controllers/HomeController.php and add upload function:
Update the save function with:
Delete Twilio Recording
To delete the Twilio recording to create space and also delete the local copy.
Open app/Http/Controllers/HomeController.php and add the code below:
Update the save function to consume the function:
Test The App
That is it! Lets go ahead and test the app.
As a reminder, to test the app locally, you need to set up Ngrok.
Run the command below to expose our local web server running on port 8000 to the internet.
Give your Twilio Number a call or visit “BASE_URL/makecall” to test. You should see a copy of the recording in your Dropbox account once you hang up.

NOTE: Remember to update the BASE URLs we defined earlier with your production or ngrok base URL.
The complete code for the tutorial can be found on Github.
What Next
Legal Implications Of Call Recording
If you choose to record calls, you need to comply with certain laws and regulations, including those regarding obtaining consent to record. Additional information on the legal implications of call recording can be found here.
Related Materials
- Recording a call with Twilio.
- How much does it cost to record a call?
- Delete Twilio Call Logs, Call Recordings, and Transcriptions
- Downloading and deleting Twilio recordings
By: Michael Jaroya
Twitter:@mikelidbary
website:www.talwork.net

Related Resources
Twilio Docs
From APIs to SDKs to sample apps
API reference documentation, SDKs, helper libraries, quickstarts, and tutorials for your language and platform.
Resource Center
The latest ebooks, industry reports, and webinars
Learn from customer engagement experts to improve your own communication.
Ahoy
Twilio's developer community hub
Best practices, code samples, and inspiration to build communications and digital engagement experiences.