Secure your Auth0-Powered Application with SMS Alerts from Twilio
Time to read:
June 10, 2020
Written by
Reviewed by

The Twilio SMS API empowers developers to programmatically send SMS to users, receive SMS messages, track the delivery of the sent messages, as well as retrieve and modify message history. The SMS API is flexible and can be used for various purposes, some of which can be sending SMS for two-factor authentication, updating users about their orders, or even automating replies of a bot.
Every application and website needs authentication to securely deliver content to the users and build trust among their users. But what if this trust gets broken? How do you make sure your users are notified for their account activities?
In this blog post, we will see how we can use the Twilio SMS API and the Auth0 hooks to notify our users when they create an account. We will not only stop there. We will also notify our users every time they change their passwords and keep them updated with their account activities.
What is Auth0?
Auth0 is an identity management solution that helps in managing authentication and authorization securely. Auth0 provides APIs which can be used in applications for authentication and authorization. We will be using Auth0 in our demo.
Auth0 has recently launched Hooks, which allows developers to customize the behavior of Auth0 with Node.js code executed at certain extension points. The extension points provided are as follows:
- Client Credentials Exchange: The client credentials exchange hook can be used when one wants to modify the scope for the user and add custom claims to the token.
- Pre-User Registration: The pre-user registration hook allows you to store some additional information about the user. This information can be stored in the
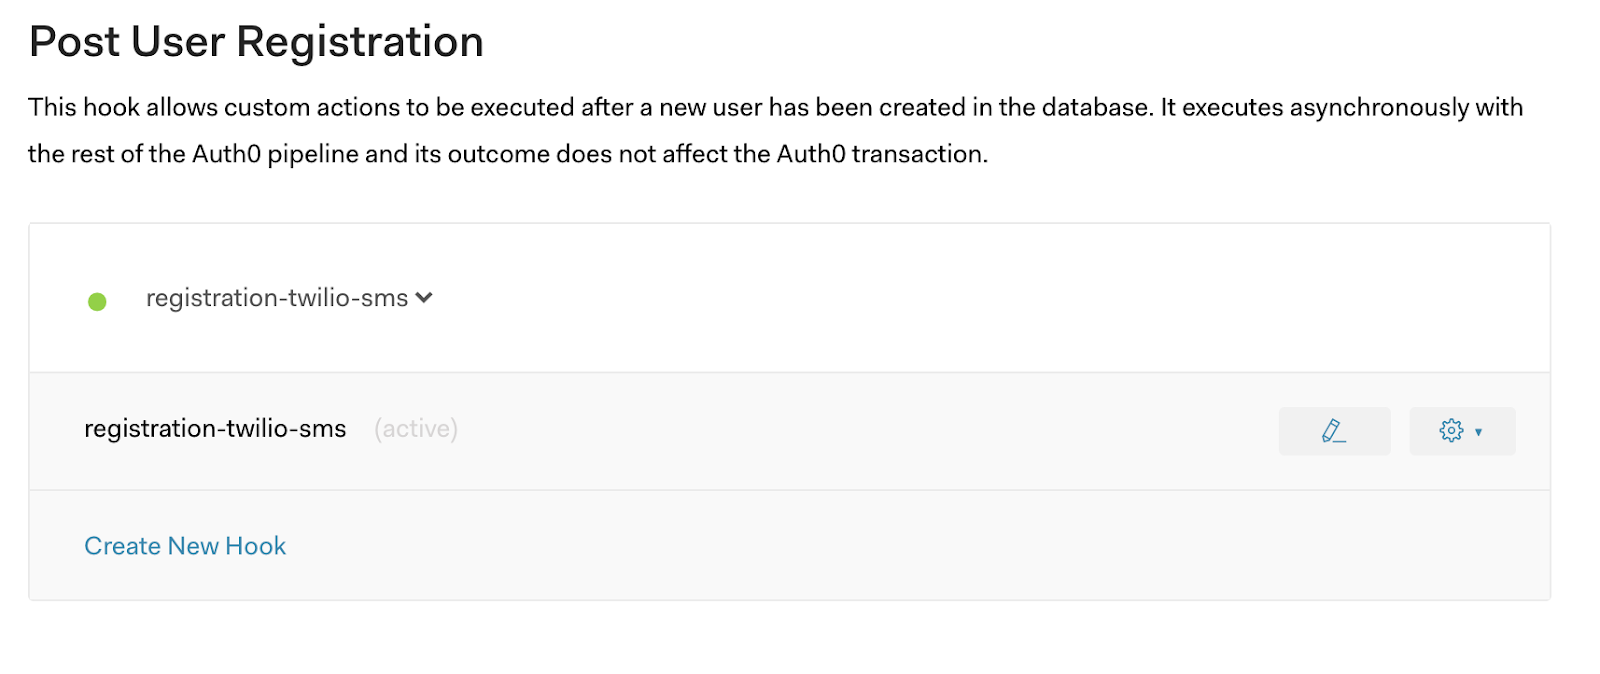
user_metadataorapp_metadata. - Post-User Registration: The post-user registration hook helps one perform any activity one wants, once the user registers for an account. We will use this endpoint to send the user an SMS at this extension point.
- Post-Change Password: The post-change password hook gives the developer the ability to perform custom actions after a successful user password change.
- Send Phone Message: The send phone message hook is specifically used for Multi-Factor Authentication.
Prerequisites
Before you begin this tutorial, please:
- Sign up for an Auth0 Account
- Create a Tenant
- Sign up for a Twilio Account
Let’s get started by registering a virtual phone number for our project and learn how we can use this number to notify our users.
Getting a Phone Number from Twilio
To get a virtual number we will need to have an account on Twilio. If you haven’t already, sign-up for an account and login with this newly created account.
After logging in, we will create a project called auth-notify. To complete the project creation step, you need to verify your email address and your phone number. For this project, we will select Node.js as the primary programming language.

Copy the Account SID and the Auth Token from the dashboard. We will be needing this later in our application.
Once everything is set up, the next step is to get a phone number. For this article, we will get the Trial Number that Twilio generously provides.
NOTE: Make sure that if you’re using this in production, you register a number and not use the trial number.
Click on the “Get a Trial Number” button and follow the steps to reserve your trial phone number. You can either choose the number automatically assigned to you or select a different one. The important thing here to note is that the number you’re choosing should be enabled to Send SMS.
Now that we have our number let’s see if it is working properly. Navigate to the Programmable SMS section and select “Learn & Build”. This provides an interactive playground where you can send SMS to the verified number from your Twilio number. Enter the message you want to send and hit “Make Request”. On a successful request, you get the SMS on the verified number.
NOTE: You can only send SMS to the verified numbers if you’re using a trial number.
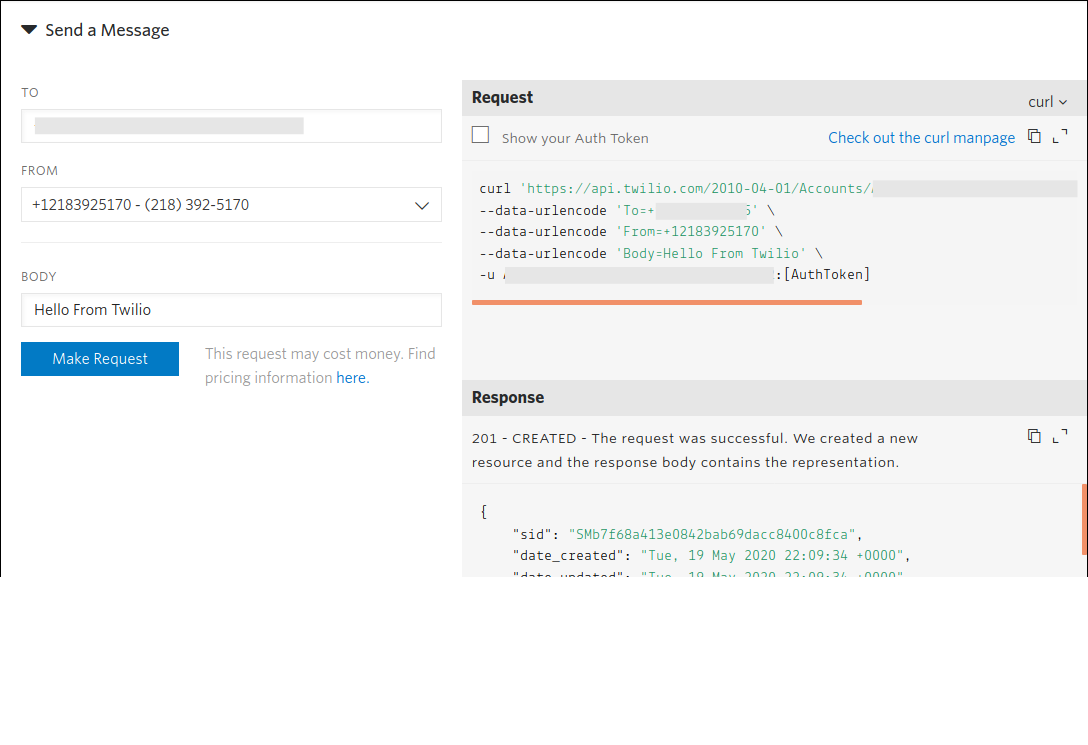
Congratulations you sent your first SMS with Twilio!
Create a Post-User Registration Hook
Login to your Auth0 account, and navigate to hooks located under the Auth Pipeline section. Click on the “Create a Hook” button.
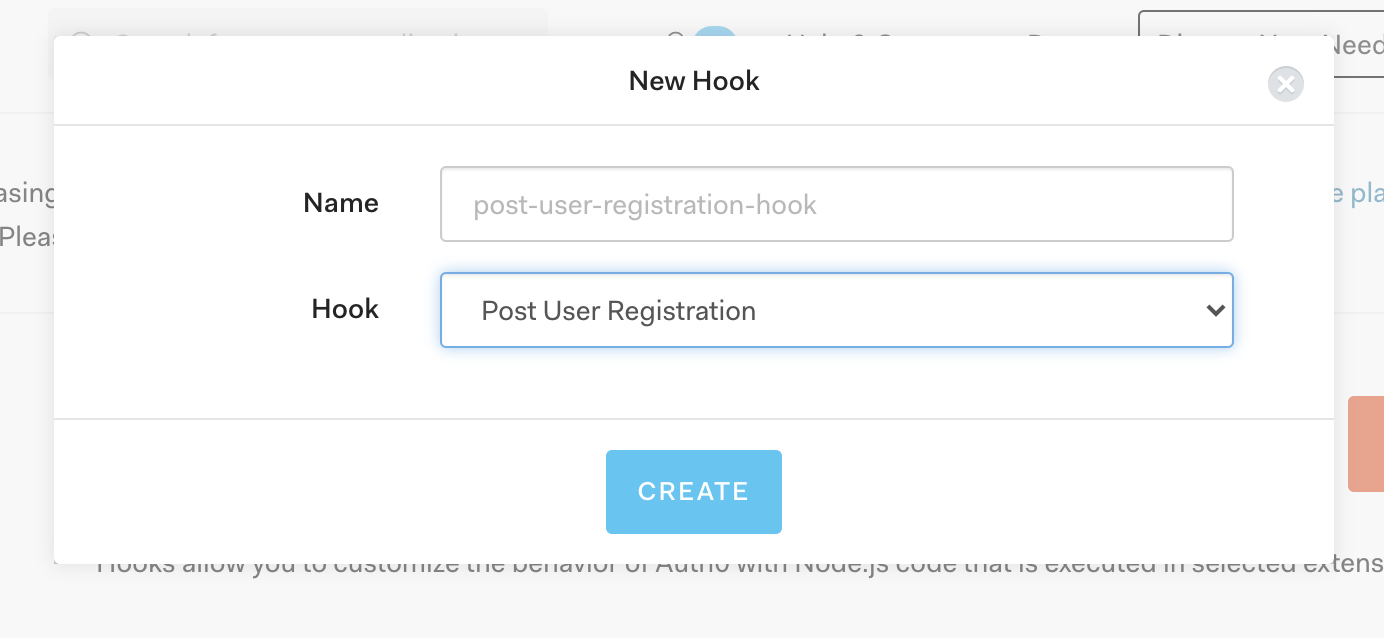
Select “Post User Registration” from the Hook dropdown and name your hook registration-twilio-sms.
After the hook gets created, select the edit hook option from the row. This trigger will open a code editor allowing us to edit and add custom code.
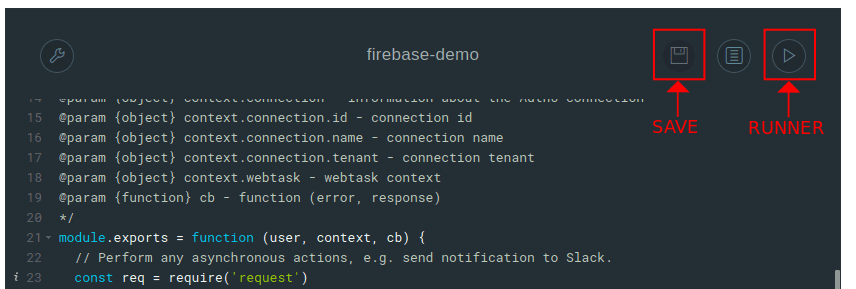
This is what the starter code looks like.
Adding Twilio SMS to the Post-User Registration Hook
The Auth0 hooks use Node.js to implement custom actions. Hence we will be using the Node.js library of Twilio. We don’t have to explicitly install the library as Auth0 does that for us. All we have to do is import the library. Replace the code above with the following, replacing the accountSid and authToken variables with your Twilio Credentials. Lastly, replace the:
In the code above, we imported the Twilio SDK and passed your Account SID and Auth Token. We used the messages.create() API from the Twilio library to pass on the object containing the body of the message, your Twilio SMS number, and the user’s phone number.
The user’s username, email address, and phone number are then obtained from Auth0.
Testing
Now let’s test the code with the Runner that Auth0 provides. The Runner generates a random user with placeholder information. To see if everything is working correctly, we will replace the recipient’s number user.phoneNumber with your number i.e. +13365555555.
One important thing to note here is that if you’re using a trial account with Twilio you will only be able to send SMS to the verified numbers.
Save the code, and hit the Runner. If everything goes well you will get a response status 200 and an SMS on your phone.
Conclusion
You can similarly notify the user whenever they change the password with the Post Password Change hook. We only have to change the message body, while everything remains the same.
You are now all set to use the Auth0 API in your project. Whenever the user registers, they get an SMS welcoming them!
Harshil Agrawal is a JavaScript developer who enjoys experimenting with different technologies. He is a Mozilla Representative and an MLH Coach, and he loves contributing to open source and building communities. He can be reached via:
- Email: connect@harshil.dev
- Twitter: @harshil1712
- Github: https://github.com/harshil1712


Related Resources
Twilio Docs
From APIs to SDKs to sample apps
API reference documentation, SDKs, helper libraries, quickstarts, and tutorials for your language and platform.
Resource Center
The latest ebooks, industry reports, and webinars
Learn from customer engagement experts to improve your own communication.
Ahoy
Twilio's developer community hub
Best practices, code samples, and inspiration to build communications and digital engagement experiences.