How to Send a vCard with Twilio Programmable Messaging
Time to read:
July 01, 2020
Written by
Reviewed by
If you've ever sent or received contact information from one phone to another (especially in a time before smartphones), then you may have unknowingly encountered a vCard before. vCards, also known as Virtual Contact Files, are a standardized (RFC 6350) file format for sending business/contact information which can be easily imported into address/contact books.
This post will quickly walk you through creating a vCard using Python and sending it as an MMS using Twilio Programmable Messaging.
The sample code used later in this post can be found here.
NOTE: Depending on your location and Twilio number, you may not be able to receive MMS outside the US/Canada and thus won't be able to receive vCards.
Getting Started
It's important to understand that vCards are essentially just text in a specific format.
If you've used Twilio MMS before, vCards can be thought of the same way as other media types like images or audio. They can be sent through either a MediaUrl parameter when creating a message resource or by using <Media> in a TwiML response. However, there are a few extra caveats regarding mime-types and caching that are noted in the “Serving the .vcf File” section below.
If you already have a .vcf file and only need to know how to send it, the following section may be skipped.
Create a .vcf File
This section shows how to create a vCard programmatically with Python using the vobject library. Other languages also have helper libraries that can do the same things (vcards-js for Node.js, ez-vcard for Java, etc).
First, create a new directory and navigate into it. Then, set up and activate a virtual environment, install the vobject helper library, and create a file named vcard.py. Run the following commands:
Next, open the newly created file called vcard.py and insert the following code:
The number of properties that can be added to a vCard is quite large (and can be found in the RFC), but for simplicity's sake this example script only adds a few of the common properties like name, phone number, birthday, address, and email.
Save this file and run it using the following command:
The command above will create a new file in the current directory named HomerSimpson.vcf.
Serve the .vcf File
Now that the .vcf file has been created, there needs to be a way for Twilio to access it. The following instructions will demonstrate how to publicly serve a local file using ngrok. Instructions to install and configure ngrok can be found here.
Ngrok is often used to tunnel to servers running on localhost, but it can also be used to serve static directories. In a separate terminal run the following command (replacing the path after file:// with your own absolute path to the directory of the HomerSimpson.vcf file):
The terminal should show something like this:
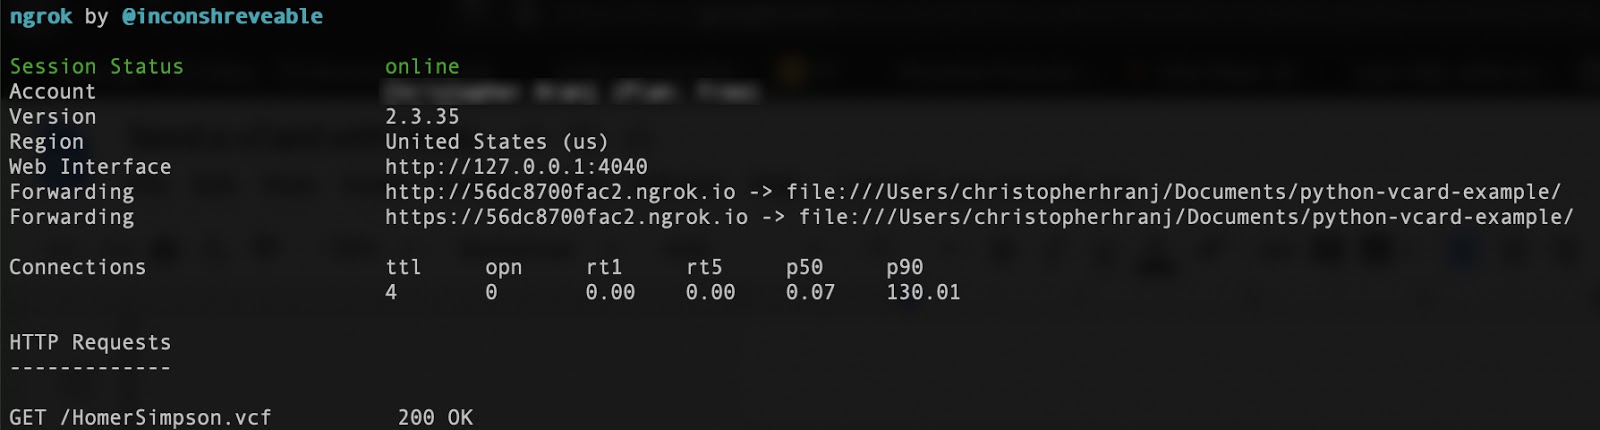
Make a note of the URL that ngrok generates, as it will be needed in the next section.
Before testing with Twilio, let's check to see if the file is reachable. Copy the ngrok Forwarding URL, append the filename to it (HomerSimpson.vcf), and paste it into a browser. If the browser shows a prompt to download HomerSimpson.vcf, then everything is working properly.
Other hosting solutions
If you already have a web server that can host static files, you can use that and set your own MediaURL. Here are a few things to keep I mind:
- When serving a
.vcffile, the mime-type needs to be set totext/x-vcardto match the filetype, otherwise Twilio will reject the request. You can read more about mime-types from the Twilio Docs. - Caching can cause some unintended issues on iOS, so the
Cache-Controlshould be set tono-cache. Read more about changing the cache behavior of files with Twilio.
Hosting options like AWS S3 or Google Cloud's Cloud Storage can also be used, but they will not be covered in this post.
Send the .vcf File with Twilio
Now that the .vcf file is accessible, it's finally time to send it. The quick and dirty way to send an MMS is from the command line using cURL.
Open a terminal and run the following command (after replacing the appropriate values with your own Twilio credentials, ngrok URL, and phone numbers):
If everything is configured properly your phone should soon receive an MMS that looks as such:

Opening the vCard allows you to create a new contact with all the information already filled in, as seen below:

Wrapping Up
Hopefully this post was able to clear up any confusion there might have been around how to send vCards using Twilio. Twilio recently added support for vCards in Whatsapp as well! They are sent the same way as you would with any other media via the WhatsApp API.
Special thanks to Twilio's own Phil Nash for the inspiration for this post and to this StackOverflow answer for some important clarifying info.
As always, thanks for reading! If you come across any issues or questions, please reach out to me on Twitter or GitHub.
Related Posts
-
 How To Containerize A Twilio App With DockerDylan Frankcom
 -
 How to run Automated AMD Tests and Fine-Tune Twilio AMD for Accurate Voice AutomationRosina Garcia Bru Fernando Vieira Machado
 -
 How to Build an AI Chatbot with Facebook Messenger, OpenAI, and Twilio Programmable Messaging using PythonDylan Frankcom
Related Resources
Twilio Docs
From APIs to SDKs to sample apps
API reference documentation, SDKs, helper libraries, quickstarts, and tutorials for your language and platform.
Resource Center
The latest ebooks, industry reports, and webinars
Learn from customer engagement experts to improve your own communication.
Ahoy
Twilio's developer community hub
Best practices, code samples, and inspiration to build communications and digital engagement experiences.