Telegram Integration with Twilio Flex via Corezoid
Time to read:
March 15, 2022
Written by
Reviewed by

Recently, one of our customers asked us to check on the feasibility of integrating Telegram messenger with Twilio Flex. These were their requirements:
- Due to the urgent nature of the situation, the solution should be quick to stand-up and deploy.
- The solution should be scalable as this would be a critical mode of communication for the end-users.
- The messages being exchanged should be persistent for a specific user irrespective of which agent they first engage. In short – maintain conversation history across interactions.
Prerequisites
To build this solution, you will need:
- A Twilio Flex Account
- You'll also need a Twilio account. If you don't yet have one, sign up here for free.
- The Twilio CLI installed
- A Telegram Account
- A Corezoid Account (3-week Trial Account)
- Basic Node.js and Javascript knowledge
Let’s get started!
Start with Flex
If you’ve already set up your Flex instance, you can skip ahead to the next step.
If you’re new to Flex, create a new Flex account. Follow the prompts to kick off the Flex setup. During this process, several Twilio services will be created and provisioned for you.
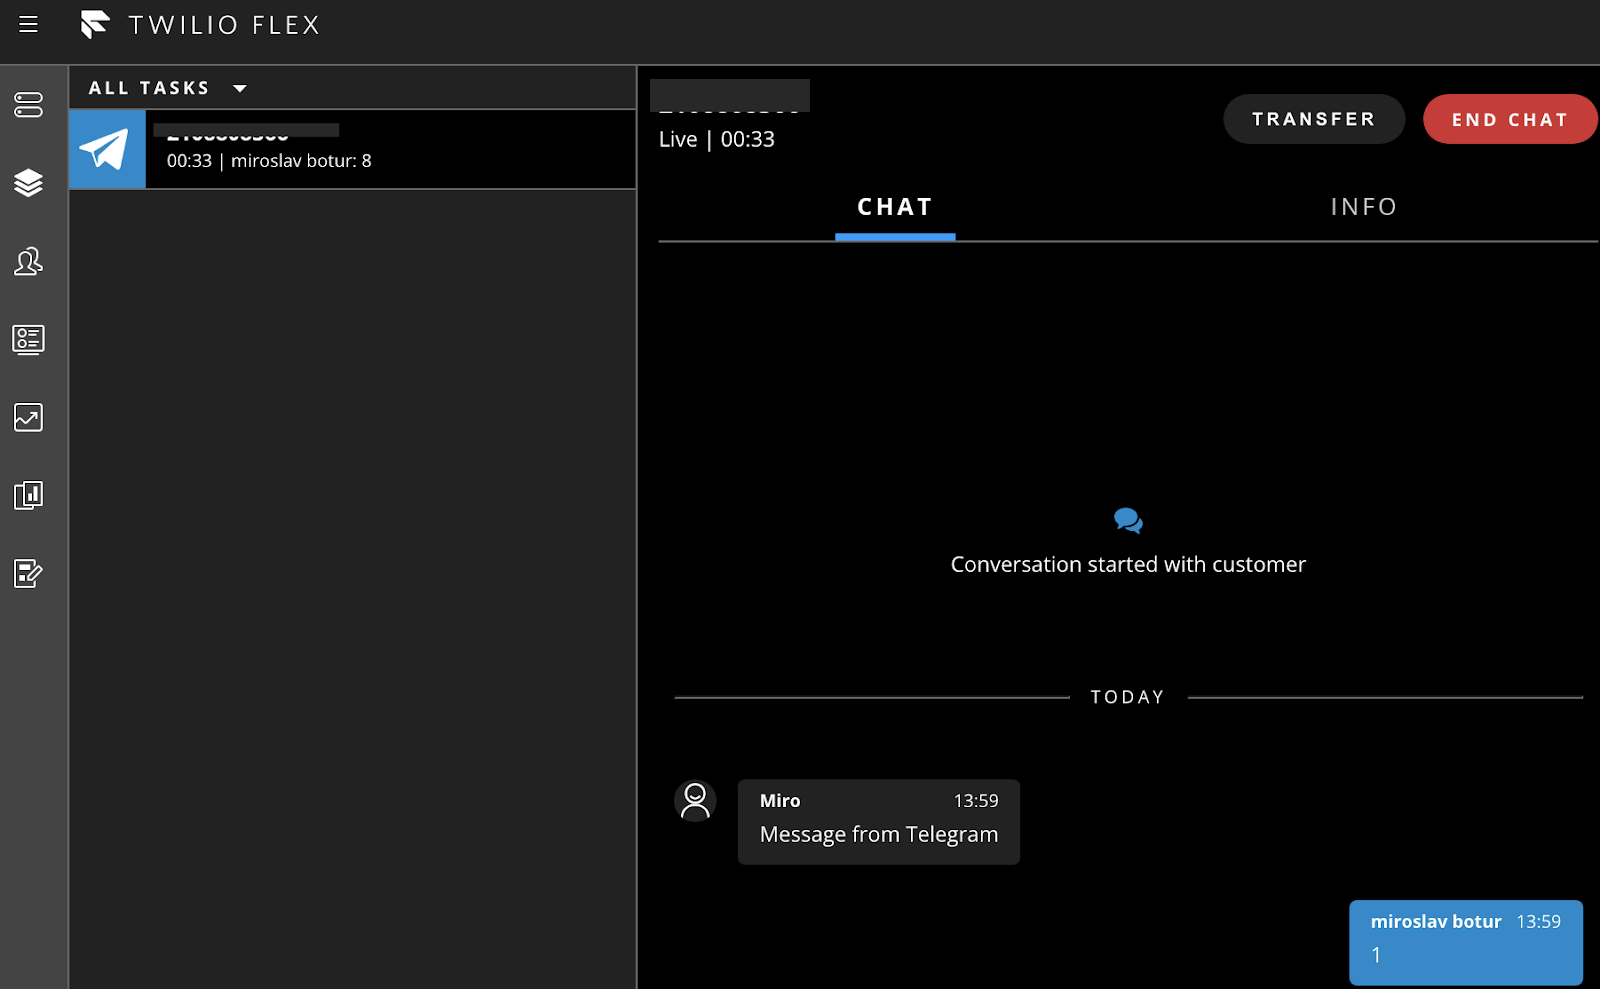
Launch the Flex UI in your browser, and you should see something like this.
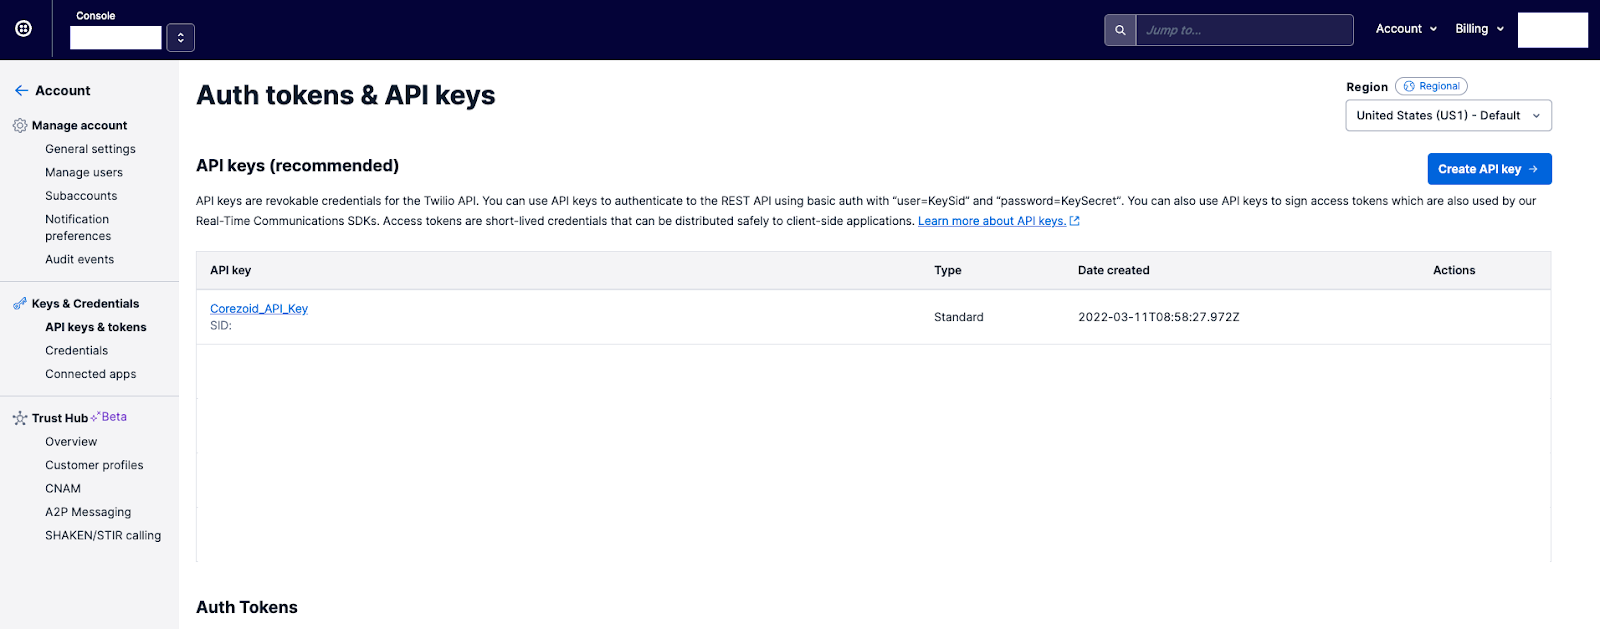
Create API Keys for Corezoid
Twilio recommends you issue an API token for Corezoid and don't use your Twilio Account SID and Secret directly. Twilio API Keys can be provisioned and revoked through the REST API or the Twilio Console. This provides a powerful and flexible primitive for managing access to the Twilio API.
For example, you might issue separate API Keys for different developers or different subsystems within your application.
Since API Keys can be independently revoked, you have complete control of the lifecycle of your API credentials. You can create a key here.
Set up a Telegram Task Channel in Task Router
Task Channels provide a mechanism to separate tasks of different types.
Execute the below command using twilio-cli
Response:
Set up a Studio Flow for Telegram
Twilio Studio is a visual tool that you can use to build communication applications with little or no code. In this section, you will import and publish one Studio flow.
Import the Telegram Flow
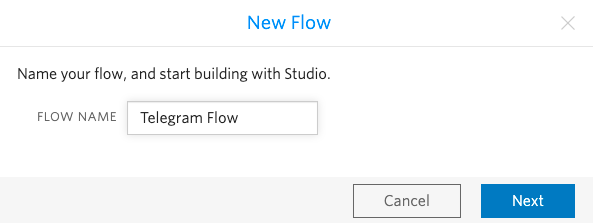
Navigate to the Twilio Studio Dashboard. Click "+" to create a new Studio Flow, then name the flow Telegram Flow (or whatever name you prefer), and click "Next".
Scroll to the bottom of the next pop-up and select Import from JSON template, then click Next.
Update the workflow and the channel to the Telegram Task Channel in the placeholders in “send_to_flex_1” with the actual values from the TaskRouter deployed as part of the Flex instance.
Save the send_to_flex_1 widget after making the changes and Publish the Studio flow.
Set up a Flex Flow
A Flex Flow is the logic linking a contact identity (e.g., SMS-enabled phone number or WhatsApp number) to Flex.
This page details the Flex Flow API Resource. Check out the additional documentation to learn more about working with Flex Flows.
Execute the below command using twilio-cli:
Response:
Set up a Twilio Serverless Service
Let's create a new service called "telegram" and two functions:
- Check if webhook already exists, and if not, create one
- Webhook itself that is responsible for sending messages back to Telegram
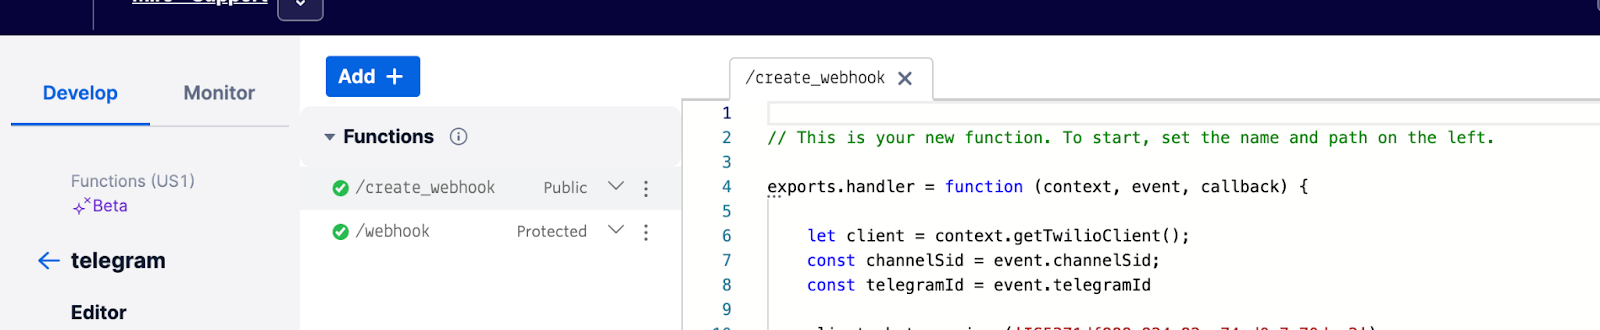
create_webhook Function
This function is public because it’s being called from Corezoid (step 12 in the previous section). Please note that this is just a functional example that does not cover authentication and proper logging.
webhook Function
This function can be protected as it is being called from within Twilio any time a message is being added to the channel. If the message is from the agent, then we pass it to the Telegram user.
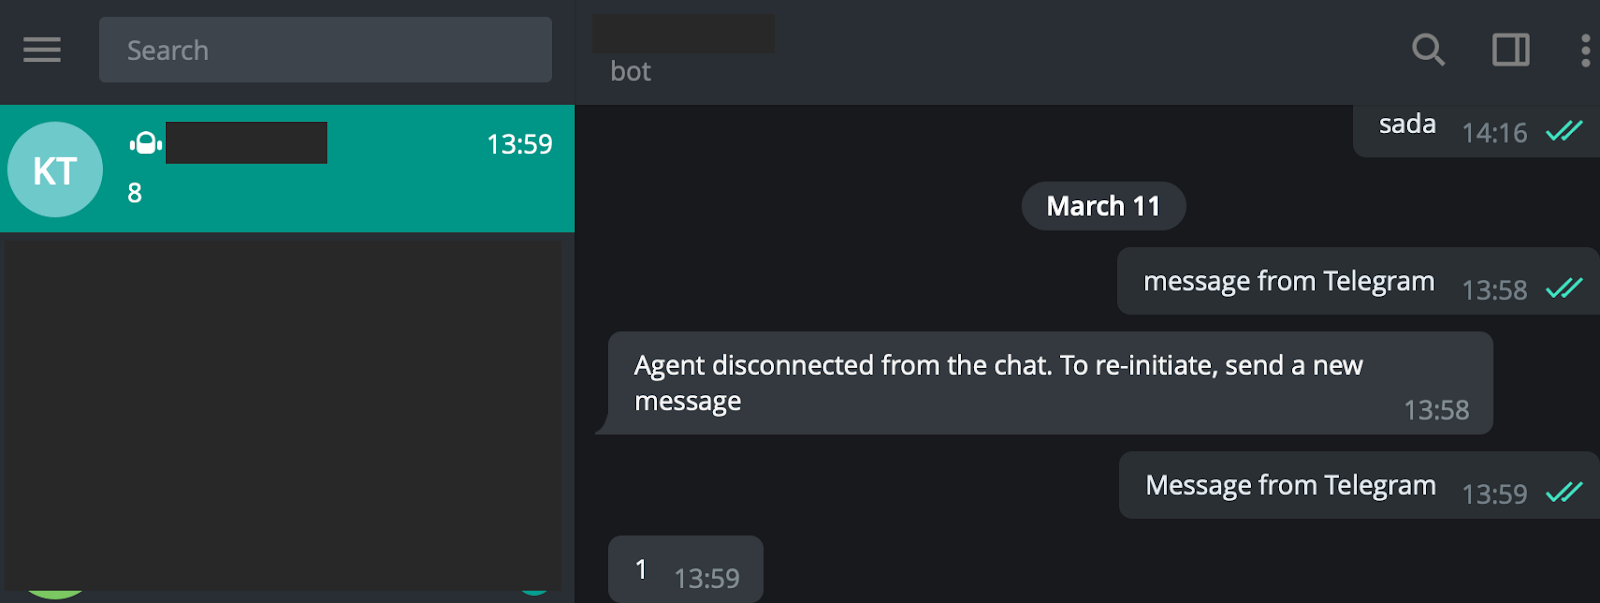
Set up a Telegram Account
- Install Telegram Messenger on your iOS/Android device.
- Register (Create) an account on Telegram App.
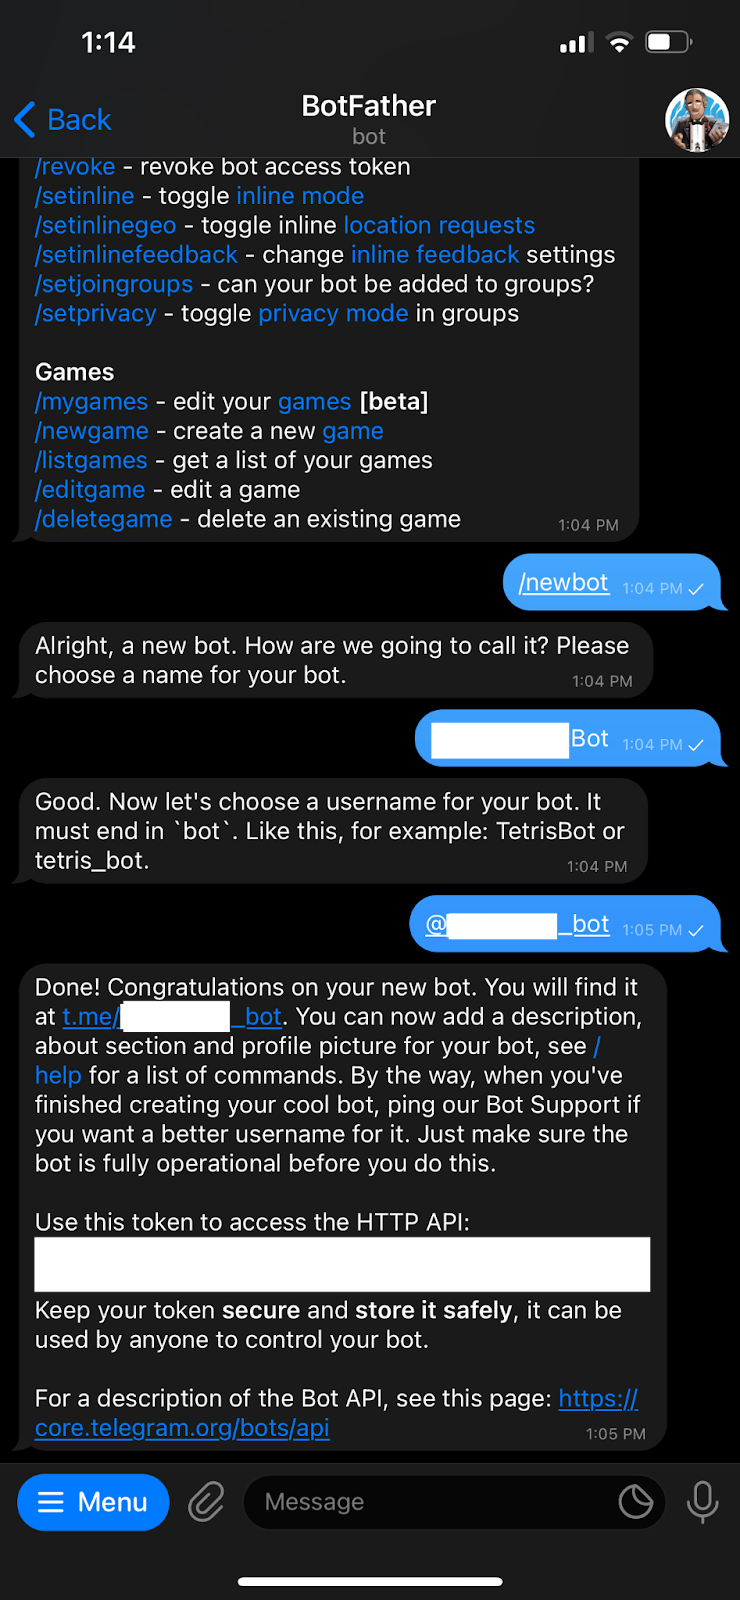
- Find ‘@botfather’ in the Telegram Messenger App.
- Use the ‘/newbot’ command to create a new bot. The BotFather will ask you for a name and username, then generate an authentication token for your new bot.
- The name of your bot is displayed in contact details and elsewhere.
- The Username is a short name, to be used in mentions and t.me links. Usernames are 5-32 characters long and are case insensitive, but may only include Latin characters, numbers, and underscores. Your bot's username must end in 'bot', e.g. 'tetris_bot' or 'TetrisBot'.
- The token is a string that is required to authorize the bot and send requests to the Bot API.
Create a Corezoid Trial Account
1. Create an account on Corezoid if you haven't yet. If you have already created an account click here to sign in.
2. Once signed in, you will be greeted with the Corezoid home screen.
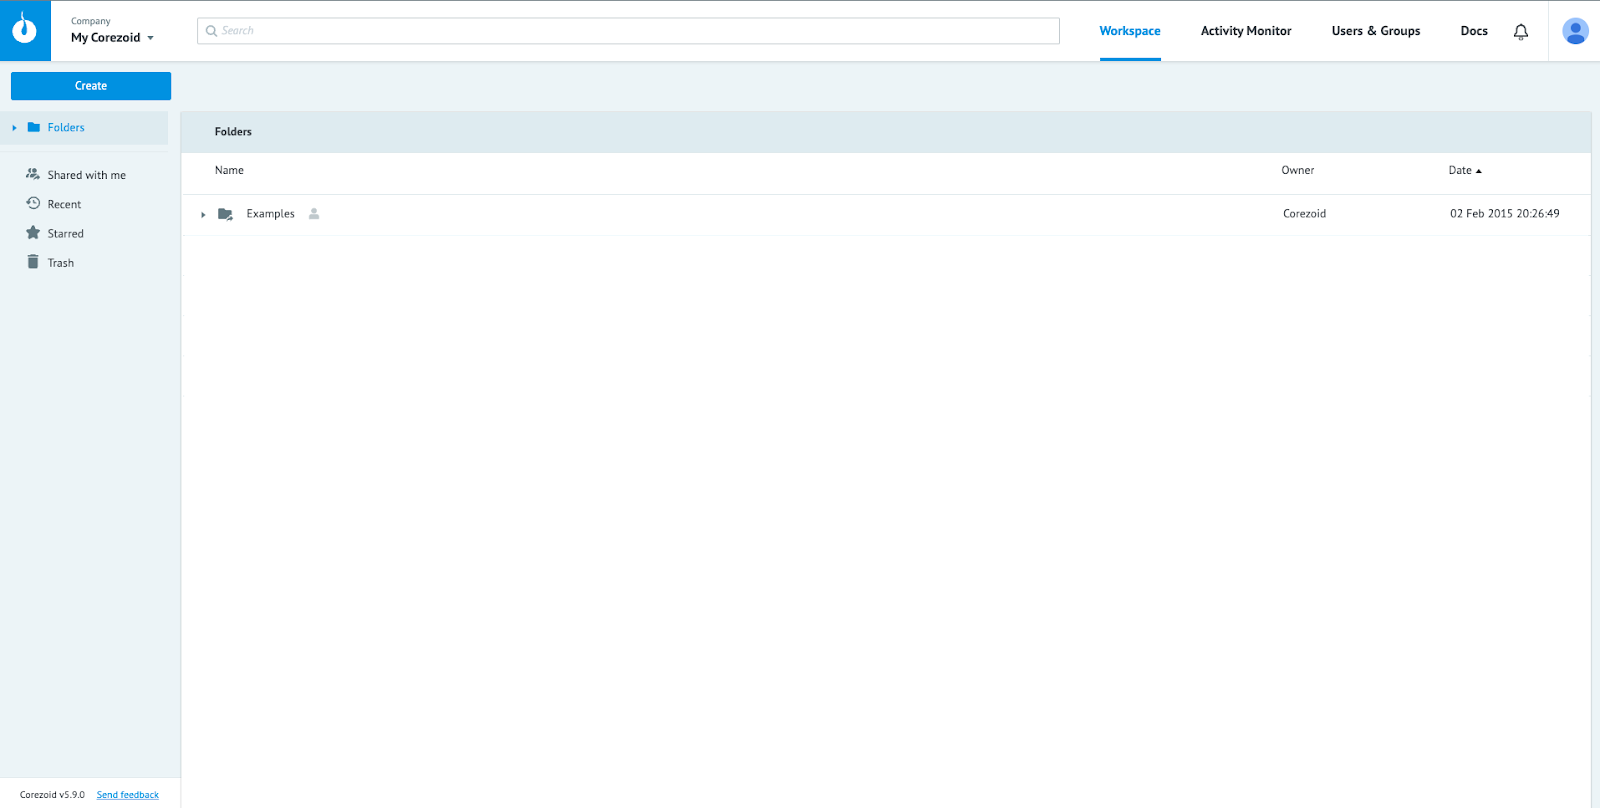
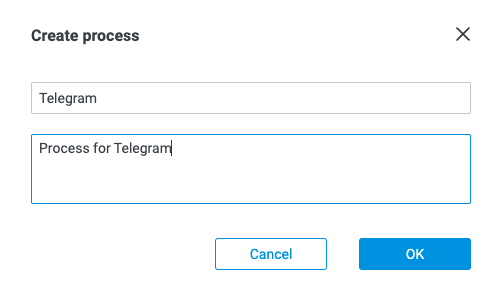
3. Click on the “Create” button on the top left corner to create a new process.

4. Create a new process called “Telegram”.
5. This will open a blank canvas to build the process flow.
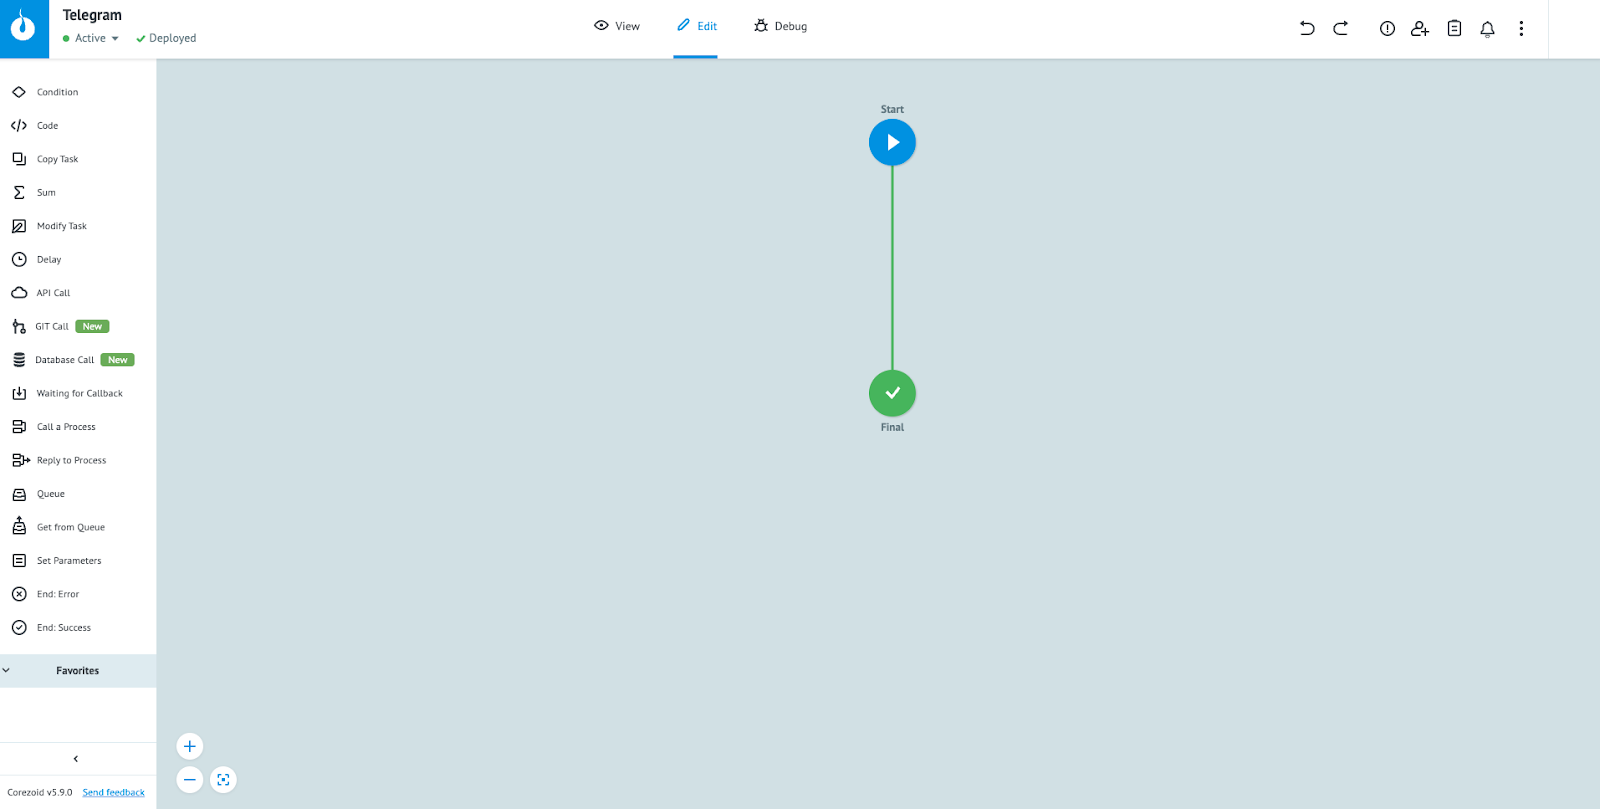
6. Select the “Start” widget, this opens a side panel with multiple options. Click on the “Connect to Messenger” button on the side panel.
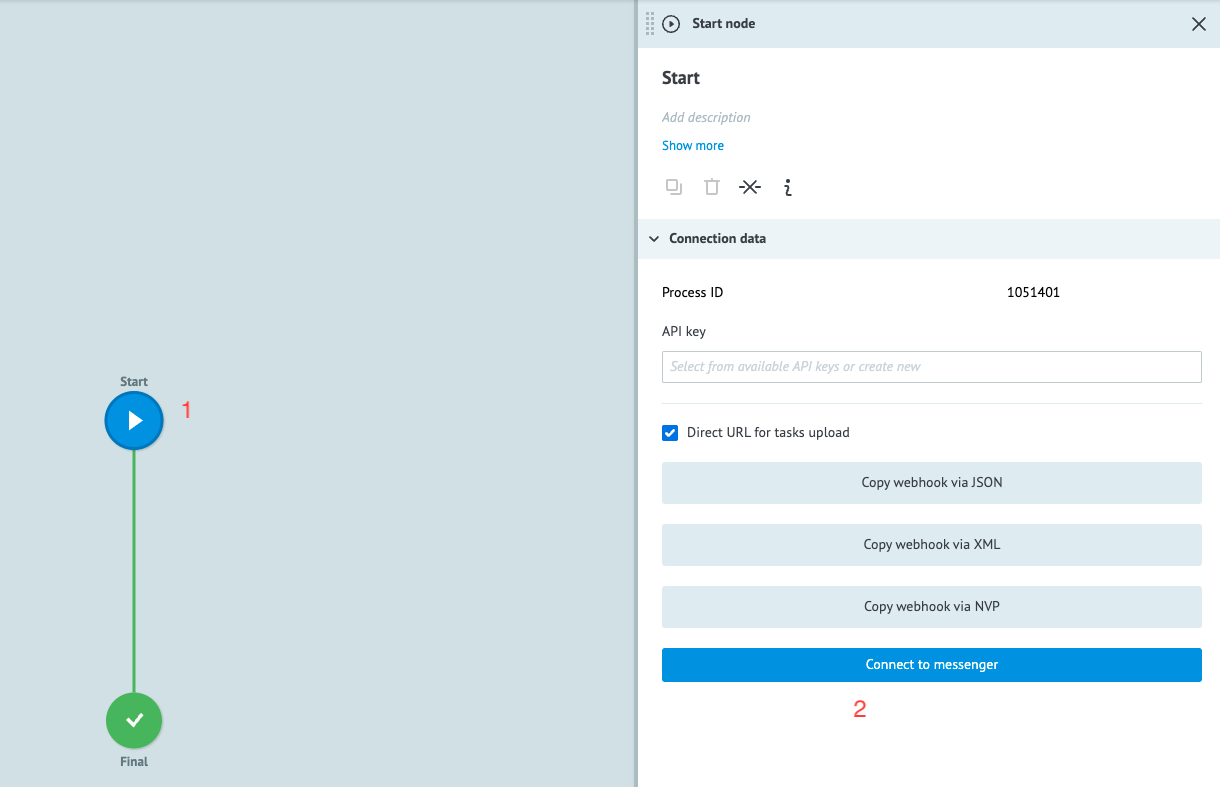
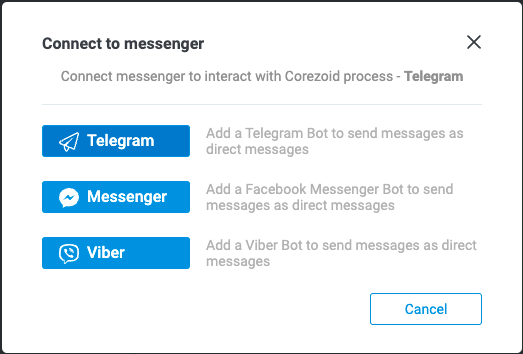
7. Enter the Telegram Bot API Token which you created and saved earlier. Then click on “OK” button.
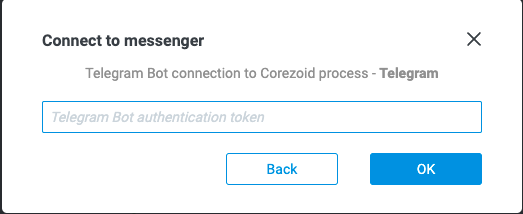
This will connect the Telegram Bot with Corezoid.
8. Let’s add additional api call widgets to the Corezoid process as described in the create customer channel blog post.
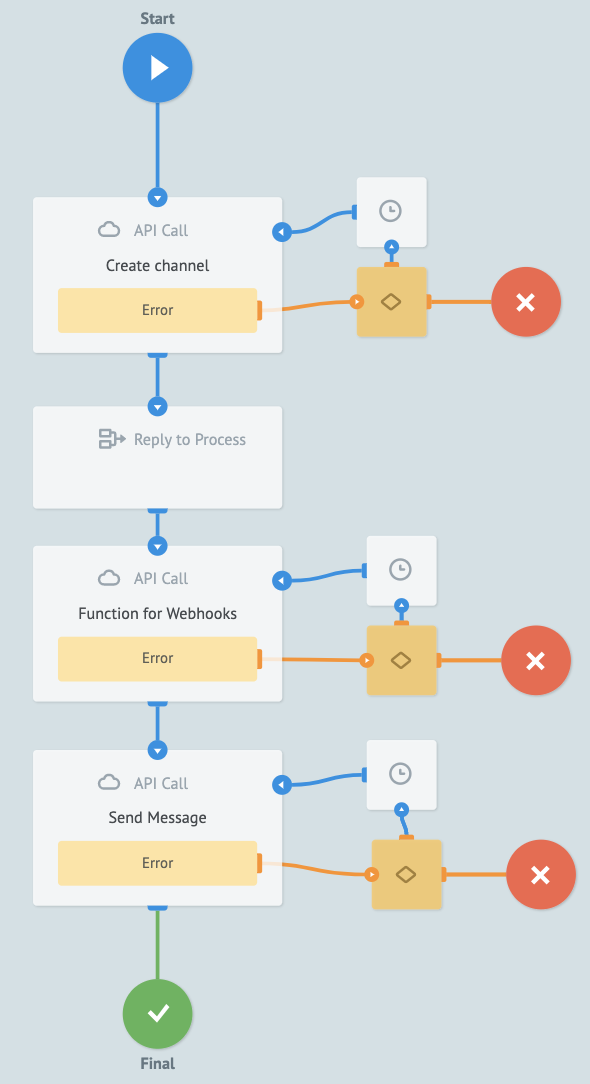
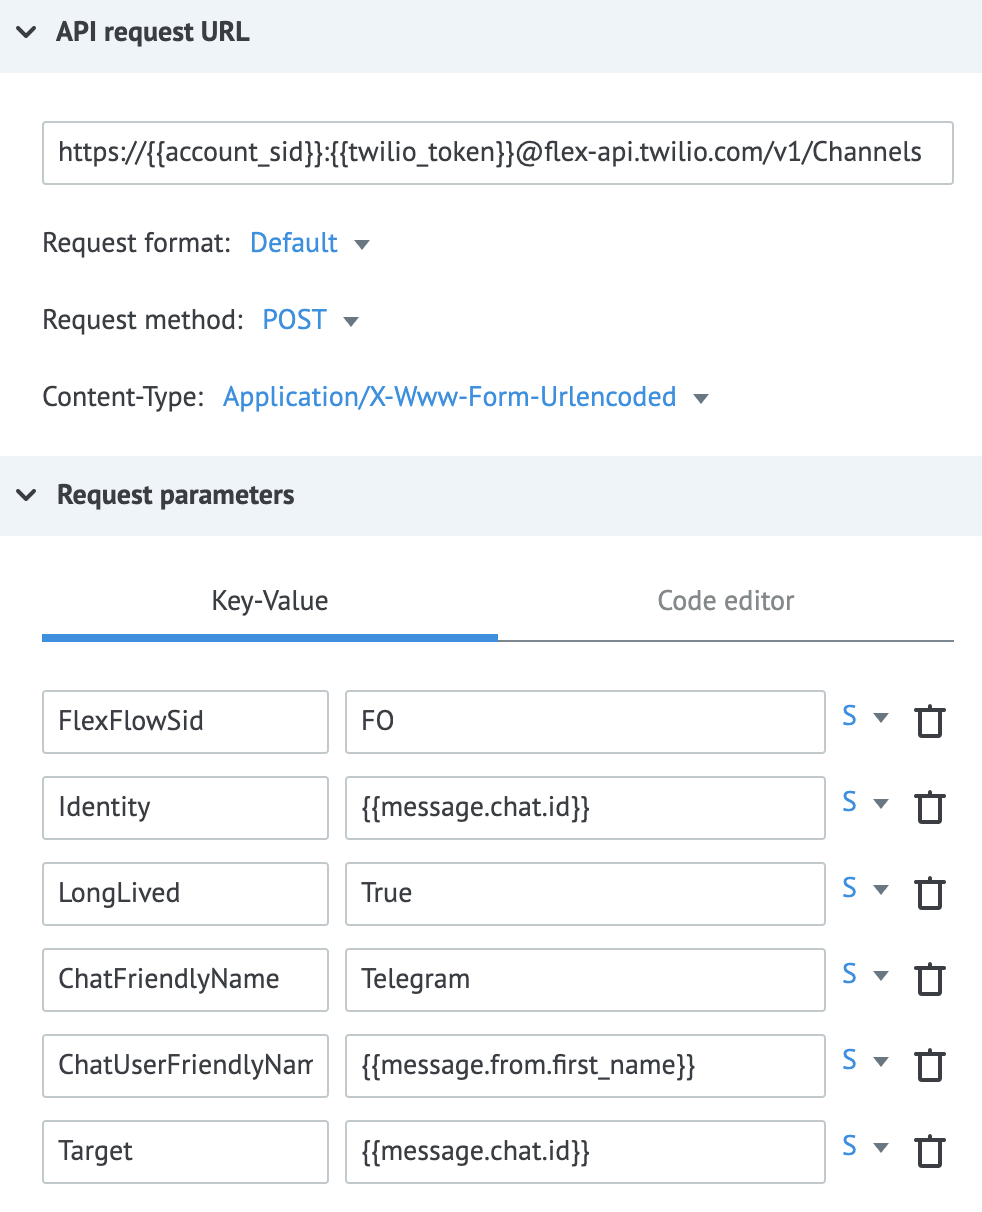
9. Create channel API call:
URL = https://{{account_sid}}:{{twilio_token}}@flex-api.twilio.com/v1/Channels
Parameters:
- FlexFlowSid =
FOxxx - LongLived =
True - Identity =
{{message.chat.id}} - ChatFriendlyName =
Telegram - ChatUserFriendlyName =
{{message.from.first_name}} - Target =
{{message.chat.id}}
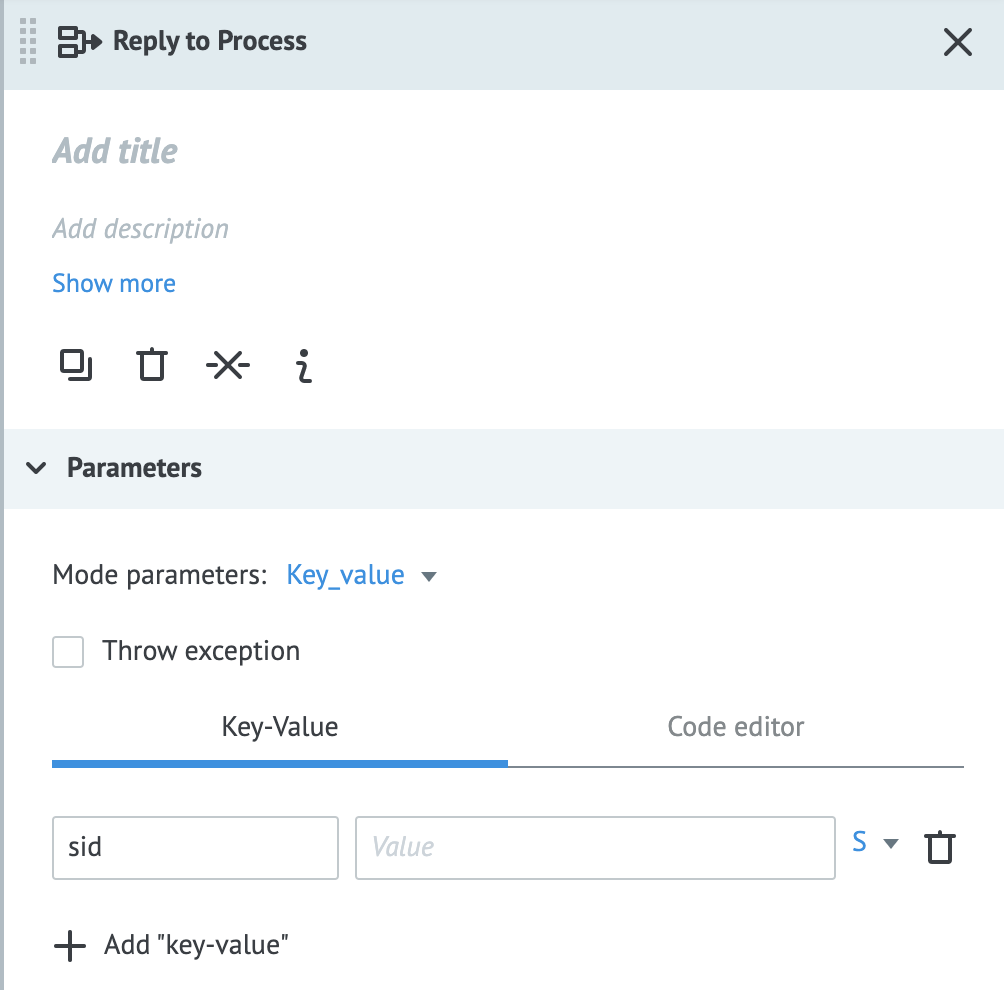
10. Add “Reply to Process” widget to get Channel SID created
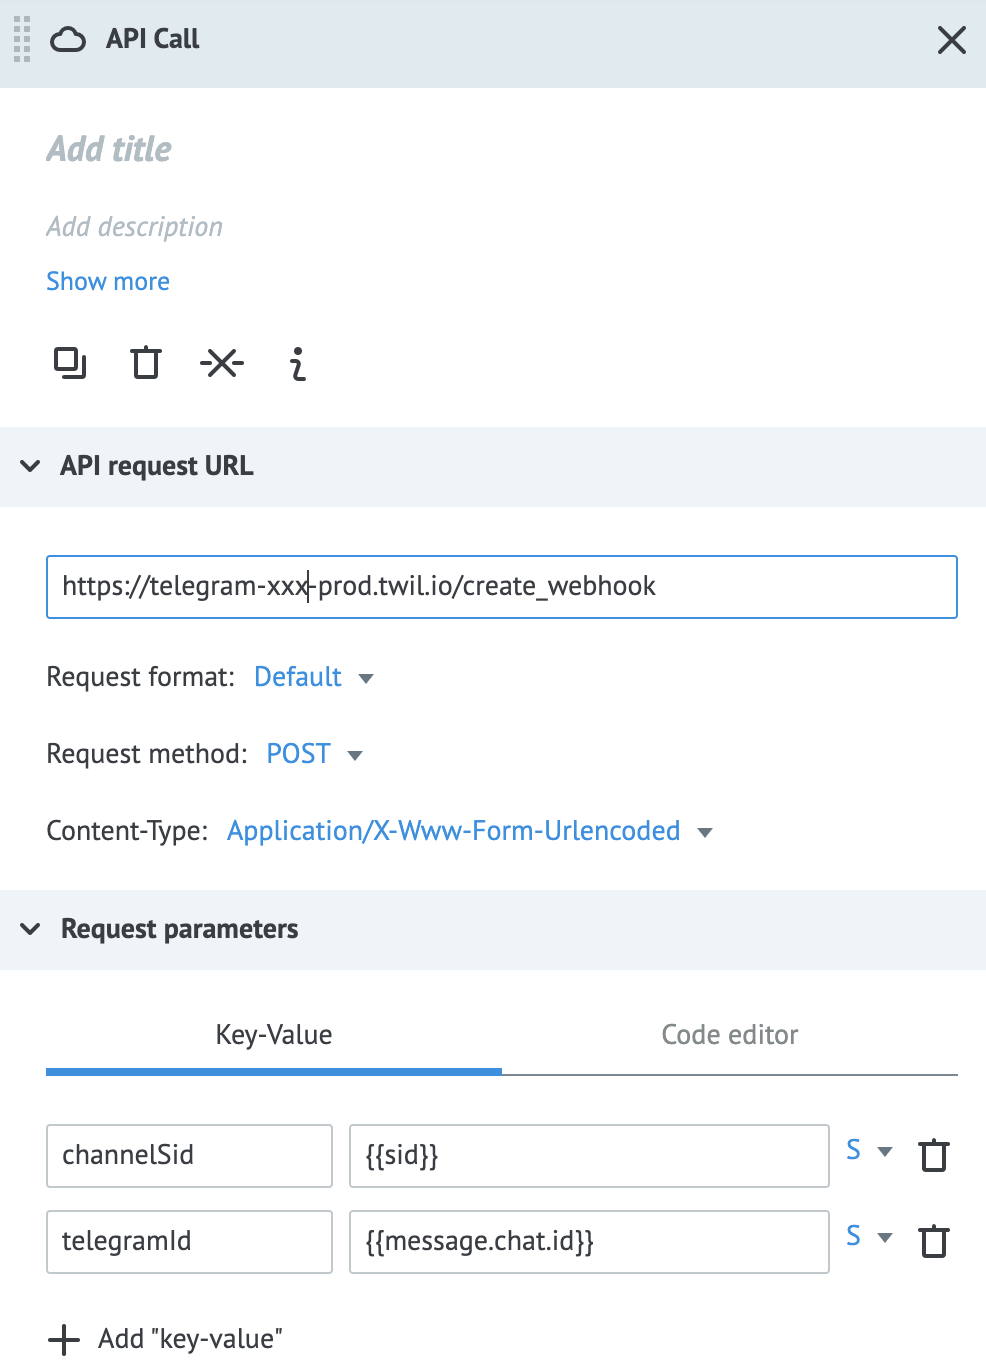
11. Call Function that adds webhook to the Channel (more about the function in the next chapter):
URL = https://<function_url>/create_webhook
Parameters:
- channelSid =
{{sid}} - telegramId =
{{message.chat.id}}
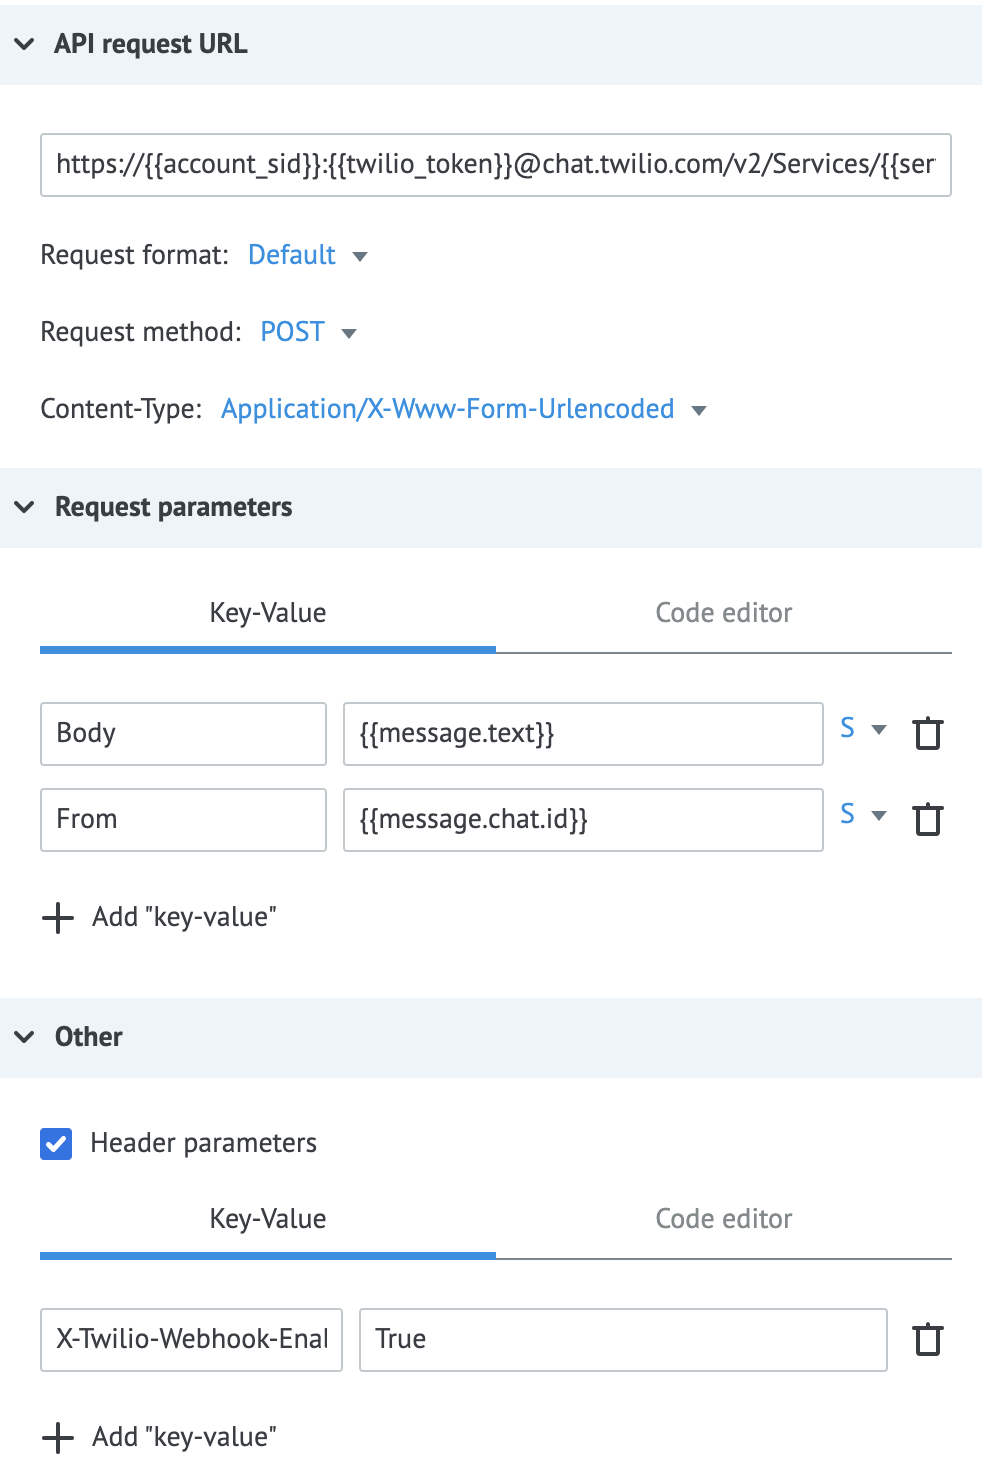
12. Send Message to Channel Widget:
URL = https://{{account_sid}}:{{twilio_token}}@chat.twilio.com/v2/Services/{{service_sid}}/Channels/{{sid}}/Messages
Parameters:
- Body =
{{message.text}} - From =
{{message.chat.id}}
Headers:
- X-Twilio-Webhook-Enabled =
True
And that’s it! You've now built a straightforward example of a process used as middleware between Telegram and Twilio, using Corezoid.
Great Job!
That’s it! You can start testing your solution:
- Send a message to your Telegram Bot
- This triggers the process in Corezoid
- Corezoid API calls creates a new channel, adds webhook & adds a new message into the channel
- Flex Flow triggers the Studio as soon as the message is in the channel
- Studio creates a new task in Flex
- Reply in Flex that triggers webhook sending agent’s message back to the Telegram
More from the Twilio.org product team coming soon
This is just one of the many ways that the fast-growing Twilio.org product team is building software to help social impact organizations advance their missions with Twilio. Stay tuned for future product releases from Twilio.org that focus on the unique needs of the social sector including tools for beneficiary, volunteer, and donor engagement.
Vinit Dave is a Senior Solutions Architect at Twilio Professional Services, primarily functioning to innovate, design and build complete e2e solutions for variety to customer problems and industry verticals. He can be reached at vdave [at] twilio [dot] com.
Miroslav Botur is a Senior Solution Architect at Twilio Professional Services. He is focused mainly on Flex Insights and enhancing analytics data by using Flex plugins, Functions and advanced Studio flows. He can be reached at mbotur [at] twilio [dot] com
Related Posts
-
 Integrating Twilio Agent Connect with Twilio Flex for Human HandoffSimran Aishwarya
 -
Script Adherence Using Real-time Conversation Intelligence with Twilio FlexCurtis Swartzentruber Ruma Nair
-
Orchestrate an AI-to-Human Agent Handoff with Twilio Agent Connect, Conversations Orchestrator, Studio, and FlexKinshuk Kar Sarang Shah
Related Resources
Twilio Docs
From APIs to SDKs to sample apps
API reference documentation, SDKs, helper libraries, quickstarts, and tutorials for your language and platform.
Resource Center
The latest ebooks, industry reports, and webinars
Learn from customer engagement experts to improve your own communication.
Ahoy
Twilio's developer community hub
Best practices, code samples, and inspiration to build communications and digital engagement experiences.