Transfer Calls Back to Your IVR from Flex
Time to read:
February 28, 2022
Written by
Reviewed by

We have all faced the scenario where we called a company, but talked with the wrong agent.
Maybe we wanted to talk to Sales, but the Service team picked the call up – probably because we selected the wrong option while in the IVR.
To tackle the scenario, agents will typically say, “please call us again, and press 2-4-1 to get to the correct department”. Or, perhaps, agents could transfer us to another department or queue but want to ensure that some parts of the IVR are still followed and tell us to hit a button sequence. And in yet another scenario, we may be offered the choice to follow a self-serve branch that may be more efficient for both the customer and the agent.
This blog post will show you a step-by-step way to provide a better customer experience by allowing an agent to transfer a customer to the exact menu in the IVR where they wanted to be. This Twilio Flex Plugin will allow the agents to perform a one-step transfer back to a selected place in the IVR flow.

Adding the “Transfer To IVR” feature
To get this new Transfer to IVR feature up and running, you need to go through 3 steps:
- Create a Twilio Function
- Create a Twilio Studio Flow
- Install the Flex Plugin
Don’t worry, the steps are pretty straightforward.
Before we start
This post assumes you already have a Twilio account (if you don't, sign up for a free account here) and have a Flex Instance running, and you know how to install a Flex Plugin. Get started with Flex Plugins if this is not the case.
- You need to have the Twilio CLI. Type
twilioin your terminal to see if you have it. If not, install it now. - You need the Flex Plugins CLI . Type
twilio pluginsto make sure you have it. If not, install it. - You need to create a new profile for your Twilio CLI, type
twilio profiles:listto check if you are using it correctly. If not, add a new profile with the commandtwilio profiles:add
Step 1 - Create a Twilio Function
Go to your Functions and create a new Service.
Once there:
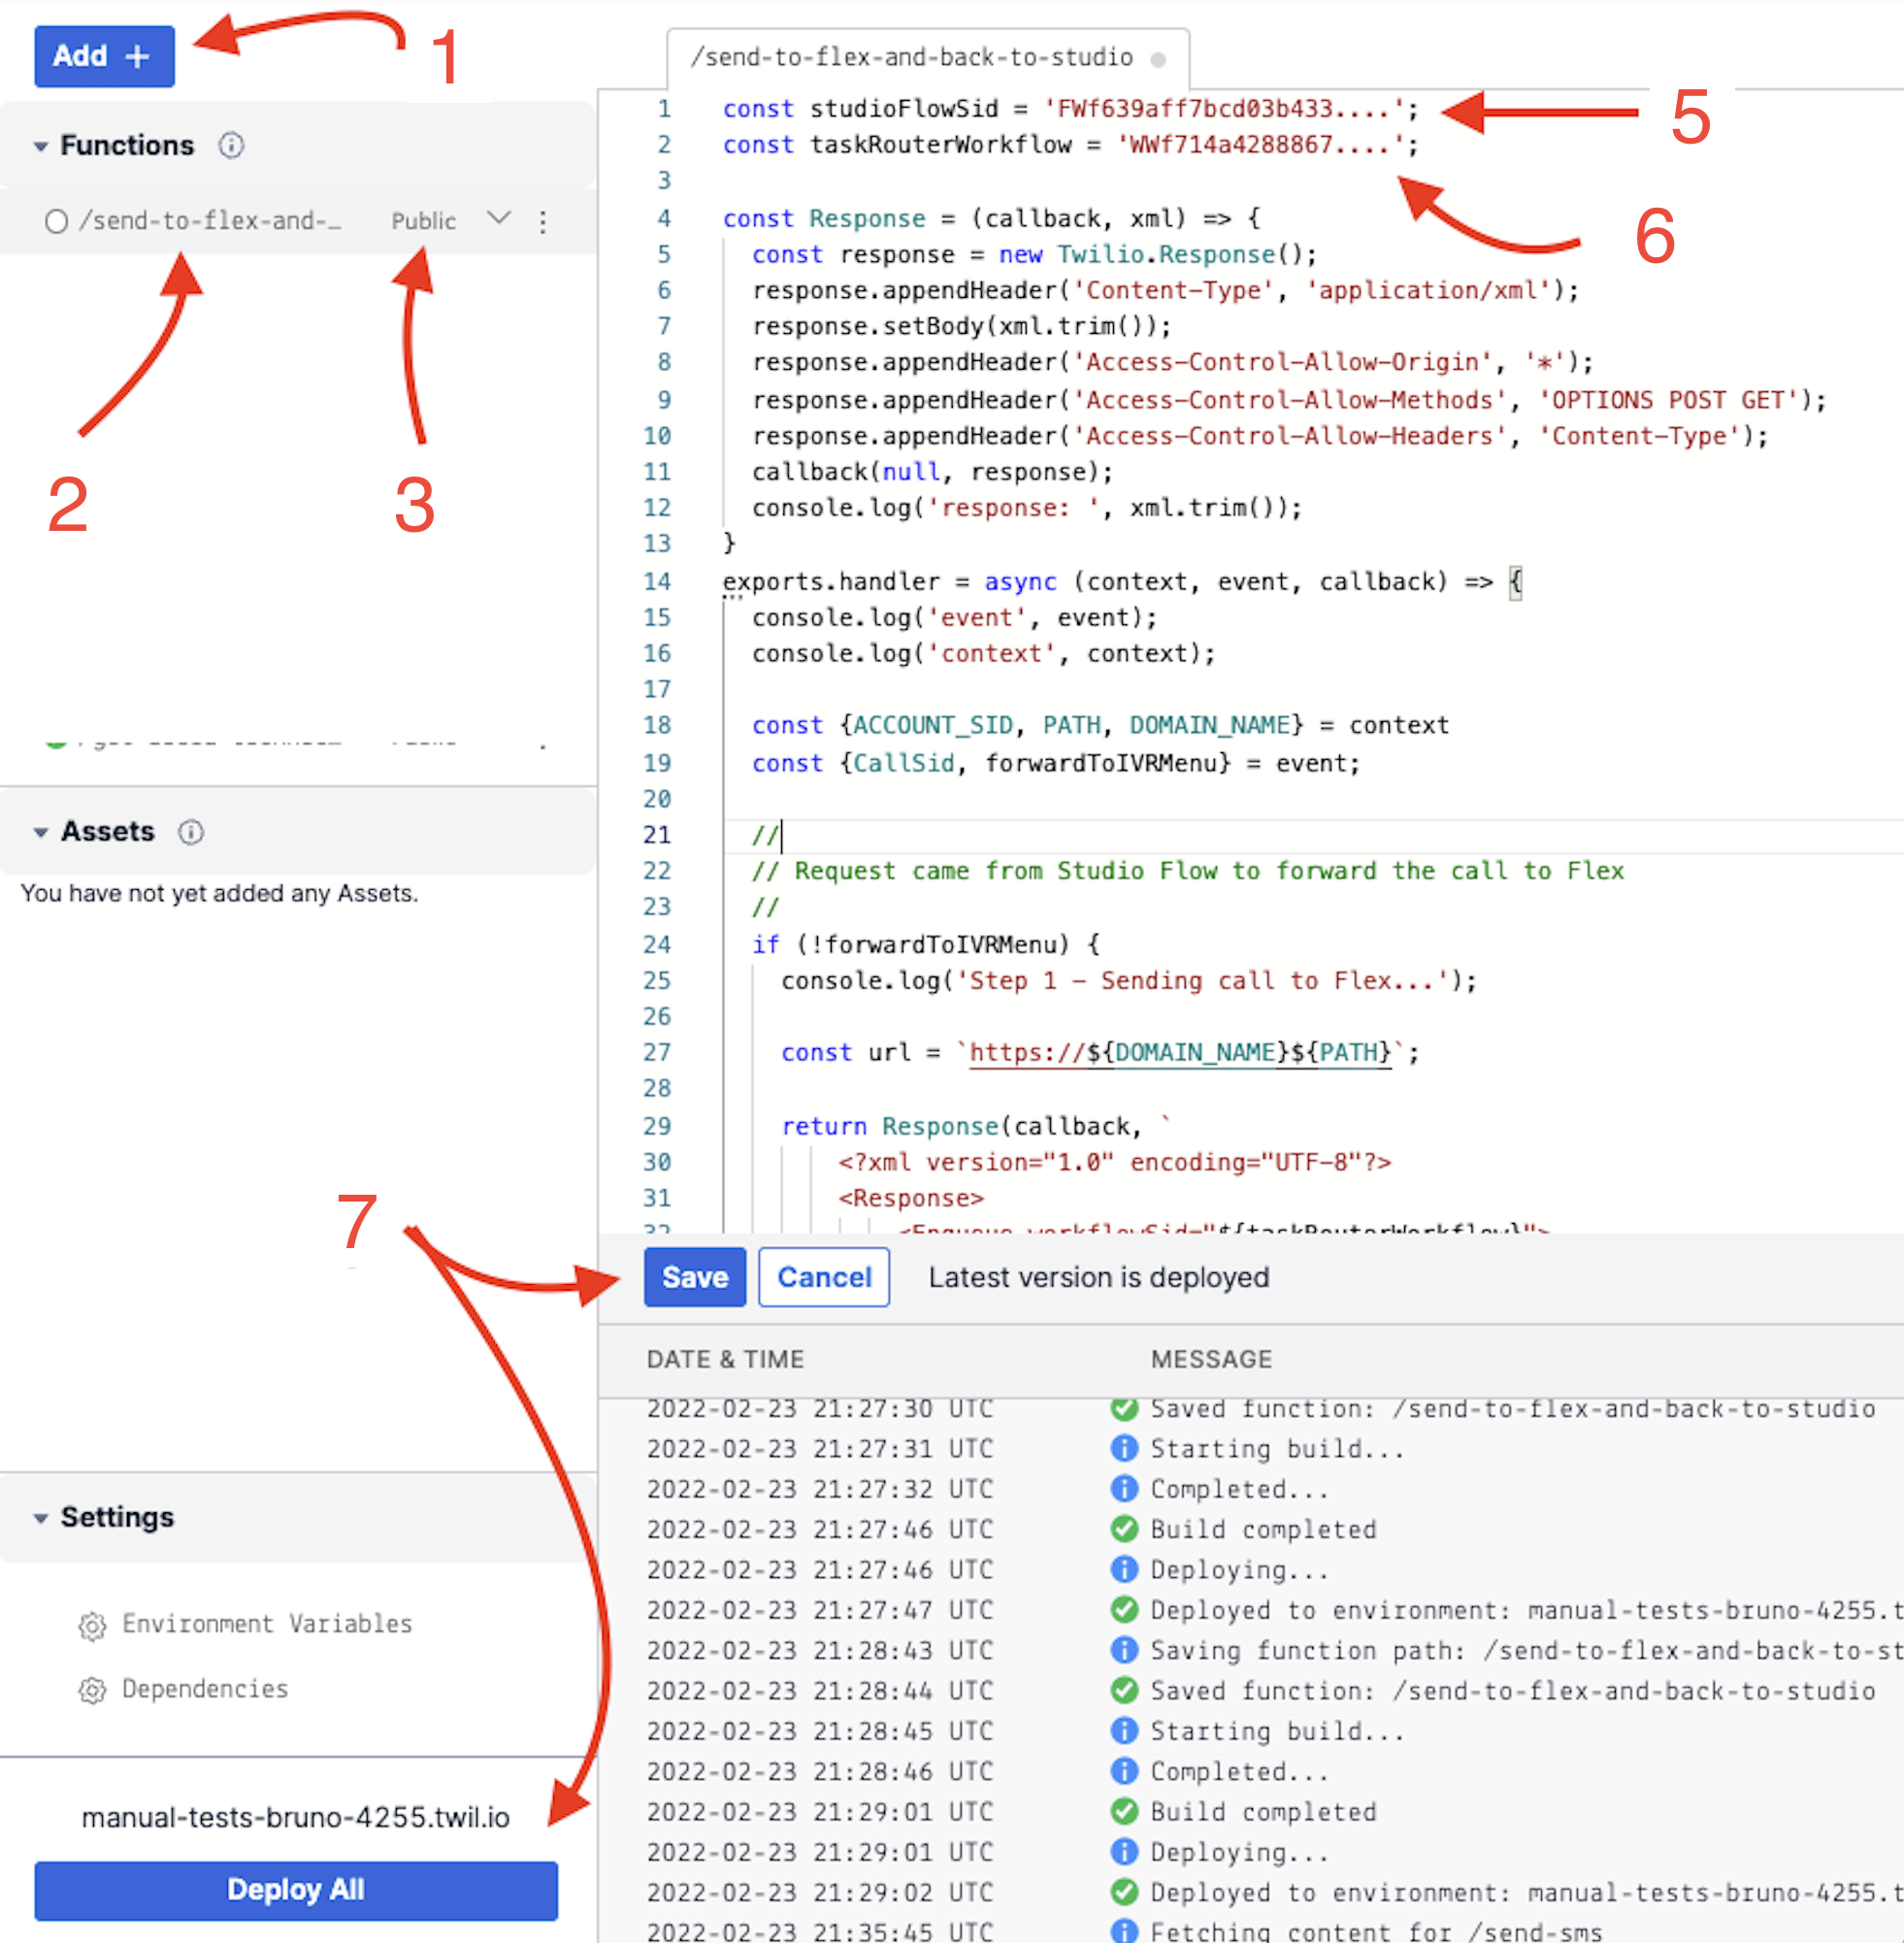
- Click on the "Add" button
- Rename your function /send-to-flex-and-back-to-studio
- Set it to Public
- Copy the function code from here and paste it in the box
- You will need to set your studioFlowSid – but you don’t have it yet, so for now, leave this as-is. This will be covered in Step 2 below.
- The constant taskRouterWorkFlow you can define now! Go to your Taskrouter Workflows and select the appropriate one. The SID for a workflow starts with “WW”, copy the SID and paste it as a value for the taskRouterWorkFlow
- That is it! Hit the Save button and Deploy all.
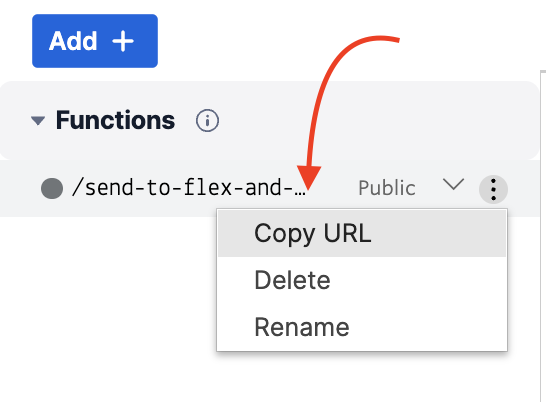
Once the function is deployed, just copy the url of this function as shown in the image below, and save it somewhere. We will need this url in the Studio flow later.
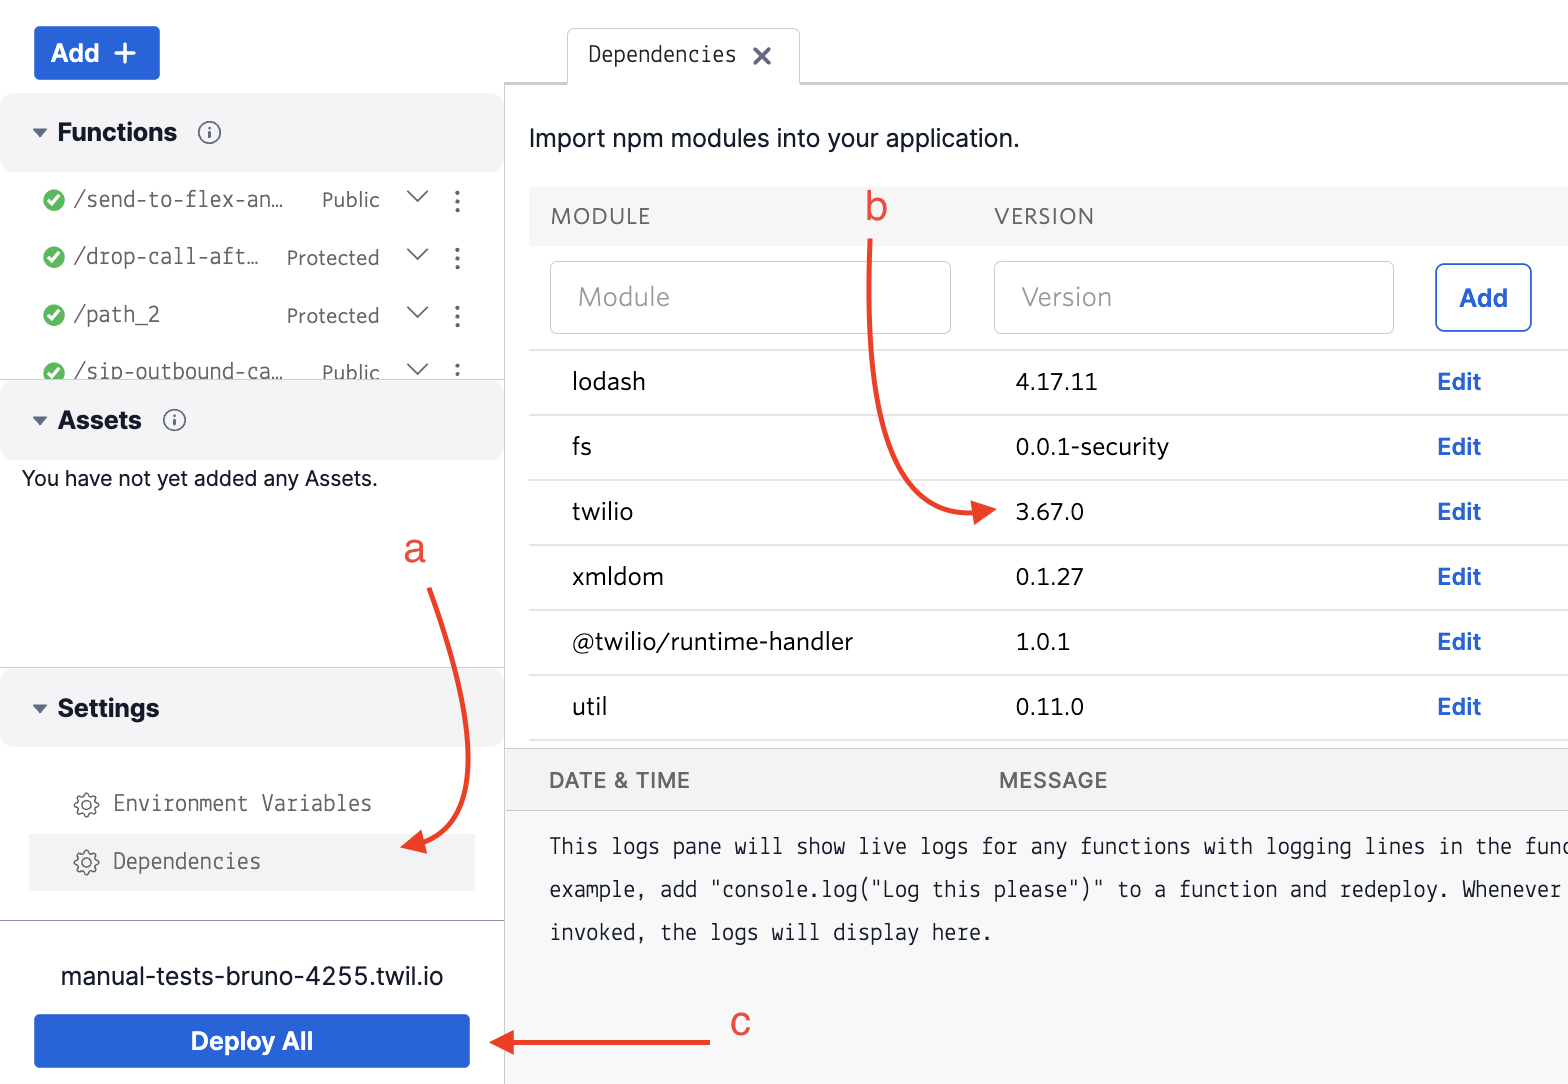
It is better to double-check the twilio NPM package you are using on this Function. Follow the screenshot below clicking on Dependencies. You have to update it to at least 3.67.0, as lower versions such as 3.29.2 are broken. Don’t forget: you need to click on Deploy again!
Step 2 - Create a Studio flow
Now, let’s configure your IVR flow.
If you already have an IVR, we still recommend you to follow the steps below and create a new IVR to put all the pieces together. Once you confirm everything is working as expected, the IVR flow can be adapted as needed.
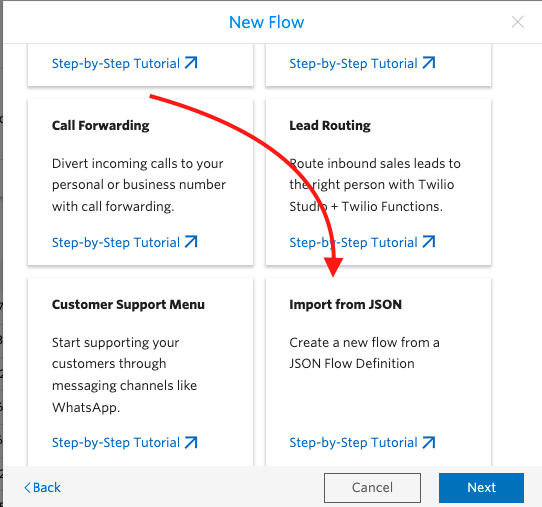
a. Go to Studio and hit the plus button to create a new Flow. Scroll down and select “Import from JSON” as shown below.
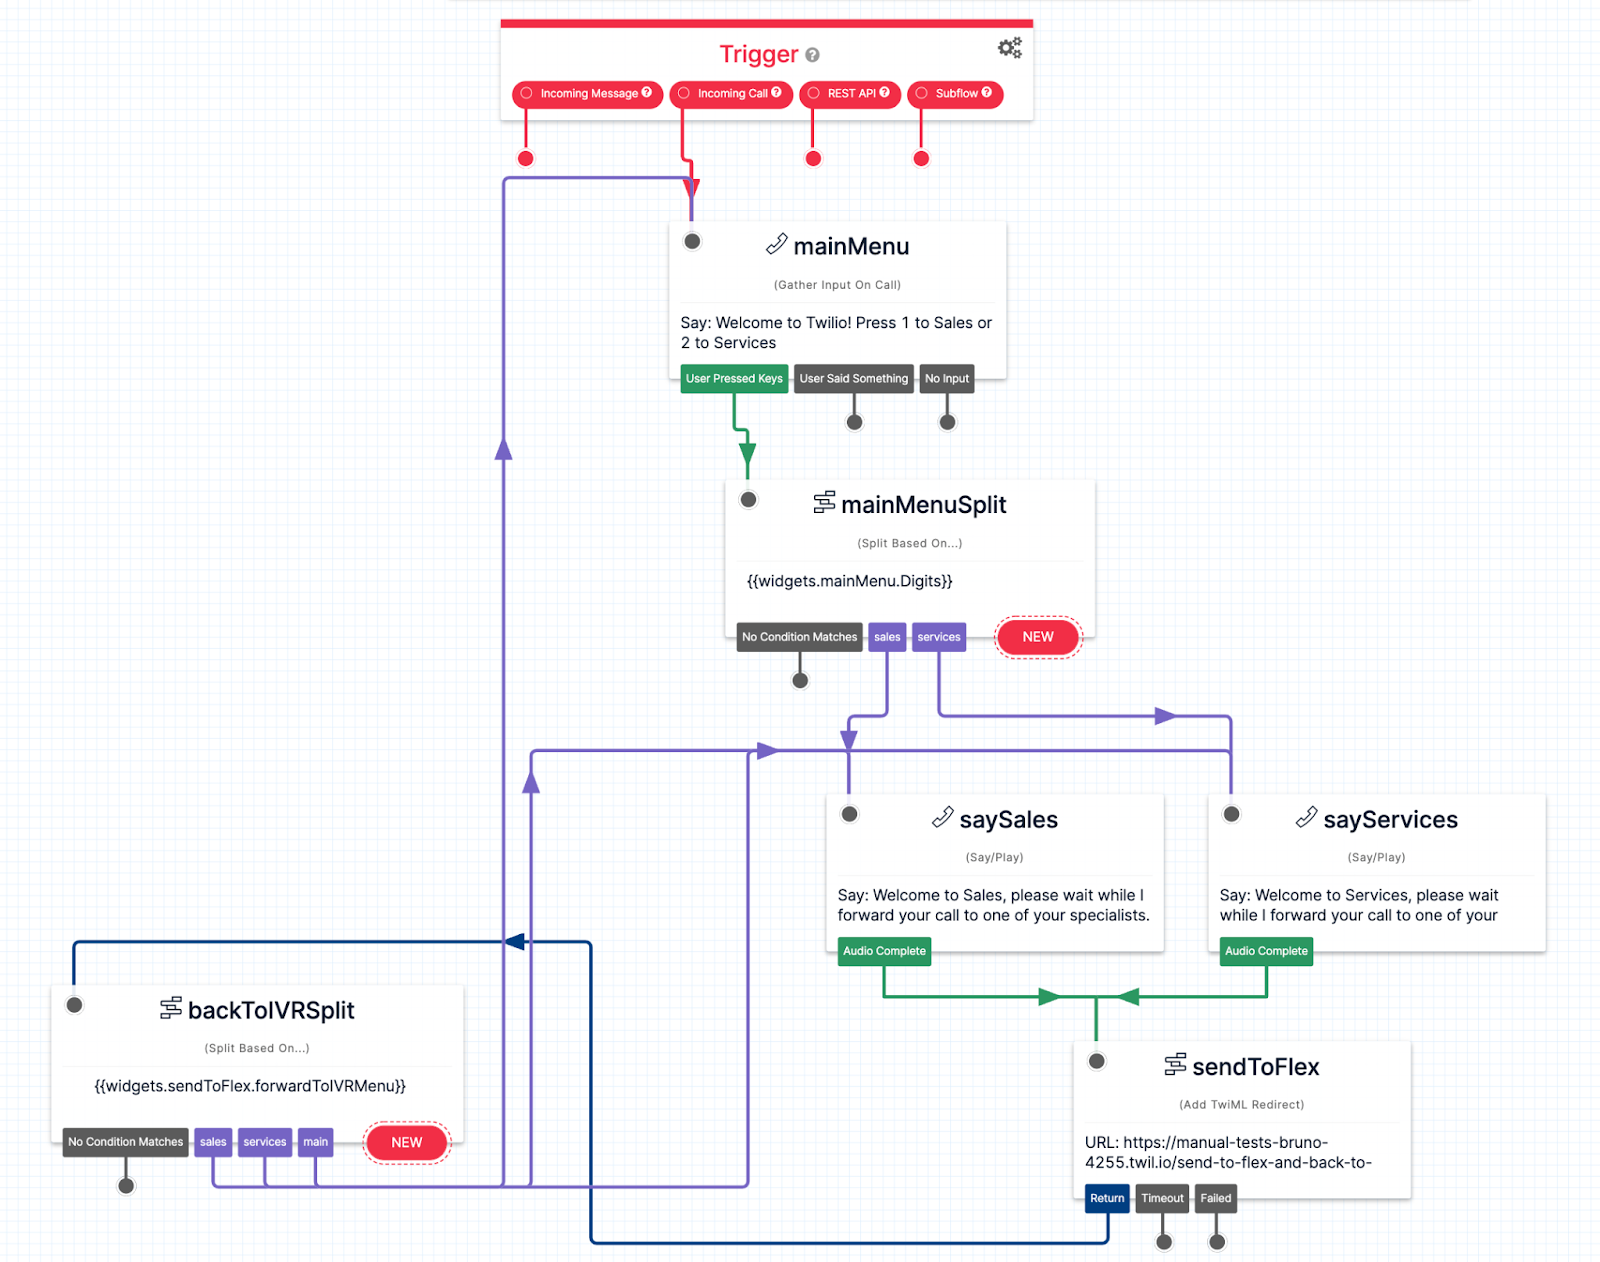
b. Copy the structure from our example here and paste into the field, then click Next. You should see the flow like the image below:
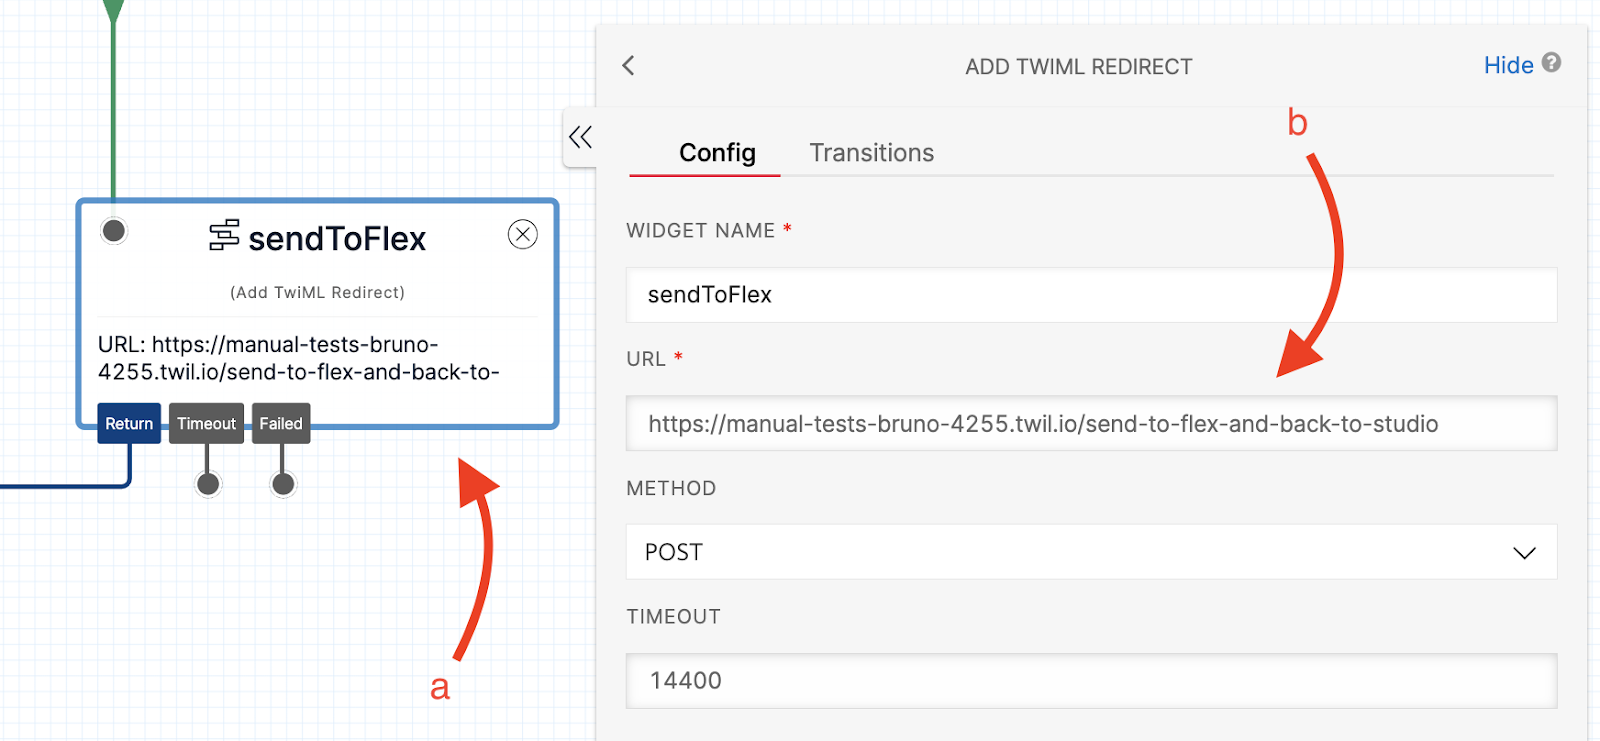
c. Click on the sendToFlex widget, and update it with the url of your function here:
d. That is it! Don't forget to hit the Publish button on Studio Flow…
Fun fact: There are only 2 types of people in the world: those who've never used a Studio flow before and those who've forgotten to click the Publish button and wondered why their IVR wasn't working. It happens to all of us!
e. Finally, need to go to the Phone Numbers and select one of the Phone Numbers to forward the call to this Studio Flow. Select the number, scroll down, and modify "A Call Comes In" to point to this flow.
f. And now that you have published the Studio Flow, you have the SID. Go back to the function created in Step 1 and update the studioFlowSid with the SID of the flow ( see step 1.e above) – remember that you always have to click on Save and Deploy after making changes to a function.
g. At this stage, you can call in... grab your phone and call the number linked to your IVR flow. Select '1' to go to Sales, and open Flex to check if the call is really reaching where it needs to reach. You won't be able yet to transfer the call back to the IVR at this stage as Step 3 below is missing, but if you are picking up the call on Flex, that is half way there!
Step 3 - Install the Plugin
Ready for the final part? Here we will modify the UI of the Flex dialpad to give the Agent the option to complete the action of transferring the call back to the IVR.
To deploy the plugin to your Flex instance:
- Clone this repo
- Open the terminal and type
npm installto install the packages into your computer. npm run deploy -- --changelog "first deployment!"to deploy this Plugin.- Once it is finished, it will show the next steps. You will have to run the command mentioned there (something like
twilio flex:plugins:release... etc., etc.)
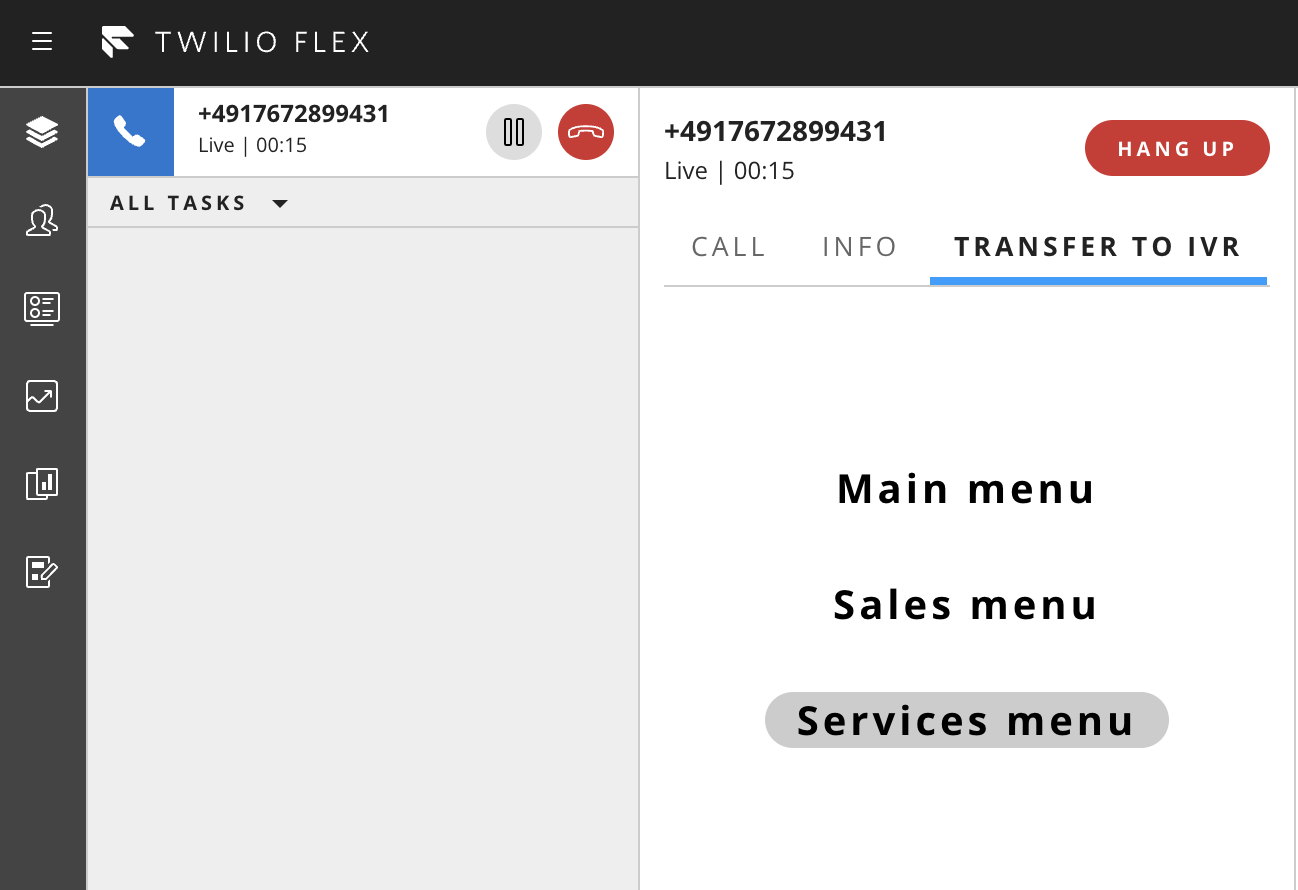
We are done! Open Flex, make a call to your IVR, and check if you can see the tab “Transfer to IVR” below.
Next steps?
There aren't many, really! For any new options you'd like to add, you can quickly change the config.ts file to reflect the menus you have on your IVR and deploy the Plug again.
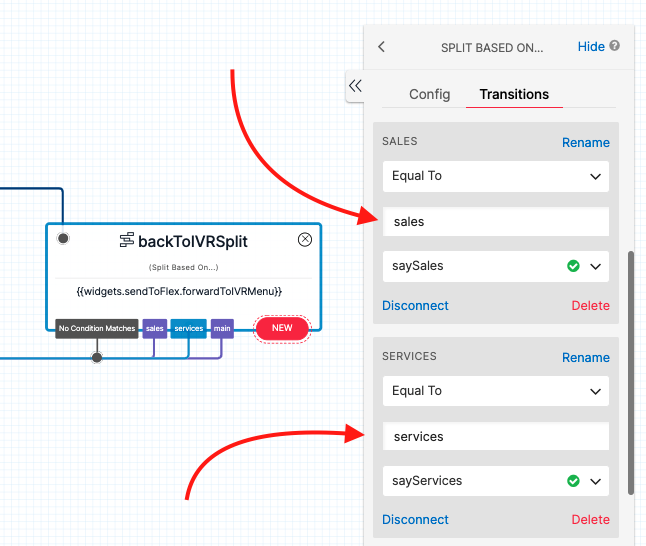
In the IVR flow created above in Studio, there is a widget called backToIVRSplit. This widget has to have the same Transitions as you have defined in the config.ts (like the image below) as this will provide the mapping between the options available to the agent in the Transfer To IVR section of the dialpad, and the IVR flow transition:
Hope you have enjoyed it! If you need any help, open an issue on the Repo and I will reply back to you!
Bruno Kilian is a Senior Solutions Engineer at Twilio. He's currently helping companies in EMEA design great customer engagement solutions powered by Twilio. Before, Bruno worked as Tech Lead in an Insurance Contact Center with ~ 600 agents in 4 countries. He can be reached on Linkedin or you can collaborate with him on Github.


Related Resources
Twilio Docs
From APIs to SDKs to sample apps
API reference documentation, SDKs, helper libraries, quickstarts, and tutorials for your language and platform.
Resource Center
The latest ebooks, industry reports, and webinars
Learn from customer engagement experts to improve your own communication.
Ahoy
Twilio's developer community hub
Best practices, code samples, and inspiration to build communications and digital engagement experiences.