ETA Notifications with Node.js and Express

January 10, 2017
Written by
Reviewed by
Paul Kamp
Twilion
Jose Oliveros
Contributor
Opinions expressed by Twilio contributors are their own
Kat King
Twilion
Phil Nash
Twilion

eta-notifications-node-express

Companies like Uber, TaskRabbit, and Instacart have built an entire industry around the fact that we, the customers, like to order things instantly wherever we are.

The key to those services? Instant customer notifications when something changes.

On this tutorial we'll build a notification system for a fake on-demand laundry service Laundr.io in Node.js and Express.

Let's get started!

Trigger the Notifications

This delivery driver's screen will show two buttons that allow him or her to trigger notifications: one for picking up an order and one for delivering it.  Those buttons will be wired to the appropriate route:

  1. Delivery person picks up laundry to be delivered ( /pickup )
  2. Delivery person arrives at the customer's house ( /deliver )

On a production app we would probably trigger the second notification when the delivery person was physically near the customer using GPS. (In this case a button will suffice.)

This is a migrated tutorial. Clone the original from https://github.com/TwilioDevEd/eta-notifications-node

const express = require('express');
const router = express.Router();
const Order = require('../models/order');

// GET: /orders
router.get('/', function(_req, res) {
  Order.find().then(function(orders) {
    res.render('orders/index', {orders});
  });
});

// GET: /orders/4
router.get('/:id/show', function(req, res) {
  const id = req.params.id;
  Order.findOne({_id: id}).then(function(order) {
    res.render('orders/show', {order: order});
  });
});

// POST: /orders/4/pickup
router.post('/:orderId/pickup', function(req, res) {
  const id = req.params.orderId;

  Order.findOne({_id: id}).then(function(order) {
    order.status = 'Shipped';
    order.notificationStatus = 'Queued';

    order.save()
      .then(function() {
        return order.sendSmsNotification('Your clothes will be sent and will be delivered in 20 minutes', getCallbackUri(req));
      })
      .then(function() {
        res.redirect(`/orders/${id}/show`);
      })
      .catch(function(err) {
        res.status(500).send(err.message);
      });
  });
});

// POST: /orders/4/deliver
router.post('/:orderId/deliver', function(req, res) {
  const id = req.params.orderId;

  Order.findOne({_id: id})
    .then(function(order) {
      order.status = 'Delivered';
      order.notificationStatus = 'Queued';
      order.save()
        .then(function() {
          return order.sendSmsNotification('Your clothes have been delivered', getCallbackUri(req));
        })
        .then(function() {
          res.redirect(`/orders/${id}/show`);
        })
        .catch(function(err) {
          res.status(500).send(err.message);
        });
    })
});


// POST: /orders/4/status/update
router.post('/:orderId/status/update', function(req, res) {
  const id = req.params.orderId;

  const notificationStatus = req.body.MessageStatus;

  Order.findOne({_id: id})
    .then(function(order) {
      order.notificationStatus = notificationStatus.charAt(0).toUpperCase() + notificationStatus.slice(1);
      return order.save();
    })
    .then(function() {
      res.sendStatus(200);
    })
    .catch(function(err) {
      res.status(500).send(err.message);
    });
});

function getCallbackUri(req) {
  return `http://${req.headers.host}/orders/${req.params.orderId}/status/update`;
};

module.exports = router;

On the server we'll use the Twilio REST API Client to actually send out the notifications.  Let's go there next.

Setting Up the Twilio REST Client

Here we create a Twilio REST API client that we can use anytime we need to send a text message.

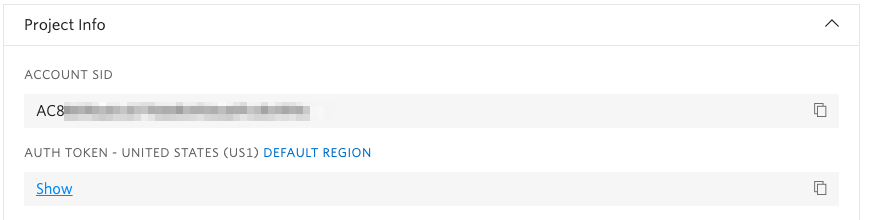
We initialize it with our Twilio Account Credentials stored as environment variables.  You can find the Auth Token and Account SID in the console:

Account Credentials


const mongoose = require('mongoose');
const config = require('../config');
const twilio = require('twilio');


const OrderSchema = new mongoose.Schema({
  customerName: String,
  customerPhoneNumber: String,
  status: {type: String, default: 'Ready'},
  notificationStatus: {type: String, default: 'None'},
});

OrderSchema.methods.sendSmsNotification = function(message, statusCallback) {
  if (!statusCallback) {
    throw new Error('status callback is required to send notification.');
  }

  const client = twilio(config.twilioAccountSid, config.twilioAuthToken);
  const options = {
    to: this.customerPhoneNumber,
    from: config.twilioPhoneNumber,
    body: message,
    statusCallback: statusCallback,
  };

  return client.messages.create(options)
    .then((message) => {
      console.log('Message sent to ' + message.to);
    });
};


const Order = mongoose.model('order', OrderSchema);
module.exports = Order;

On deck: how we handle notification triggers.

Handle a Notification Trigger

This code demonstrates how to handle a HTTP POST request triggered by the delivery person.

It uses the sendSmsNotification method of our Order model to send an SMS message to the customer's phone number (which we have registered in our database).  Simple!

const express = require('express');
const router = express.Router();
const Order = require('../models/order');

// GET: /orders
router.get('/', function(_req, res) {
  Order.find().then(function(orders) {
    res.render('orders/index', {orders});
  });
});

// GET: /orders/4
router.get('/:id/show', function(req, res) {
  const id = req.params.id;
  Order.findOne({_id: id}).then(function(order) {
    res.render('orders/show', {order: order});
  });
});

// POST: /orders/4/pickup
router.post('/:orderId/pickup', function(req, res) {
  const id = req.params.orderId;

  Order.findOne({_id: id}).then(function(order) {
    order.status = 'Shipped';
    order.notificationStatus = 'Queued';

    order.save()
      .then(function() {
        return order.sendSmsNotification('Your clothes will be sent and will be delivered in 20 minutes', getCallbackUri(req));
      })
      .then(function() {
        res.redirect(`/orders/${id}/show`);
      })
      .catch(function(err) {
        res.status(500).send(err.message);
      });
  });
});

// POST: /orders/4/deliver
router.post('/:orderId/deliver', function(req, res) {
  const id = req.params.orderId;

  Order.findOne({_id: id})
    .then(function(order) {
      order.status = 'Delivered';
      order.notificationStatus = 'Queued';
      order.save()
        .then(function() {
          return order.sendSmsNotification('Your clothes have been delivered', getCallbackUri(req));
        })
        .then(function() {
          res.redirect(`/orders/${id}/show`);
        })
        .catch(function(err) {
          res.status(500).send(err.message);
        });
    })
});


// POST: /orders/4/status/update
router.post('/:orderId/status/update', function(req, res) {
  const id = req.params.orderId;

  const notificationStatus = req.body.MessageStatus;

  Order.findOne({_id: id})
    .then(function(order) {
      order.notificationStatus = notificationStatus.charAt(0).toUpperCase() + notificationStatus.slice(1);
      return order.save();
    })
    .then(function() {
      res.sendStatus(200);
    })
    .catch(function(err) {
      res.status(500).send(err.message);
    });
});

function getCallbackUri(req) {
  return `http://${req.headers.host}/orders/${req.params.orderId}/status/update`;
};

module.exports = router;

Next, let's take a closer look at how we send the SMS.

Sending the Message

Here we demonstrate actually sending the SMS.

Picture worth 1,000 words?  Improve the message by adding some optional media with mediaUrl:

'mediaUrl' : 'http://lorempixel.com/image_output/fashion-q-c-640-480-1.jpg'

In addition to the required parameters (and optional media), we can pass a statusCallback url to let us know if the message was delivered.

const mongoose = require('mongoose');
const config = require('../config');
const twilio = require('twilio');


const OrderSchema = new mongoose.Schema({
  customerName: String,
  customerPhoneNumber: String,
  status: {type: String, default: 'Ready'},
  notificationStatus: {type: String, default: 'None'},
});

OrderSchema.methods.sendSmsNotification = function(message, statusCallback) {
  if (!statusCallback) {
    throw new Error('status callback is required to send notification.');
  }

  const client = twilio(config.twilioAccountSid, config.twilioAuthToken);
  const options = {
    to: this.customerPhoneNumber,
    from: config.twilioPhoneNumber,
    body: message,
    statusCallback: statusCallback,
  };

  return client.messages.create(options)
    .then((message) => {
      console.log('Message sent to ' + message.to);
    });
};


const Order = mongoose.model('order', OrderSchema);
module.exports = Order;

Status updates on message delivery is interesting - let's look there next.

Handle an Incoming Twilio Callback

Twilio will make a POST request to this controller each time our message status changes to one of the following: queued, failed, sent, delivered, or undelivered.

We then update this notificationStatus on the Order and business logic dictates what we'd do next. This is an excellent place to add logic that would resend the message if it failed, or send out an automated survey after the customer receives their clothes and a delivery SMS.

const express = require('express');
const router = express.Router();
const Order = require('../models/order');

// GET: /orders
router.get('/', function(_req, res) {
  Order.find().then(function(orders) {
    res.render('orders/index', {orders});
  });
});

// GET: /orders/4
router.get('/:id/show', function(req, res) {
  const id = req.params.id;
  Order.findOne({_id: id}).then(function(order) {
    res.render('orders/show', {order: order});
  });
});

// POST: /orders/4/pickup
router.post('/:orderId/pickup', function(req, res) {
  const id = req.params.orderId;

  Order.findOne({_id: id}).then(function(order) {
    order.status = 'Shipped';
    order.notificationStatus = 'Queued';

    order.save()
      .then(function() {
        return order.sendSmsNotification('Your clothes will be sent and will be delivered in 20 minutes', getCallbackUri(req));
      })
      .then(function() {
        res.redirect(`/orders/${id}/show`);
      })
      .catch(function(err) {
        res.status(500).send(err.message);
      });
  });
});

// POST: /orders/4/deliver
router.post('/:orderId/deliver', function(req, res) {
  const id = req.params.orderId;

  Order.findOne({_id: id})
    .then(function(order) {
      order.status = 'Delivered';
      order.notificationStatus = 'Queued';
      order.save()
        .then(function() {
          return order.sendSmsNotification('Your clothes have been delivered', getCallbackUri(req));
        })
        .then(function() {
          res.redirect(`/orders/${id}/show`);
        })
        .catch(function(err) {
          res.status(500).send(err.message);
        });
    })
});


// POST: /orders/4/status/update
router.post('/:orderId/status/update', function(req, res) {
  const id = req.params.orderId;

  const notificationStatus = req.body.MessageStatus;

  Order.findOne({_id: id})
    .then(function(order) {
      order.notificationStatus = notificationStatus.charAt(0).toUpperCase() + notificationStatus.slice(1);
      return order.save();
    })
    .then(function() {
      res.sendStatus(200);
    })
    .catch(function(err) {
      res.status(500).send(err.message);
    });
});

function getCallbackUri(req) {
  return `http://${req.headers.host}/orders/${req.params.orderId}/status/update`;
};

module.exports = router;

That's all, folks! We've just implemented an on-demand notification service that alerts our customers when their order is picked up or arriving.

Now let's look at other features Twilio makes it easy to implement.

Where to next?

Node and Twilio are like two peas in a pod.  Here are some other tutorials where we demonstrate interesting features:

Workflow Automation

Increase your rate of response by automating the workflows that are key to your business. In this tutorial you will learn how to build a ready-for-scale automated SMS workflow for a vacation rental company.

Masked Numbers

Protect your users' privacy by anonymously connecting them with Twilio Voice and SMS. Learn how to create disposable phone numbers on-demand so two users can communicate without exchanging personal information.

Did this help?

Thanks for checking this tutorial out!  Let us know what you've built - or what you're building - on Twitter.