FAQ: Using Your HackPack v3 in a Post-SIGNAL World
Time to read:

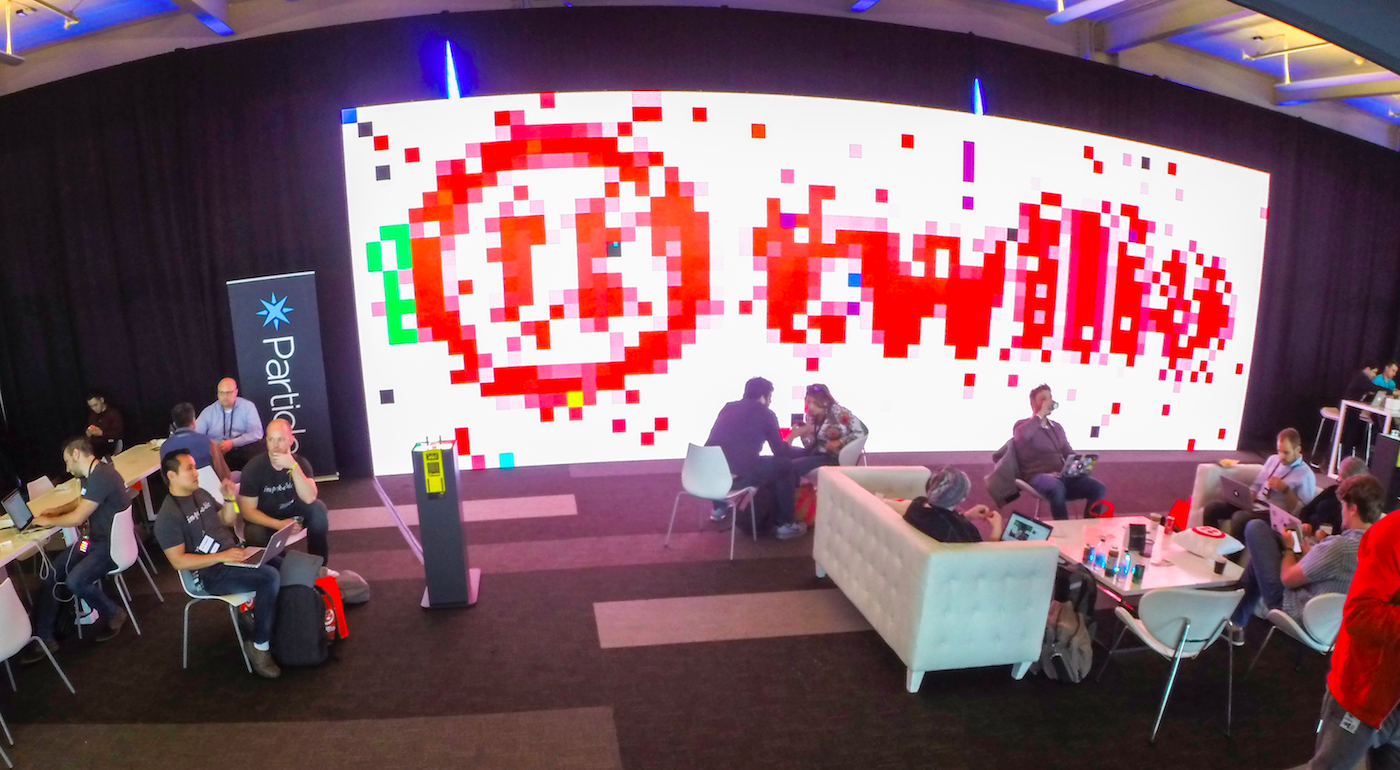
This year at SIGNAL, every attendee got their own Particle Electron powered HackPack. The HackPacks controlled a big screen display upstairs at the show, allowing attendees to wow us in a live exhibit of the intersection of code and artistic creativity.
We were so impressed with all the creativity on display at the conference. Over 1,250 of you powered up your HackPack during the conference and accepted our challenge, nearly-instantly validating our conference charge to celebrate DOers. You impressed us all with the awesome hacks you came up with and the amazing things you got our wall to do. For that we thank you – you took the Big Board places we didn’t even imagine.
By Saturday, June 3 we will be deactivating all SIM cards that have not yet added associated billing information to Particle accounts. In plain English, this means that the onboard Particle Electron is yours to experiment with… as well as the awesome PCB it was mounted on. You’ll have to go through the below steps to claim it to your Particle account to continue to build great hardware.
Today we’ll cover some of the questions we’re seeing about next steps. We’ll enable you to do awesome Internet of Things… things so that when we see you next you’re even better prepared for the next challenge. We’re excited for what you come up with… and can’t wait to see what you build.
Claiming the Electron to Your Account
There is a slightly different methodology for claiming the Electron depending on whether you powered on the badge at the show or are just turning it on now. Our full write-up is on the Hackpack.cc site, but following is a general overview.

If You Claimed the Device at SIGNAL
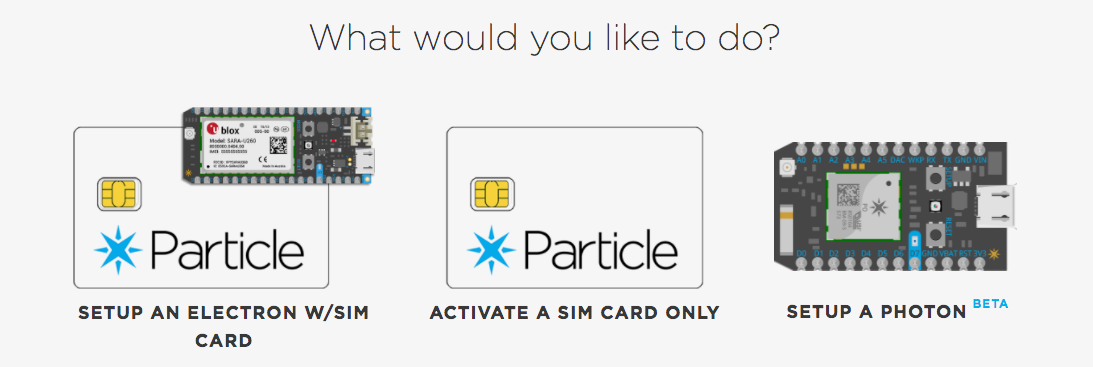
Visit the website setup.particle.io and choose the option ‘ACTIVATE A SIM CARD ONLY’.
If you have the Particle SIM Card punch-out that came with your HackPack, the ICCID is printed on the bottom. If you do not, skip further down in the article where we detail how to remove the Electron from the Badge PCB and further on how to remove the SIM card. The SIM card has the ICCID number to enter printed on top.
If You Didn’t Claim the Device at SIGNAL
Visit the website setup.particle.io and choose the option ‘SETUP AN ELECTRON W/ SIM CARD’.
You’ll want to visit the hardware portion of this article and follow the removal instructions. The ICCID is on the front of the SIM Card.
Removing the Electron from the Badge
To register the Electron or to use it outside the badge, you’ll need to remove it from its current habitat. Start by gently prying out the battery lead (the red/black wires with the white connector) and rocking the antenna connector (gold with the textured insulated wire) out of the socket.
The Electron you received is friction fit onto female headers on the HackPack v3 badge. This means that you might not need any tools to remove it from the socket – gently try rocking the Electron back and forth or side to side to extract it from the board.
If the Electron is still stubbornly attached to your board, you can use two flat-head screwdrivers and carefully pry up either side of the board. DO NOT use the bare screwdrivers, but wrap the head with a paper towel or something soft to distribute the force.
You should be careful to avoid delicate areas such as small components or the SIM card (see picture of the bottom below), but slight force should be okay. Try to raise one side a bit then alternate; if you apply pressure evenly you can extricate it without any bent pins.
Removing the SIM Card from the Electron
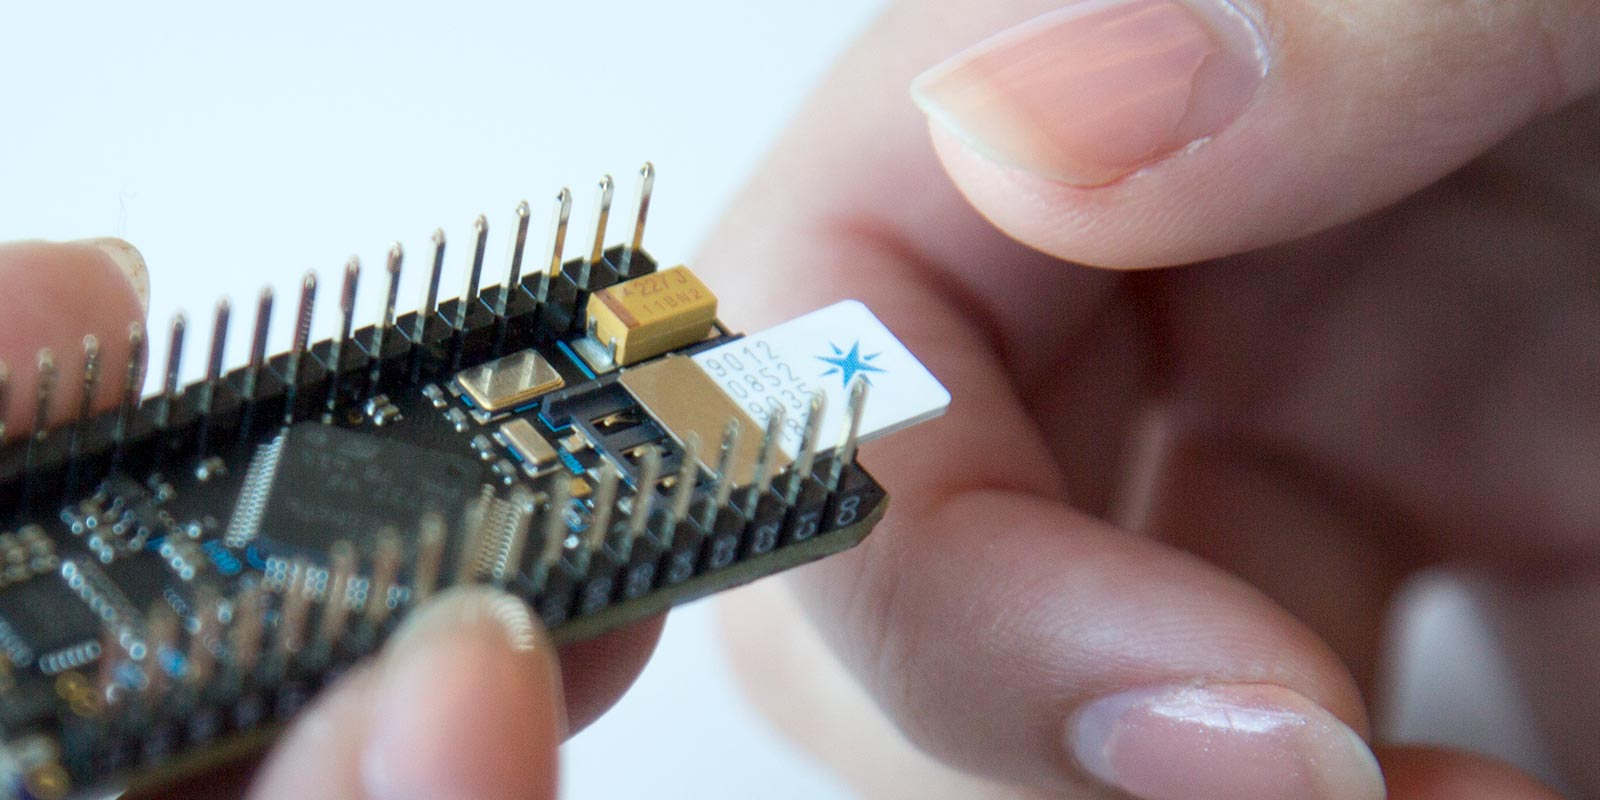
To activate the Electron if you no longer (or never had) have the Particle SIM punch-out, you’ll need to remove the SIM card. On that SIM card there is a 19-22 digit ICCID number, which is what you’ll enter into the respective section on setup.particle.io.

Note the orientation of the SIM card – the FLAT side is facing towards the outside of the board and the text is facing up with the pins. To reinsert the SIM card, apply gentle pressure and insert the angled side back into the slot. The SIM card will resist when it hits the end-guide. Do not force it further – this is when it is in the correct position.
Reinserting the Electron in the Badge – or a Breadboard
The Electron uses standard 2.54mm (.1 inch) header spacing, so it will also feel at home on a breadboard. Using a standard pitch breadboard, merely bridge the center gap and push down until it is firmly fastened on the board. Now you can use it with your jumper cables and long leaded components – neat!
Want to put the Electron back in the HackPack v3 and play with the blinky lights? What a bright idea!
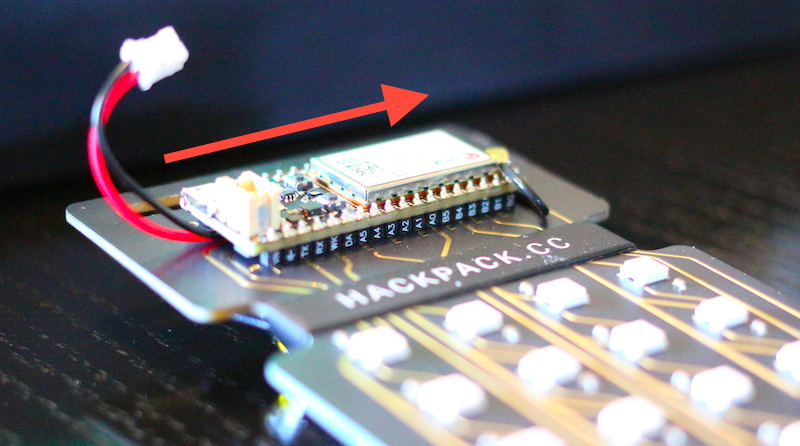
Orient the badge so the Twilio logo is facing you, the battery pack leads are on the left and the antenna lead are on the right. Re-insert the Electron with the battery connector on the left and the antenna on the right.
IMPORTANT: DO NOT USE THE FAR LEFT PAIR OF HOLES. The Electron should be re-inserted as far to the right as possible and the left pair of holes should remain empty:

Pushing down on the top of the pins (yes, they are a little bumpy – you can try to grasp the edges of the board if it’s easier) push the Electron back into the female headers. It’s properly fitted when you cannot see light between the board and the plastic pin labels (pictured) on the side.
Finally, reattach the cellular antenna and the battery connector.
Charge the Electron’s Battery
At some point – if it hasn’t yet – the battery we’ve provided will run low.
The Micro USB connector on the Electron will recharge the battery, and it can trickle charge even when you are not using much power from the board.
However, note that the Neopixel LEDs provided with the badge are high powered. If they are running at full brightness, the board will not be recharging… in fact, excess power above what USB can provide will be pulled from the battery. Ensure you are not running high powered lights or similar when recharging the device.
Programming the Electron
Now that you’ve claimed the Electron, we leave you in the very capable hands of Particle to program it. We suggest first using it to blink an LED – after that, the world is your oyster!
If you are still using the HackPack badge, you can base your code off our original firmware. There are 16 NeoPixels on board, addressed serially and connected to pin ‘A5’. You can use the NeoPixel library standard if you change the serial pin to A5 and continue to use the awesome blinking LED array.
As for other ideas? Here are just a few…
- Bike light?
- SMS to Morse Code translator?
- SMS Notifications?
- Twitter Notifications?
We’ll publish some other snippets and full-blown applications both here on the blog and on our documentation site – so this is your call to subscribe! Look for posts on the functionality of the Electron as well as a few posts on using the Electron with the HackPack badge. Additionally, visit Particle’s Electron examples for some more step by step tutorials on common applications.
However, you’re the DOer – we know you’re going to come up with something amazing. And as always, we can’t wait to see what you build – promise to come back and show us!
Related Posts
Related Resources
Twilio Docs
From APIs to SDKs to sample apps
API reference documentation, SDKs, helper libraries, quickstarts, and tutorials for your language and platform.
Resource Center
The latest ebooks, industry reports, and webinars
Learn from customer engagement experts to improve your own communication.
Ahoy
Twilio's developer community hub
Best practices, code samples, and inspiration to build communications and digital engagement experiences.


