Getting started with the Particle Photon – IoT for under $20
Time to read:
October 15, 2015
Written by
This post is part of Twilio’s archive and may contain outdated information. We’re always building something new, so be sure to check out our latest posts for the most up-to-date insights.

When working with IoT projects it is common to want them to have a small footprint and ideally be hidden somewhere out of sight.
This could be the case for a number of reasons. Maybe you want it to be partially inside a wall because it is controlling your lights, or behind a picture frame so that it turns a spotlight towards that picture when someone is looking at it.
Nevertheless, if you want to be able to control many devices around your house price will always end up being something to consider.
In the past we’ve shown you how to get started with the Arduino Yun and even taught a dog how to send selfies with it. But at around $60 a pop it becomes unfeasible to hide one Arduino behind each one of your electrical devices, especially if you don’t need a full Linux distro in them.
In this blog post I will show you how to get started with the Particle Photon – a $19 tiny Wi-Fi development kit for creating connected projects and products for the Internet of Things. By the end of this post you will have learned the following things:
- What a Photon is, and what is the technology behind it.
- How to connect the photon to your computer and get started with its cloud based IDE.
- How to flash your first program into the Photon.
- How to build a form to control your Photon via the internet.
Overview
The Photon is only 1.44 x 0.8 inch in size, which means it’s smaller than a matchstick while still boxed.
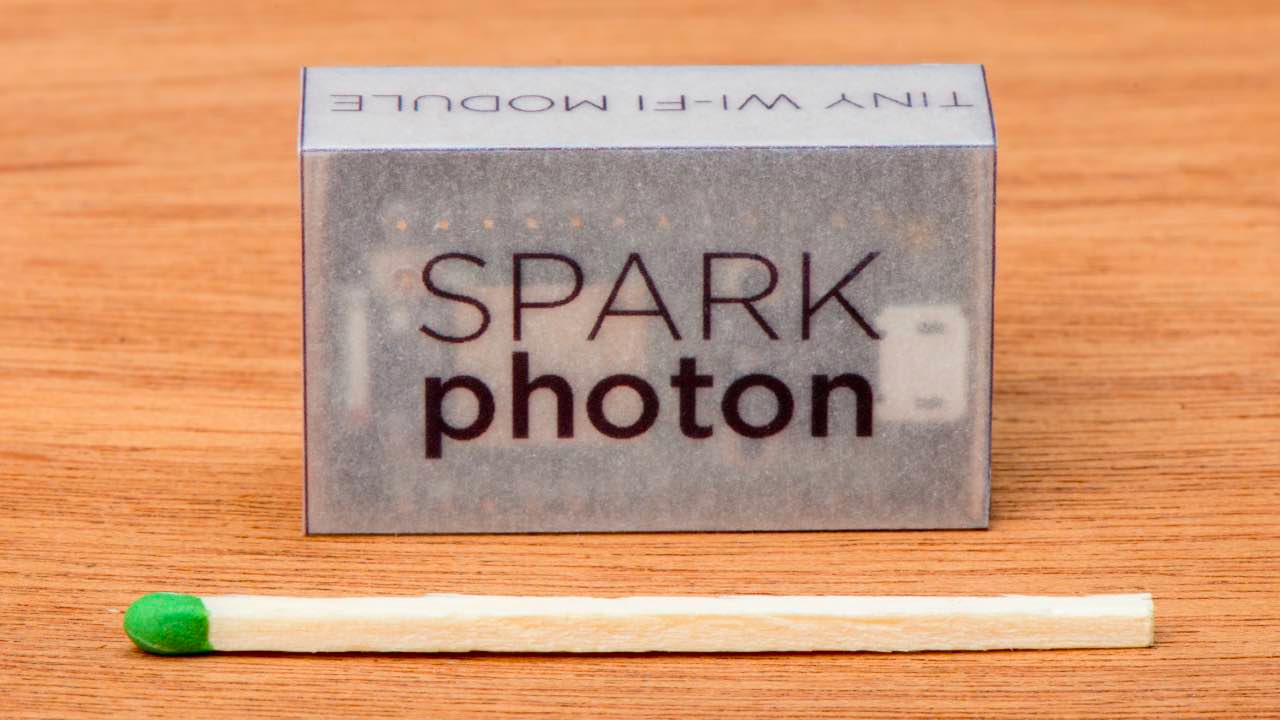
But let’s look at what it has to offer:
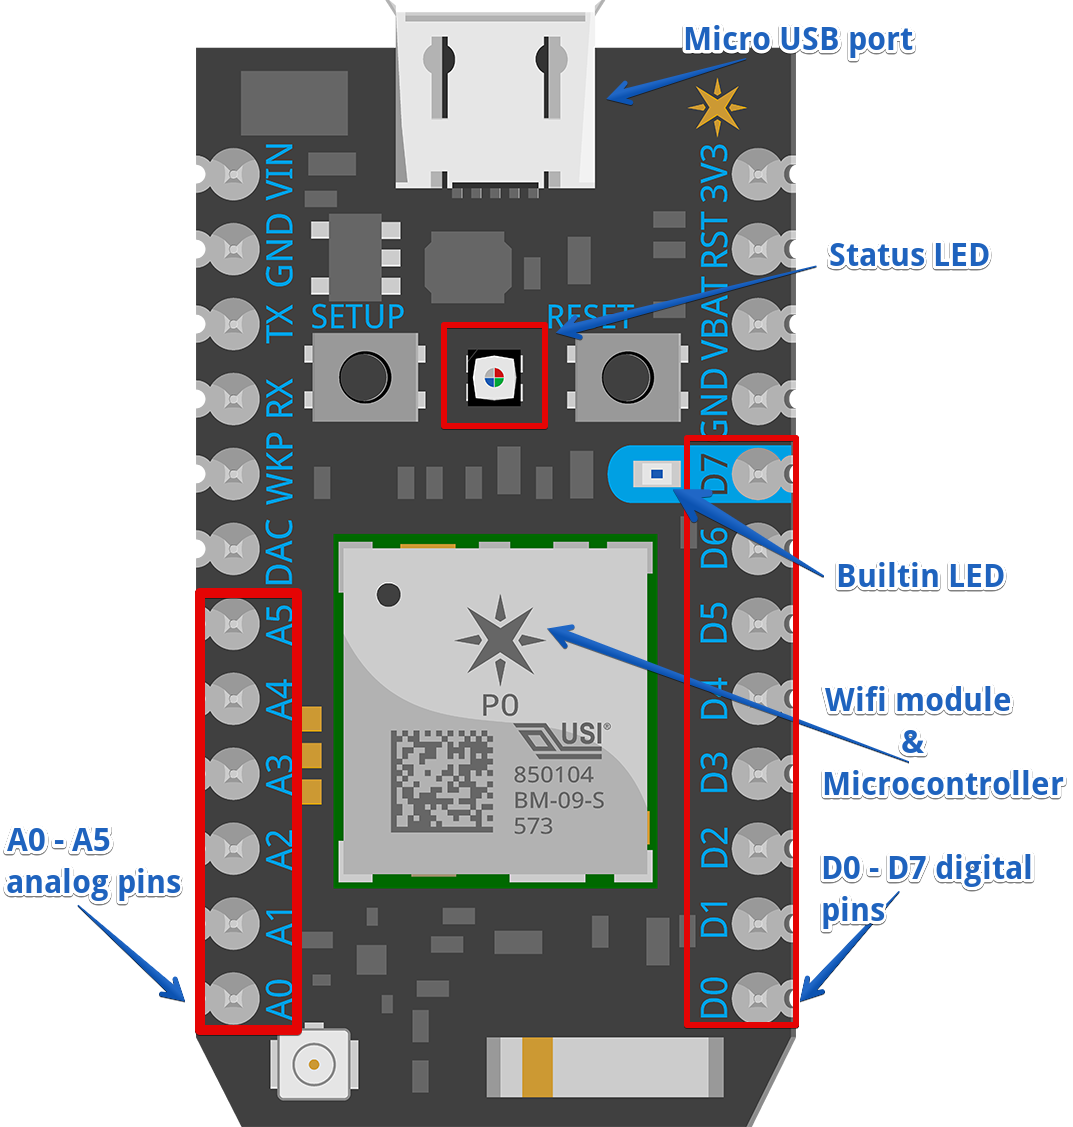
You can power the Photon directly via the on-board USB Micro B connector or directly through the VIN pin. It has 18 digital pins and 10 analog pins.
It also has a very handy built-in LED – the D7 LED which is next to the D7 pin. This LED will turn on when the D7 pin is set to HIGH, which is really helpful when you just want to check that your programs work without having to wire a lot of gear.
The SETUP button is on the left and the RESET button is on the right. You can use these buttons to help you set your device’s mode.
The RGB LED is in the center of your Photon, above the module. The colour of the RGB LED indicates which mode your Photon is currently in.
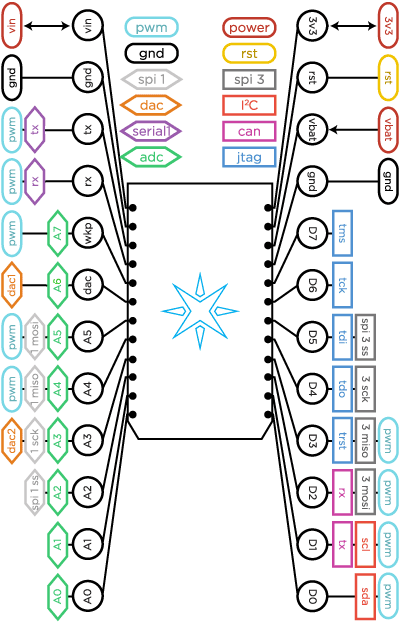
A more in depth look at the Photon’s pinout can be seen below.
Connecting your Photon
In order to connect your Photon, you need to first make sure you claim it as yours. You can have as many claimed devices as you want and because the Photon is a cloud device you can claim it via its mobile app or USB. We will be doing this via USB and I will make the assumption you’ve already followed the installation steps for Windows or OSX depending on your environment.
Connect the Photon to your computer and you should see the status LED blinking blue. If you plan on connecting anything to your Photon right now, I would suggest plugging it on a breadboard to make things easier.
If for some reason it doesn’t start blinking blue, hold down the SETUP button until it does.
On a new terminal screen type the following:
Follow the instructions on the screen to configure your Particle with your local Wifi. Notice that at the time of writing the Particle Photon will not connect to a 5Ghz wifi network.
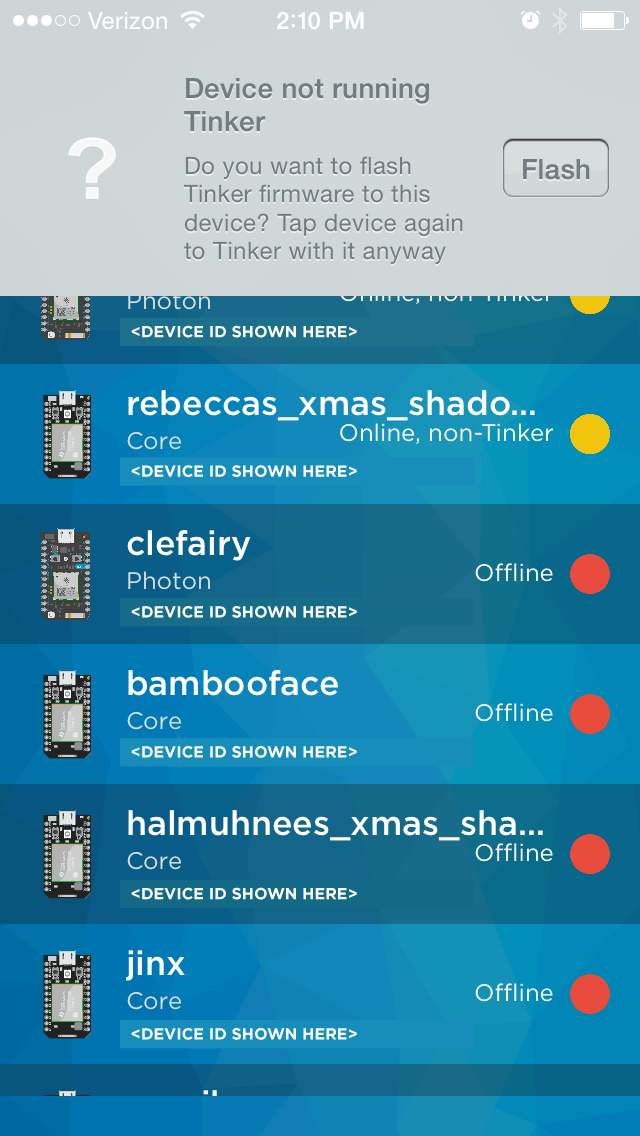
Once your Photon is configured and connected to your wifi, you can start playing with it by using Tinker which is a sample application that comes preloaded on your Photon and works with the Particle mobile app.
In case your device has already been previously flashed, you can re-flash Tinker by choosing your device from the device list and clicking “flash”.
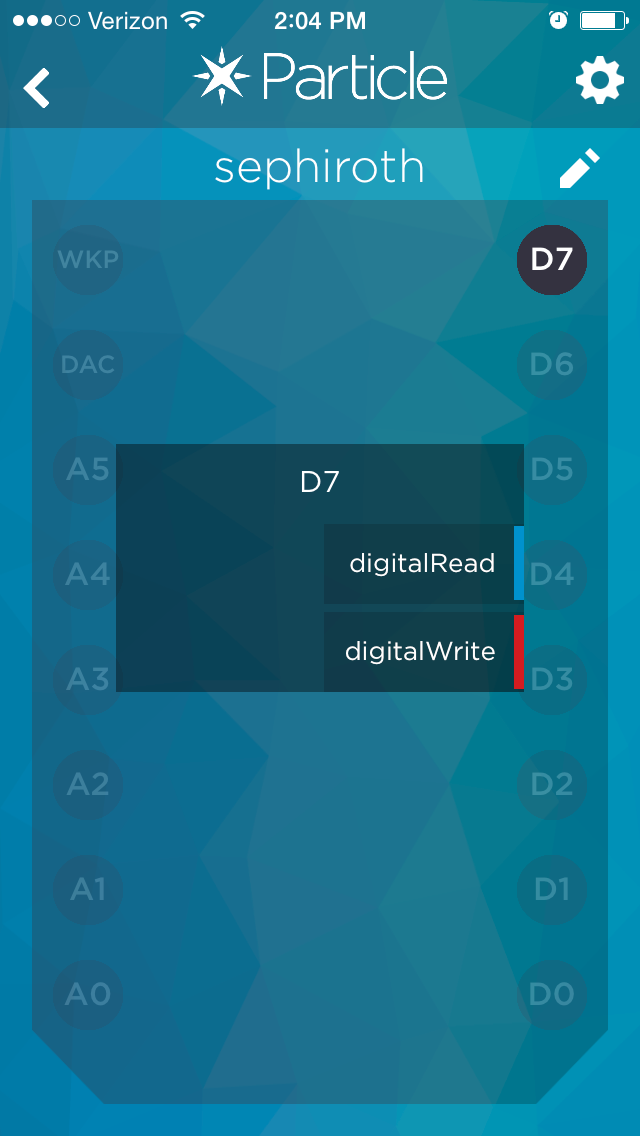
Once on the Tinker screen, tap D7 and select digitalWrite. As you’ve seen before, the D7 pin has the built-in LED attached to it, so tapping D7 again should turn that LED on or off.
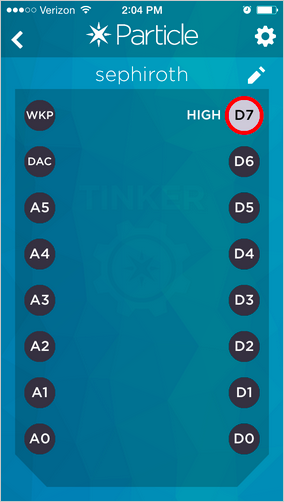
Congratulations, with only a few minutes settings things up you have just controlled an LED over the internet. Tinker is fun for a quick dry-run, but there’s a lot more to the Photon.
Using the web IDE
One big difference between the Photon and your ordinary Arduino is that fact that the Photon has a web IDE that can be used from anywhere. This is great because it means you can send OTA updates to your Particle from anywhere in the world, as long as it’s connected.
We will write our first Photon program by heading to https://build.particle.io/ and logging in. These should be the same credentials you’ve used when you configured the Photon on your mobile phone.
When you’re in, click the Create New App button and give it a name. I called mine Blinky but you can call it whatever you like. On the right side paste the following code.
Your D7 LED should now be blinking blue once every second. Go ahead and award yourself by playing with it a bit by changing the value on the delay function to alter the frequency in which the LED goes on or off.
That was cool right? But that’s just flashing, what if you wanted to take full control of your Photon?
Building a form to control your LED
To control the Photon from a form, we first need to flash new code to it. Create a new project like you did before, but this time call it web-connected-led.
We will write some very similar code to what we’ve written before, but this time we will also create a cloud function. This will make our code accessible externally through Particle’s cloud.
We use Particle.function to indicate that we want to have a one-to-one mapping to one of our program’s functions. In this case we have mapped toggle to ledToggle.
Flash this code into your Photon and do the following:
Copy your device ID from the web IDE by clicking on Devices.

Now copy the access token by clicking Settings.
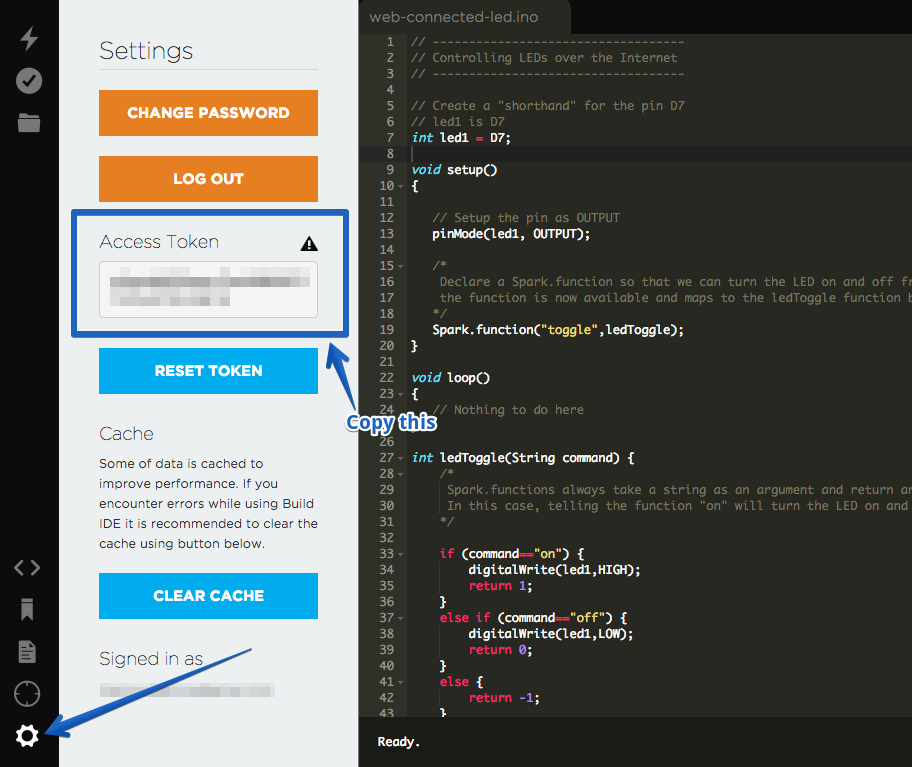
Back on your preferred text editor, create a new file called index.html on your Desktop. Add the following code to that file:
The only thing you need to change is the highlighted line by replacing your-device-ID-goes-here and your-access-token-goes-here with the device ID and access token you copied earlier.
Load that page up on a browser and you should see a form with two radio buttons. Choose one of them and push the Do it! button. You should see that the LED light goes on or off according to what you chose.
Conclusion
We have now successfully claimed and configured a Particle Photon and built our first form that controls the status of the built-in LED via internet using the web IDE.
This is only the tip of the iceberg since every I/O pin on the Photon can be configured and controlled via its API, making it a very powerful microcontroller especially for IoT projects when you don’t have physical access to the device. Talk about Over-the-air updates eh?
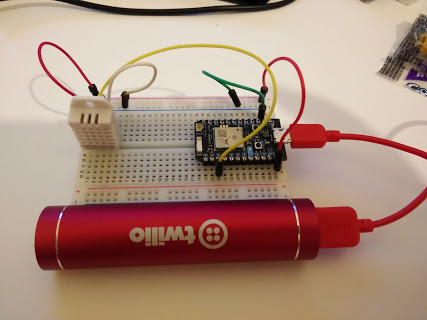
I have mine connected to a portable mobile charger, but you can also use any external power source and leave it somewhere hidden away.
From here you could go ahead and automate parts of your house as we described in the post Turn Your Light Off Via Text: Using Particle and Twilio For Home Automation.
There are also people creating halloween hacks or using it to make their lives easier. Check out the growing list of Particle projects listed on this website.
I would love to see what you will build. Hit me up on Twitter @marcos_placona or by email on marcos@twilio.com to tell me about it.
Related Posts
Related Resources
Twilio Docs
From APIs to SDKs to sample apps
API reference documentation, SDKs, helper libraries, quickstarts, and tutorials for your language and platform.
Resource Center
The latest ebooks, industry reports, and webinars
Learn from customer engagement experts to improve your own communication.
Ahoy
Twilio's developer community hub
Best practices, code samples, and inspiration to build communications and digital engagement experiences.