How to Use Twilio Functions with the Phone Verification API
Time to read:
October 24, 2017
Written by
This post is part of Twilio’s archive and may contain outdated information. We’re always building something new, so be sure to check out our latest posts for the most up-to-date insights.

Twilio Functions is a serverless environment designed to build and run Twilio applications, and allowing you to use Node.js code for handling communications events such as a text message, an incoming voice call, or HTTP requests. It also ensures that you can leverage benefits of the Twilio platform like security, no infrastructure requirements, auto-scaling, and native integration with Twilio REST Helper Library in a familiar environment powered by Node (6.10.x).
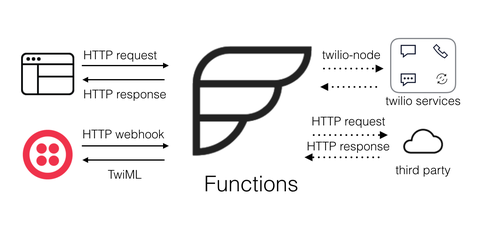
This article will illustrate the power of Twilio Functions, showing just how easy the Twilio Functions interfaces are to use, by demonstrating a use case for Twilio Phone Verification (formerly known as Authy). Typical use cases for Phone Verification are fraud prevention and transaction verification.
The Twilio Phone Verification API allows you to verify that a given phone number is accurate and it’s in the user’s possession. It’s simple to use, and involves a single API call to request a code to be sent to the user (via SMS or Voice call) plus one API call to verify the code returned by the user is valid.
The Phone Verification API is deployed on top of Twilio’s Super Network so it has global reach by default. It’s localized in 35+ languages, and it offers lots of customizations from the length of the code to message template to be sent to the user.
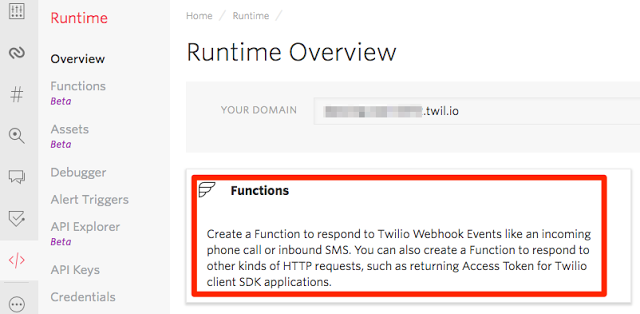
To get started, head over to the Twilio Console, select ‘All Products & Services’ on the left side menu, and then ‘Runtime’ under ‘Developer Tools’.

From the Runtime Overview page, select ‘Functions’.
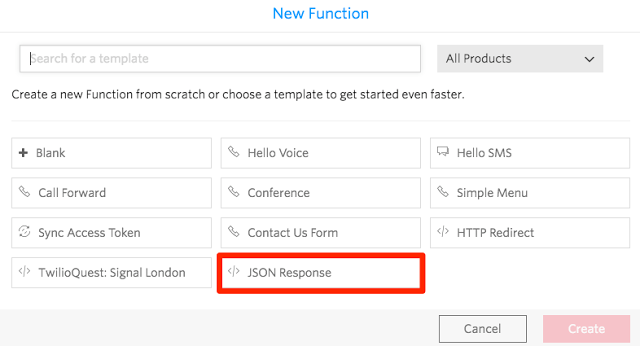
Hit the plus (+) sign to create a new Function and select ‘JSON Response’. Click Create when you’re ready.
Your recently created Function is now ready to be developed.
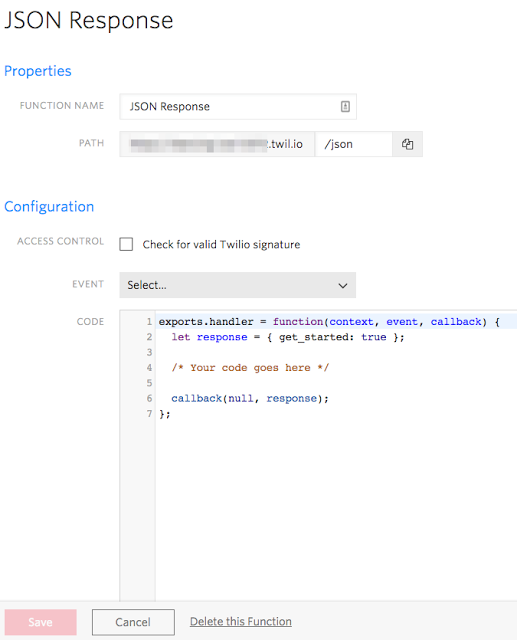
Give it a name, for example, ‘Phone Verification Start’, set the path to /start, and add the following code to the Function:
The code above will receive an HTTP request with two parameters (phone_number and country_code) shown on lines 3 and 4. These parameters are going to be available in the code in the event object upon the request. The context object will hold environment variables we will need next (line 8).
Then, we are going to make a request to the Phone Verification API (line 13) and send the response back to the client using the callback object (line 19). You should end up with something similar to the following Twilio Function:

Press ‘Save’.
Finally, we need an AUTHY_API_KEY (line 8 above) to make everything work.
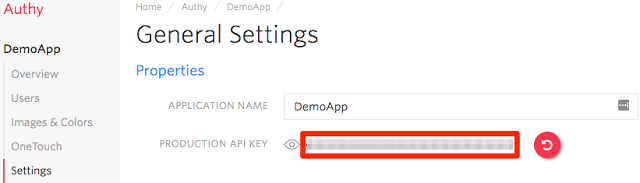
If you don’t have an Authy application created already, go back to the ‘All Products & Services’ menu in the Twilio Console and then select ‘Authy’ under ‘Engagement Cloud’.
Create a new Authy application, give it a name, go to ‘Settings’ and grab the Production API Key.
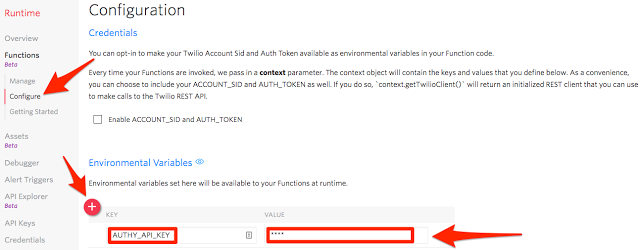
Go back to your Twilio Function, select ‘Configure’ and then create a new Environment Variable called AUTHY_API_KEY. Set the value to be the Production API Key you grabbed above after creating the Authy application.
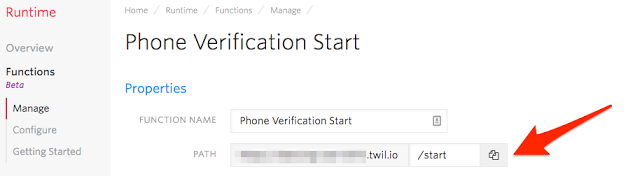
Click on ‘Manage’, select your Twilio Function and copy the full URL where your Function is going to be available.
You are now ready to test the start of your Phone Verification Function.
Send an HTTP request to the URL you just copied, add the phone_number and country_code you want to send the verification code to. Use your Twilio Account SID and Twilio Auth Token as the credentials.
As an example, I’m using Postman but you are free to use anything you want.
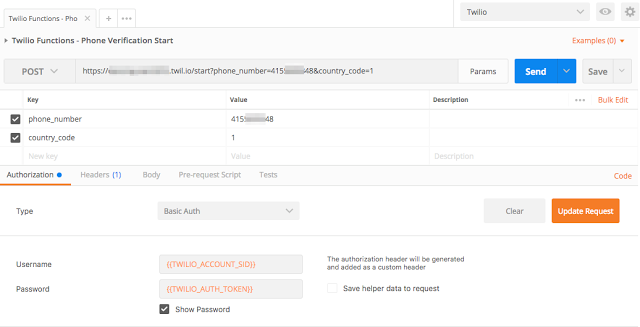
Send your request. A response from the Phone Verification API will be sent back to you along with an SMS message sent to the phone number you specified.
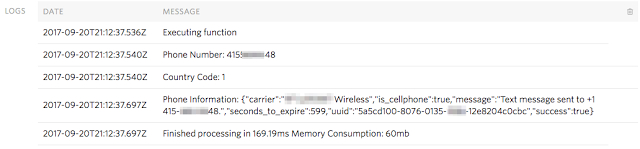
You can also watch the console messages under the ‘Logs; section of the Twilio Function you have created. Here is an example of the expected output:
Now that you have received the verification code on your phone, we need to verify that code against the Phone Verification API. To do that, let’s go back to the Twilio Console, create another Function using the JSON Response template and call it Phone Verification Check.
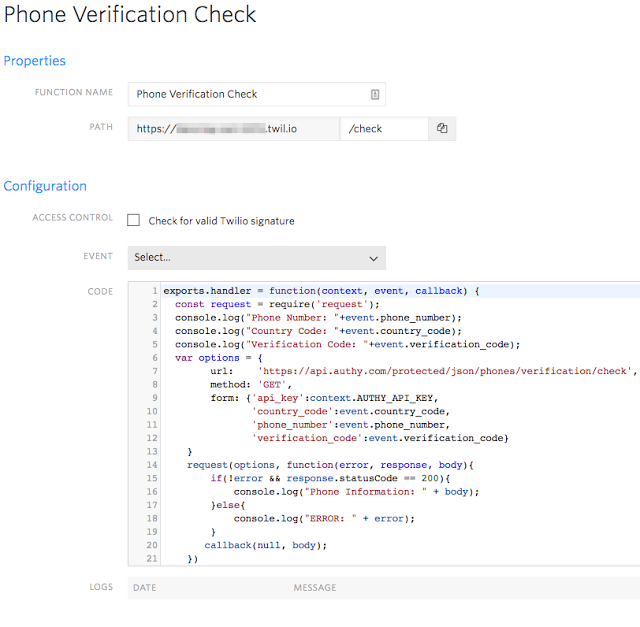
Set the PATH to /check and add the following code to the Function:
The code above will receive an HTTP request with three parameters (phone_number, country_code and verification_code) shown on lines 3, 4 and 5. These parameters are going to be available in the code in the event object upon the request.
The context object will hold environment variables. We are going to retrieve on line 9.
Then, we are going to make a request to the Phone Verification API (line 14) and send the response back to the client using the callback object (line 20).
You should end up with something similar to the following Twilio Function:
Press ‘Save’.
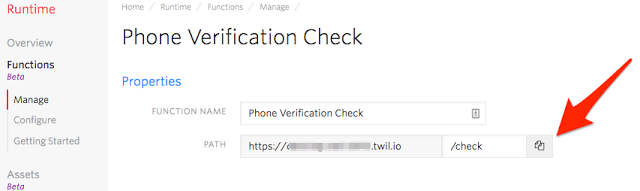
Grab the Phone Verification Check Twilio Function URL:
You are now ready to test your Phone Verification Function for checking the provided code.
Go back to Postman (or whatever testing tool you are using) and populate the phone_number, country_code and verification_code required parameters that you received when calling the Phone Verification Start Function, as well as the required credentials to invoke the Twilio REST call.
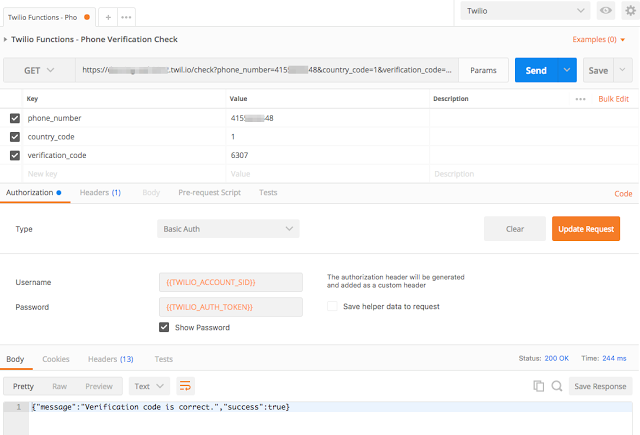
Send the HTTP request. Your Twilio Function (Phone Verification Check) should process the request and respond with the Phone Verification API scenario information you just tested.
Check the log messages in the ‘Logs’ section of your Twilio Function. You should see something similar to this:

If you want to learn more about Twilio Functions I’d recommend watching the “Building Serverless Twilio Apps with Twilio Functions” recently presented at Signal London.
There you have it: Twilio Functions interfacing with the Twilio Phone Verification API.
Related Posts
Related Resources
Twilio Docs
From APIs to SDKs to sample apps
API reference documentation, SDKs, helper libraries, quickstarts, and tutorials for your language and platform.
Resource Center
The latest ebooks, industry reports, and webinars
Learn from customer engagement experts to improve your own communication.
Ahoy
Twilio's developer community hub
Best practices, code samples, and inspiration to build communications and digital engagement experiences.