How to Use Twilio's WhatsApp API in CakePHP
Time to read:
March 27, 2024
Written by
Reviewed by
How to Use Twilio's WhatsApp API in CakePHP
With a large number of people using WhatsApp every day, Twilio's WhatsApp Business API allows businesses to communicate with their customers via WhatsApp. This can involve creating a WhatsApp support bot, sending authentication OTPs, and providing automated product previews via WhatsApp.
In this tutorial, we will explore how to send a customized message via WhatsApp to users using Twilio's WhatsApp Business API in a CakePHP application.
Requirements
To follow along with this tutorial, you will need to have the following:
- PHP 8.3 or higher installed
- Composer installed globally
- Basic knowledge of or experience with CakePHP
- A Twilio account. If you are new to Twilio, you can create a new account here.
Create a new CakePHP application
To scaffold a new CakePHP project using Composer, you need to run the command below on your terminal.
When prompted with "Set Folder Permissions? (Default to Y) [Y, n]?", answer with "Y" to complete the project installation.
Next, you need to run the command below to navigate the terminal to the project's working directory and start the application development server.
Once the application server starts running, open http://localhost:8765 in your browser to access the application's default welcome page as shown in the screenshot below.

To continue, you need to open the project in your preferred code editor.
Install the Twilio PHP Helper Library
Twilio's PHP helper library allows us to utilize Twilio's WhatsApp Business API in a CakePHP application relatively trivally. Run the command below in a new terminal window or tab to install it using Composer.
Retrieve your Twilio API access tokens
You will need your Twilio Account SID and Auth Token to connect to Twilio with the PHP Helper Library. To retrieve them, log in to your Twilio Console dashboard, where you'll find them in the Account Info panel, as shown in the screenshot below.

Store the Twilio access tokens as environment variables
After retrieving your Twilio access tokens, you need to ensure that they are stored securely in your project using environment variables.
The .env file is used for securely storing sensitive data. To use the .env file, you need to make a copy of the config/.env.example file and rename it to .env using the command below.
Next, from the project's root directory, navigate to the config folder and open the .env file. Then add the following variables to it.
Then, replace TWILIO_ACCOUNT_SID and TWILIO_AUTH_TOKEN with your corresponding Twilio access token values.
Now, for the application to automatically load the environment variables, open the bootstrap.php file and uncomment the following lines.
Set up the WhatsApp number
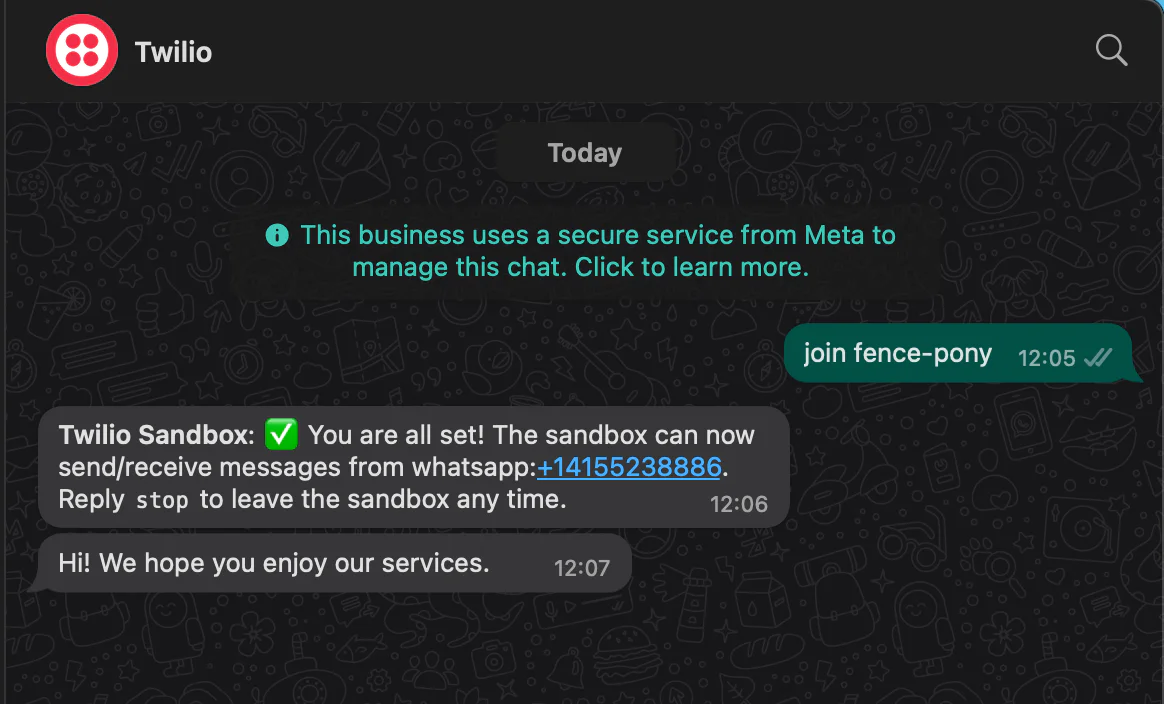
Now, let’s set up the Twilio Sandbox WhatsApp number. To do that, From your Twilio Console dashboard menu, navigate to Explore Products > Messaging > Try it out > Send a WhatsApp message option, as shown in the screenshot below.

Next, follow the instructions to connect to the WhatsApp Sandbox, which you can see an example of in the screenshot above.

Now, copy your Twilio number from the Twilio WhatsApp Sandbox's From field and add it to the .env file without the prefix whatsapp: as follows:
Add the ability to send a WhatsApp message
Let’s create a SendWhatsAppMessage class that will connect the application to the applicable Twilio endpoint, which sends messages via WhatsApp to users. To do so, inside the src folder, create a new folder named Services. Inside the Services folder, create a file named TwilioService .php. Then, add the following code to the new file.
In the code above,
- The
sendWhatsAppMessage()method accepts two parameters:$to, representing the recipient's WhatsApp number, and$messagethe content to be sent. - The Twilio access tokens are retrieved from the relevant environment variables, and a Twilio client instance is instantiated with them.
- The
$client->messages->create()method is invoked, passing the recipient's WhatsApp number, Twilio number, and the message to be sent.
Create the controller
Now, let's create the application controller to handle the application logic. To create the controller, run the command below:
Running the above command will automatically generate the WhatsAppMessageController.php file inside the src/Controller folder. Open the WhatsAppMessageController.php file and replace its code with the following:
In the code above:
$this->request->is("post")is used to check whether the form has been submitted.- Then the recipient's number and the message content are obtained from the form fields using
$this->request->getData(). These details are then passed to thesendWhatsAppMessage()method to send the WhatsApp message.
Create the template
To create the application, navigate to the templates folder from the application's root directory and create a folder named WhatsAppMessage. Inside the folder, create a file named index.php and add the following code to it.
Add a route to the routing table
Now, navigate to the config folder and open routes.php. Locate $routes->scope() and add the following code before $builder->fallbacks().
Test the application
To test the application, open http://localhost:8765/whats-app-message in your browser. Enter the recipient's WhatsApp number and the message to send. Then, click the "Send WhatsApp Message" button to send it, as shown in the GIF image below:
Now, you should receive a message on your WhatsApp number, as shown in the screenshot below.
That's how you use Twilio's WhatsApp API in CakePHP
Twilio's WhatsApp Business API provides a powerful solution for businesses to engage with their users through WhatsApp. This tutorial demonstrates how to use Twilio's WhatsApp API in a CakePHP application to send customized messages to users.
Popoola Temitope is a mobile developer and a technical writer who loves writing about frontend technologies. He can be reached on LinkedIn.
Related Posts


Related Resources
Twilio Docs
From APIs to SDKs to sample apps
API reference documentation, SDKs, helper libraries, quickstarts, and tutorials for your language and platform.
Resource Center
The latest ebooks, industry reports, and webinars
Learn from customer engagement experts to improve your own communication.
Ahoy
Twilio's developer community hub
Best practices, code samples, and inspiration to build communications and digital engagement experiences.