Wake-Up Call Service Part 2: Managing Users with MongoDB
Time to read:
September 01, 2023
Written by
Reviewed by
In the first part of this tutorial series, you learned how to emulate a wake-up call alarm using Twilio Programmable Voice and Cron job. You were able to create a wake-up call alarm for a specified number at a specified time and implement snooze and stop functionalities.
In this tutorial, you’ll learn how to leverage the power of MongoDB to handle alarms linked to multiple users. Additionally, you’ll discover how to make your call service persistent in the event of a server restart or crash. Let’s get started!
Overview
Before you dive in, let's look at the two additional updates you’ll be implementing in the existing wake-up call service.
An alarms database
You’ll need a database to store all of your alarms. Yes, you can store them locally in your code, however this is not good practice. It will eat up memory quickly and can be easily wiped out after a server crash or restart.
Instead, in this tutorial, you’ll learn how to set up a MongoDB database and integrate it with the call service. You’ll also learn how to create an alarms model and add, delete, and find alarms in the MongoDB database.
Persistent Cron alarms
One thing we can’t store and have active in the database are the cron jobs. Once the server restarts or crashes, all of the alarm cron jobs that are running will be wiped. To combat this, you’ll create a start-up function that creates the cron jobs again by iterating through all of the alarms on the database. This will run every time your Node.js application boots up, which will always occur after restarts and crashes.
Prerequisites
- Completed code from part 1 of this tutorial series. You can clone the completed code here.
- A free MongoDB account.
- An organization linked to your MongoDB account.
- A project on your MongoDB account.
MongoDB Integration
Before you can create a database, you’ll need to have an organization and a project on MongoDB. If you don’t have them, follow the steps shown on the MongoDB Docs:
Setup Database
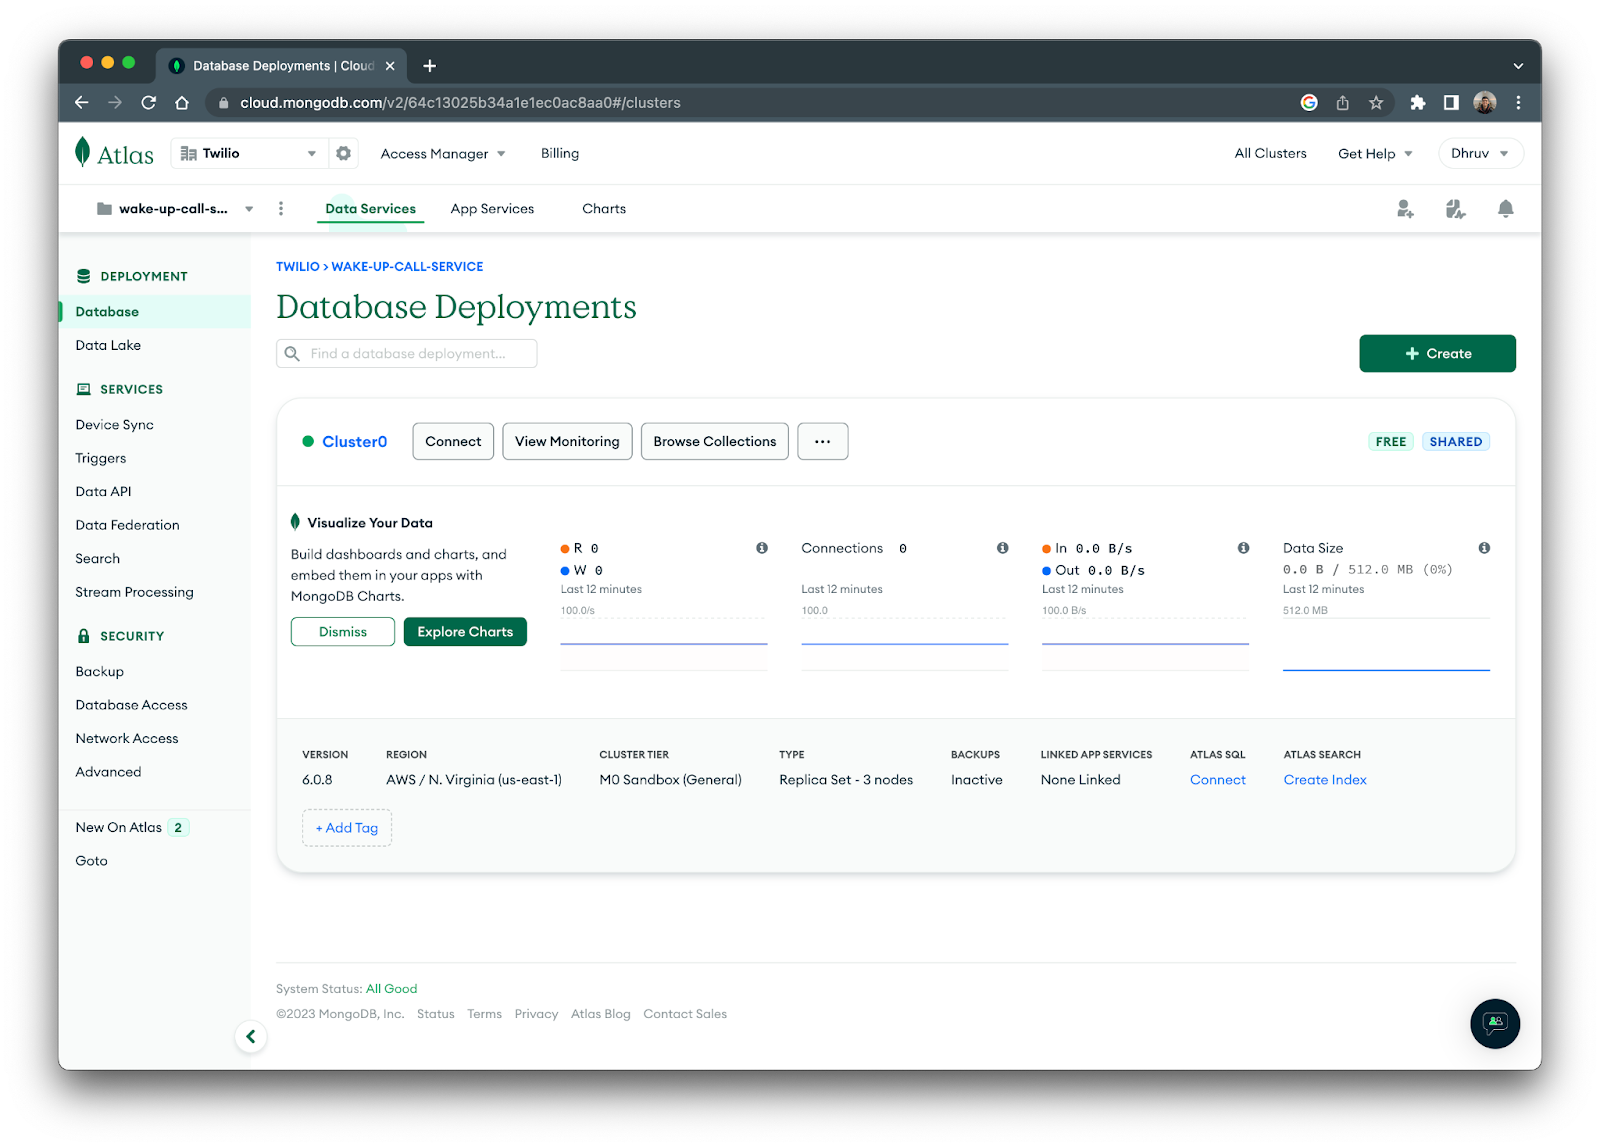
Navigate to your projects dashboard and you’ll be on the Database Deployments menu.
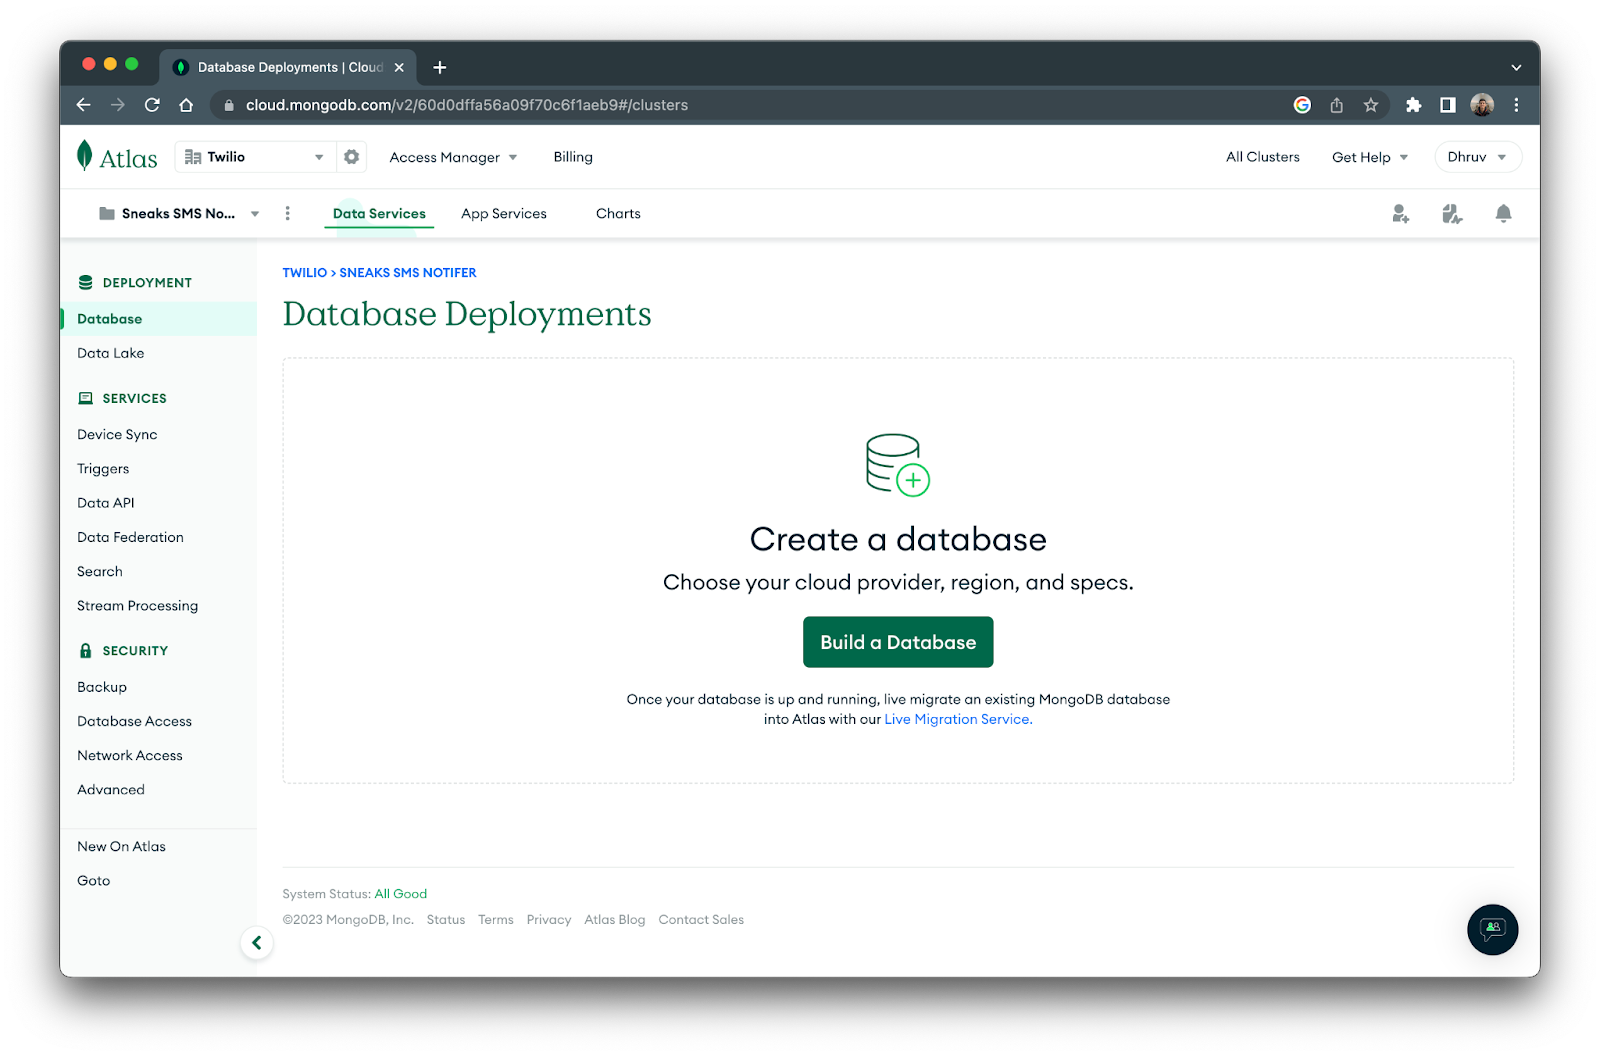
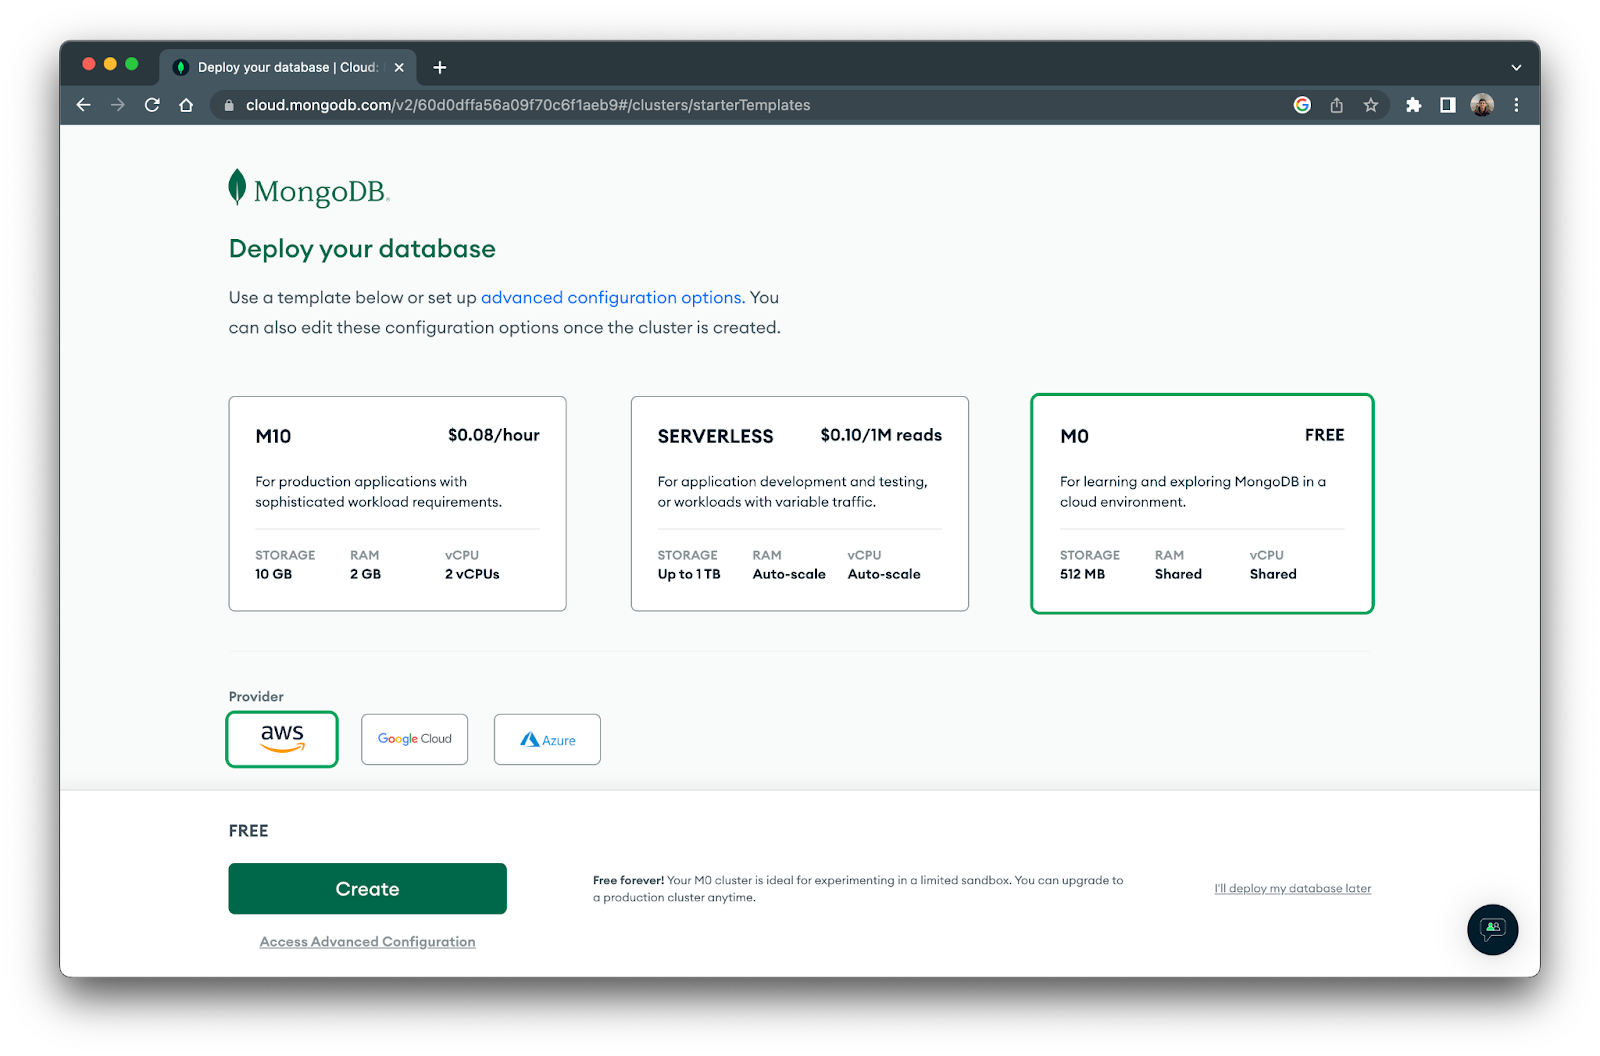
Click on the Build a Database button, where you’ll be prompted to configure your database. Configure your database to your liking; I selected the M0 tier (since it's free) and left the other settings with their defaults.
Click the Create button, where the next step will be to set up security controls.
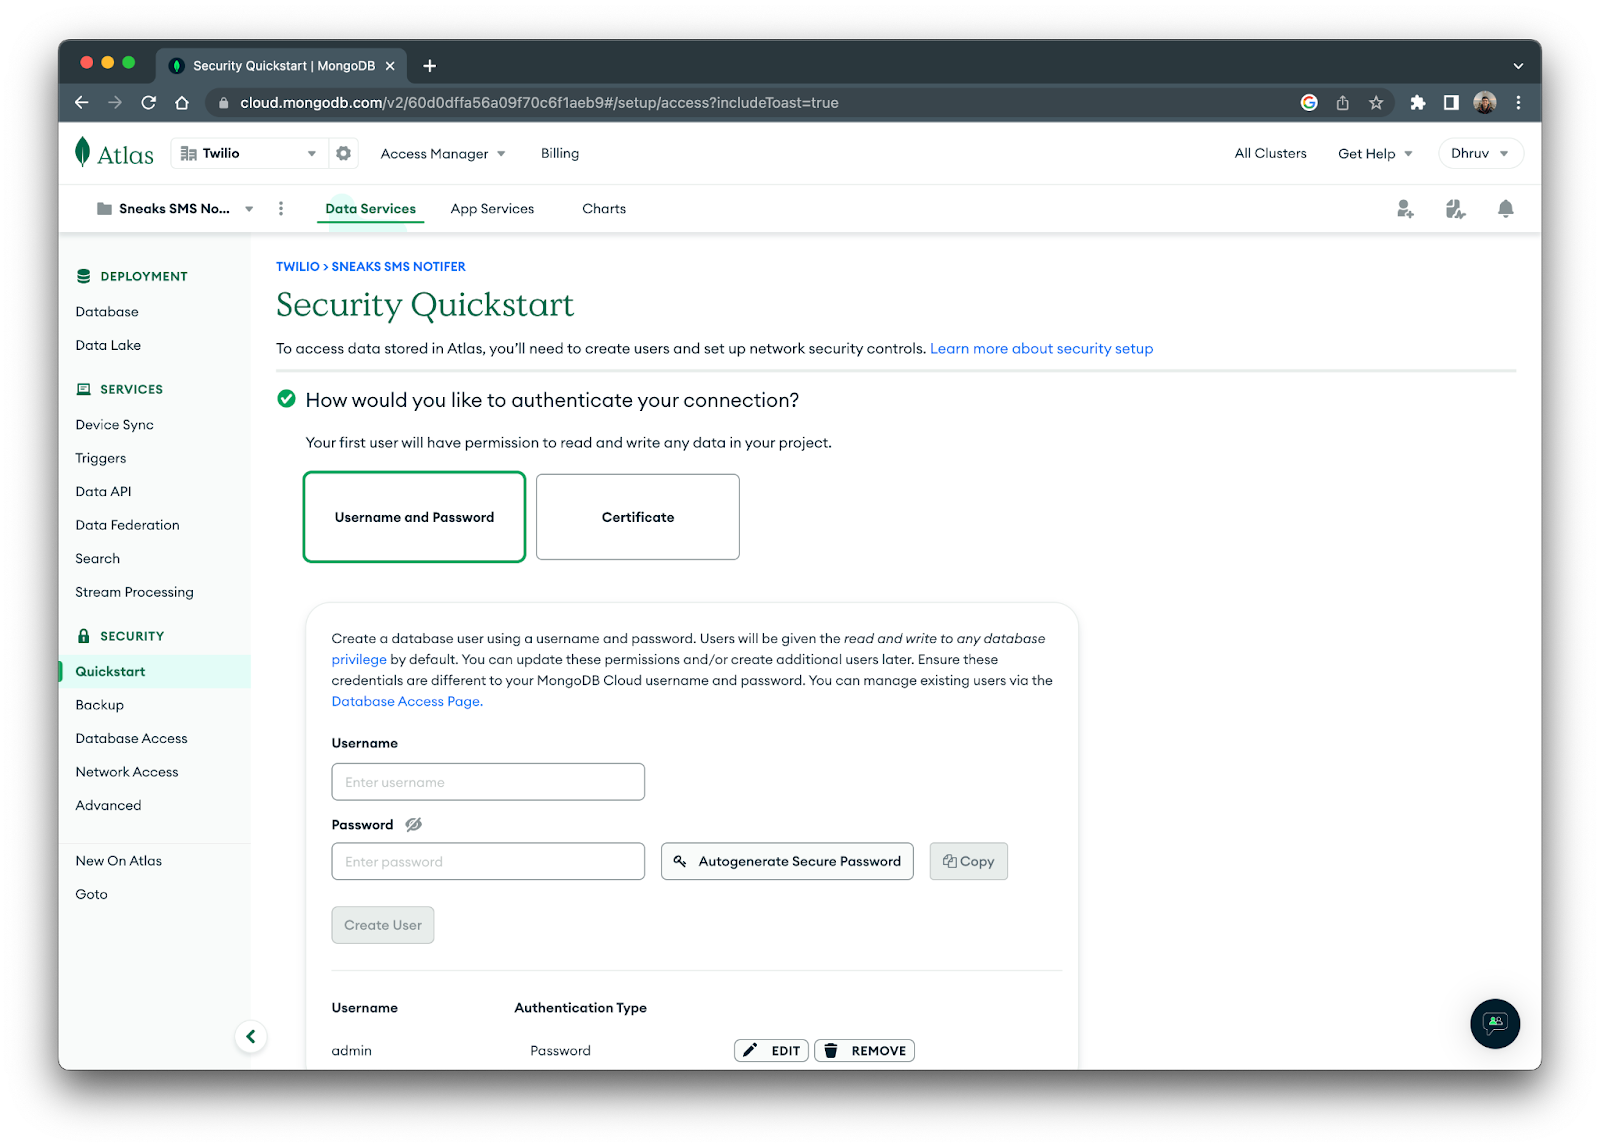
Enter a Username and Password (I recommend selecting Autogenerate Secure Password). Then, store these values in a safe place, since you’ll use them later in the tutorial.
Scroll further down to the Add entries to your IP Access List and add 0.0.0.0/0 as an IP address. This allows access to your database from any server whether you're hosting on your own local environment or a cloud server.
Finally, click Finish and Close at the bottom and your database will be ready to use!
On your Database Deployments dashboard where you’ll see the new database cluster that you just created.
Connect MongoDB to your Node.js service
The last thing you’ll need to do in your MongoDB Console is to grab your cluster's connection string, so you can connect to it from your Node.js application.
Next to your cluster name, click on Connect, then Drivers, and you’ll see your connection string on step 3.
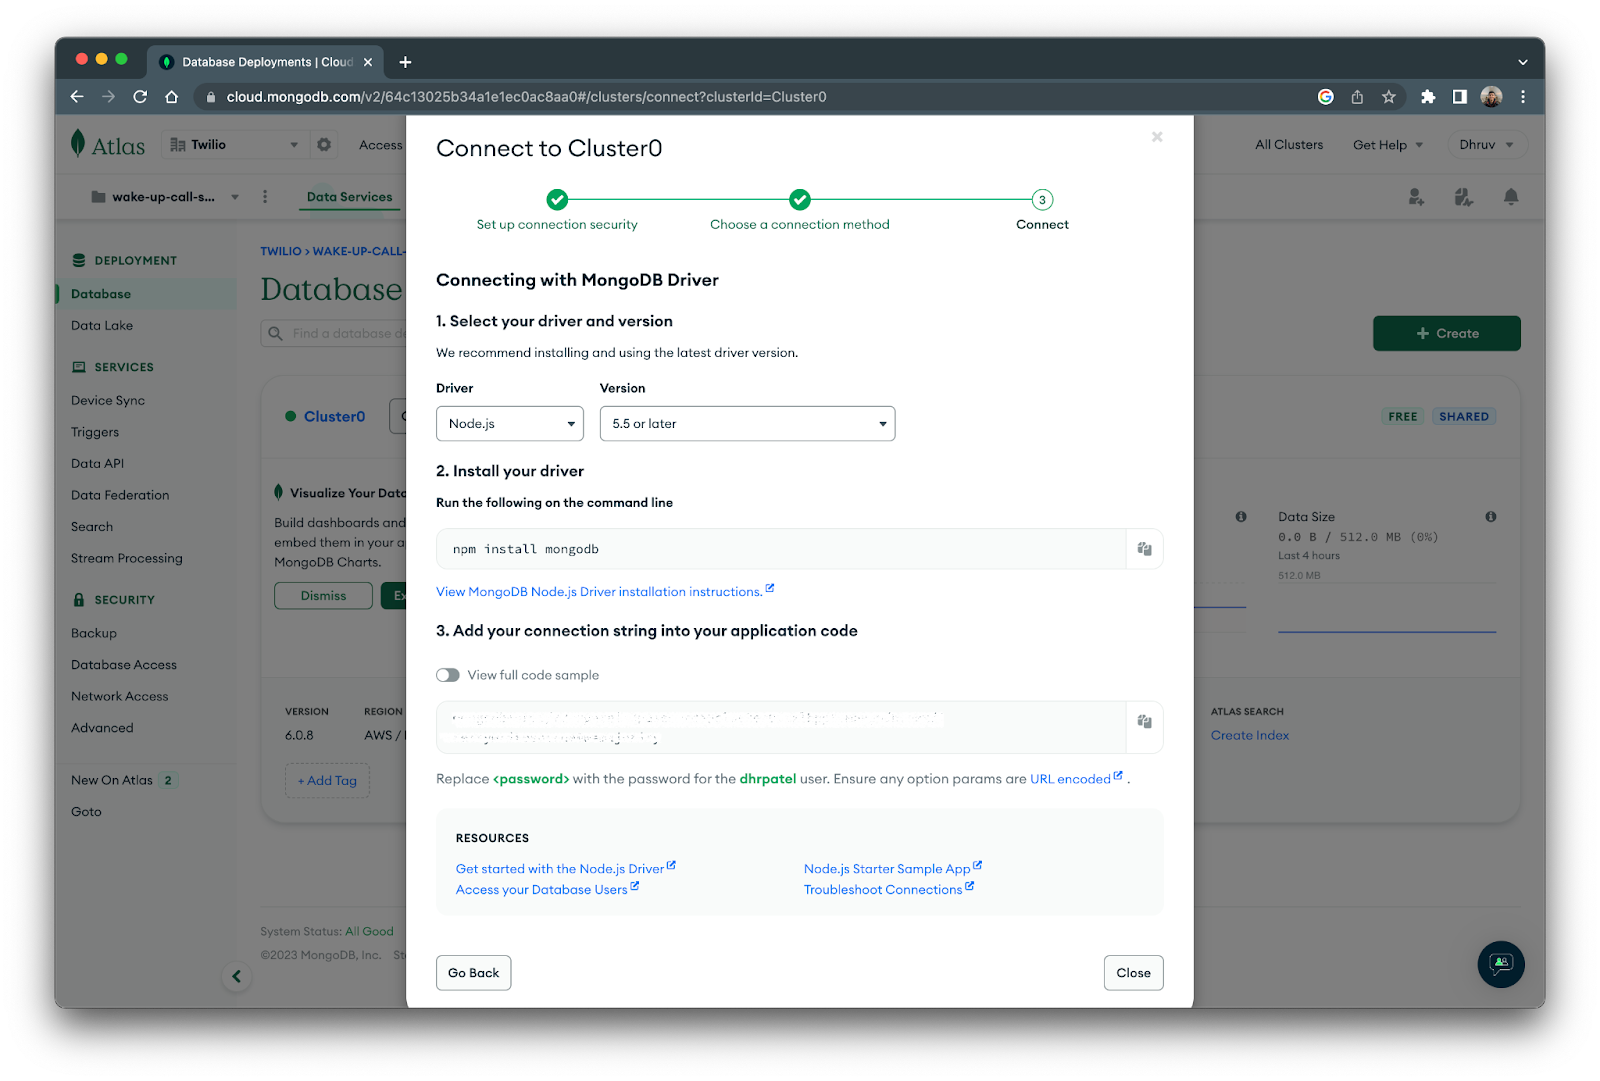
Copy the string and navigate to the .env file in your project directory. Paste in the following and replace the placeholder value with the connection string you just copied.
Now, replace the <username> and <password> placeholders with the username and password you created earlier.
To connect your Node.js service to MongoDB, you’ll be using the Mongoose package which is a MongoDB object modeling tool for Node.js. This package also acts as a wrapper to the MongoDB API and simplifies how you can interact with your MongoDB database.
To install Mongoose, navigate to your project directory in your shell/terminal and execute the following command.
Now, navigate to your index.js file and add in the following lines at the top of the file where you’ve initialized all the other packages.
This will have Mongoose connect to your database using the connection string you provided in the .env file.
Create the alarms model
Using Mongoose, you’ll model a schema for your alarms collection in MongoDB. This schema will define the necessary attributes you’ll need for an alarm schema.
To create a schema for an alarm, create a folder named models within your project directory, then create a file within the new folder named alarm.js. The models folder can be used to store more models if you plan on creating multiple collections and models; a good example for this service can be users, which can store your users and their metadata.
Open up the alarm.js file you just created and add the following code to import the Mongoose library and Schema class from the library.
Now, add the following object to define the Alarm schema:
Let’s take a look at the attributes for the alarms schema:
phoneNumberwill hold the phone number that the alarm is linked to. This will be stored as a string in E.164 format.currentStatewill hold the state at which the alarm is at. This can either be on, off, or ready. When thecurrentStateis on, the alarm will be in a trigger state, where the call cycle is ongoing. The off state means the alarm is off and the ready state means the alarm is set and ready to be turned on at the specified time.recurringstates whether the alarm state will reset to ready after it has been turned off.alarmTimewill hold a custom object defined by a recurrence rule from the Node Schedule package. This object will hold thehour,minuteandtz(timezone) variables, which defines at what time the alarm will be triggered.createdAtwill hold a UTC date of when the alarm was created. Although you won’t use this attribute, it can be useful for debugging or future updates to your service.
Lastly, add the following code to create the model and export it so you can use it in your alarm functions.
Update alarm functions to interact with the database
In this section, you’ll update all of the functions in services/alarm.js so that they’re compatible with multiple alarms rather than just one.
Within services/alarm.js, replace all of the code above module.exports with the following.
The changes made here are that the Alarm model from the previous section is imported and some of the default alarm settings have been removed. The default alarm settings that were removed have been added as Alarm attributes since they are unique to a particular alarm.
Within module.exports, replace the createAlarm function with this updated version:
This function now creates a new alarm model for the user and saves it to the database. This updated function also removes the cron job creation, and instead uses the new createAlarmJob function, which you’ll create later.
Replace the stopAlarm function with the following.
This function will fetch the alarm from the database, change the currentState attribute to its default state, and then save the alarm back to the database.
If the alarm is not recurring, the function will use the schedule.scheduledJobs object provided by the node schedule package to find and cancel the cron job linked to the phoneNumber.
When creating jobs with the node schedule package, you can include a key so that you can fetch a specific job using the schedule.scheduledJobs object; you’ll be using the phone number that the alarm is linked to as the unique key for alarm jobs.
Outside module.exports, replace the executeCallCycle function with the following.
This function will now fetch the updated alarm from the database after every call cycle, to check whether it has been stopped by the user.
The only new function you’ll create is the createAlarmJob function which takes in an alarm schema and creates a cron job for it.
Add the function to the bottom of the file.
The first argument for the schedule.scheduleJob function will be the key identifier for the alarm job that we mentioned previously. The second is the recurrence rule, which will define when the alarm should go off. The third argument is a function that will execute once the cron job gets triggered.
The last thing you need to update is the call to the stopAlarm function in the /stopAlarm route. The stopAlarm function now takes in a phone number, so the service knows which alarm to stop.
Replace the stopAlarm function call and update the route with the highlighted lines.
Now that you’ve updated all of the functions to handle multiple alarms using MongoDB, the next and last step is to make your cron alarm jobs persistent in the event of a crash or server restart.
Make cron jobs persistent
To make your cron jobs persistent, you need to:
- Fetch all alarms in the database that are set to
’ready’and ‘on’ - Execute the
createAlarmJobfunction for alarms that are ready - Run the
executeCallCyclefor alarms that were ongoing and triggered at the time of the server restart or crash.
Head back to the services/alarm.js file and add the following function within module.exports.
Since the index.js file is the starting point of the Node.js application, it will always run once the server starts up. Because of this, we can import the syncCronJobs function to the file and call it from there since it will execute anytime after a server crash or restart.
Head over to the index.js file and replace the line where you imported the alarm functions from services/alarm.js with the following code.
This updates the import statement to include the syncCronJobs function and immediately calls the function to turn on all of the alarm jobs that are set to ready from the database.
Conclusion
With the power of MongoDB, your wake-up call service is now capable of handling multiple users and will stay persistent in the event of a server crash or restart! Feel free to test it out with multiple numbers by adding the following code snippet to the bottom of index.js.
Replace the alarmTime.hour, alarmTime.minute, and alarmTime.tz values accordingly. Here’s a list of the acceptable tz (timezone) values for alarmTime.tz.
Before running node index in your terminal, ensure you’ve replaced all the placeholder environment variables in the .env file with their actual values. For SERVER_URL, you can run a ngrok tunnel to port 3000 and place the forwarding url as the value (refer to the testing section in part 1 if you need help).
The code for this part of the tutorial can be found in this Github repository.
Stay tuned for part 3 where you’ll learn how to use Twilio Programmable Messaging and OpenAI’s function calling to create and set alarms through natural language!
Dhruv Patel is a Developer on Twilio’s Developer Voices team. You can find Dhruv working in a coffee shop with a glass of cold brew. Alternatively, he can be reached at dhrpatel [at] twilio.com or LinkedIn.


Related Resources
Twilio Docs
From APIs to SDKs to sample apps
API reference documentation, SDKs, helper libraries, quickstarts, and tutorials for your language and platform.
Resource Center
The latest ebooks, industry reports, and webinars
Learn from customer engagement experts to improve your own communication.
Ahoy
Twilio's developer community hub
Best practices, code samples, and inspiration to build communications and digital engagement experiences.