How to Build a Serverless API with Amazon Web Services’ API Gateway
Time to read:
June 23, 2017
Written by

It’s easy to use the Twilio API to send and receive SMS using Python and Bottle. What if we convert that traditional web application into a serverless application using Amazon Web Services’ API Gateway and AWS Lambda?
Interested in learning how to create a serverless Python application? Great, because we’re going to build a serverless API for Twilio SMS throughout this post.
What Problem Are We Trying to Solve?
If we were to build a production ready service for our next million dollar startup, a Bottle web server running locally on the laptop with Ngrok tunneling would not scale. That’s a no brainer.
But, if a startup were to allow multiple users to use the same number, say Sales and Marketing, how would they control access to the API calls? They’d want to monitor and throttle usage for each department so they don’t break the bank.
They would need a service that allows multiple users to call the same Twilio service that is scalable, secure and hopefully easy to manage. As a bonus, we can enable them to control the usage for each user. Let’s build it.
Old Way of Solving this Problem
Traditionally, this is what we’d need to solve the problem:
- Web server such as Nginx or Apache.
- Use some web framework to expose the endpoints (what Bottle framework was doing in the original SMS using Python and Bottle post). In the traditional Model-Control-View model paradigm, we don’t really need the View part but the framework comes in a bundle so I guess we will just throw away the parts that are not need).
- Write the functions to correlate what each endpoint would do.
- Optionally, it would probably be easiest if the server can be accessed publicly, like the Ngrok tunneling in Matt’s post. This means the server needs a public IP with DNS setup.
- Some type of authentication mechanism to control access, depending on which framework was used.
- Optionally, we should monitor the API usage.
Even after all the work, that is just one server. When the business grows beyond the single server, more servers are needed. We can put the service on AWS EC2 instances with auto-scaling, but that would only solve #4 above, still leaving the rest tasks to be worked on.
There is a Better Way
Luckily, we live in the age of cloud computing. By combining AWS API service with Lambda, we can solve most of the problems above. Here is an overview of the flow:
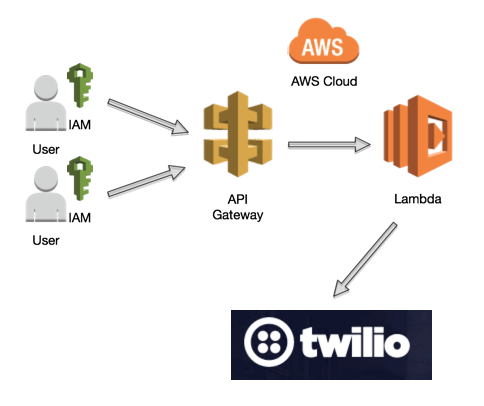
Each component above represents a service from AWS and not servers or VM’s. Here is the workflow:
- The API gateway will create publicly accessible URI endpoints.
- Each user will be assigned a key to identify the user and assigned proper usage.
- The API request will be passed on to AWS Lambda service.
- The Lambda function will in turn make a call to Twilio API and sends the text message.
I will show you how to set up this flow by extending Matt’s code into Lambda. Truth be told, both the API Gateway and Lambda services have extensive features that we are only scratching the surface of. Luckily, they are both well documented, here are some links that can be helpful if you want to learn more about them: Amazon API Gateway, Amazon Lambda.
Both services can work in conjunction with Twilio’s subaccount services, which allows you to separate the billing and API keys per subaccount.
Tools Needed
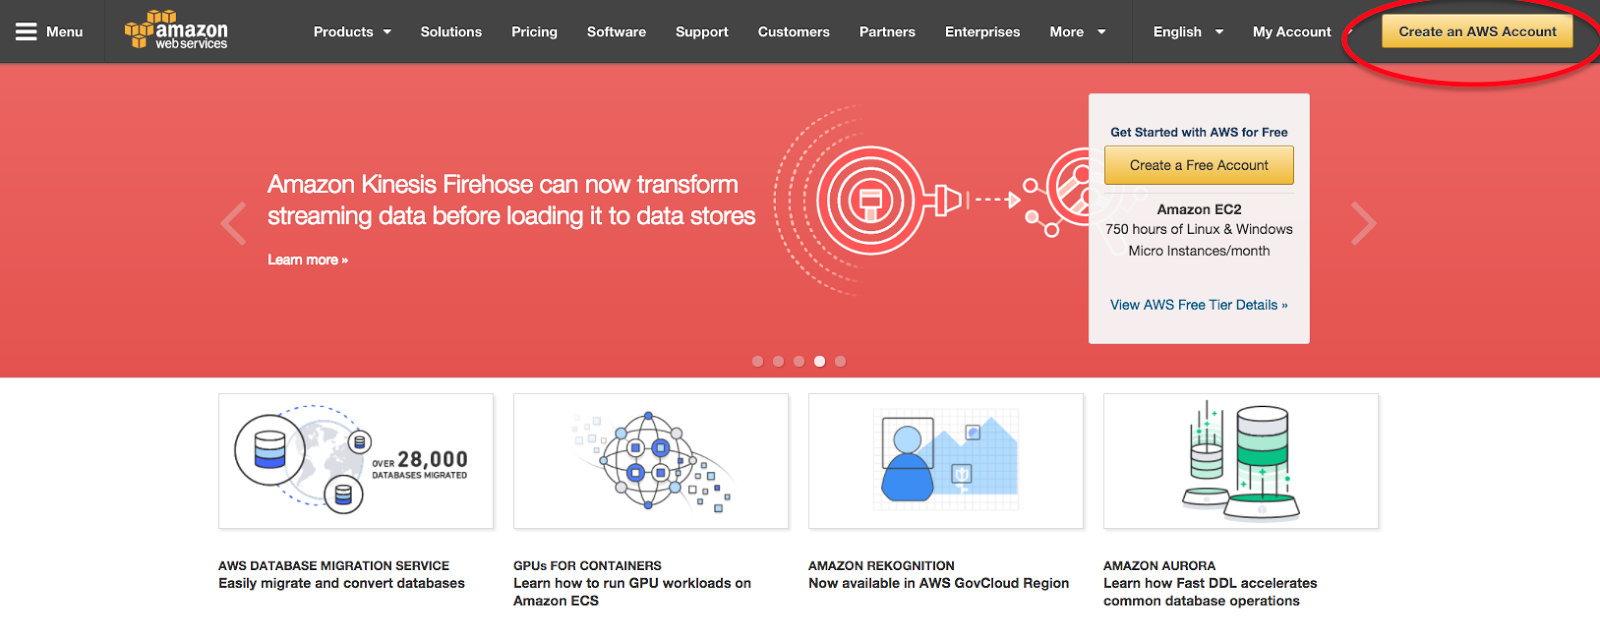
- Your AWS Account, https://aws.amazon.com/. If you don’t already have one, it is highly recommended to register a free account. Many of the services have a free tier (see about Lambda below) that you can use for free.
- Twilio account, API key that you have set up from the post, Getting Started with Python, Bottle, and Twilio SMS / MMS.
Step 0. Before We Begin:
- If you are brand new to AWS, here is a quick start guide broken down into solutions for each industry that you might find interesting, https://aws.amazon.com/quickstart/.
- If you are brand new to Lambda, it might be beneficial to watch the introduction video about the serverless model on https://aws.amazon.com/lambda/.
- If you are brand new to Amazon API service, it might be helpful to quickly glance thru the high level points here https://aws.amazon.com/api-gateway/.
- At the time of publishing in June 2017, there is a free tier for Lambda up to 1 million requests per month that is more than enough for getting started with the service. Please check the pricing page, https://aws.amazon.com/free/, for the latest AWS free tier details.
- The Amazon API service is currently NOT offered in the free tier. However, there are no minimum fees or upfront commitments with the usage-based service. Pricing is based on usage and your region of choice. For example, in US-East, the price is$3.5 per million API calls received plus the cost of data transfer out, https://aws.amazon.com/api-gateway/pricing/. My total cost of API services when I built this use case was $0.01, but your mileage might vary.

- In AWS, not all regions are created equal. We will be using us-east-1 region in N. Virginia to build both services, make sure you select it on the top right hand corner. This is sometimes overlooked and cause issues down the line when the services have to exist in the same region.

Step 1. Create IAM Role
For security best practices, we will create a new role using Amazon Identity and Access Management for the API call that will later be assigned to the Lambda function.
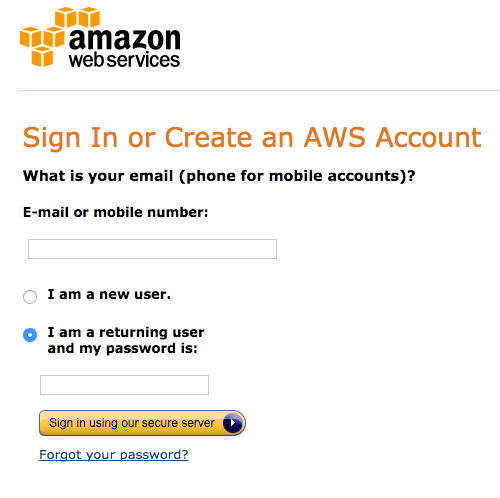
- Create a free account or sign in to your AWS console via https://aws.amazon.com/:
The click should lead you to a page where you can create a new account or log in to your existing account.
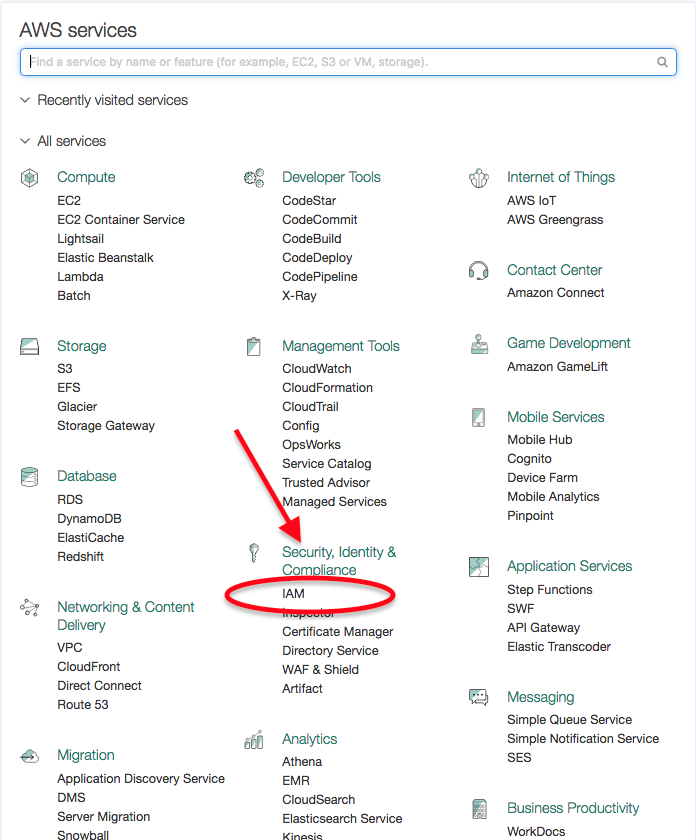
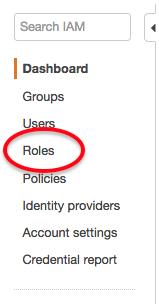
1. Once logged in, click on “Services” on the top left hand corner and choose IAM under Security, Identify & Compliance.
2. Choose the role option on left panel.
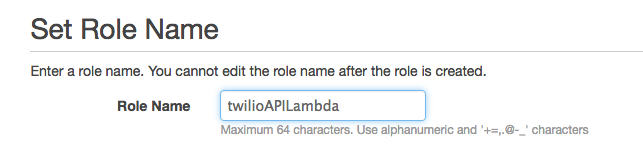
3. Create new role and give it a name.

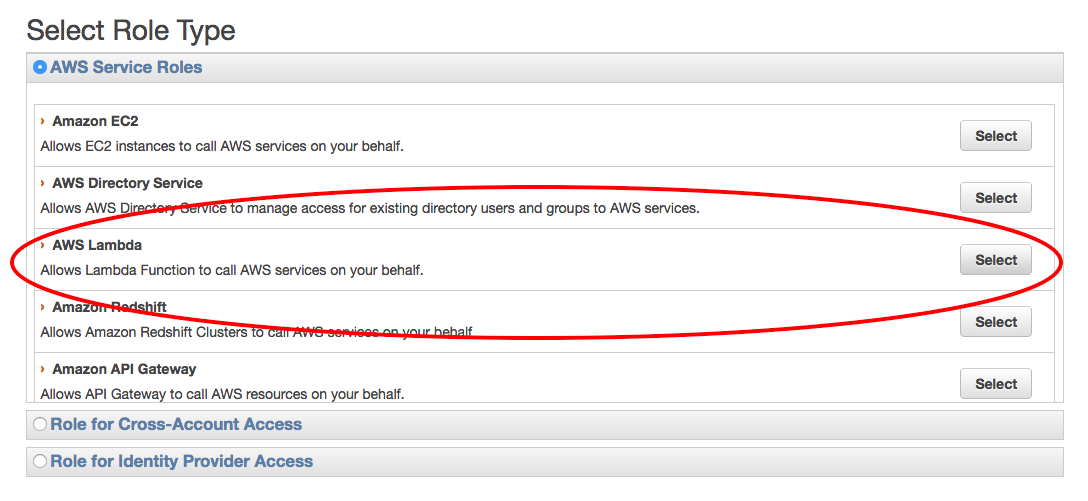
4. Select AWS Lambda for role type.
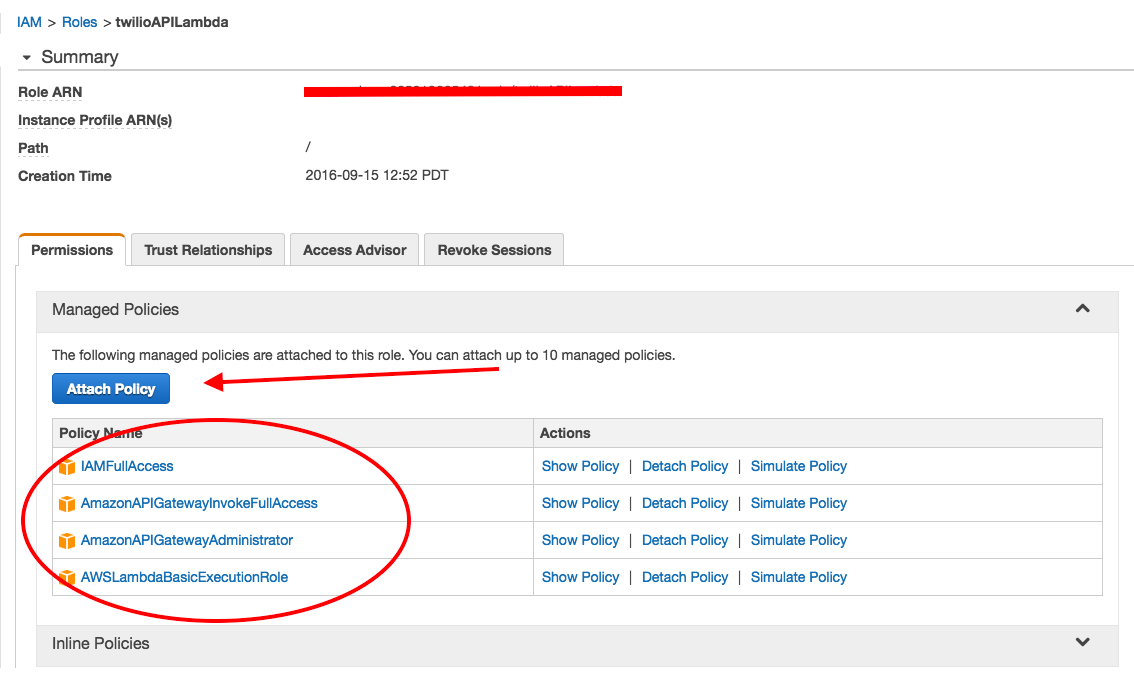
5. Click on Attach policy and attach the following pre-made policies with the role.
Step 2. Create New Amazon API Endpoint
In our simple design, we will use the a simple API endpoint of POST to /sms. In the body of the POST message, we will construct 3 JSON key value pairs of to_number, from_number, and message.
1. From Services drop down, choose API Gateway under Application Services.

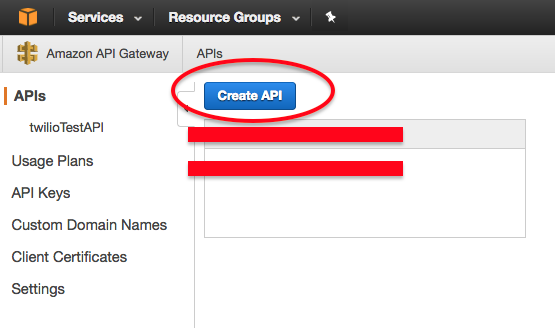
2. If this is your first time on the API Gateway page, click on the “Get Started” button or click on ‘Create API’ if you have existing API gateways.

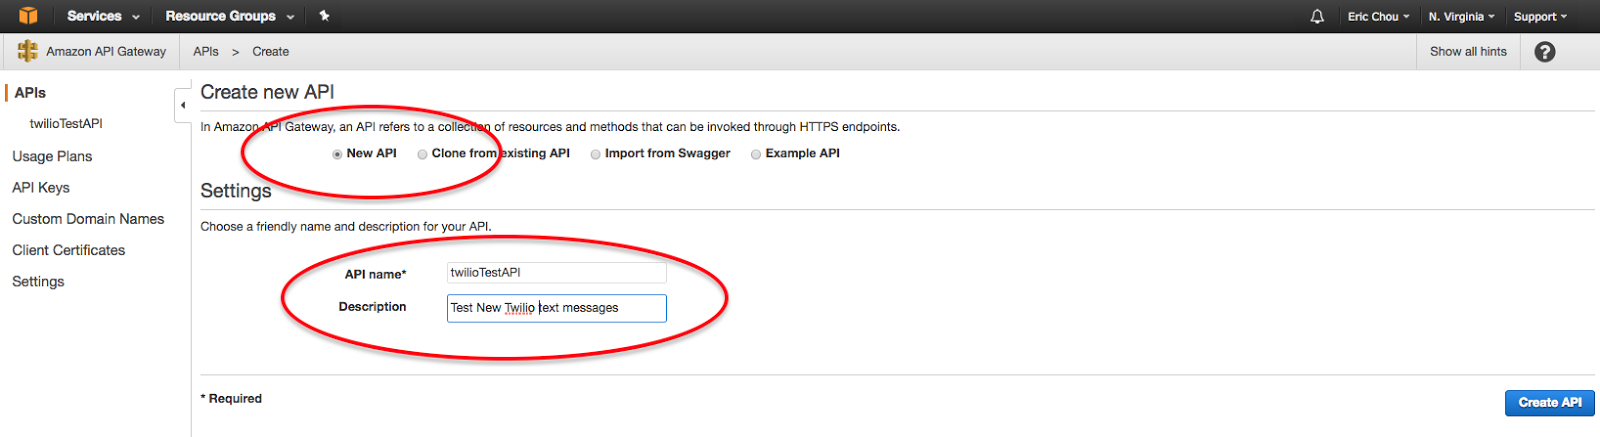
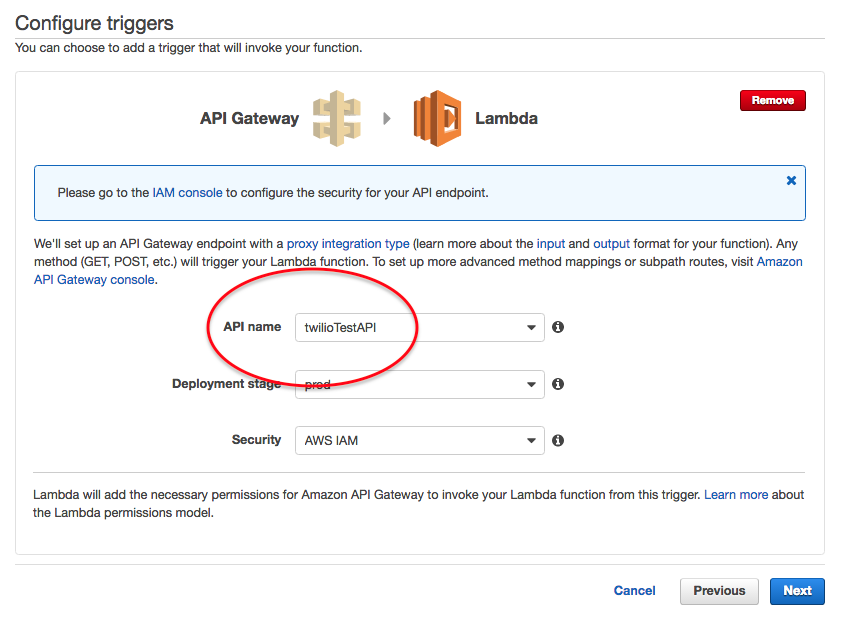
4. If there are pre-populated sample code, close it and choose new API. Name it twilioTestAPI as the name. You can put anything you want for the description.
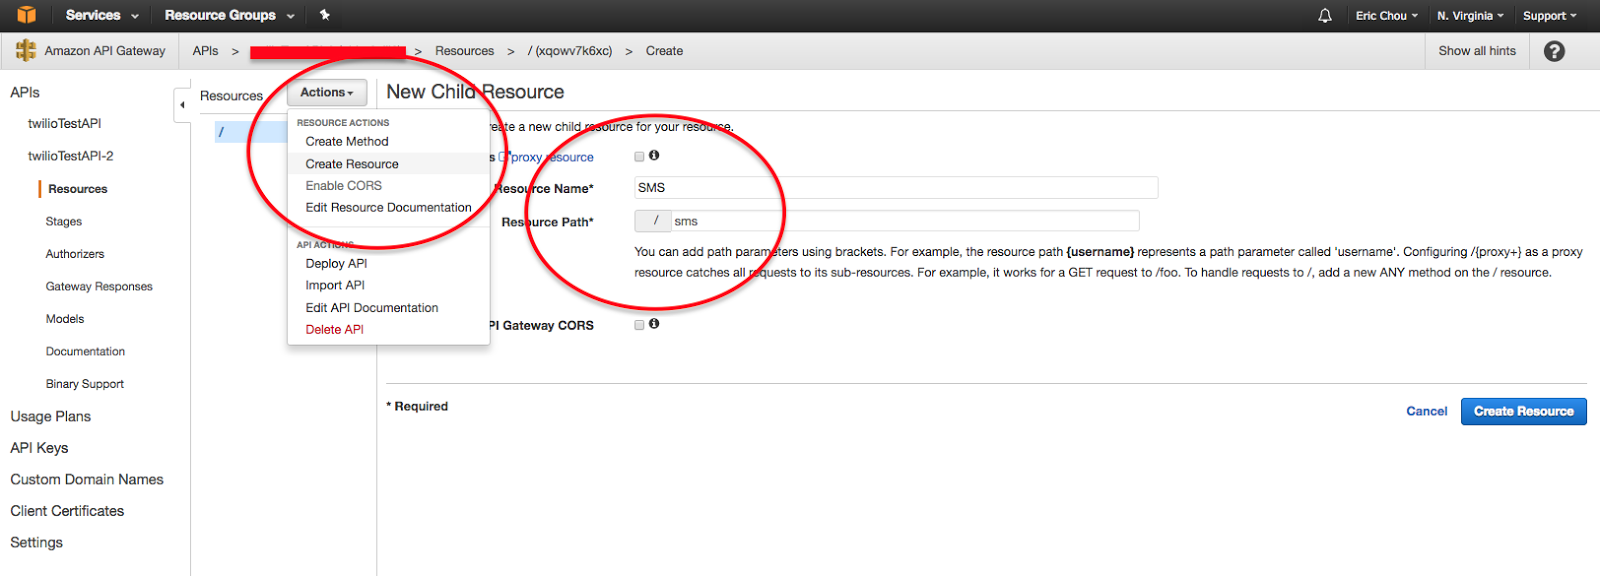
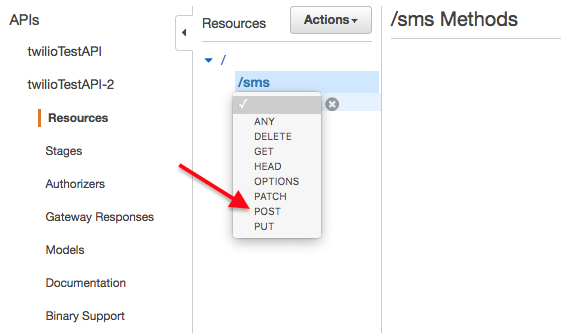
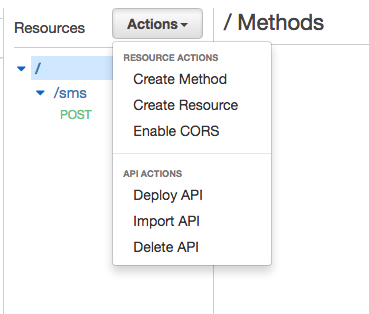
5. Use the Action drop down to create a resource, name it SMS.
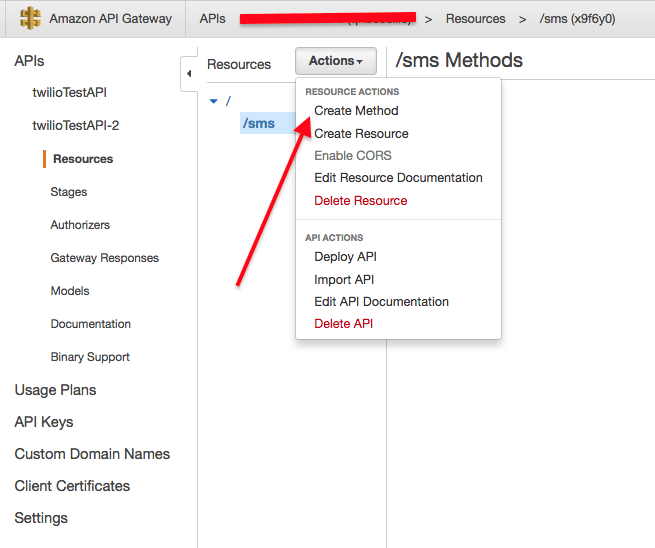
6. Click on action again to create a method, then from the drop down menu create a POST method.
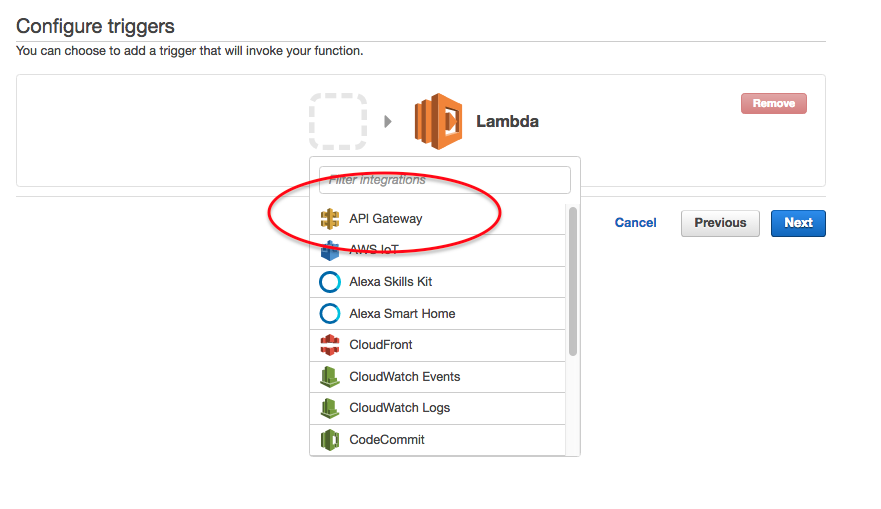
7. Select Lambda Function as the integration type. A menu to select Lambda Region and name of the function will appear.
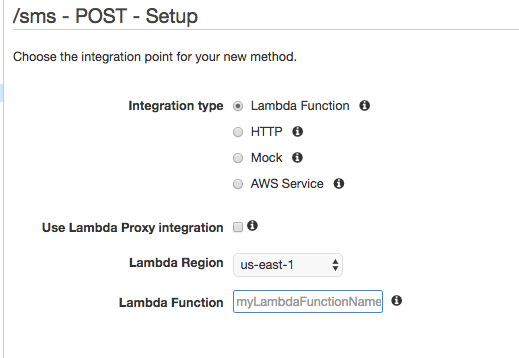
8. At this point we need to go create the Lambda function before we can link the API to the correct resource. So let’s do that. I find it easier to leave this tab open in the browser so we can come back to it, but it is up to your personal preference.
Step 3. Create Twilio Lambda Function
- Make a new directory somewhere on your computer for the code you will write for the Lambda function.
- Change to the newly created directory and install the Twilio helper function locally via PIP in the same directory. It is important to install the any helper function you need in a single directory. In later steps we need to zip all the modules in this directory into one zip file and upload to Lambda.
Note. If you are using a Python version that was installed with Homebrew, instead of pip -t you would need to use pip install -prefix. For more information please see https://github.com/pypa/pip/pull/4103. In general, we have seen some issues with Homebrew-installed Python due to installation location issues. If you can, use a standard Python install for these examples.
3. Create a new file named lambda_function.py and construct the code below. Replace it with your Twilio Account SID and Auth Token which you can get from the Twilio Console. The lambda_function.lambda_handler() function will be our entry point when the function is called.
4. Zip everything in the directory into a file called twilioLambda.zip.
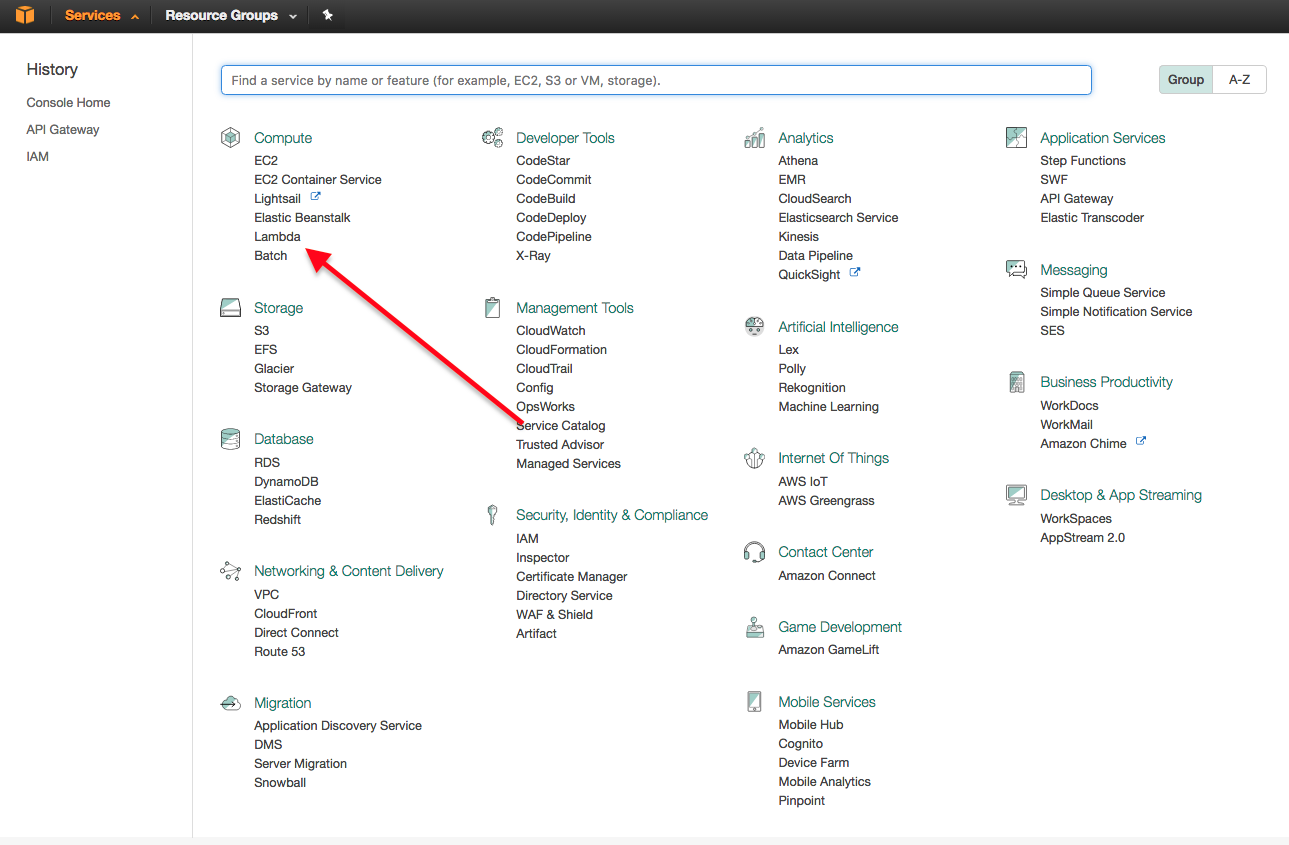
5. Go back to your browser for the AWS portal, click on Services and choose Lambda under Compute.
6. Create a new function.

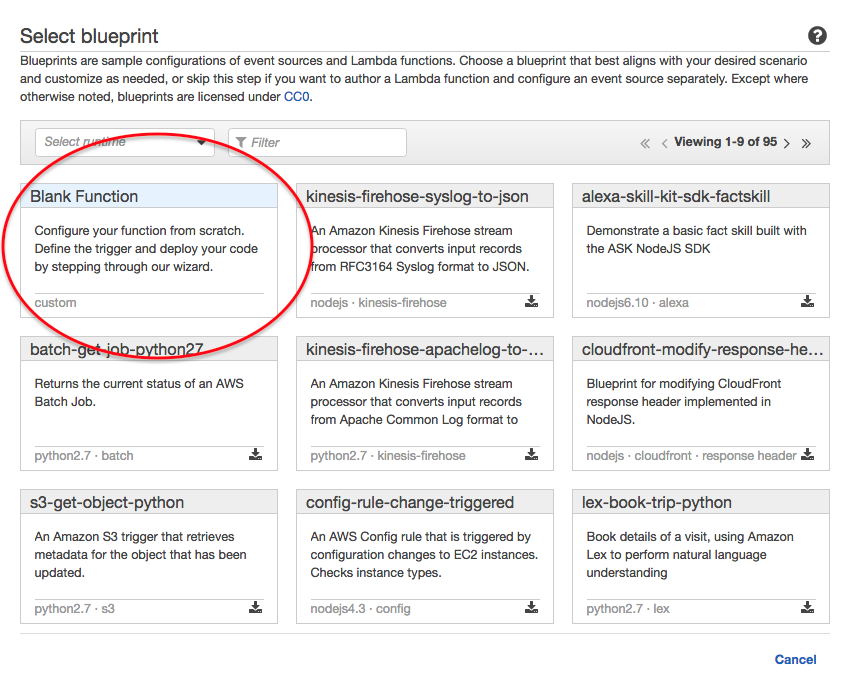
7. Choose Black Function.
8. Use the drop down box to choose API Gateway as your trigger.
9. Choose twilioTestAPI as the API name.
10. Add a name for your function, such as
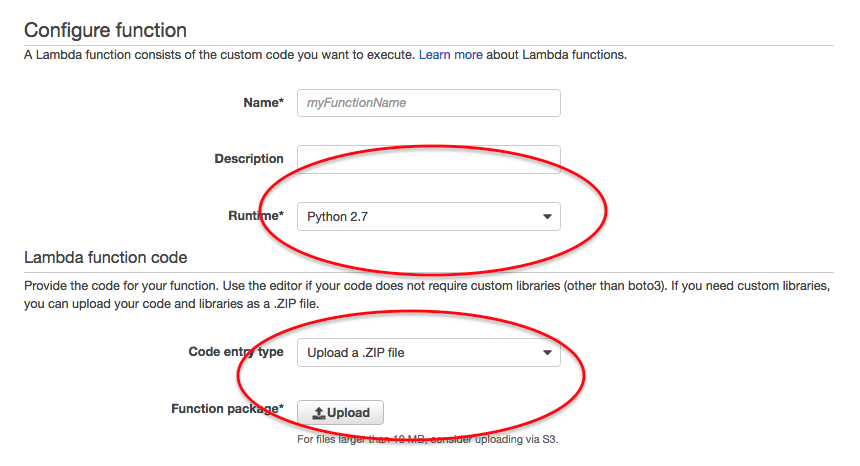
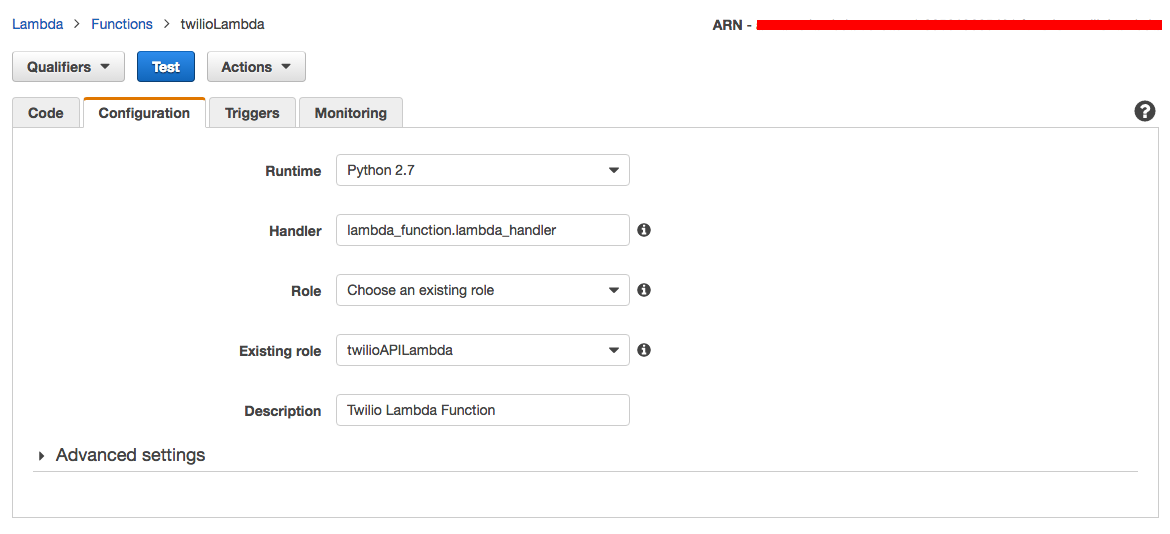
twilioAPILambda, choose Python 2.7 as Runtime and ‘upload a zip file’ for Code entry type. Click on ‘upload’ and upload the previously created zip file.
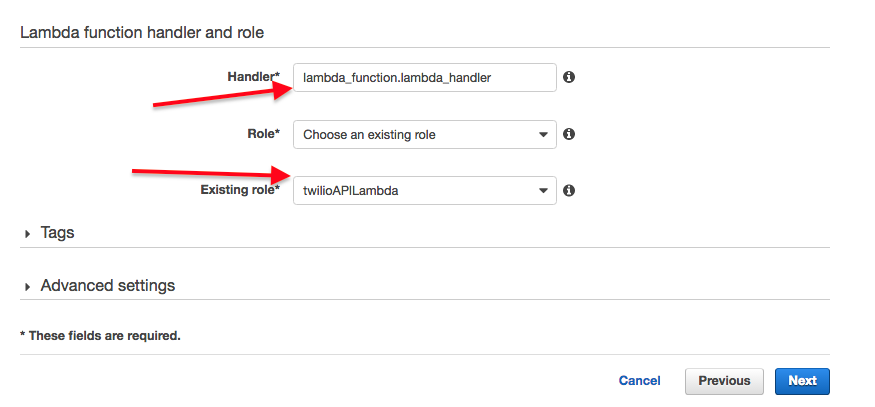
11. Scroll down for Lambda function handler and role. Leave the handler name as lambda_function.lambda_handler, choose an existing role, and the role you created in step 1.
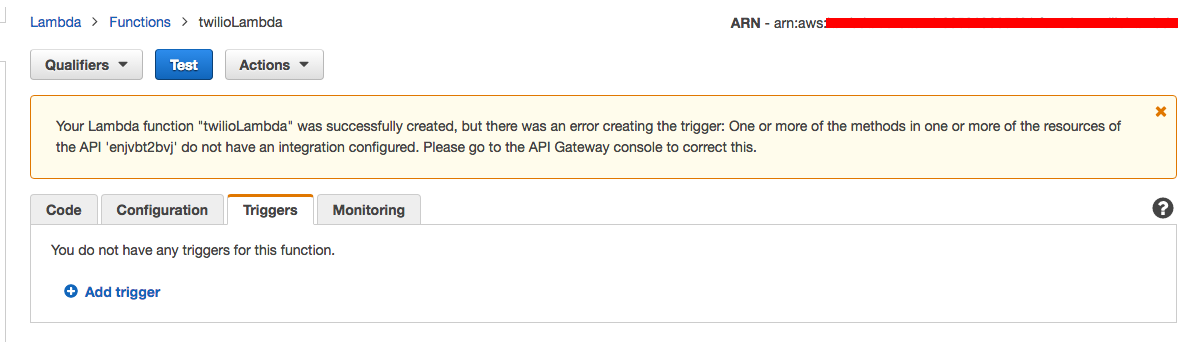
12. Review and Choose Create Function.
13. Please note, you might get this trigger error, but that is ok. We will wire it up in the next step.
Step 4. Wire up the API Service with Lambda Function
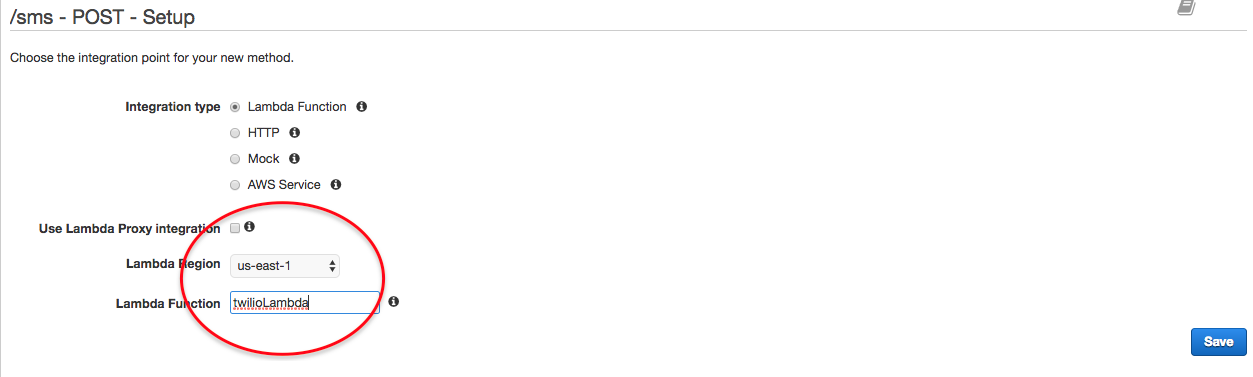
- Head back to the AWS API Gateway page from Step 2 substep 7, refresh your page and choose Lambda Function, us-east-1 region (or other regions if that is where you created your Lambda function), and fill in the name of the Lambda function that you just created. Then click on Save.
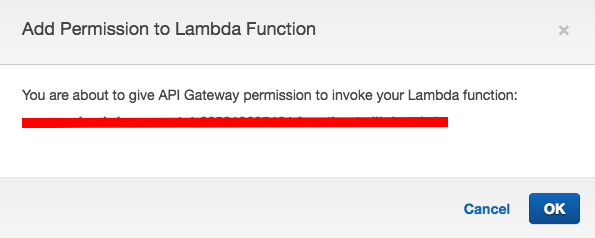
2. Click on ‘Ok’ when prompted to grant access from API to the Lambda function.
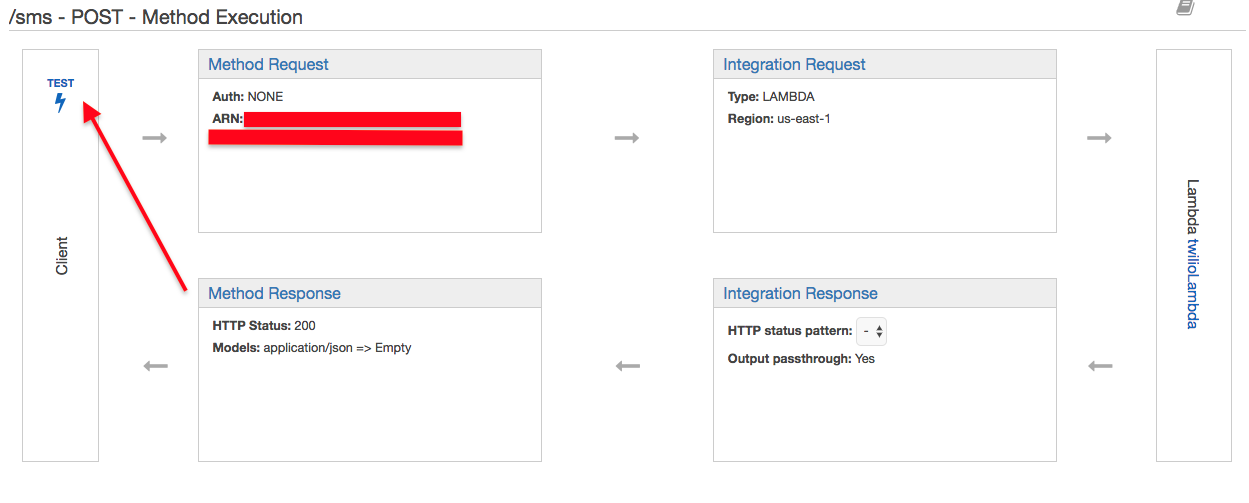
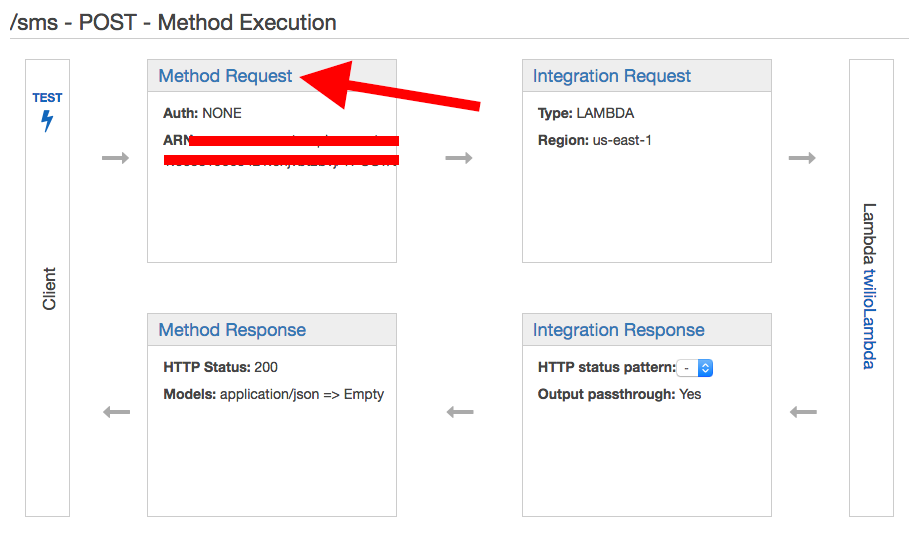
3. At this point you will see them wired up. You can click on the Test button to test the connection.
4. Enter your to_number, from_number, and message according to your account in the request body and click on test. Below is an example of the JSON request body:
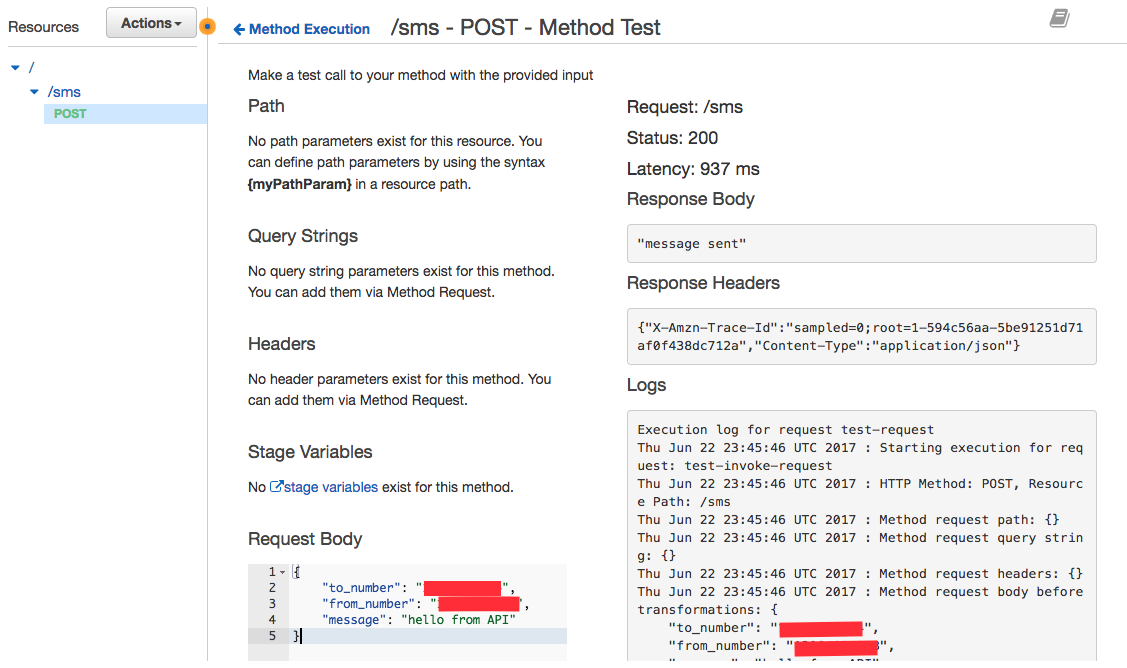
4. You should get a 200 status and a ‘message sent’ in the response body. If it does not work, delete the resource and recreate it again.
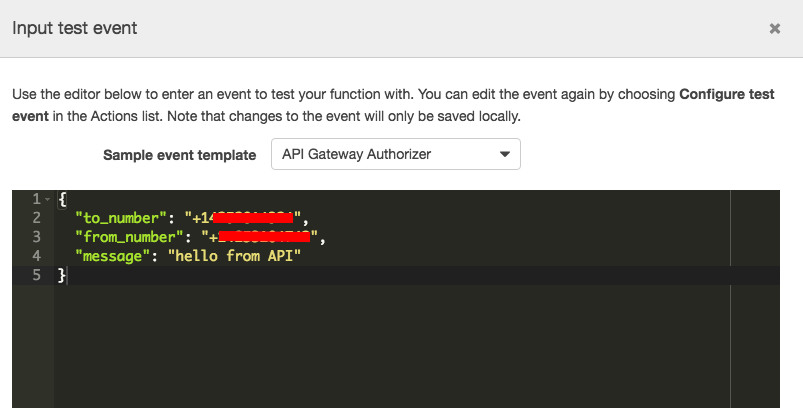
5. You can also test it from the lambda function itself on the corresponding Lambda page on AWS, use the test button and fill in the same fields.
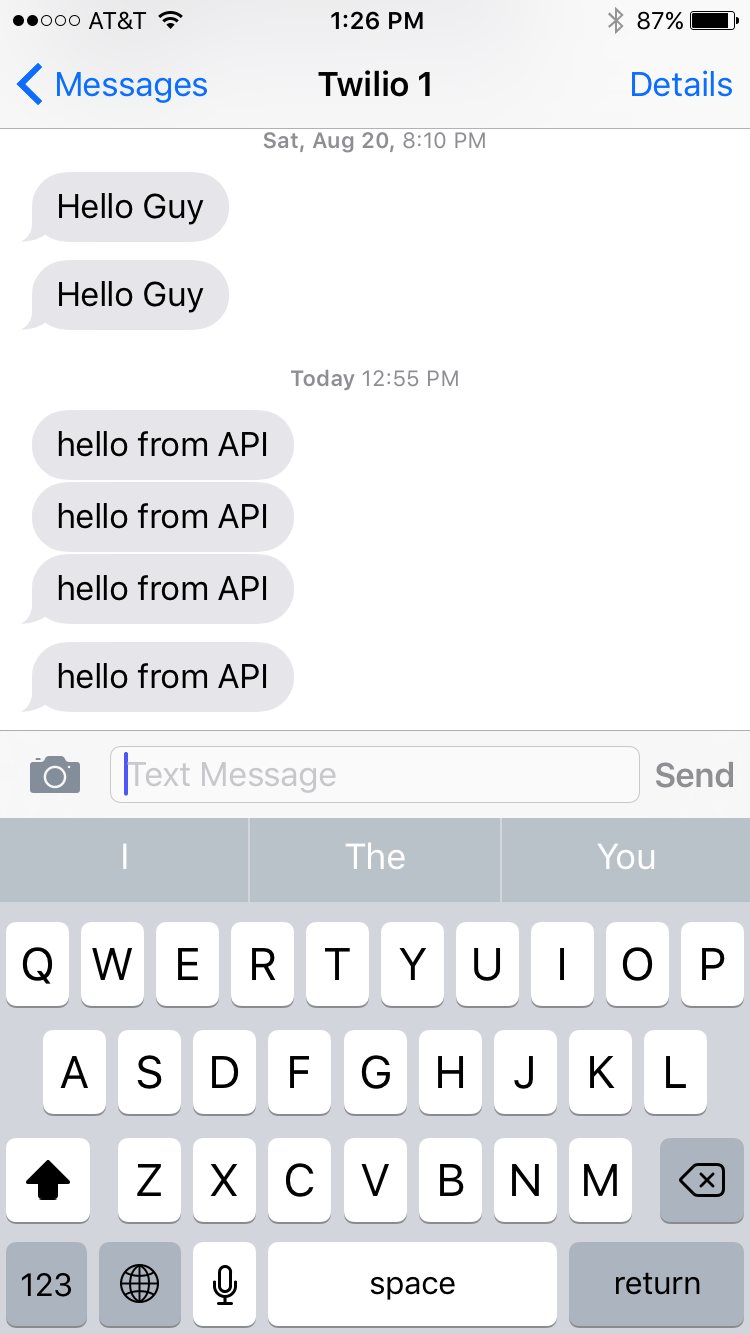
6. You should now see the message on your phone.
Step 5. Create Security authentication and Usage Plan
- Create API Key, after creation take a note of the API key:
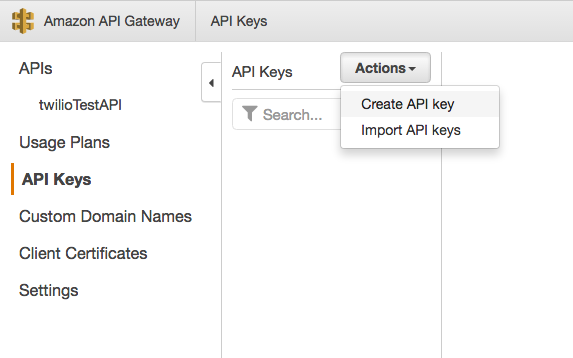

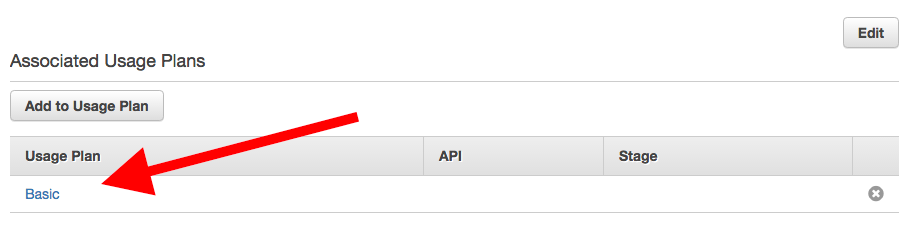
2. Create Usage plan and associate it back to the API.

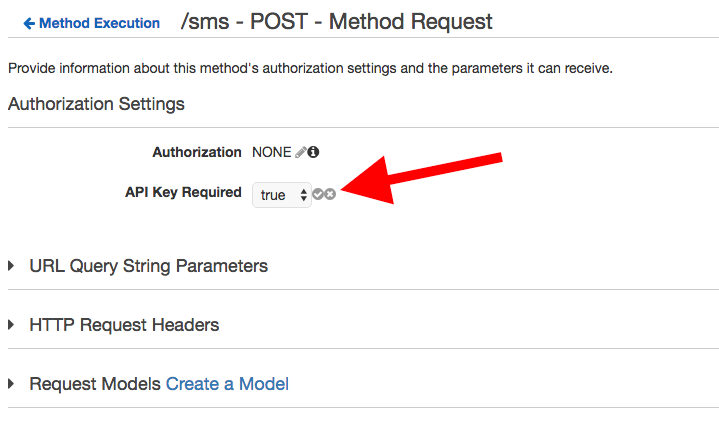
3. Set API Key required to be True for the POST method.
4. From Action drop down, choose create API.
5. Take a note of the Invoke URL.

6. Associate the Usage Plan to the API Stage that you just created.

Step 6. At Last, Test out the Public API
Here is a quick Python script for testing the URI, notice that I change the message to indicate this was from the Python script:
Here is the result when we execute the above code:
Let’s try again with some bogus key in the header:
As expected, here is the forbidden message:
Conclusion
Whew, we did it! Hopefully you can get a sense of the power of the serverless setup. I believe the combination of Amazon Lambda and Amazon API services is one of those disruptive technologies that allows for quick and secure service deployments that previously could not be done before.
Please feel free to reach out to me on Twitter @ericchou or by email eric@pythonicneteng.com if you have any questions regarding this post or my new book, Mastering Python Networking.

Related Resources
Twilio Docs
From APIs to SDKs to sample apps
API reference documentation, SDKs, helper libraries, quickstarts, and tutorials for your language and platform.
Resource Center
The latest ebooks, industry reports, and webinars
Learn from customer engagement experts to improve your own communication.
Ahoy
Twilio's developer community hub
Best practices, code samples, and inspiration to build communications and digital engagement experiences.