Automate Frequently Asked Questions in Multiple Languages Using WhatsApp and Twilio Studio
Time to read:
December 14, 2021
Written by
Reviewed by

Why should businesses use WhatsApp as a channel?
WhatsApp is one of the most popular messaging apps in the world. Users in the platform are ready to have conversations with businesses in a fast and efficient way.
When Twilio launched the WhatsApp API we quickly learned the power of WhatsApp as a conversational channel. For example, we started with one-time password use cases and users were responding with "thank you" and emojis which is something we haven’t seen in any other channel.
There are two ways you can communicate with your customers via WhatsApp:
- Inbound: This means your customer initiates the conversation. This can be used in customer care use cases or support.
- Outbound: This can be done through templates, these are preapproved messages that enable businesses to send the first message to their end customers. Many organizations send outbound notifications and alerts. To learn more about this refer to our documentation here.
This tutorial will show you how to build a customer care flow using WhatsApp and Studio (no coding skills needed).
Tutorial requirements:
- A smartphone with an active phone number and WhatsApp installed.
- A Twilio Account - If you are new to Twilio create a free account now.
Configure the Twilio WhatsApp Sandbox
Twilio provides a WhatsApp sandbox so you can quickly develop and test Whatsapp as a communication channel. Once your Studio flow is completed and approved by your team you can request production access to your own Twilio phone number. Feel free to contact the Twilio team.
Let’s connect your smartphone to the sandbox. From your Twilio Console, navigate to the sidebar and select Programmable Messaging. Click on try it out and select Send a WhatsApp Message. The WhatsApp sandbox page will show you the sandbox number assigned to your account, and a join code.
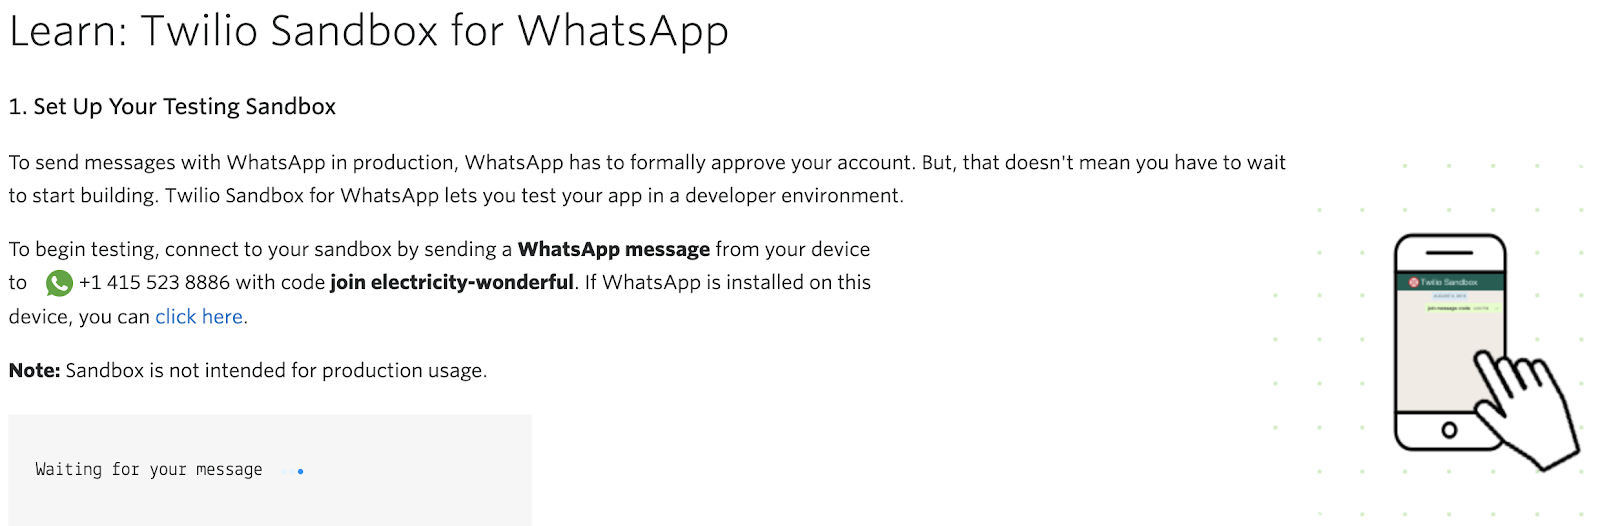
To enable the WhatsApp sandbox, send a WhatsApp message with the given code to the number assigned to your account. After you send the message, you should receive a reply from Twilio indicating that your mobile number is connected to the sandbox and can start sending and receiving messages.
Configure the Studio flow
Twilio Studio is a powerful collaboration tool where you and your team can design the desired communication flow. Once your flow is completed you can provide access to your technical team so they can integrate the flow to your internal systems. Studio has been used by many of our customers to reduce the amount of requests that are being routed to internal resources. This has resulted in a reduction of operational costs and an increase in automation which leads to a better customer experience.
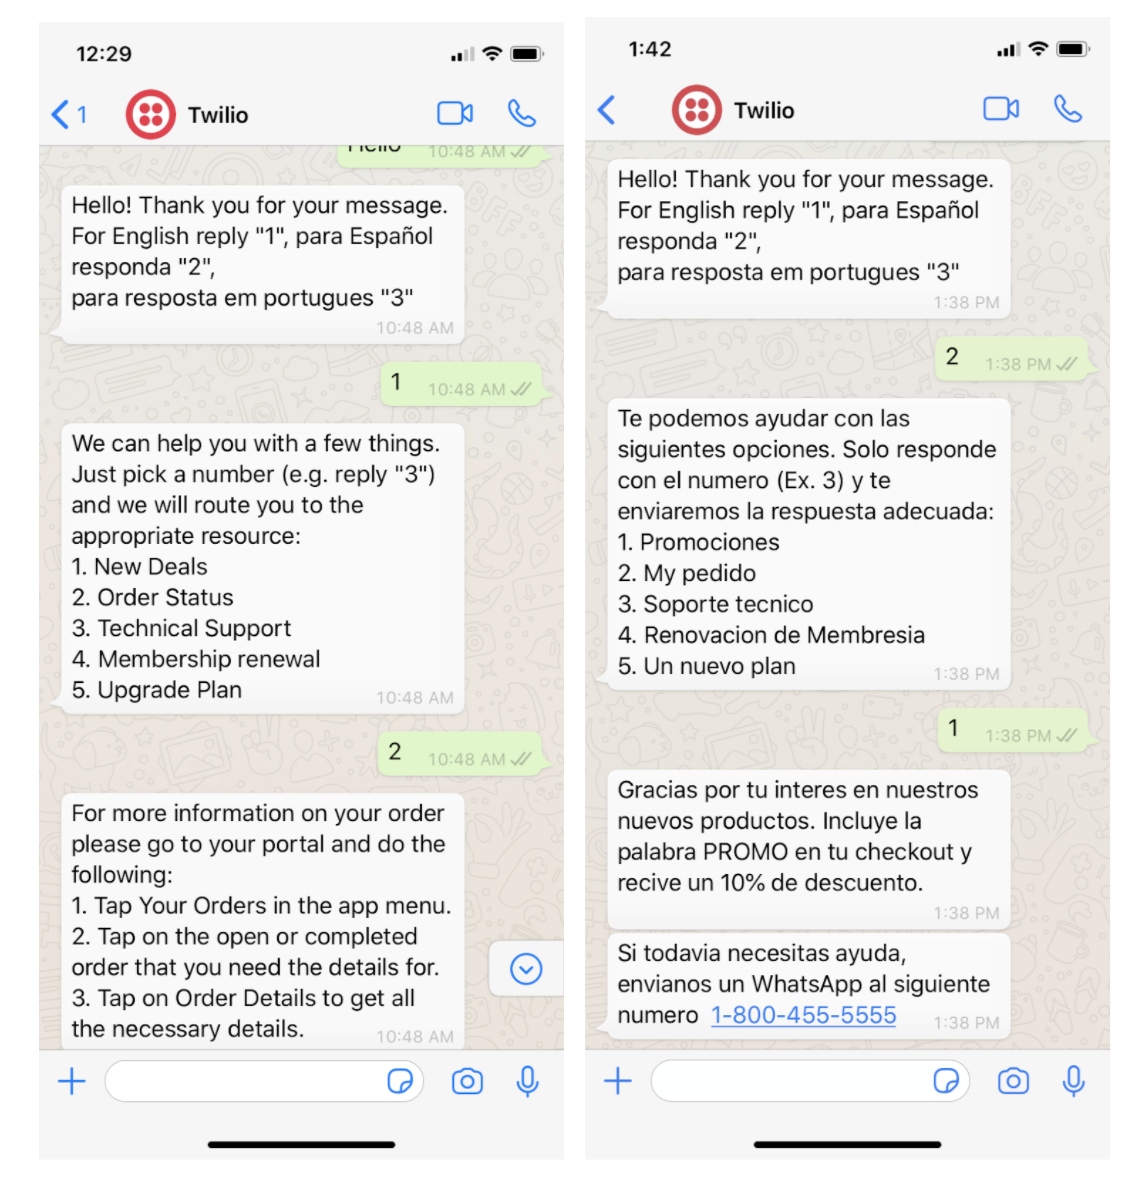
For this tutorial you are going to build a customer care flow in English, Spanish and Portuguese. The end user will be able to select their preferred language and get the answer to any of their questions. You will be leveraging subflows for each of the languages.
This is what the final Twilio Studio flow will look like:

You can get the finalized flow in JSON format here.
Access the Twilio Studio dashboard from the Twilio Console and follow these steps:
Step 1. Create a new Studio flow by clicking the Create a Flow link or the blue plus (+) sign if it’s not your first flow. Here is a screenshot of what your Studio Flow dashboard may look like:

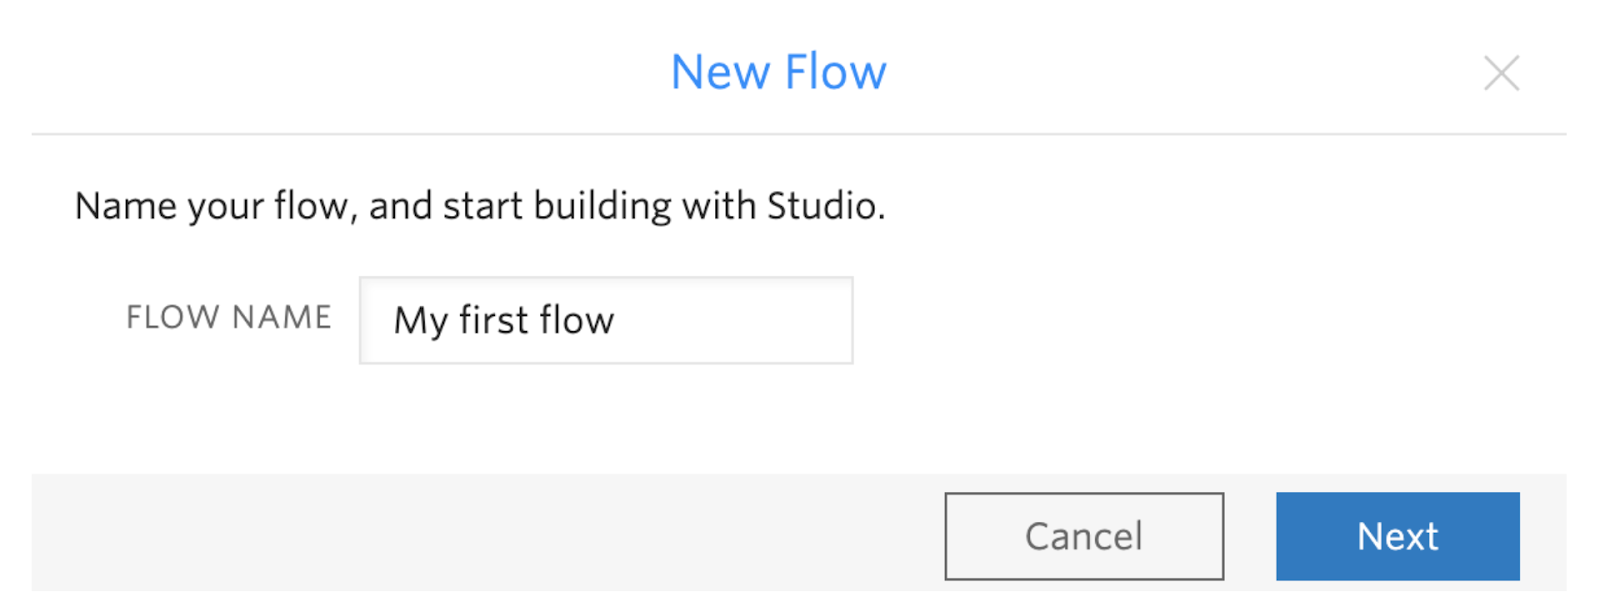
This will launch the "New Flow" wizard. For the purpose of this article, the flow is named "My first flow" but you can name it whatever you like. You will be repeating this action for the Spanish and Portuguese flows.
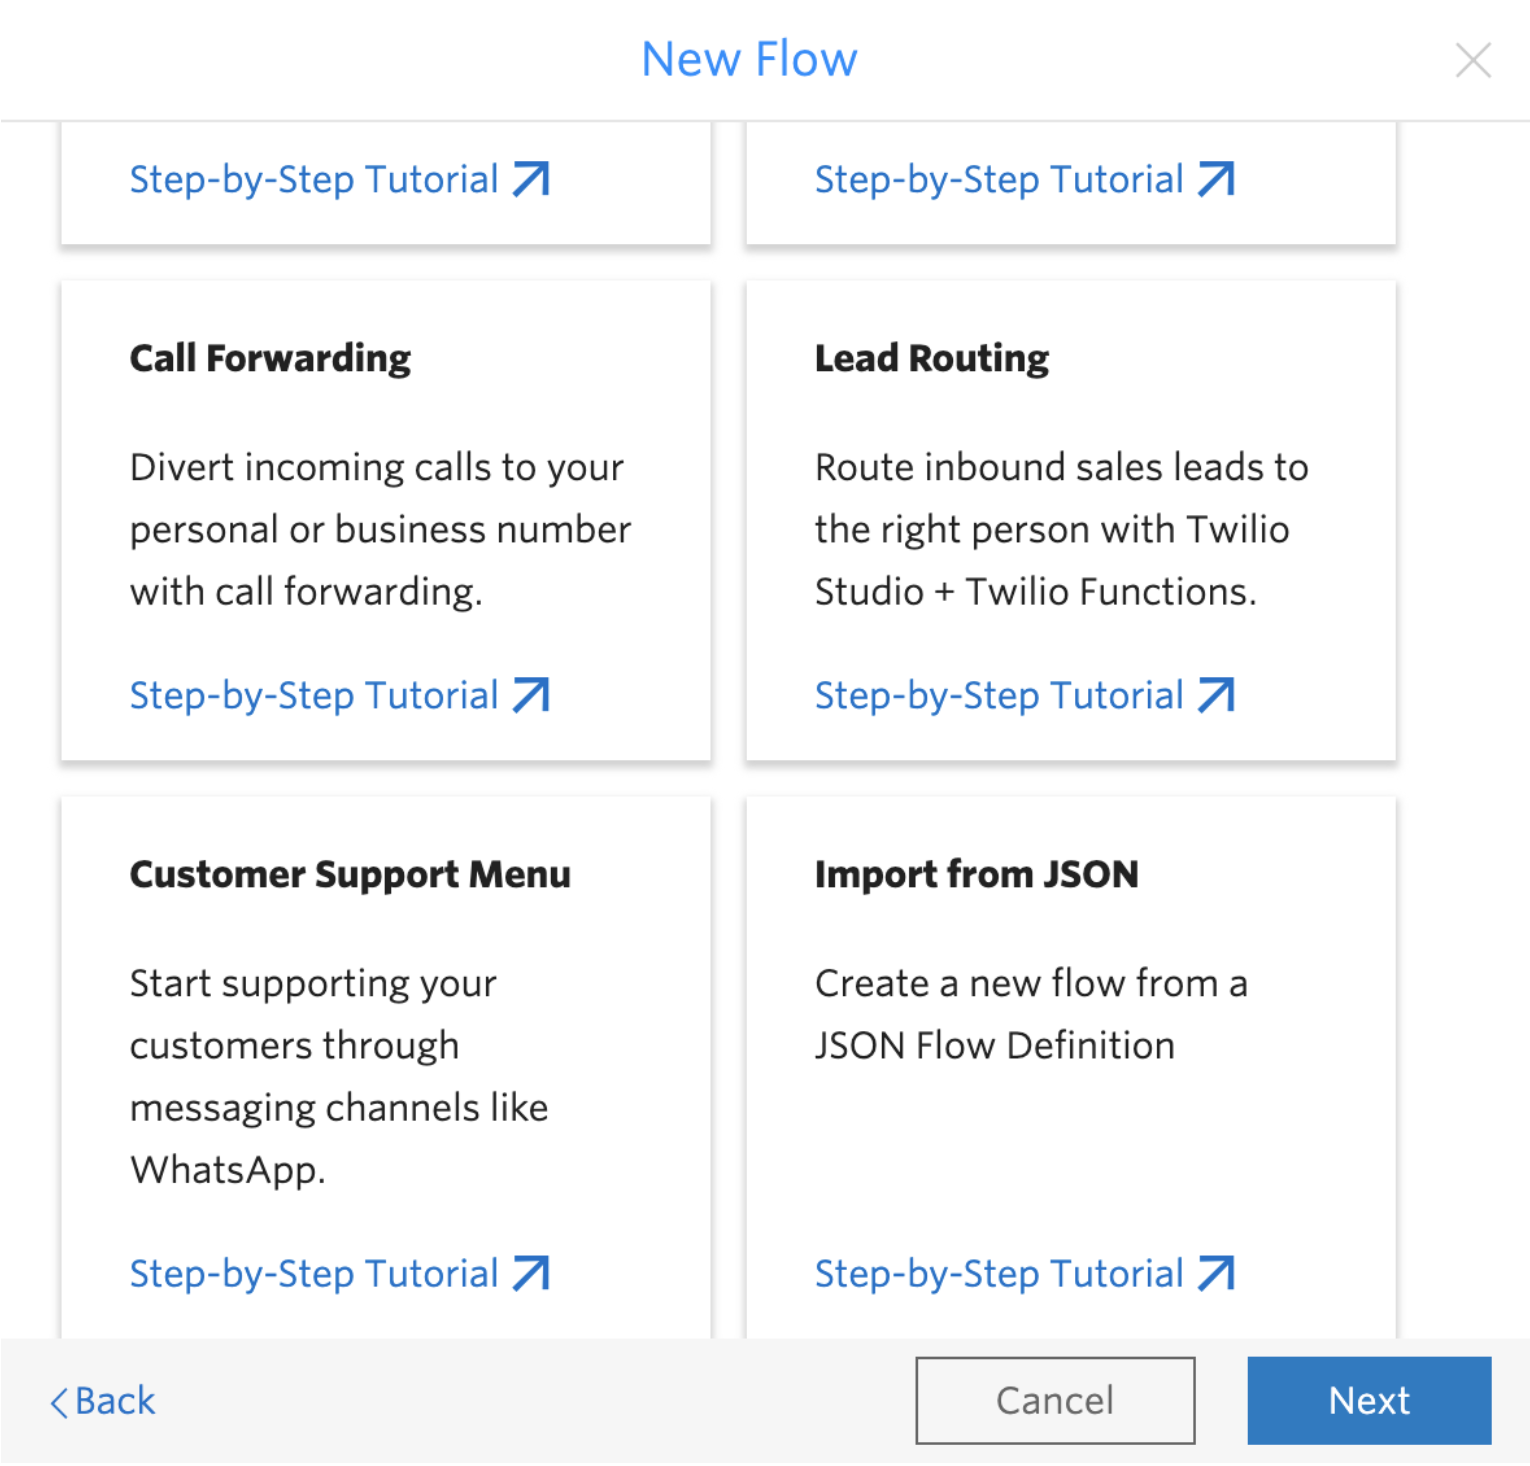
Step 2. You will see the different templates that were built for different use cases, feel free to explore this later. For this tutorial select the last option, Import from JSON. Click the Next button as seen below:
Step 3. Replace the contents of the text box with the content of the english flow provided in the finalized flow on GitHub:
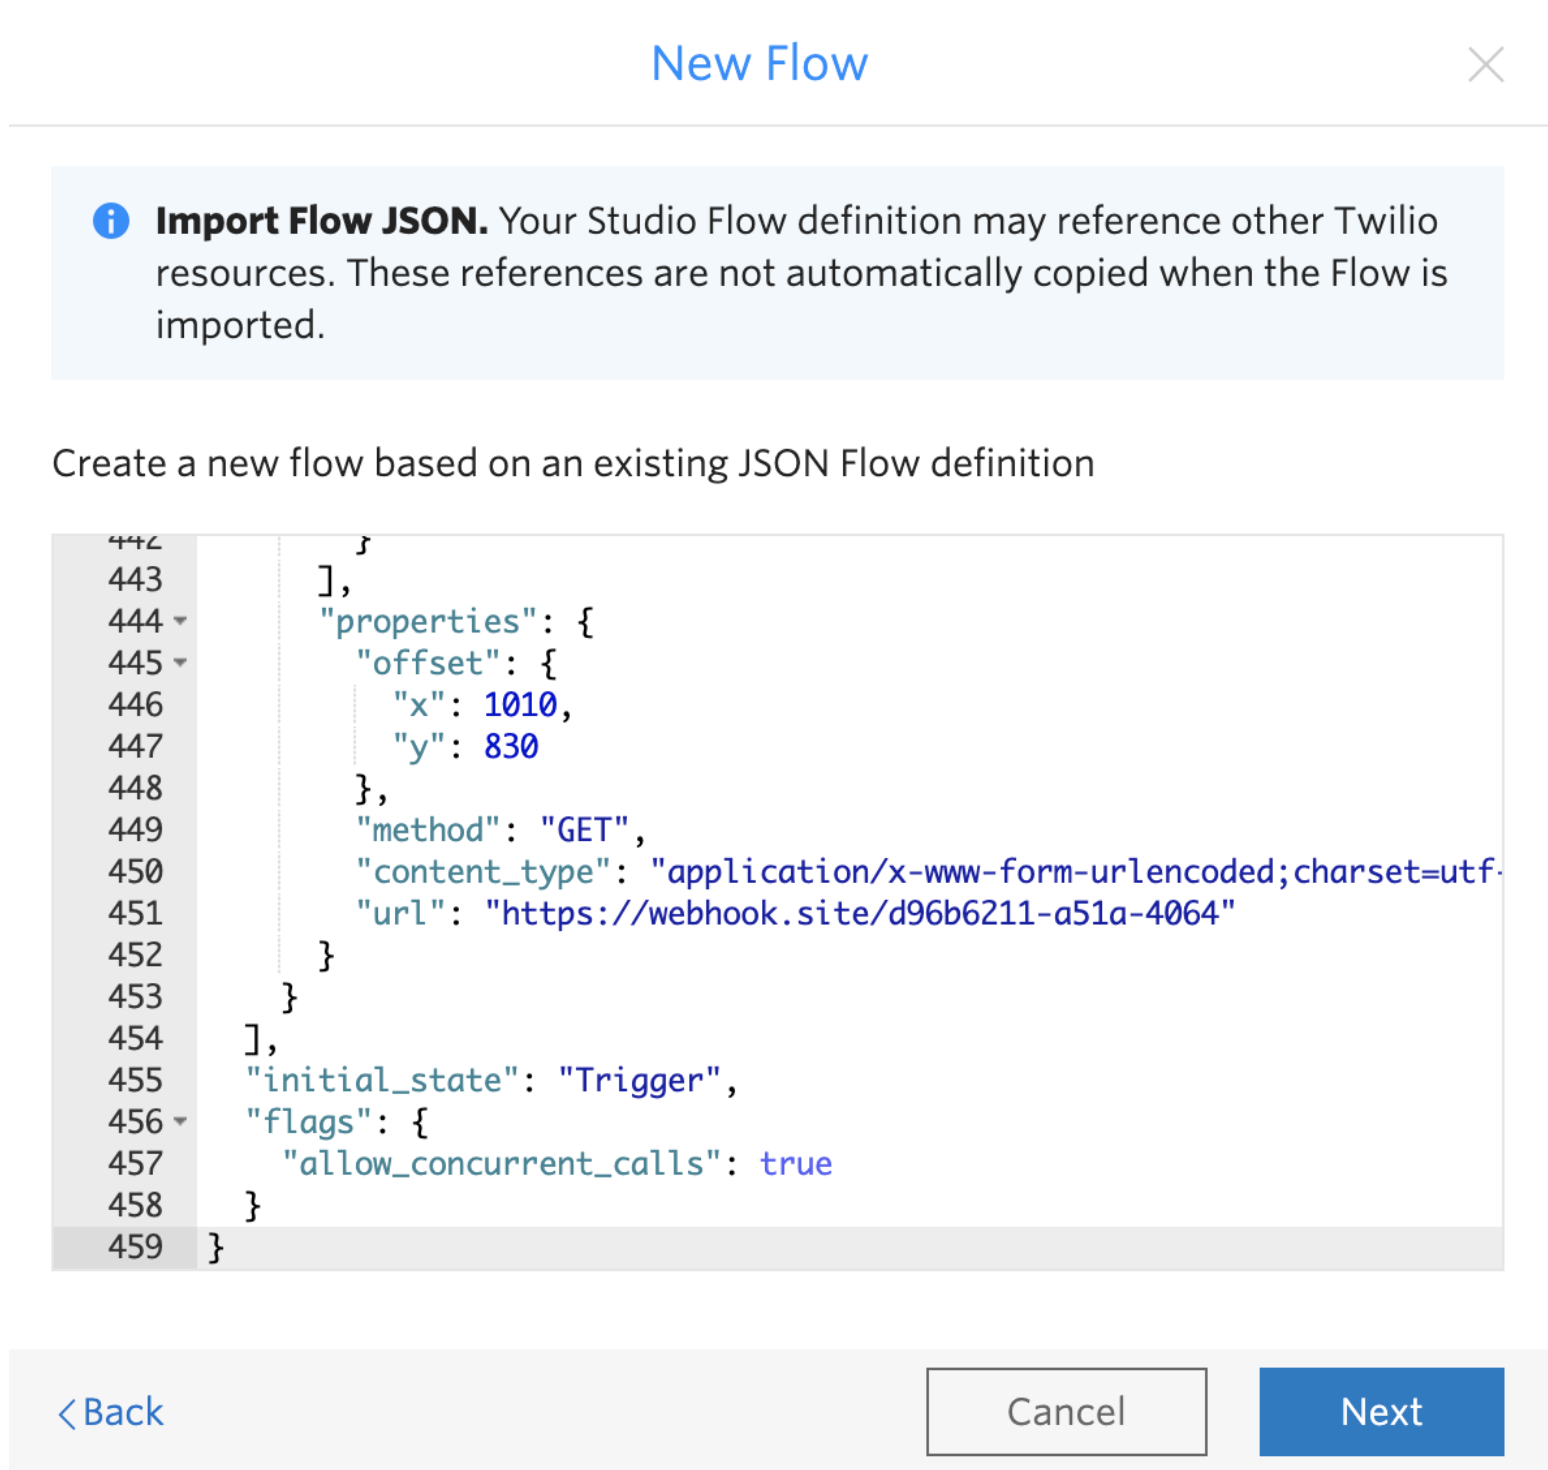
Click the Next button to have our flow ready. If you want to modify the questions and the answers all you have to do is click on one of the widgets on the Editor page and edit the content:

Create the Subflows
With Studio Subflows, you can break apart large, complex flows into smaller flows and link them together, enabling you to customize the experience for your end users and quickly iterate through different use cases.
Repeat Steps 1 and 2 from the previous section for both languages. In step 3, paste the following files to the Spanish and the Portuguese flow:
After making all the modifications don’t forget to save your changes and publish your flow.
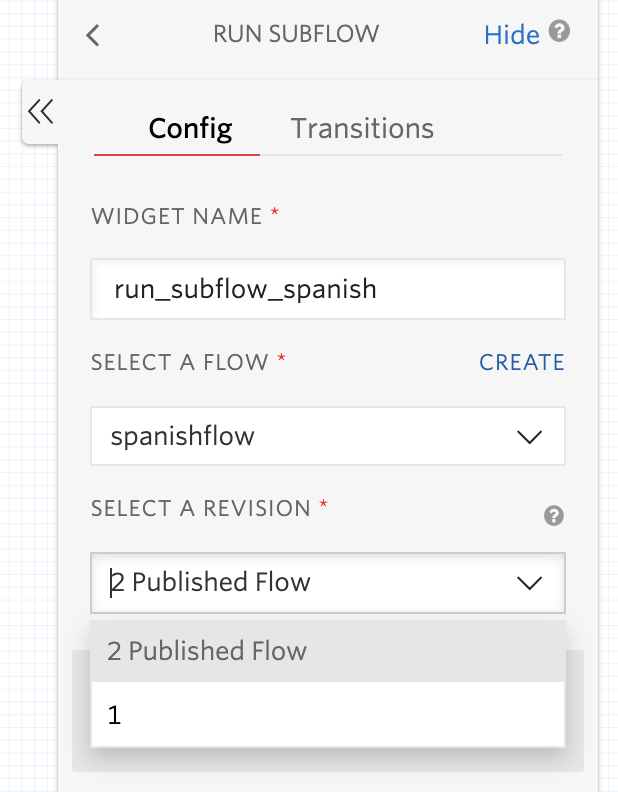
To connect the subflows, click on the specific language widget inside of "My first flow". In the config window, under Select a flow click on the name of your Spanish flow, for example, "spanishflow". Under Select a Revision, click on the latest revision which might include "Published Flow".
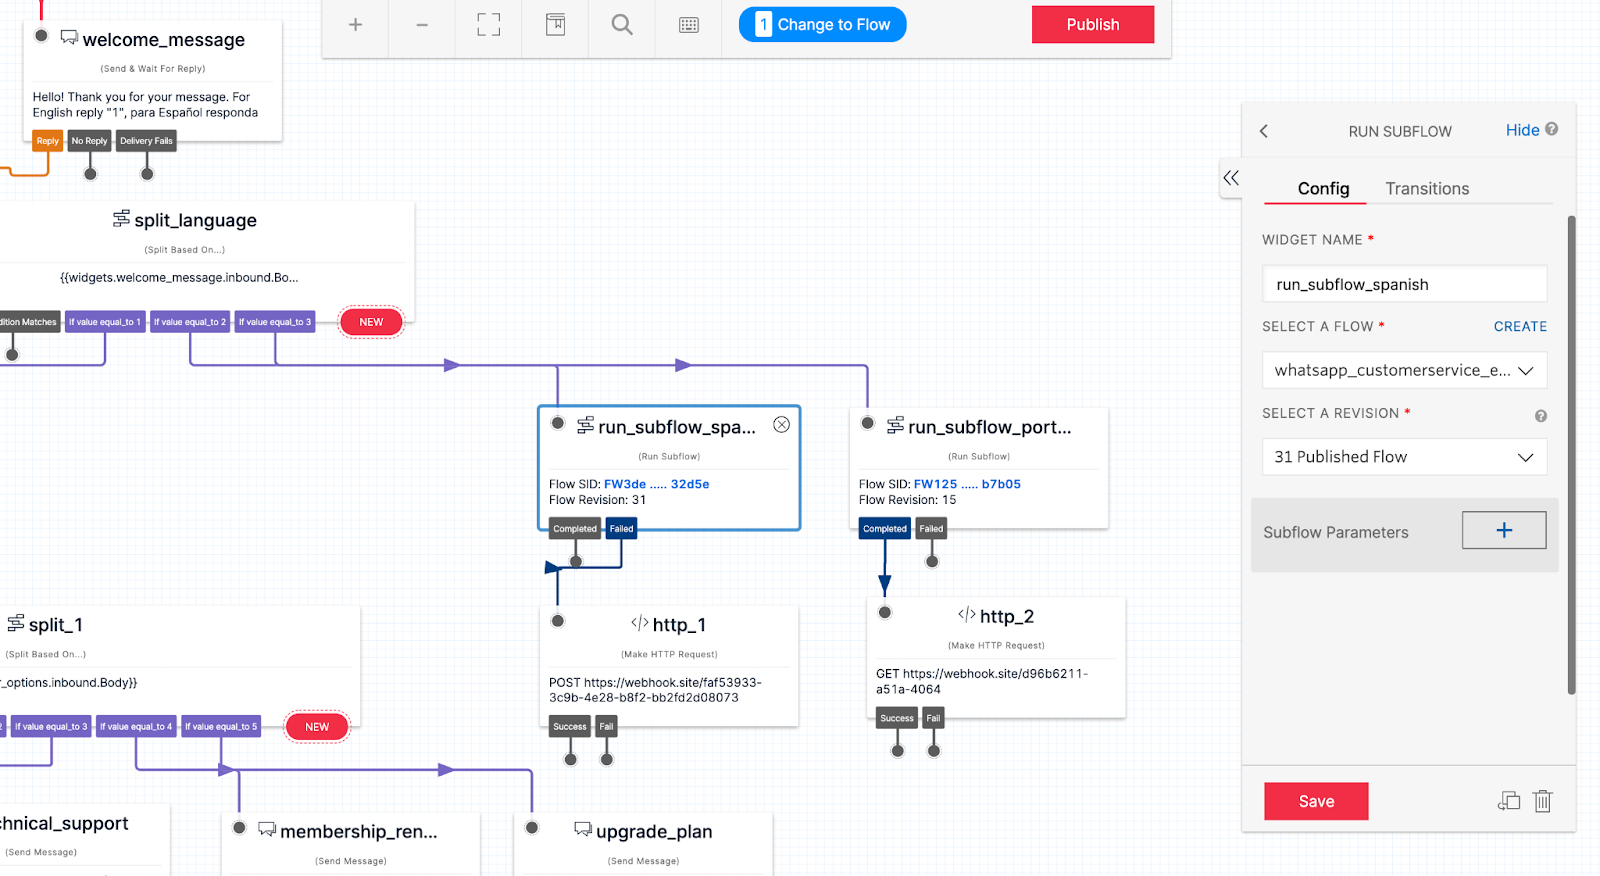
Click on the Save button and publish the entire flow again. You can refer to the screenshot below:
Be sure to repeat this step for other languages such as Portuguese to ensure the flows are all linked properly. After configuring both languages, click the Publish button.
Set up the WhatsApp Sandbox
The final step is to link this flow to your WhatsApp Sandbox phone number. This will enable your flow to be triggered when a Whatsapp message comes in and you’ll be ready to automate your FAQs.
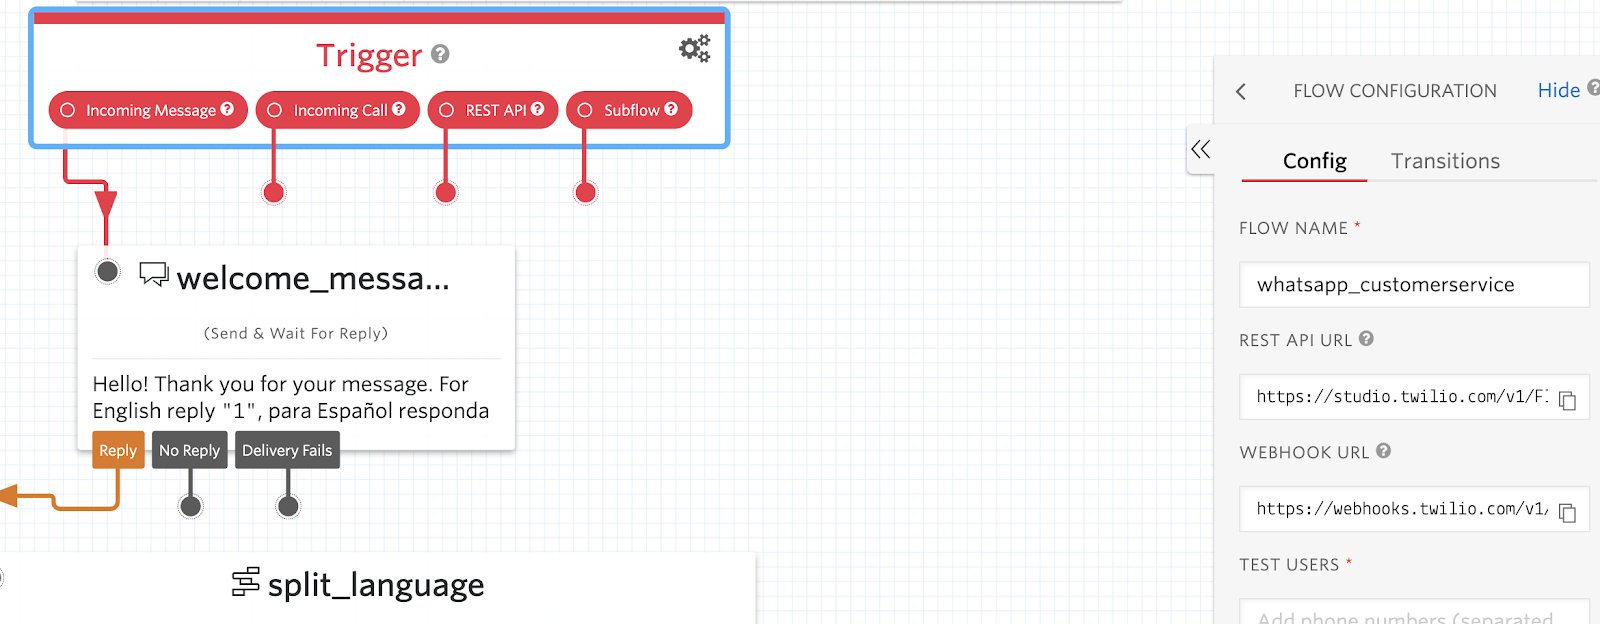
Click on the Trigger Widget on the Studio Editor and copy the Webhook URL as seen in the screenshot below:
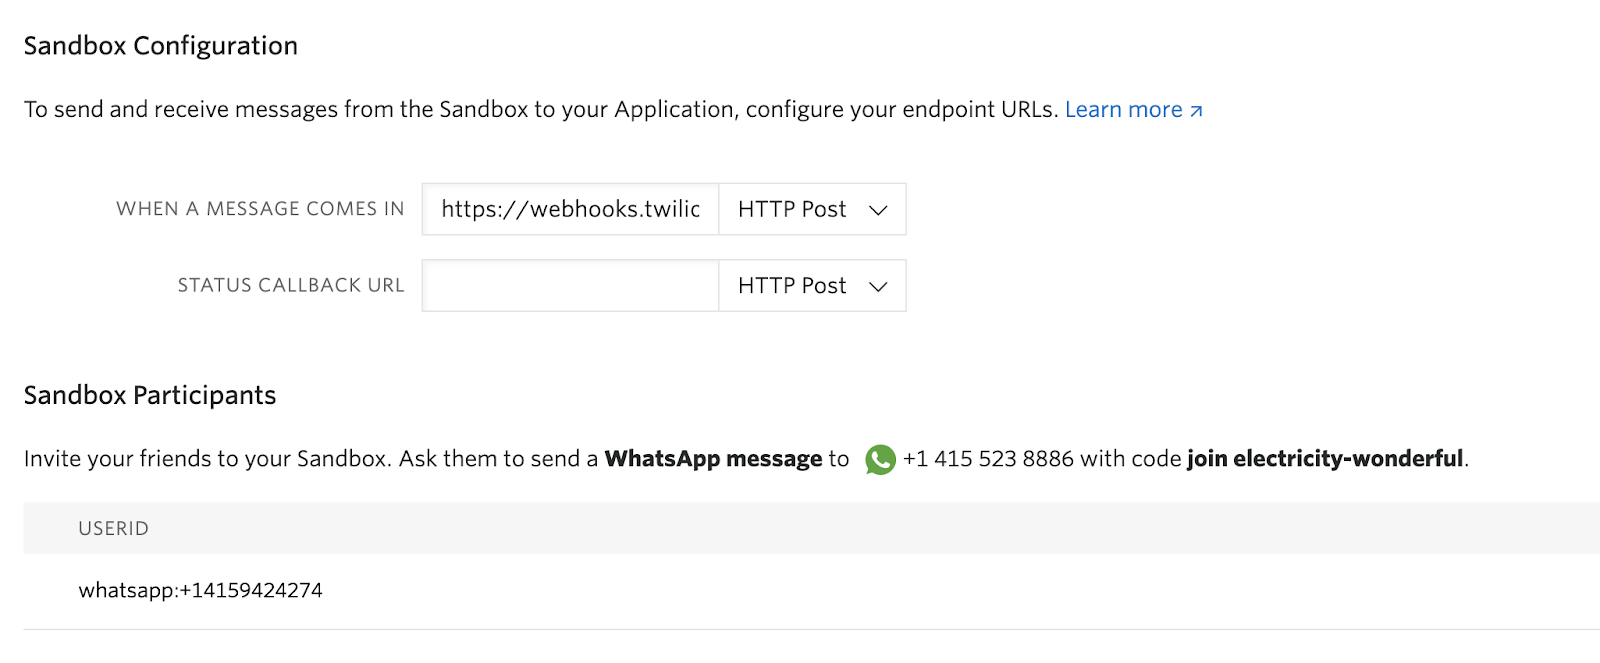
Locate the WhatsApp Sandbox Settings in the Twilio Console. Under the Sandbox Configuration, paste the Webhook URL from the Studio into the text field for "WHEN A MESSAGE COMES IN". Refer to the screenshot below:
Click the Save button and you're done. Congratulations! You have automated your FAQs using Studio and WhatsApp. Test it out by sending a WhatsApp to your Sandbox number.
Do you have any ideas on how to extend this or make it even better? Let us know! We can't wait to see what you build!


Related Resources
Twilio Docs
From APIs to SDKs to sample apps
API reference documentation, SDKs, helper libraries, quickstarts, and tutorials for your language and platform.
Resource Center
The latest ebooks, industry reports, and webinars
Learn from customer engagement experts to improve your own communication.
Ahoy
Twilio's developer community hub
Best practices, code samples, and inspiration to build communications and digital engagement experiences.