Automate Your Mac Via SMS using JavaScript for Automation, Node.js and Twilio
Time to read:
June 30, 2015
Written by
This post is part of Twilio’s archive and may contain outdated information. We’re always building something new, so be sure to check out our latest posts for the most up-to-date insights.

JavaScript is eating the programming world. Look around and you’ll see JavaScript in places people never would’ve expected 10 years ago. There’s JavaScript running on servers. There are more front-end JavaScript frameworks than you can shake a stick at. And there’s even JavaScript on my dog! Lucky me because I love JavaScript.
A few months ago at BrooklynJS I was super excited to discover a new way I can use JavaScript. Alan Mooiman gave a great talking showing how you can use JavaScript to automate your Mac. After seeing Alan’s talk I wondered, could I write a script to take some action on my Mac using Twilio SMS? Spoiler alert: yes! yes I can!
This post is all about learning how to automate your Mac via SMS message. The actual task we automate could be one of countless options but for the sake of simplicity we’re going to write an app that sends an iMessage message from the messages app when an SMS comes in.
Our Tools
- Node.js – We’ll be using node to receive our incoming SMS message from Twilio.
- JavaScript for Automation – It’s like AppleScript but it’s JavaScript.
- OSX >= 10.10 – JavaScript for Automation requires Yosemite or higher.
- Twilio – Need an account? Sign up for free!
Sending iMessages with JavaScript
We’ll start by working on the automation portion of our application. We’ll use JavaScript for Automation to make this happen. JavaScript for Automation allows you to do the things you would historically use AppleScript for using JavaScript. Pretty rad, right?
Writing this in Apple’s Script Editor will make it easy for us to quickly test our code. If you’re a Vim lover like me, I know it’ll be tough but you can do it!
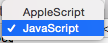
Once we open Script Editor we need to switch our language from AppleScript to JavaScript.
Now we can start writing our code. Since we’re keeping it basic we only need 3 lines of code:
Make sure your replace the first element with the e-mail address you use for iMessage but keep the preceding “E:”. For example, mine would be “E:ricky@twilio.com”. Are you unsure what your iMessage email is? In the Messages application press “cmd ,” and then click on the accounts tab. Replace the second element with the address of a buddy you’d like to message or if you don’t want to spam your friend during testing you can send a message to yourself.
Before we run this code let’s break it down. On the first line we’re getting an object that references the Messages application. The second line we get a reference to our buddy that we want to send a message to. On the last line, we call the send method and pass it the message content we want to send as well as the buddy we’re sending to.
Now that we have our code in place we can run it by hitting the big play button in Script Editor (or if you want to be l33 by pressing cmd r). You’ll see your message application open and a message is sent to the friend you specified. Oh yeah!

Hooking It Up To Twilio
Now that we’ve automated our mac to send our iMessage it’s time to write the code that triggers this automation when a text message comes in via Twilio.
First thing’s first, we need to create a new node application. Hop into Terminal and get this bad boy started:
We’re going to be using hapi.js for this application. If you haven’t worked with hapi before, it’s a framework that makes building node.js web applications super easy. If you’ve worked with express it is a lot like that! In order to use hapi we need to install it:
Now we can create our index.js file that will contain the code for our basic application:
We’ve written the code for a basic server but right now it doesn’t do anything. Luckily, we just need one route for our application. We can call the route incoming:
Start up our server and test out our new route:
You may have noticed that we made our route only respond to POST requests. We can use curl to try this out:
We now see we’re getting our beautiful “hello world” response. But we want to do something that receives information about our incoming message and then executes our JavaScript that sends the message. In order to use that we’re going to need to use the exec() function. Warning! The exec function runs a shell command on your local machine so be careful that you make sure users can’t do anything malicious if you open this up to the outside world.
In order to use exec() we need to require a couple standard libraries at the top of our index.js file:
Before we write the next part we need to jump back into Script Editor and save the code we wrote earlier in the same directory as our Node.js application. Save it as “sendmessage.scpt”. Saving a file sounds like it should be easy but the Script Editor dialogue can be confusing. When you go to save you need to click on the down arrow next to the “Save As” name and you’ll have the ability to browse to your folder.
So far we’ve only run our automation script via Script Editor but we can also run it from the command line. Jump into terminal and browse the directory where we just saved our file. Now run this command:
Again, you’ll see our messages application has sent our iMessage for us. This command is fairly basic but I wanted to highlight -l argument. This argument indicates that the script we’re running is JavaScript, otherwise the command will think we’re running code written in AppleScript and it will crash.
We now have everything in place to call this script from our Node.js application. Go back into index.js and add the following code to call JavaScript for Automation script:
This route will get called by Twilio whenever someone sends an SMS message to our app. We want to respond to that message indicating that our SMS was received. We can do that using TwiML. TwiML allows us to provide some basic instructions of what Twilio should do with an incoming message or phone call. We could use the Twilio Node.js helper library to generate our TwiML but since TwiML is actually XML we’re going to just hardcode in our response to avoid adding another dependency:
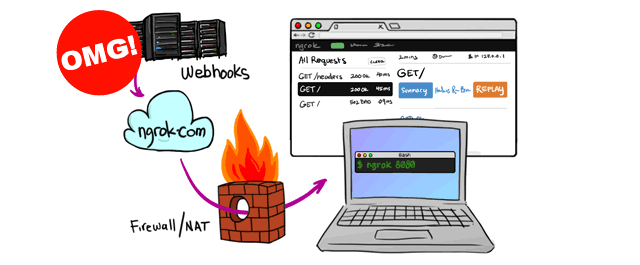
Twilio needs to be able to access our application so we need to expose our local host to the outside world. Fortunately, we can use one of my favorite tools called ngrok to make this happen. If you haven’t used this tool before, download and install ngrok.
With ngrok installed, we can run the following command to expose our localhost to the outside world:
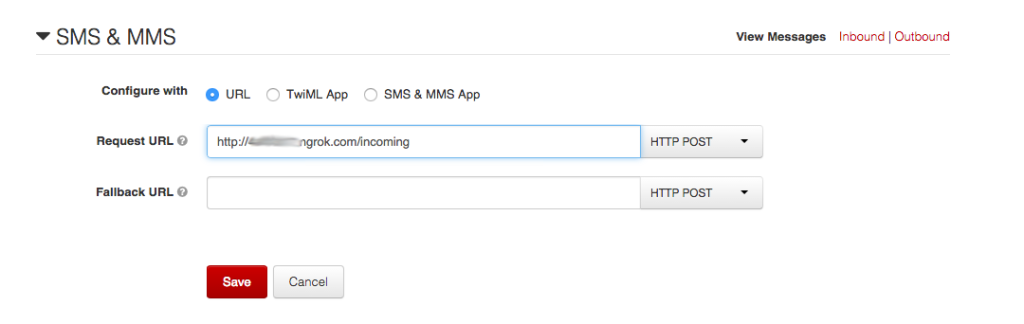
Make note of the url ngrok created for your application then head to your Twilio dashboard. If you don’t already have a phone number you’d like to use for your application then buy a new phone number. Once you have a phone number set the SMS Request URL to the /incoming route on our application:
The moment of truth. Send an SMS message to your application and watch as your Messages app opens and sends an iMessage. Party time!
You can find the completed code for our application on GitHub.
Hackers Gonna Hack
You’ve now built a basic example showing how you can automate your Mac via SMS. And we’re doing it all using JavaScript! What will you build now that you have this ability? Here are a couple ideas:
- SMS to have your computer open Photobooth snap a picture and send back to you via MMS
- SMS your computer and get it to say something (using terminal say) to scare people in your house
Are you looking for a way to improve the iMessage application we built together today? Try replacing the hard coded text we’re sending each time with the body of the SMS message you’re sending in.
Have any questions or what to show me the latest project you’ve hacked together? Drop a note in the comments below or holler at me on twitter (@rickyrobinett).


Related Resources
Twilio Docs
From APIs to SDKs to sample apps
API reference documentation, SDKs, helper libraries, quickstarts, and tutorials for your language and platform.
Resource Center
The latest ebooks, industry reports, and webinars
Learn from customer engagement experts to improve your own communication.
Ahoy
Twilio's developer community hub
Best practices, code samples, and inspiration to build communications and digital engagement experiences.