Baby/!Baby: Building a Twilio SMS/MMS Autoresponder with Serverless and Airtable
Time to read:
April 05, 2023
Written by
Reviewed by
As I write this, my wife is 39 weeks pregnant. Our first child could come any day! It’s a mix of frantically getting ready and impatiently waiting (as I’m sure many parents can understand). One constant among all of this has been an influx of texts and calls from our community asking if the baby has arrived. While we appreciate everyone reaching out, it quickly becomes unmanageable (and repetitive) to answer them all with the same message. Plus, as soon as things start happening I plan on turning my phone off.
As a Twilio Startup Evangelist, I knew there had to be a better way to automate this task, so I used Twilio Services and Airtable to build an SMS and MMS autoresponder with customized text and images. When friends and family text our Baby/!Baby number, they get a status update and photo. When I text the number, I can seamlessly update the status and photo. This gives everyone a simple way to ask what’s going on while also making it easy for me to provide updates once.
Prerequisites
For this tutorial, you will need:
- A free Twilio Account.
- A Twilio phone number.
- An Airtable Account.
- A personal phone number on a phone that can make and receive MMS messages.
Building the Database
Create a base in Airtable and make sure you pick a nice name (like Baby/!Baby) and a calming color (I suggest pale yellow). Rename the first table as Baby, which is where we will store status updates. Clear/override the defaults and use these column headers:
| Column Header | Type | Formula (if applicable) |
|---|---|---|
| created | Formula | CREATED_TIME() |
| message | Long Text | |
| image | URL | |
| prettyDate | Formula | DATETIME_FORMAT(created, 'MMM D, YYYY hh:mm A') |
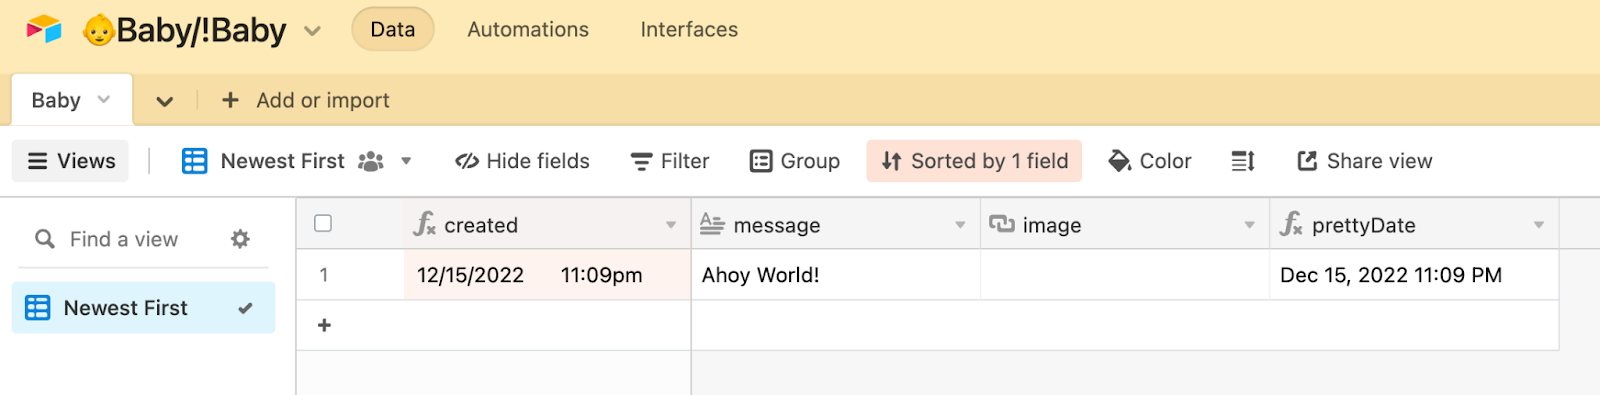
To make things easier for later, sort the view by created and choose 9->1. This will put the most recent message at the top for when we retrieve it later. I also renamed the view Newest First so I was clear what I am getting. It is also helpful to fill in a message, just to confirm the app is working.
Next, navigate to Airtable’s API documentation page and choose your base. Airtable has customized documentation for each base, which simplifies using the API. You can also find your base ID here, which we will use soon.
The ID of this base is app**************.
Generating an Airtable Access Token
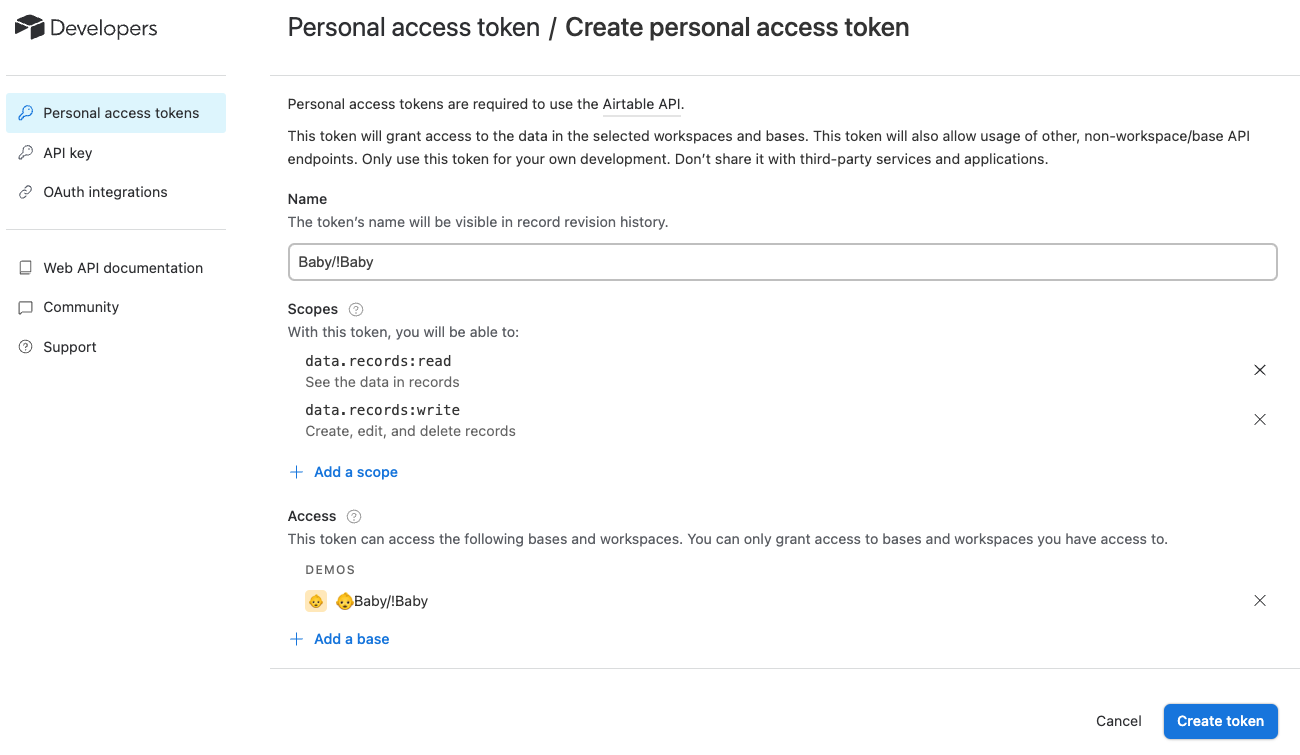
You will need a personal access token to retrieve and store data via the API. Head to the Airtable token page and create a new token. Add the following Scopes to your token: data.records:read and data.records:write, and then add the base you just created under Access.
Set up the Twilio Function
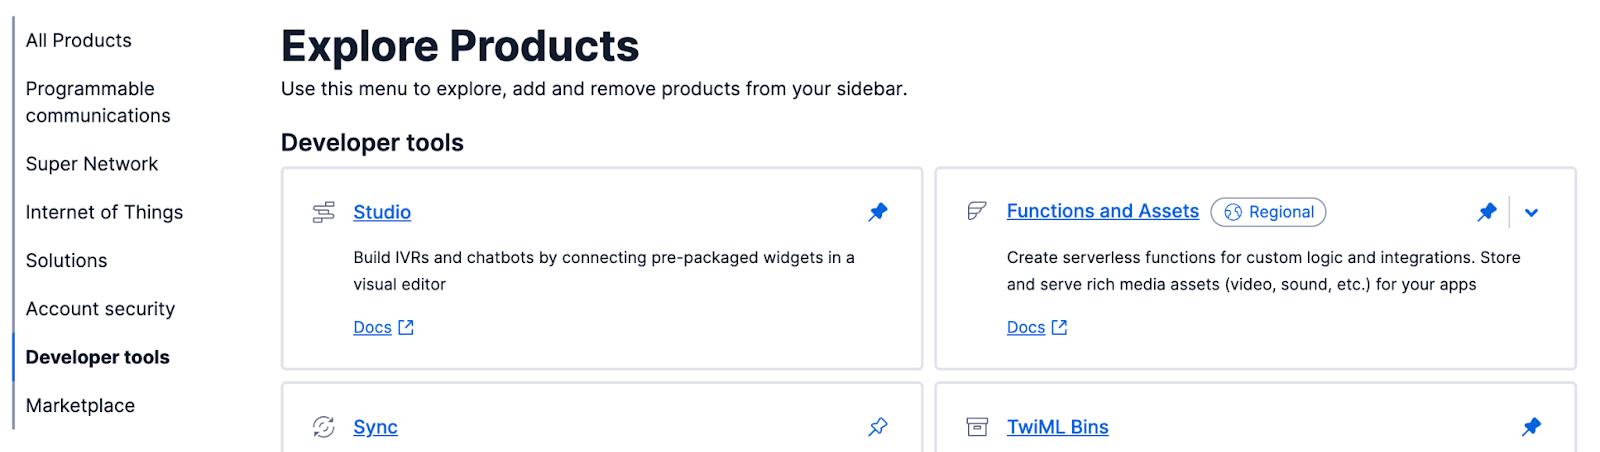
Go to your Twilio Console and navigate to Functions and Assets. If you don’t have it pinned to your sidebar, click Explore Products +, then navigate to Developer tools. You will be using Functions and Assets quite a bit so I suggest pinning it to your sidebar.
Now navigate to Functions and Assets > Services and click the blue Create Service button. The naming restrictions are a bit more strict here, so I named mine baby-not-baby.
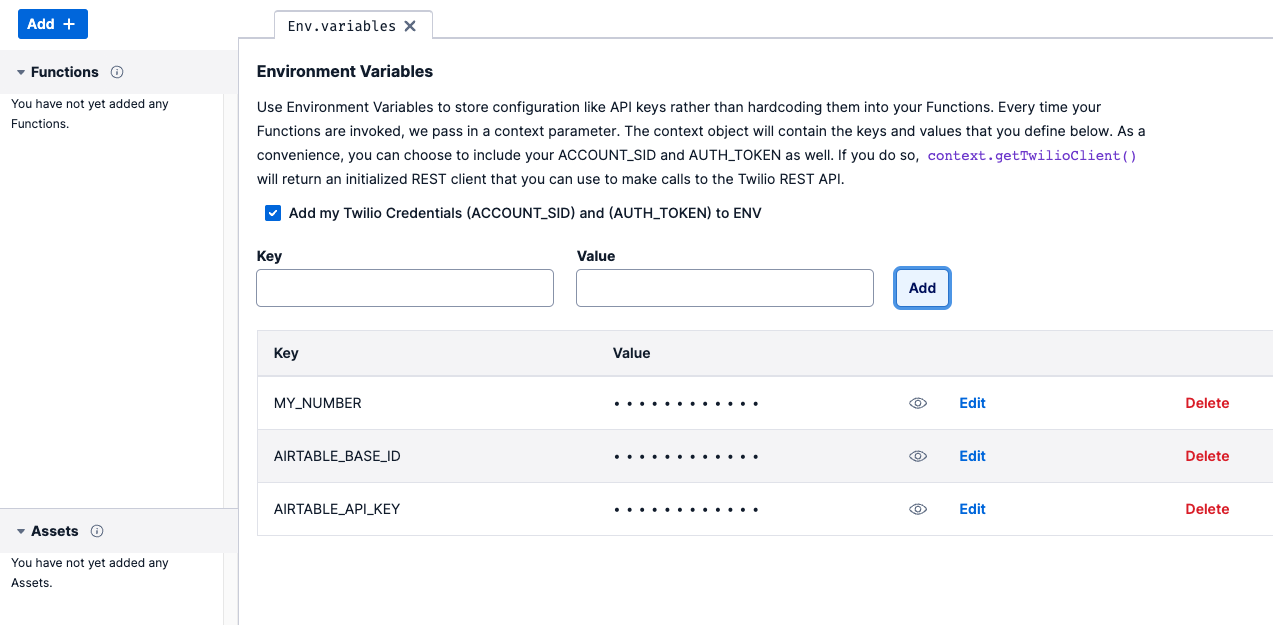
Before jumping into the code, set up the Environmental Variables and Dependencies. Click on ⚙ Environmental Variables from the Settings & More section on the left. Here is where you will add your AIRTABLE_BASE_ID and AIRTABLE_API_KEY (access token) that we found in the previous two steps. Then create a third variable MY_NUMBER and set the value to your phone number. The format should be E.164, such as “+12223334444”.
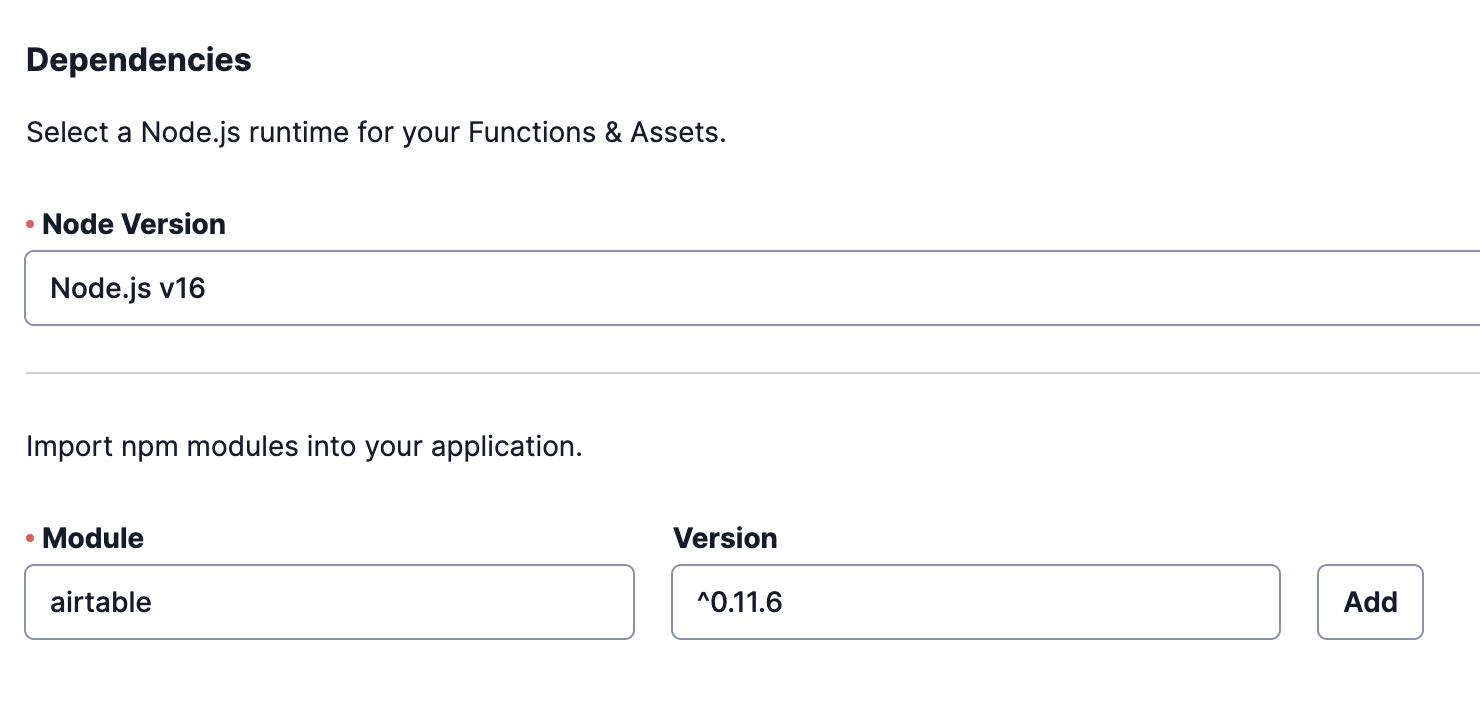
⚙ Dependencies is located directly below Environmental Variables on the left. Here we need to add Airtable so that we can use the official javascript API client. Under Module write airtable and under Version put ^0.11.6.
Getting Started with the Function
Click the blue Add + button towards the top left of the function window and select Add Function. Make the name of this function /baby_not_baby. Let’s get started by writing the skeleton of the code. Replace the existing code with the following.
Here are some explanations to help understand the code:
- The Airtable setup at the top is essentially boilerplate from the airtable API docs
- The
exports.handler = async functionis the standard for Twilio Functions with the addition of theasynckeyword. This allows us to wait for the response from API call to Airtable. new Twilio.twiml.MessagingResponse()is a built in function that pulls the context of the inbound message (i.e. to/from numbers) in order to make responding to a message easier.- The
callback(null, response)function returns the response object we will create.
Saving Updates to Airtable
For this part of the function we will create a new record in Airtable with the inbound message data. Add the below code after the if (event.From == MY_NUMBER) line, replacing the// Code goes here to update Airtable comment.
- To make it asynchronous, we put the
awaitkeyword before the airtable API function call and use the.then()&.catch()functions to handle the response. - You may notice that the format of how we call the Airtable API is different from the documentation. This is because I choose to do things asynchronously.
- We use the
.create()function to add a record to the Airtable. .create()take an array of objects, each with afieldskey that contains the record data- The keys within the
fieldsobject are the column headers. - We use the
eventobject, passed in through the export handler function to access the parameters - The
.then()and.catch()functions are used to return the status of the record creation console.error(err)saves the error message to the Twilio Console in case something goes wrong.- The status is saved in the message body of the response in order to let you know if the update worked.
Sending the Update to Everyone
For everyone else, we should get the most recent record in airtable and send a reply with the content. Add the code below after the else statement, replacing the // Code goes here to get the status from Airtable comment.
- Again, we use the
awaitkeyword to make the function asynchronous. - The
.select()function grabs records from the Baby table based on the supplied options{maxRecords: 1,view: "Newest First"}. - By only getting one record from the Newest First view the most recent status message is pulled.
- Even though we are asking for only one record, Airtable still returns an array of records. We get the first record by using
records[0]. - It is much easier to make the date string look nice in Airtable, which is why we created the prettyDate column and use it here.
- We need to check if there is an image, and if there is we can add it to the response. Otherwise, we just add the message.
Putting it all together
Here is what the final function code should look like:
With this written, you can hit the Save button and then the Deploy All button. Once that is done you're ready to assign a number and test it out.
Assigning a Twilio Number
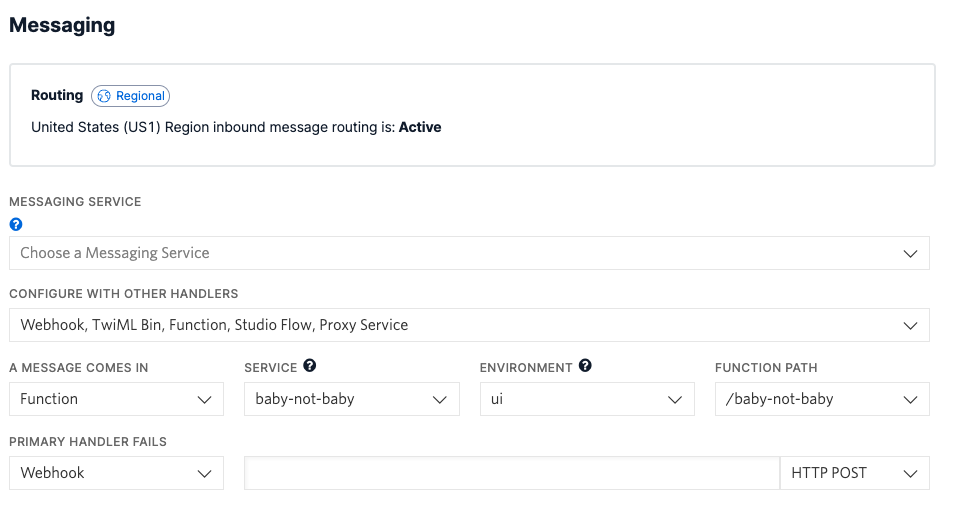
Use the sidebar in your Twilio Console to navigate to Active Numbers under Phone Numbers > Manage. Click into the number you want to assign to this app (or buy a new one). Scroll down to Messaging. Under A MESSAGE COMES IN we will assign it to use this function. Select Function under the first dropdown. Then set your service to baby-not-baby or whatever you named the service. Environment will be ui and the function path is /baby-not-baby (or again whatever you named the function). Then, click Save configuration.
Using the App
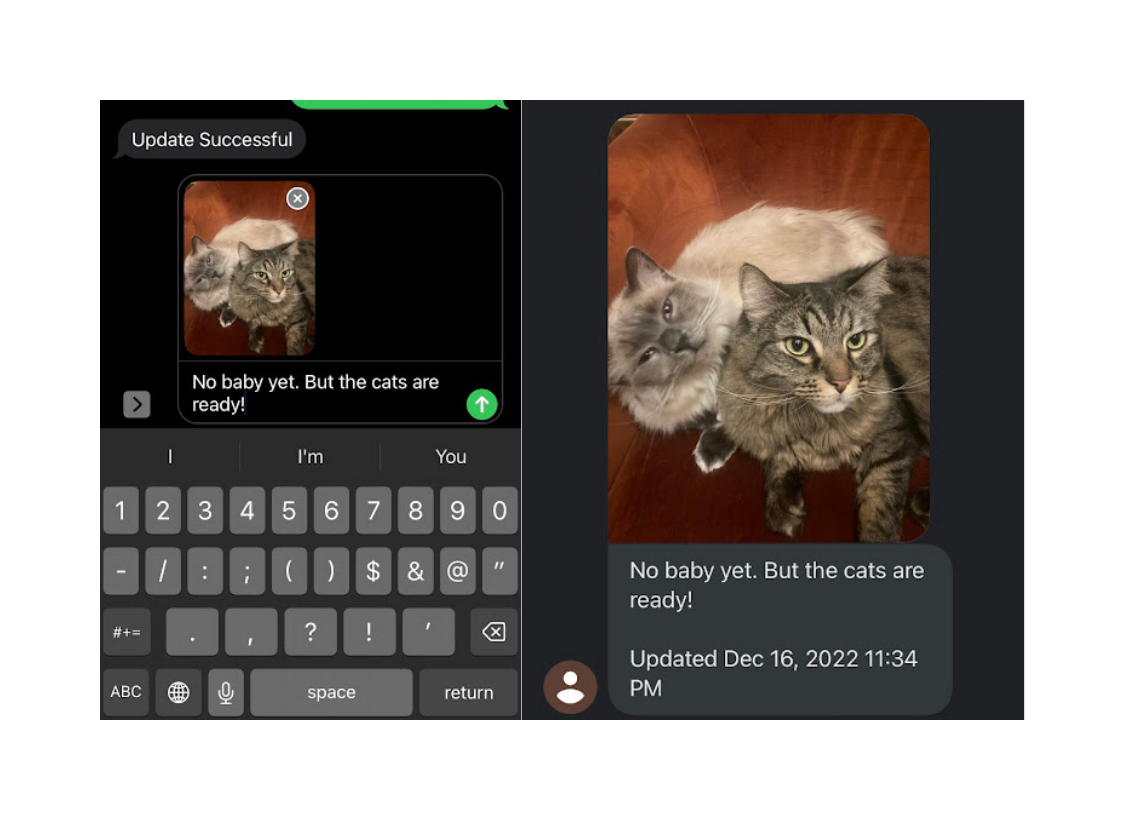
To update that status, send a message to the number from the phone number you designated at MY_NUMBER. If you want to include a picture, make sure to send it as an MMS along with the content of the message. You can see if it worked by checking the Airtable.
Anyone else who messages the number will receive your most recent status update!
Conclusion
A savvy reader may notice the discrepancy in the date in the image above and the publication date of this post. Here is a little update from the other side of having the baby and parental leave! Our daughter ended up arriving over a week late, so this app got plenty of use by our friends and family. They all loved checking in and seeing the picture we posted each day. (Especially my mother who checked in 2-3 times per day!) We had 45 friends and family use the app to check in over 300 times in the two weeks between it going live and our baby deciding to join us.
Alex is a Developer Evangelist on the Startup Evangelism team based in Denver, Colorado, USA. His favorite Twilio tool is the Serverless CLI plugin, which he uses for rapid prototyping. These days he codes in JavaScript, but he also has experience in C++ (robots), Python (AI & ML), and Ruby (web apps). Outside of work Alex loves reading sci-fi, cooking, live music, and spending time with his family. He can be reached at agoldman@twilio.com.


Related Resources
Twilio Docs
From APIs to SDKs to sample apps
API reference documentation, SDKs, helper libraries, quickstarts, and tutorials for your language and platform.
Resource Center
The latest ebooks, industry reports, and webinars
Learn from customer engagement experts to improve your own communication.
Ahoy
Twilio's developer community hub
Best practices, code samples, and inspiration to build communications and digital engagement experiences.