Build Chrome Desktop Notifications in PHP with Laravel 8, Pusher, and Twilio SMS

November 18, 2020
Written by
Ogbonna Vitalis
Contributor
Opinions expressed by Twilio contributors are their own
Reviewed by

Build Chrome Desktop Notifications in PHP with Laravel 8, Pusher, and Twilio SMS

In modern day web applications, real-time notifications are very common as service providers want to keep users informed and engaged about events happening on their platforms. Notifications are a great way to build incentive for users to come back to the platform.

In this tutorial, we will be implementing a real-time application with desktop notifications by utilizing your browser’s Notification API, Laravel, Pusher, and notifications via Twilio Programmable Messaging.

Prerequisites

To follow along in this tutorial, here are the essentials to get started:

Set up a Laravel Application

This tutorial assumes that you are somewhat familiar with PHP and the Laravel Framework. Hence, we will quickly go through the installation process of Laravel and the procedures needed to create a brand new Laravel 8 Application.

Create a Laravel Application

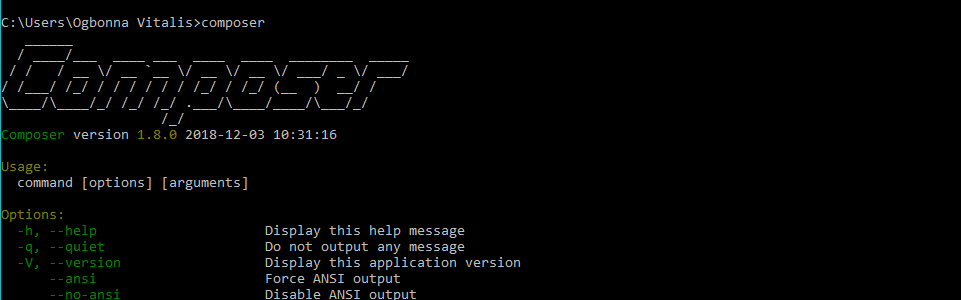
First, download and install Composer, the PHP package manager, to your local machine.

After a successful installation, typing the word composer in the command line will give an output as shown in the following screenshot:

Composer installation

Now that Composer is installed, we can proceed to install Laravel on your local machine.

To download and install Laravel on your local machine, type the following command in your terminal.

$ composer global require laravel/installer

Note that the installation may take some time to complete, depending on your connection speed.

Now that Laravel has been successfully installed, we can proceed with the creation of a brand new Laravel application for our project.

The name of our project in this tutorial will be called "desktop-notes-twilio". This application can be cloned from my GitHub repo here if you would like to take a look at the code directly, while following along.

Create this application by using the laravel new command:

$ laravel new desktop-notify-twilio

Once the installation is complete, navigate to this project folder from the command line and serve this application using the following command:

$ php artisan serve

This will make our "desktop-notify-twilio" application live and accessible via the browser on port:8000.

To access our newly created Laravel application, we navigate to any browser of choice and type in the address http://127.0.0.1:8000.  Successful launch should display the Laravel welcome message in the browser as shown in the following image:

Hurray! The application is successfully initialized and is ready for development.

Set Up the Models, Migrations, and Controllers

After installing the frontend dependencies, we will need to set up our models, migrations, and controllers of our application.

Create a model and migration at the root directory of our project with the following command:

$ php artisan make:model Post -m

Paste the following schema inside of the database\migrations\2020_09_16_132505_create_posts_table file:

// create_posts_table

public function up()
{
        Schema::create('posts', function (Blueprint $table) {
            $table->increments('id');
            $table->string('title');
            $table->text('body');
            $table->timestamps();
        });
}

Migrate this schema after editing the .env file with your database details. Create the table by running the artisan migration command on your terminal:

$ php artisan migrate

After migration, edit the mass assignment properties of the model class that was created in app/Models/Post.php file:


class Post extends Model
{

  /**
   * The attributes that are mass assignable.
   *
   * @var array
   */
  protected $fillable = ['title', 'body'];
}

Having completed the models and migrations setup, create the PostController file using the make controller artisan command:

$ php artisan make:controller PostController

Save a Post

Add a route and controller method to save a new post. We will be making a call to the PostController from the frontend to save our posts. Add the new route to the web routes at routes/web.php.

# ./routes/web.php
//import the controller class
use App\Http\Controllers\PostController;


Route::match(['get', 'post'], '/publish',[PostController::class, 'savePost']);

Having completed the route setup, we add the corresponding controller method as follows:

# ./app/Http/Controllers/PostController.php

use App\Models\Post;

class PostController extends Controller {

  public function savePost(Request $request) {

    if($request->isMethod('GET')){
        return view('publish');
    }

    $data = $request->only(['title', 'body']);
    $post = Post::create($data);

    event(new \App\Events\PostCreated($post));
     return redirect('/')->with('success', 'Your post just got published and user notified!');

  }


}

Work with Events and the Laravel Pusher Package

The importance of organization and separation of concerns cannot be overemphasized in the software development industry. Events in Laravel are a great way to decouple event login within your application.

We can define events to be triggered within our application when an action occurs, and we can define listeners to listen for such events and carry out other activities.

Laravel allows for easy definition of events and listeners out of the box. It also includes helper functions and classes to allow us to easily trigger and broadcast events.

Create and Configure Laravel Events

To create an event for each post created in our application, we use the make:event command via our terminal, at the root directory of our project:

$ php artisan make:event PostCreated
$ php artisan make:event PostLiked

The PostCreated.php and PostLiked.php Event files are created inside the App\Events folder. Now, write the following code inside the PostCreated.php file:


<?php

namespace App\Events;

use Illuminate\Broadcasting\Channel;
use Illuminate\Queue\SerializesModels;
use Illuminate\Broadcasting\PrivateChannel;
use Illuminate\Broadcasting\PresenceChannel;
use Illuminate\Foundation\Events\Dispatchable;
use Illuminate\Broadcasting\InteractsWithSockets;
use Illuminate\Contracts\Broadcasting\ShouldBroadcast;

class PostCreated implements ShouldBroadcast
{
    use Dispatchable, InteractsWithSockets, SerializesModels;

    public $message;

    /**
     * Create a new event instance.
     *
     * @return void
     */
    public function __construct($post)
    {
        $this->message  = "The Post:{$post->title}...was just created";
    }

    /**
     * Get the channels the event should broadcast on.
     *
     * @return Channel|array
     */
    public function broadcastOn()
    {
        return ['post-created'];
    }
}

Also inside PostLiked.php file write:


<?php

namespace App\Events;

use Illuminate\Broadcasting\Channel;
use Illuminate\Queue\SerializesModels;
use Illuminate\Broadcasting\PrivateChannel;
use Illuminate\Broadcasting\PresenceChannel;
use Illuminate\Foundation\Events\Dispatchable;
use Illuminate\Broadcasting\InteractsWithSockets;
use Illuminate\Contracts\Broadcasting\ShouldBroadcast;

class PostLiked implements ShouldBroadcast
{
    use Dispatchable, InteractsWithSockets, SerializesModels;


    public $message;

    /**
     * Create a new event instance.
     *
     * @return void
     */
    public function __construct($username)
    {
        $this->message  = "{$username} liked your post";
    }

    /**
     * Get the channels the event should broadcast on.
     *
     * @return Channel|array
     */
    public function broadcastOn()
    {
        return ['post-liked'];
    }
}

The Illuminate\Contracts\Broadcasting\ShouldBroadcast interface on the event class is used to inform Laravel that this event should be broadcasted.

The broadcastOn method returns the channel that we want to broadcast our event on. The Channel class is used for broadcasting on public channels. PrivateChannel and PresenceChannel are for private channels. Public channels are channels made available for all users of the application. Here authorization is not required, whereas authorizations are required and only authorized users can listen to private channels.

By default, Laravel broadcasts all of an event class’ public properties as its payload. The broadcastWith function helps us override that behavior and choose which specific class property to send.

Dispatch Events

In our app, we want to dispatch the PostPublished event after a post has been saved or liked. In Laravel, we can dispatch events using the Event Facade, or the event() helper function.

To dispatch our PostPublished event, we can edit the store method in the PostController, and place the event call right after the post is saved:

# ./app/Http/Controllers/PostController.php

namespace App\Http\Controllers;

use Illuminate\Http\Request;
use App\Models\Post;

class PostController extends Controller
{
  /**
   * Saves a new post to the database
  */

  public function savePost(Request $request) {

    if($request->isMethod('GET')){
        return view('publish');
    }

    $data = $request->only(['title', 'body']);
    $post = Post::create($data);

    event(new \App\Events\PostCreated($post));
    return redirect()->action('PostController@getPosts');

  }

   /**
   * Fetches all Post in the database
   */
  public function getPosts() {

    $posts = Post::all();
    return view('welcome', compact($posts));

  }
}

Install and configure Pusher PHP server in Laravel

So far, we have configured and dispatched our events. It's now time to set up Pusher for Laravel.

Install pusher-php-server using the following command:

$ composer require pusher/pusher-php-server

Next, we’ll set up some minor configuration to let Laravel know we will be using Pusher to manage our broadcasts.

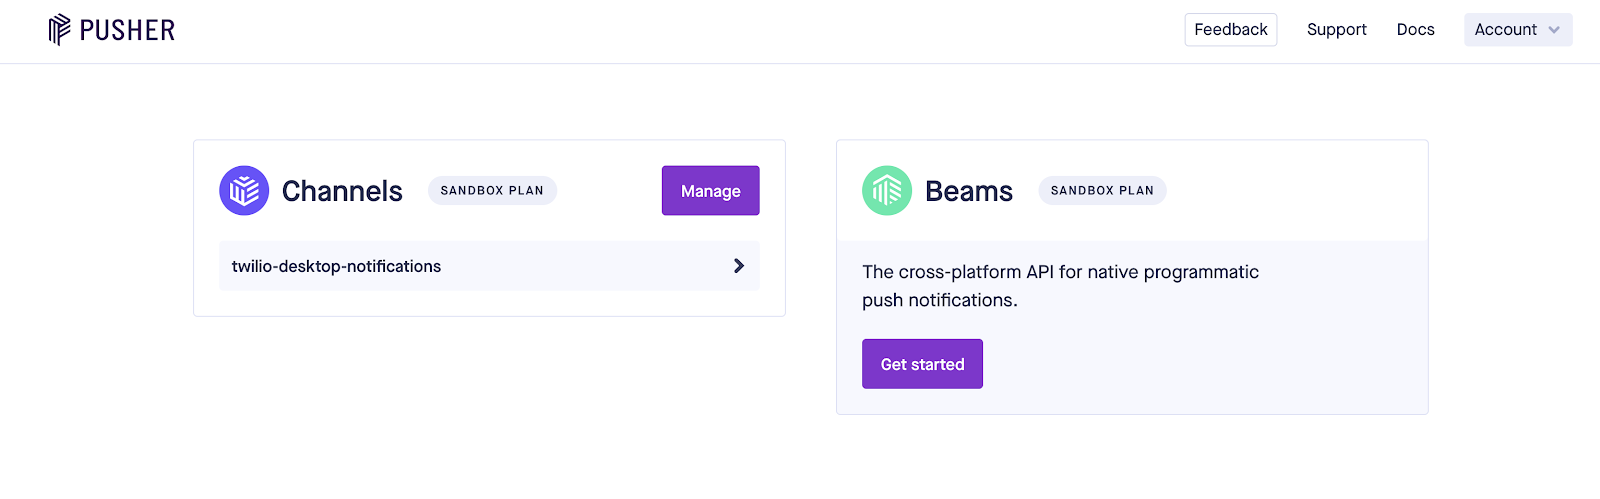
Create a Pusher account here if you don't already have one, and then create a channel for your application from your Pusher dashboard as shown in the following screenshot:

Pusher dashboard

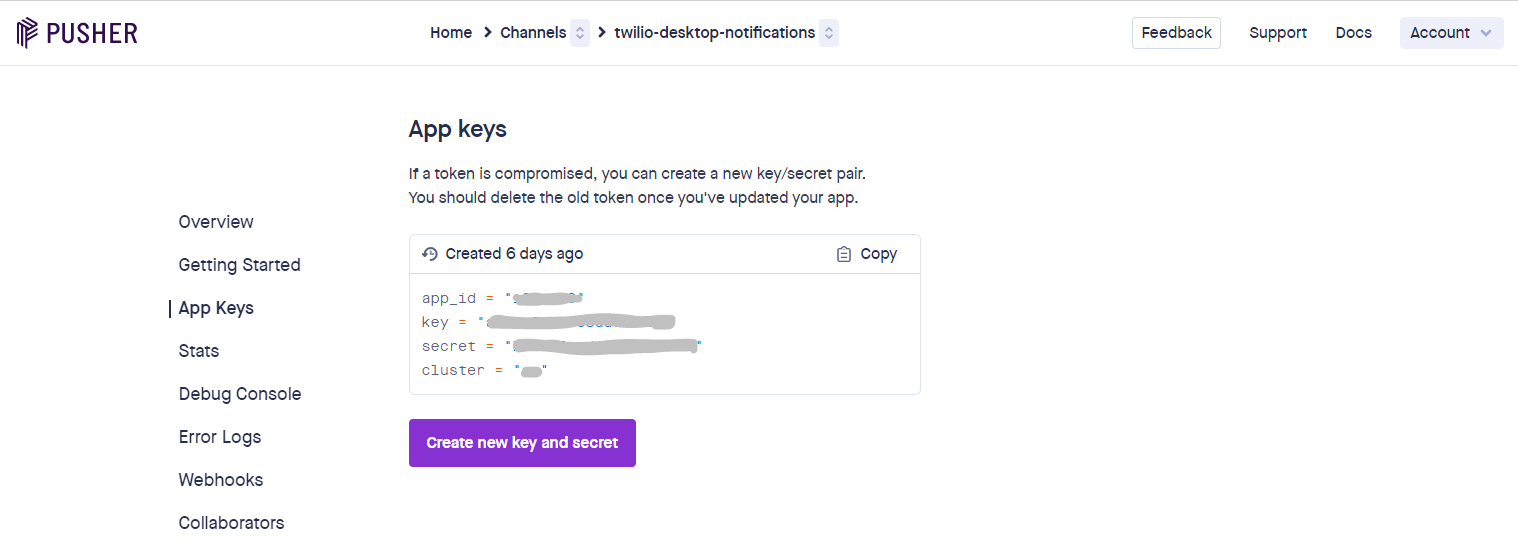
 Add Pusher App Channel credentials to the .env file as follows in order to integrate the API:


# ./.env

BROADCAST_DRIVER=pusher

PUSHER_APP_ID=your_pusher_add_id
PUSHER_APP_KEY=your_pusher_app_key
PUSHER_APP_SECRET=your_pusher_app_secret
PUSHER_APP_CLUSTER=your_pusher_app_cluster

Your Pusher credentials can be retrieved from the App Keys menu under your development channel as shown in the following screenshot:

Pusher API Keys dashboard

Build the Frontend

To create a basic page view for our app, we can edit the default resources/views/welcome.blade.php file created by Laravel. Replace its contents with the following:


<!-- ./resources/views/welcome.blade.php -->
<!DOCTYPE html>
<html lang="en">

<head>
    <meta charset="utf-8">
    <meta http-equiv="X-UA-Compatible" content="IE=edge">
    <meta name="viewport" content="width=device-width, initial-scale=1">
    <title>Twilio Notifications</title>
    <link rel="stylesheet" href="https://stackpath.bootstrapcdn.com/bootstrap/4.5.2/css/bootstrap.min.css"
        integrity="sha384-JcKb8q3iqJ61gNV9KGb8thSsNjpSL0n8PARn9HuZOnIxN0hoP+VmmDGMN5t9UJ0Z" crossorigin="anonymous">
    <link rel="stylesheet" type="text/css" href="/css/bootstrap-notifications.min.css">
</head>

<body>
    <div class="container my-5">
        <nav class="navbar navbar-expand-lg navbar-dark bg-dark">
            <button class="navbar-toggler" type="button" data-toggle="collapse" data-target="#navbarTogglerDemo03"
                aria-controls="navbarTogglerDemo03" aria-expanded="false" aria-label="Toggle navigation">
                <span class="navbar-toggler-icon"></span>
            </button>
            <a class="navbar-brand" href="#">
                <img src="https://getbootstrap.com/docs/4.5/assets/brand/bootstrap-solid.svg" width="30" height="30"
                    class="d-inline-block align-top" alt="" loading="lazy">
                Twilio Nots
            </a>


            <div class="collapse navbar-collapse" id="navbarTogglerDemo03">
                <ul class="navbar-nav mr-auto mt-2 mt-lg-0">
                  
                    <li class="nav-item active">
                        <a class="nav-link" href="/">Home <span class="sr-only">(current)</span></a>
                    </li>
                    <li class="nav-item">
                        <a class="nav-link" href="/publish">Publish a new Post</a>
                    </li>

                    <li class="nav-item dropdown dropdown-notifications">
                        <a class="nav-link dropdown-toggle" href="#" id="navbarDropdownMenuLink" role="button"
                            data-toggle="dropdown" aria-haspopup="true" aria-expanded="false">
                            <i data-count="0" class="glyphicon glyphicon-bell notification-icon"></i>New Notification
                        </a>
                        <div class="dropdown-menu" aria-labelledby="navbarDropdownMenuLink">
                            
                            <a class="dropdown-item" href="#">View All</a>
                            <a class="dropdown-item" href="#">Clear All</a>
                        </div>
                    </li>
                </ul>
                <form class="form-inline my-2 my-lg-0">
                    <input class="form-control mr-sm-2" type="search" placeholder="Search" aria-label="Search">
                    <button class="btn btn-outline-success my-2 my-sm-0" type="submit">Search</button>
                </form>
            </div>
        </nav>


     @if (session('success'))
        <div class="alert alert-success alert-dismissible fade show" role="alert">
            <strong>Notifications!</strong>  {{ session('success') }}
            <button type="button" class="close" data-dismiss="alert" aria-label="Close">
                <span aria-hidden="true">&times;</span>
            </button>
        </div>
    @endif

        <div class="container mt-5">
            <div class="row">
           @foreach($posts as $post)
                <div class="col-md-4 mb-2">
                    <div class="card">
                        <svg class="bd-placeholder-img card-img-top" width="100%" height="180"
                            xmlns="http://www.w3.org/2000/svg" preserveAspectRatio="xMidYMid slice" focusable="false"
                            role="img" aria-label="Placeholder: Image cap">
                            <title>Placeholder</title>
                            <rect width="100%" height="100%" fill="#868e96"></rect><text x="50%" y="50%" fill="#dee2e6"
                                dy=".3em"></text>
                        </svg>
                        <div class="card-body text-center">
                            <h5 class="card-title">{{$post->title}}</h5>
                            <p class="card-text">{{$post->body}}.</p>
                            <a href="/like" class="btn btn-primary">Like Post</a>
                        </div>
                    </div>

                </div>
            @endforeach

            </div>
        </div>

    </div>


    <script src="https://ajax.googleapis.com/ajax/libs/jquery/3.5.1/jquery.min.js"></script>
    <script src="//js.pusher.com/3.1/pusher.min.js"></script>
    <script src="https://cdn.jsdelivr.net/npm/popper.js@1.16.1/dist/umd/popper.min.js"
        integrity="sha384-9/reFTGAW83EW2RDu2S0VKaIzap3H66lZH81PoYlFhbGU+6BZp6G7niu735Sk7lN" crossorigin="anonymous">
    </script>
    <script src="https://stackpath.bootstrapcdn.com/bootstrap/4.5.2/js/bootstrap.min.js"
        integrity="sha384-B4gt1jrGC7Jh4AgTPSdUtOBvfO8shuf57BaghqFfPlYxofvL8/KUEfYiJOMMV+rV" crossorigin="anonymous">
    </script>

    <script type="text/javascript">
    var notificationsWrapper = $('.dropdown-notifications');
    var notificationsToggle = notificationsWrapper.find('a[data-toggle]');
    var notificationsCountElem = notificationsToggle.find('i[data-count]');
    var notificationsCount = parseInt(notificationsCountElem.data('count'));
    var notifications = notificationsWrapper.find('div.dropdown-menu');

    if (notificationsCount <= 0) {
        notificationsWrapper.hide();
    }

    // Enable pusher logging - don't include this in production
    // Pusher.logToConsole = true;

    var pusher = new Pusher('PUSHER_APP_KEY', {
        encrypted: true,
        cluster: 'PUSHER_APP_CLUSTER',
        broadcaster: 'pusher',
        key: 'PUSHER_APP_KEY'
    });

    // Subscribe to the channel we specified in our Laravel Event
    var channel = pusher.subscribe('post-liked');

    // Bind a function to a Event (the full Laravel class)
    channel.bind('App\\Events\\PostLiked', function(data) {
        var existingNotifications = notifications.html();
        var avatar = Math.floor(Math.random() * (71 - 20 + 1)) + 20;
        var newNotificationHtml = `
          <li class="notification active">
              <div class="media">
                <div class="media-left">
                  <div class="media-object">
                    <img src="https://api.adorable.io/avatars/71/` + avatar + `.png" class="img-circle" alt="50x50" style="width: 50px; height: 50px;">
                  </div>
                </div>
                <div class="media-body ml-4">
                  <strong class="notification-title">` + data.message + `</strong>
                  <!--p class="notification-desc">Extra description can go here</p-->
                  <div class="notification-meta">
                    <small class="timestamp">about a minute ago</small>
                  </div>
                </div>
              </div>
          </li>
        `;
        notifications.html(newNotificationHtml + existingNotifications);
        notificationsCount += 1;
        notificationsCountElem.attr('data-count', notificationsCount);
        notificationsWrapper.find('.notif-count').text(notificationsCount);
        notificationsWrapper.show();
    });

    // Subscribe to the channel we specified in our Laravel Event
    var channel2 = pusher.subscribe('post-created');

    // Bind a function to a Event (the full Laravel class)
    channel2.bind('App\\Events\\PostCreated', function(data) {
        var existingNotifications = notifications.html();
        var avatar = Math.floor(Math.random() * (71 - 20 + 1)) + 20;
        var newNotificationHtml = `
          <li class="notification active">
              <div class="media">
                <div class="media-left">
                  <div class="media-object">
                    <img src="https://api.adorable.io/avatars/71/` + avatar + `.png" class="img-circle" alt="50x50" style="width: 50px; height: 50px;">
                  </div>
                </div>
                <div class="media-body ml-4">
                  <strong class="notification-title">` + data.message + `</strong>
                  <!--p class="notification-desc">Extra description can go here</p-->
                  <div class="notification-meta">
                    <small class="timestamp">about a minute ago</small>
                  </div>
                </div>
              </div>
          </li>
        `;
        notifications.html(newNotificationHtml + existingNotifications);
        notificationsCount += 1;
        notificationsCountElem.attr('data-count', notificationsCount);
        notificationsWrapper.find('.notif-count').text(notificationsCount);
        notificationsWrapper.show();
    });


    </script>
</body>

</html>

Most of the code above is boilerplate Laravel HTML content with relevant scripts and CSS files attached. 

Creating the Other Frontend Pages

Create two additional pages publish.blade.php and success.blade.php inside the resources/views folder. The publish.blade.php will have a form from which a post can be created while the success.blade.php will show success messages when a post is liked.

Add the following code to the publish.blade.php file:

<?php

<!-- ./resources/views/publish.blade.php →

   <!DOCTYPE html>
<html lang="en">

<head>
    <meta charset="utf-8">
    <meta http-equiv="X-UA-Compatible" content="IE=edge">
    <meta name="viewport" content="width=device-width, initial-scale=1">
    <title>Twilio Notifications</title>
    <link rel="stylesheet" href="https://stackpath.bootstrapcdn.com/bootstrap/4.5.2/css/bootstrap.min.css"
        integrity="sha384-JcKb8q3iqJ61gNV9KGb8thSsNjpSL0n8PARn9HuZOnIxN0hoP+VmmDGMN5t9UJ0Z" crossorigin="anonymous">
    <link rel="stylesheet" type="text/css" href="/css/bootstrap-notifications.min.css">
    <!--[if lt IE 9]>
      <script src="https://oss.maxcdn.com/html5shiv/3.7.3/html5shiv.min.js"></script>
      <script src="https://oss.maxcdn.com/respond/1.4.2/respond.min.js"></script>
    <![endif]-->
</head>

<body>
    <div class="container my-5">
        <nav class="navbar navbar-expand-lg navbar-dark bg-dark">
            <button class="navbar-toggler" type="button" data-toggle="collapse" data-target="#navbarTogglerDemo03"
                aria-controls="navbarTogglerDemo03" aria-expanded="false" aria-label="Toggle navigation">
                <span class="navbar-toggler-icon"></span>
            </button>
            <a class="navbar-brand" href="#">
                <img src="https://getbootstrap.com/docs/4.5/assets/brand/bootstrap-solid.svg" width="30" height="30"
                    class="d-inline-block align-top" alt="" loading="lazy">
                Twilio Nots
            </a>


            <div class="collapse navbar-collapse" id="navbarTogglerDemo03">
                <ul class="navbar-nav mr-auto mt-2 mt-lg-0">

                    <li class="nav-item ">
                        <a class="nav-link" href="/">Home <span class="sr-only">(current)</span></a>
                    </li>
                    <li class="nav-item active">
                        <a class="nav-link" href="/publish">Publish a new Post</a>
                    </li>

                  
                </ul>
                <form class="form-inline my-2 my-lg-0">
                    <input class="form-control mr-sm-2" type="search" placeholder="Search" aria-label="Search">
                    <button class="btn btn-outline-success my-2 my-sm-0" type="submit">Search</button>
                </form>
            </div>
        </nav>

        <div class="container mt-5">
            <form method="post" method="/publish">
            {{ csrf_field() }}
                <div class="form-group">
                    <label for="exampleFormControlInput1">Post Title</label>
                    <input type="text" class="form-control" id="exampleFormControlInput1" name="title" required >
                </div>
                
                
                <div class="form-group">
                    <label for="exampleFormControlTextarea1">Post Body</label>
                    <textarea class="form-control" id="exampleFormControlTextarea1" rows="3" name="body" required></textarea>
                </div>
<div class="form-group">
                    <label for="exampleFormControlInput1">A Phone Number to be Notified </label>
                    <input type="tel" class="form-control" id="exampleFormControlInput1" name="phone" required  placeholder="+234...">
                </div>

                <div class="form-group">
                <input type="submit" class="btn btn-success"  placeholder="Publish" value="Publish">
                </div>

            </form>
        </div>

    </div>


    <script src="https://ajax.googleapis.com/ajax/libs/jquery/3.5.1/jquery.min.js"></script>
    <script src="//js.pusher.com/3.1/pusher.min.js"></script>
    <script src="https://cdn.jsdelivr.net/npm/popper.js@1.16.1/dist/umd/popper.min.js"
        integrity="sha384-9/reFTGAW83EW2RDu2S0VKaIzap3H66lZH81PoYlFhbGU+6BZp6G7niu735Sk7lN" crossorigin="anonymous">
    </script>
    <script src="https://stackpath.bootstrapcdn.com/bootstrap/4.5.2/js/bootstrap.min.js"
        integrity="sha384-B4gt1jrGC7Jh4AgTPSdUtOBvfO8shuf57BaghqFfPlYxofvL8/KUEfYiJOMMV+rV" crossorigin="anonymous">
    </script>

</body>

</html>

Then in the success.blade.php file add:

<?php

<!-- ./resources/views/success.blade.php →

  <!DOCTYPE html>
<html lang="en">

<head>
    <meta charset="utf-8">
    <meta http-equiv="X-UA-Compatible" content="IE=edge">
    <meta name="viewport" content="width=device-width, initial-scale=1">
    <title>Twilio Notifications</title>
    <link rel="stylesheet" href="https://stackpath.bootstrapcdn.com/bootstrap/4.5.2/css/bootstrap.min.css"
        integrity="sha384-JcKb8q3iqJ61gNV9KGb8thSsNjpSL0n8PARn9HuZOnIxN0hoP+VmmDGMN5t9UJ0Z" crossorigin="anonymous">
    <link rel="stylesheet" type="text/css" href="/css/bootstrap-notifications.min.css">
    <!--[if lt IE 9]>
      <script src="https://oss.maxcdn.com/html5shiv/3.7.3/html5shiv.min.js"></script>
      <script src="https://oss.maxcdn.com/respond/1.4.2/respond.min.js"></script>
    <![endif]-->
</head>

<body>
    <div class="container my-5">
        <nav class="navbar navbar-expand-lg navbar-dark bg-dark">
            <button class="navbar-toggler" type="button" data-toggle="collapse" data-target="#navbarTogglerDemo03"
                aria-controls="navbarTogglerDemo03" aria-expanded="false" aria-label="Toggle navigation">
                <span class="navbar-toggler-icon"></span>
            </button>
            <a class="navbar-brand" href="#">
                <img src="https://getbootstrap.com/docs/4.5/assets/brand/bootstrap-solid.svg" width="30" height="30"
                    class="d-inline-block align-top" alt="" loading="lazy">
                Twilio Nots
            </a>


            <div class="collapse navbar-collapse" id="navbarTogglerDemo03">
                <ul class="navbar-nav mr-auto mt-2 mt-lg-0">

                    <li class="nav-item ">
                        <a class="nav-link" href="/">Home <span class="sr-only">(current)</span></a>
                    </li>
                    <li class="nav-item">
                        <a class="nav-link" href="/publish">Publish a new Post</a>
                    </li>

                </ul>
                <form class="form-inline my-2 my-lg-0">
                    <input class="form-control mr-sm-2" type="search" placeholder="Search" aria-label="Search">
                    <button class="btn btn-outline-success my-2 my-sm-0" type="submit">Search</button>
                </form>
            </div>
        </nav>

        <div class="container mt-5">
            <div class="jumbotron">
                <h1 class="display-4">Hello, There!</h1>
                <p class="lead">You just liked one of our Posts.</p>
                <hr class="my-4">
                <p>We are super excited.. Thanks alot
                </p>
                <a class="btn btn-primary btn-lg" href="#" role="button">Home</a>
                <a class="btn btn-primary btn-lg" href="/like" role="button">Like Again</a>
            </div>
        </div>

    </div>


    <script src="https://ajax.googleapis.com/ajax/libs/jquery/3.5.1/jquery.min.js"></script>
    <script src="//js.pusher.com/3.1/pusher.min.js"></script>
    <script src="https://cdn.jsdelivr.net/npm/popper.js@1.16.1/dist/umd/popper.min.js"
        integrity="sha384-9/reFTGAW83EW2RDu2S0VKaIzap3H66lZH81PoYlFhbGU+6BZp6G7niu735Sk7lN" crossorigin="anonymous">
    </script>
    <script src="https://stackpath.bootstrapcdn.com/bootstrap/4.5.2/js/bootstrap.min.js"
        integrity="sha384-B4gt1jrGC7Jh4AgTPSdUtOBvfO8shuf57BaghqFfPlYxofvL8/KUEfYiJOMMV+rV" crossorigin="anonymous">
    </script>

</body>

</html>


From the code above, we created three files welcome.blade.php, publish.blade.php, and success.blade.php. The push notification in the welcome.blade.php is triggered whenever a user adds a new post or likes an existing post within the application.  

To listen for events, we subscribed to the post-liked and post-created channels respectively. This allows us to watch the channel we are broadcasting to from our backend, listen for the PostPublished and PostLiked events, and define a callback that activates the desktop notification whenever any of these events are fired.

At this point, your routes file, routes/web.php should contain three routes as shown in the following code snippet:

//routes/web.php

                 
<?php

use Illuminate\Support\Facades\Route;
use App\Http\Controllers\PostController;


Route::get('like', function () {
    event(new App\Events\PostLiked('Vitalis'));
    return view('success');
});

Route::match(['get', 'post'], '/publish',[PostController::class, 'savePost']);
Route::get('/', [PostController::class, 'getPosts']);

Bring It All Together

Start the project using the command:

$ php artisan serve
$ php artisan migrate

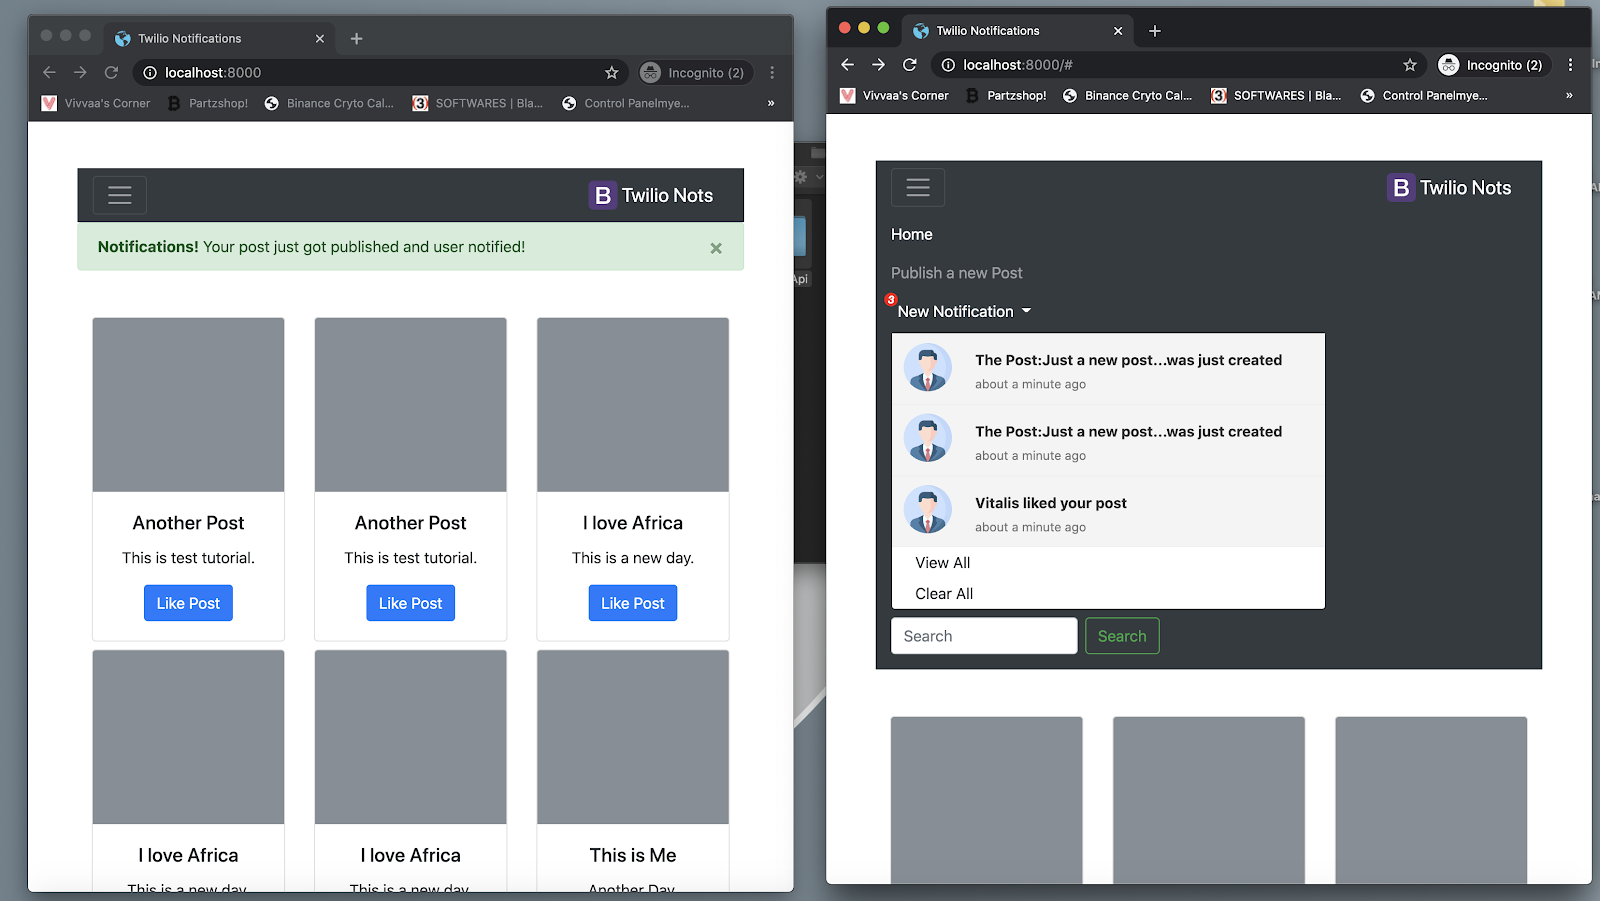
Navigate to the app's homepage to see it in action. If you use Laravel Valet, you can also share the app and visit it via another device to test the desktop notifications.

Thanks to Laravel and Pusher, we’ve built an event-driven, basic, real-time app enabled with desktop notifications. As a next step, we will be integrating Twilio SMS into this amazing application.

But before integrating Twilio SMS into this application, test the application and ensure the notifications are working. On Chrome browser, you can test the applications using incognito modes.

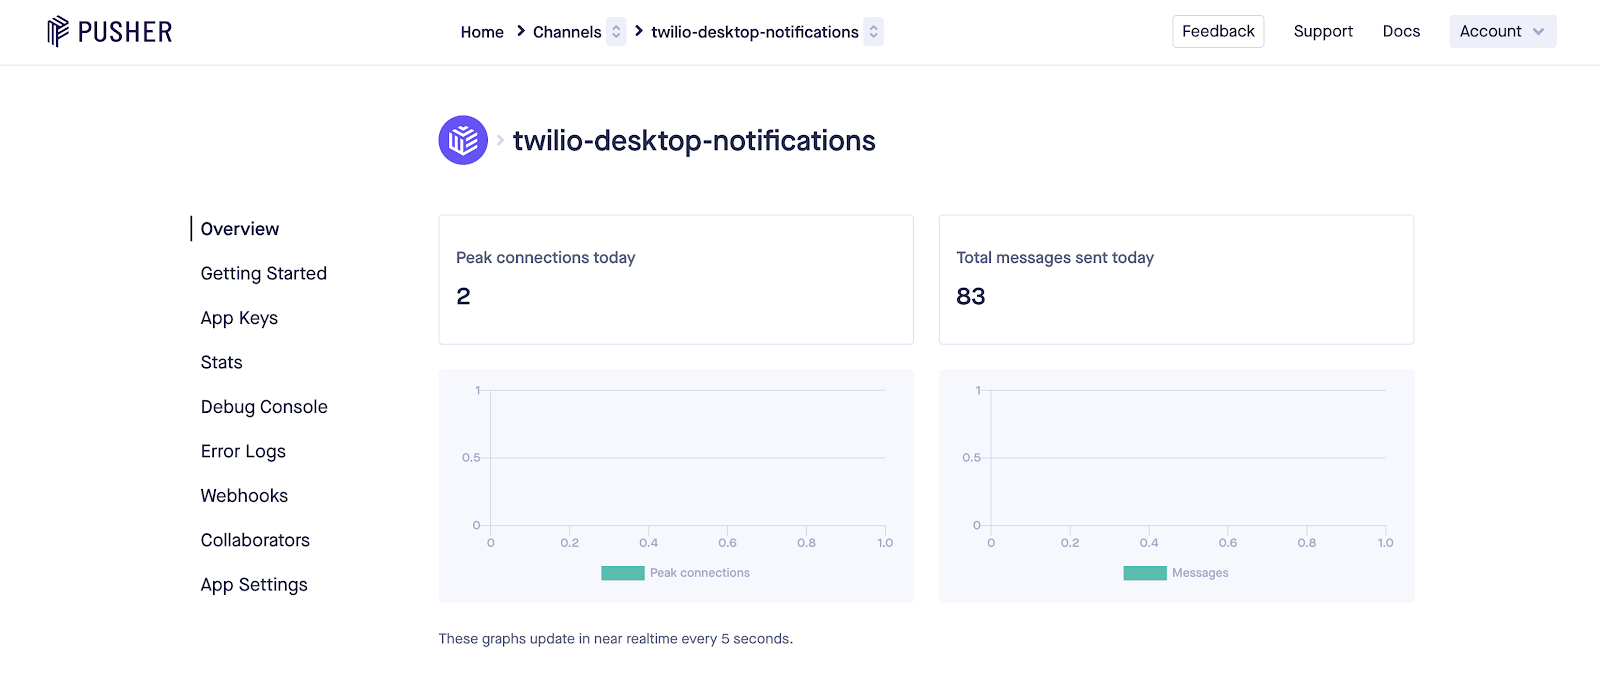
Also check your Pusher dashboards for updates on each notification sent. Your dashboard should be similar to mine as seen in the following screenshot:

Pusher dashboard

Set Up the Twilio PHP SDK

To connect the Twilio SMS API to our application, create a Twilio account and select a Twilio phone number for our application.

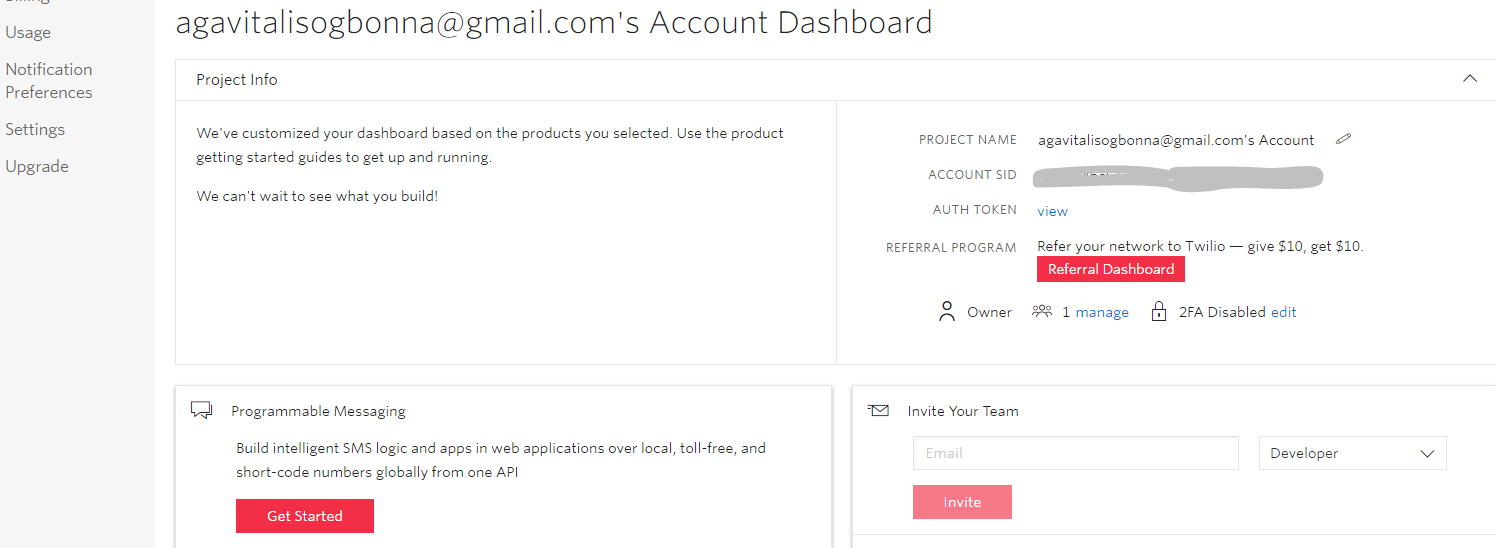
Locate the Twilio Account SIDand Auth Token from the Twilio Console in order to access Twilio's APIs. Be sure to store these credentials securely.

NOTE: You can only get a single Twilio phone number with your trial account. It is also required that the number to which you send the SMS be verified by Twilio and the country supported.

Twilio console

Install Twilio PHP SDK to the project

The installation process of Twilio PHP SDK is similar to the Laravel Bouncer package which we installed earlier. To install the Twilio SDK, type the following Composer command in the terminal to bundle the Twilio SDK:

$ composer require twilio/sdk

Configure Twilio SDK to work with the application

Add the following credentials in the .env file:

TWILIO_ACCOUNT_SID = ACXXXXXXXXXXXXXXXXXXXXXXXXXXX
TWILIO_AUTH_TOKEN= XXXXXXXXXXXXXXXXXXXXXXXXXXXXXXX
TWILIO_PHONE_NUMBER= +14XXXXXXXXX

In order to make the Twilio configuration variables available globally in our application, we will add the following lines of code in our config/services.php file.

'twilio' => [
    'TWILIO_AUTH_TOKEN'  => env('TWILIO_AUTH_TOKEN'),
    'TWILIO_ACCOUNT_SID' => env('TWILIO_ACCOUNT_SID'),
    'TWILIO_PHONE_NUMBER' => env('TWILIO_PHONE_NUMBER'),
],

Edit the PpostController as shown below to enable SMS notification after post creation. Don’t forget to change the Twilio phone number used in this sample tutorial to yours.

   
<?php

namespace App\Http\Controllers;

use Illuminate\Http\Request;
use App\Models\Post;
use Twilio\Rest\Client;
use Twilio\Jwt\ClientToken;


class PostController extends Controller
{
  /**
   * Saves a new post to the database
  */

  public function savePost(Request $request) {

    if($request->isMethod('GET')){
        return view('publish');
    }

    $data = $request->only(['title', 'body']);
    $post = Post::create($data);

    event(new \App\Events\PostCreated($post));

    //send SMS
    $accountSid = config('services.twilio')['TWILIO_ACCOUNT_SID'];
    $authToken = config(services.twilio')['TWILIO_AUTH_TOKEN'];
    $twilioPhoneNumber = config('services.twilio')['TWILIO_PHONE_NUMBER'];
    $client = new Client($accountSid, $authToken);

    try{
        // Use the client to do fun stuff like send text messages!
        $client->messages->create(
            // the number you'd like to send the message to
            $request->phone,
            array(
              // A Twilio phone number assigned  at twilio.com/console
              'from' => $twilioPhoneNumber,
              // the body of the text message you'd like to send
              'body' => 'Hey! A new post was just created',
          )
      );
      } catch (Exception $e) {
          echo "Error: " . $e->getMessage();
      }

   return redirect('/')->with('success', 'Your post just got published and user notified!');


  }

   /**
   * Fetches all Post in the database
   */
  public function getPosts() {

    $posts = Post::all();
    return view('welcome', compact('posts'));

  }

}

Test the Laravel Desktop Notification App

To test the application, serve this application using the PHP artisan server command:

$ php artisan serve

This command will make the application accessible via the browser using the address http://localhost:8000 where we can create and like posts, receive a push notification on the desktop, and receive a Twilio confirmation SMS on the posts created.

Testing the application

Conclusions and Recommendations

We have successfully created a Laravel application that integrates Pusher and events for notifications. We also sent an SMS using the Twilio SDK in a Laravel application. The source code of this application can be found on my Github repo here.

This application however is limited in functionality as it should have authentication, the post liked should be stored in the database, and the creation of new posts restricted to authenticated users only.

As a recommendation, try adding these extra features while you explore the amazing functionalities of Twilio Programmable Messaging, Laravel, and Pusher.

Vitalis is a software engineer who loves technology and finds hubbies in teaching and learning. He loves comedy, quality discussions and Football. You can find Vitalis on Twitter via @agavitalis, GitHub via @agavitalis, Linkedin, and his blog, Vivvaa’s Corner.