Sync in the Browser: a Quickstart Guide
In this guide, we'll get you up and running with a sample application you can build on as you learn more about Sync.
This sample application uses React and Node.js, so you will need to have Node.js installed locally to try it out.
Table Of Contents
The first thing to do is grab all the necessary information from your Twilio account. To set up your Sync token generator, we will need the following:
| Config Values | Description |
|---|---|
| Account SID | Your primary Twilio account identifier - find this on the main page of the Twilio console. |
| API Key | Used to sign tokens. Generate one using the console API Keys tool. |
| API Secret | Used to sign tokens, together with the corresponding API Key. |
Follow the instructions in the README to configure and run it on your machine, using the values above.
This is where the fun begins! When you visit the homepage of the web application, you should see a page which looks like this:
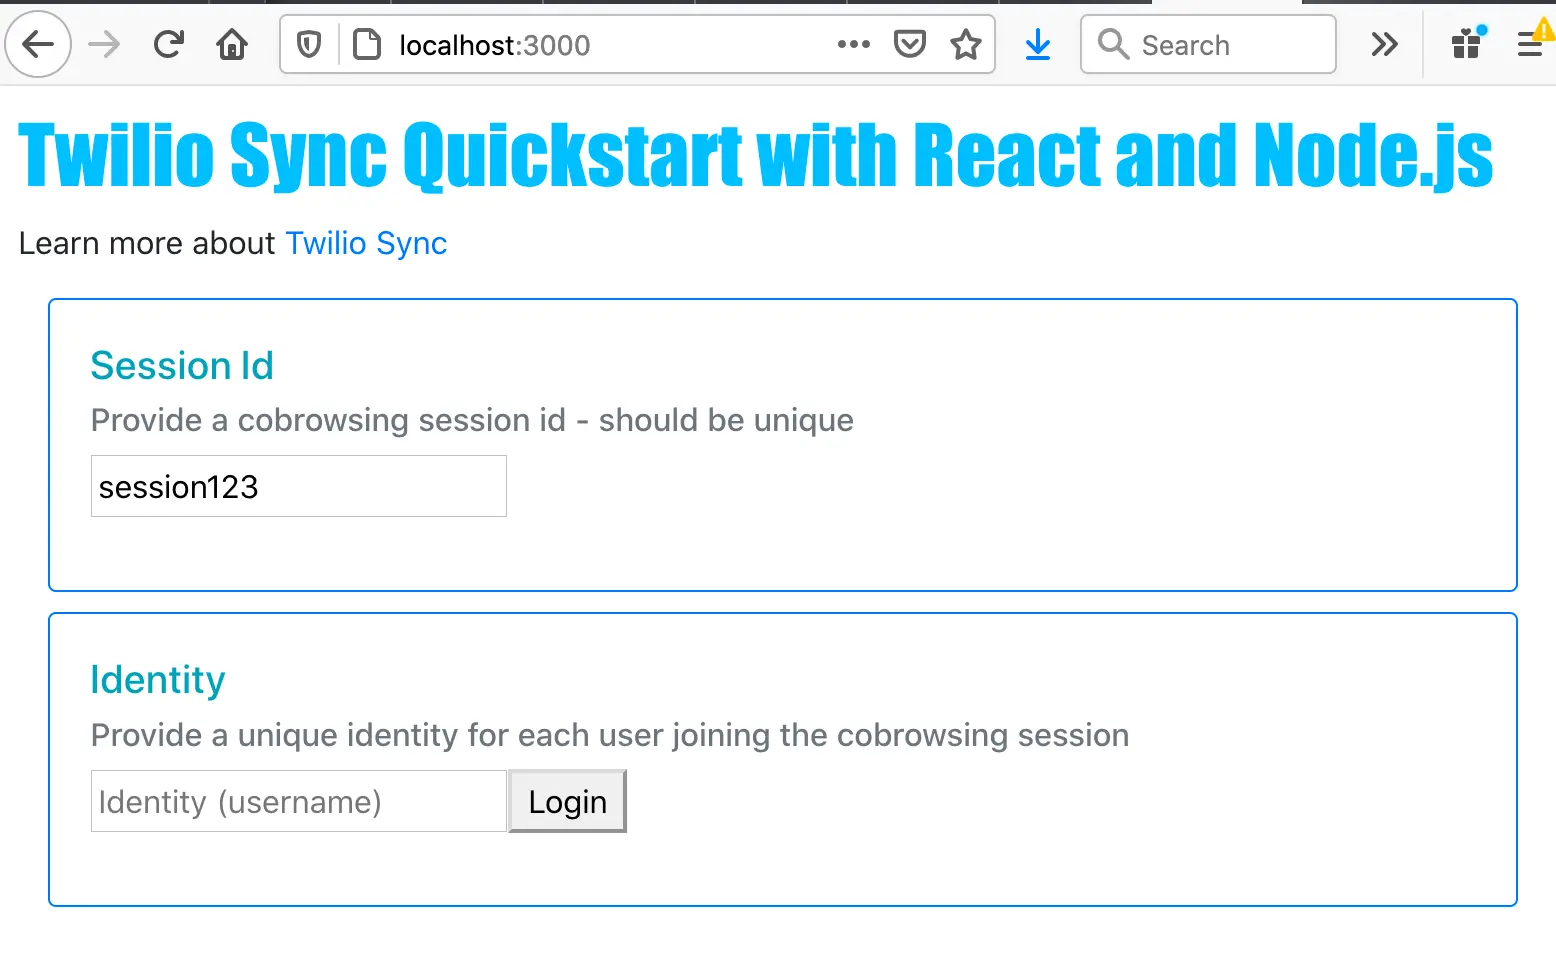
Fill in a username to use as the identity with your Sync service. If you want, you can change the session id to work with a different cobrowsing session. Sessions are unique to your Sync service, so you only need to change it if you want to try things out with another set of synced form data.
After pressing the Login button, you will see this screen:
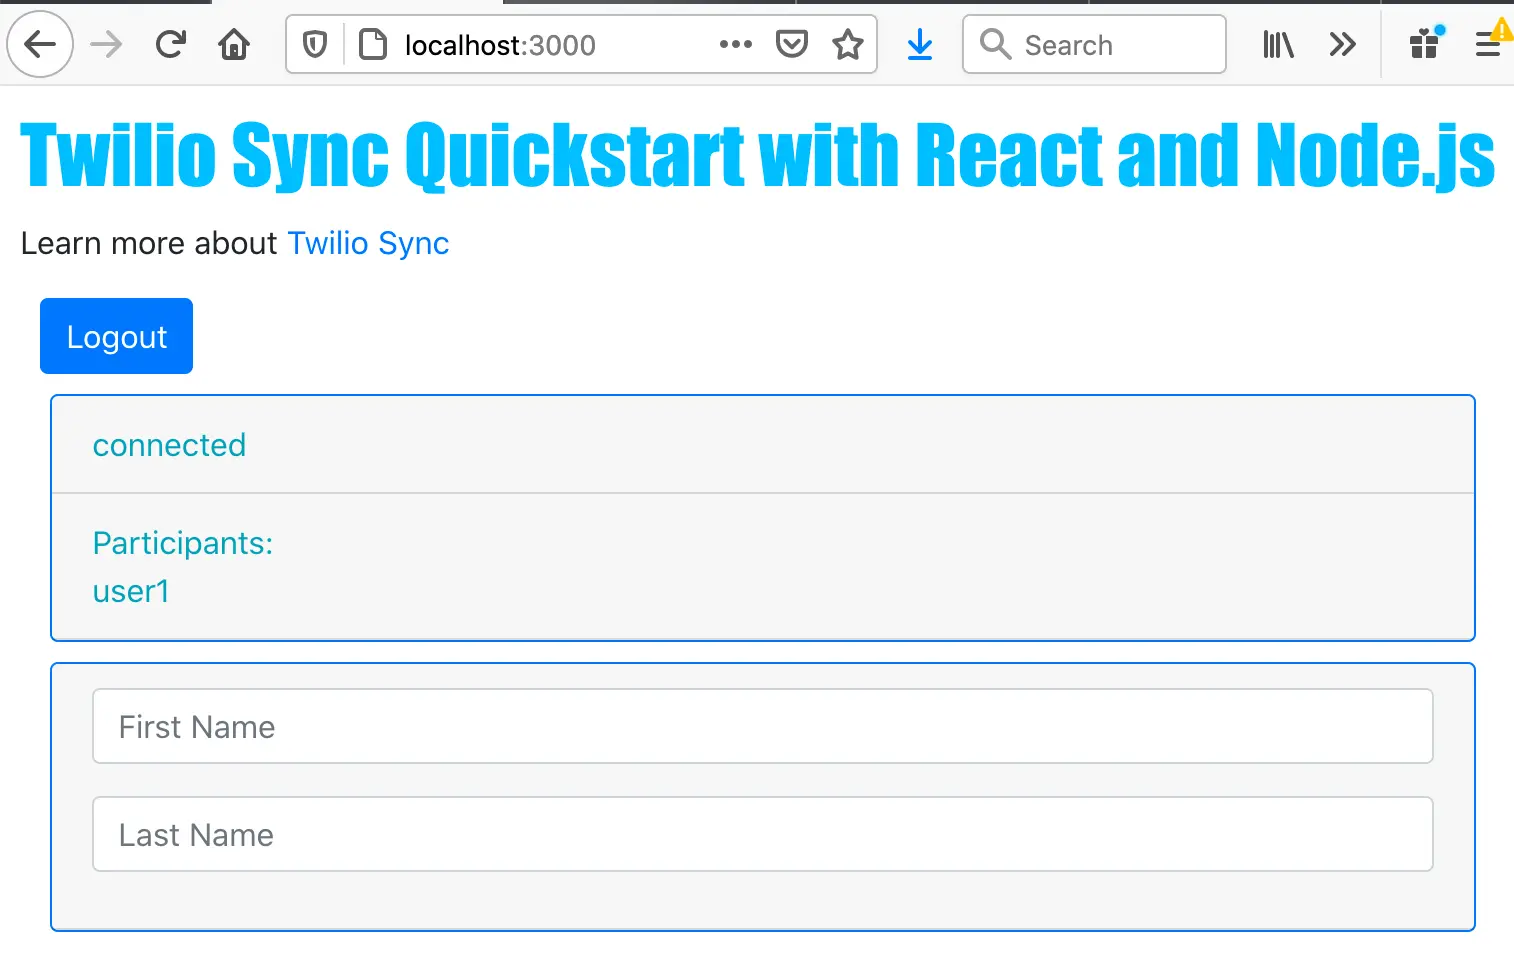
All participants in the session will be seen in the list. Editing the form data in one tab will cause the other tabs to be updated after editing is complete.
You can use the web application with only one browser tab open, but the idea behind cobrowsing is that two (or more) people can see the same things in their web browser, without having to share their screens using a third-party application. So open another web browser or just a new tab to the quickstart application, and then log in to the same session id with a different identity.
If you open this page in another browser window or tab, you should be able to change the form values, and then see them reflected in the other open tabs.
We explore how to manage your users in our user identity guide and cover everything you can do with Sync objects in the Sync Objects Overview.
Now that you have completed the Sync Quickstart,
- Check out our guide to Managing Identity and Access Tokens when working with Sync.
- Have fun building with Sync and make sure to let us know what you're building!