Build Simple SMS Phone Verification with Twilio Verify and Python
Time to read:
February 01, 2018
Written by
This post is part of Twilio’s archive and may contain outdated information. We’re always building something new, so be sure to check out our latest posts for the most up-to-date insights.

Security is at the top of everyone’s mind and phone verification is a super simple way to secure your application. Confidence in your users’ phone numbers decreases fraud and increases reliability of notifications. Let’s take a look at how to verify phone numbers using Python, Flask, and the Twilio Verify API.
What you’ll need
To code along with this post, you’ll need:
- A Twilio account
- An Verify App which you can create in the Twilio console
- Python (I’m using Python 3.6.4, but this will work with Python 2.x too)
- Pip for installing dependencies
- Virtualenv
Setting up
Navigate to the Twilio Console and grab your Authy App API Key (found under Settings).
In a new project folder, I named mine phone_verification, create a config file called config.py and add your API Key like so:
Create a requirements.txt file. This file will help you manage your dependencies in a Python project. We have two dependencies for this project; add the following to your requirements.txt file:
In your terminal, spin up your virtualenv with the following:
This is all the setup we should need to get our app started.
Phone Verification made easy with Twilio Verify
In order to do phone verification, our app will follow the following workflow:
- The user enters three bits of information to our application
- Phone number
- Country code
- Whether they want to verify by voice or SMS
- Our application makes a request to the Verify API to initiate the verification
- The user receives a call or text message with a 4 digit code
- The user then enters that code into a form in the application
- The application sends the code off to the Verify API, with their phone number and country code again, to verify
- If it is correct then the user has verified their number
With just two API calls and two web pages, you’ll be able to verify your users’ phone numbers. Let’s create our application.
Creating the Flask Application
Our app will begin with a basic web form to accept user input to demonstrate the above steps. Start by creating a file called verify.py and add the following code:
This code will act as our controller and route requests to the right place. Let’s start by updating the phone_verification route.
We need to collect the user’s phone number and country code so we can send them a verification request.
Create a folder called templates and add a file called phone_verification.html. We only want to accept valid country codes, and thankfully the Authy team has some handy form helpers to aid us.
Now we can add the following code to the phone_verification.html file. This will create our HTML form that can accept user input of phone numbers, country codes, and their preferred method of contact.
Back in our verify.py controller, let’s wire up this template to our route with the highlighted changes:
Fire up the server by running python verify.py from your terminal and navigate to http://localhost:5000/phone_verification. You should see a page that looks like this:
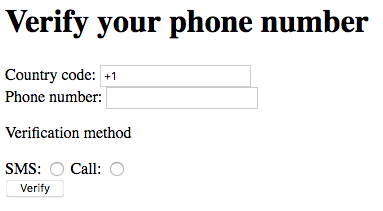
Sweet, we’re making progress! Clicking ‘Verify’ won’t do anything yet. Let’s set that up now.
Our form submits a POST request to the phone_verification endpoint. We can add the following code to process that request in our verify.py file:
Now that we’ve grabbed our inputs from the form, we have everything we need to send a phone verification request to the user. This one line of code in our phone_verification route makes that API call:
Validating the Token
The code we just added will send the user a text message or call with a 4 digit token. Next we need to add a view where the user can input the token for validation.
Add a new route in our verify.py document below our /phone_verification route:
Add a new template in our template folder called verify.html and populate it with the following code:
Now we’ll update our verification request to redirect to this page so that the user can validate their token. In verify.py:
Next we need to check the token. We’ll do that by POSTing to the /verify endpoint which will call the Authy API. The check requires the phone number, country code, and token, but we don’t want to ask the user for their phone number again. We will use Flask sessions to store that information.
First, set a secret key so our session can be initialized. This can be any random string:
Update the /phone_verification route to save the country_code and phone_number to the user session.
We can grab those in our /verify endpoint and only require the token in the form. Update your verify endpoint with the following code:
Finally add the SDK call to check the verification token:
To run this app, fire up the server with the following command:
Navigate to http://localhost:5000/phone_verification to test it out!
Verify All The Things!
With just two API calls and two web pages, you’ve now validated that a user has a real phone number and access to that number, which will help prevent a lot of fraudulent accounts and ensure that your users can receive other text or voice notifications from your app.
After verifying a user you’d want to save the user’s phone number with a flag that it had been verified.
You can check out the full code on Github. If you have any questions about phone verification or account security, please leave a comment or contact me on Twitter.


Related Resources
Twilio Docs
From APIs to SDKs to sample apps
API reference documentation, SDKs, helper libraries, quickstarts, and tutorials for your language and platform.
Resource Center
The latest ebooks, industry reports, and webinars
Learn from customer engagement experts to improve your own communication.
Ahoy
Twilio's developer community hub
Best practices, code samples, and inspiration to build communications and digital engagement experiences.